In this guide, we will discuss The Promise Kodi addon installation steps. The Promise Kodi addon is the latest version of The Oath Kodi add-on, which is not working anymore.
Note:- Sadly, The Promise repository is down and not working now.
Some popular Kodi add-ons like The Promise add-on are Netflix, Disney+, HBO Max, 4K, Alvin, Wolf Pack, Insomnia, Crazy Canucks, Asgard, No One, Magic Dragon, etc.
Before moving ahead, I want to mention that we have extensive guides on the best Kodi add-ons, anime add-ons, sports add-ons, live TV add-ons, and adult add-ons.
Coming to the Promise Kodi addon, the add-on is available on the “The WareHouse Repository” and “Hacker0x00 Repository“. Here, we will install it using The WareHouse Repository.
The Promise add-on offers various streaming categories like My TV Shows, Cartoons, My Movies, Sports, New Movies, Documentaries, IPTV, and, New TV Shows.
You can integrate the Real Debrid, AllDebrid, Linksnappy, or Premiumize for streaming HD movies and TV shows on the Promise add-on.
All steps are similar for other devices, including Fire TV, Nvidia Shield, Firestick, Android TV Box, Mi Box, Linux, Mac, and, Windows.
Installation Steps
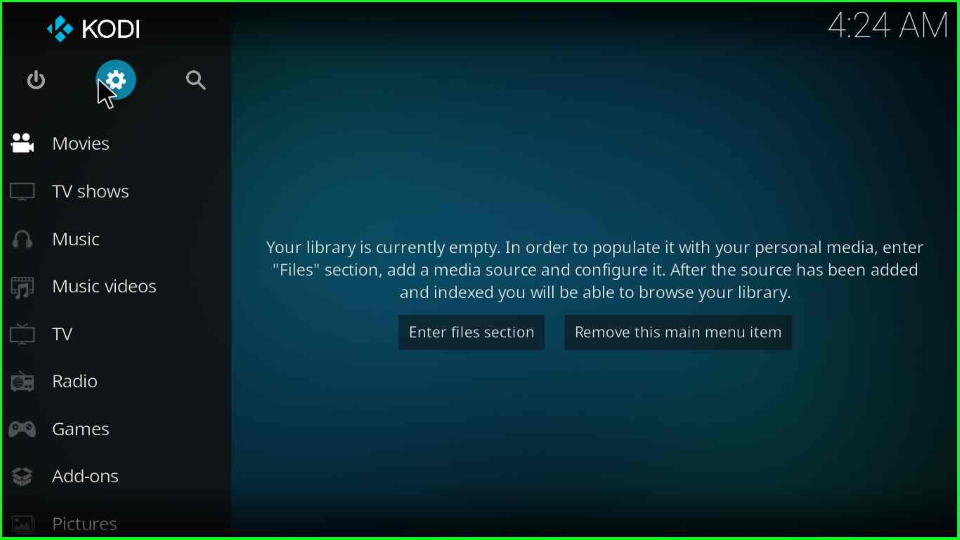
Start Kodi and hit the gear icon to open “Settings”.
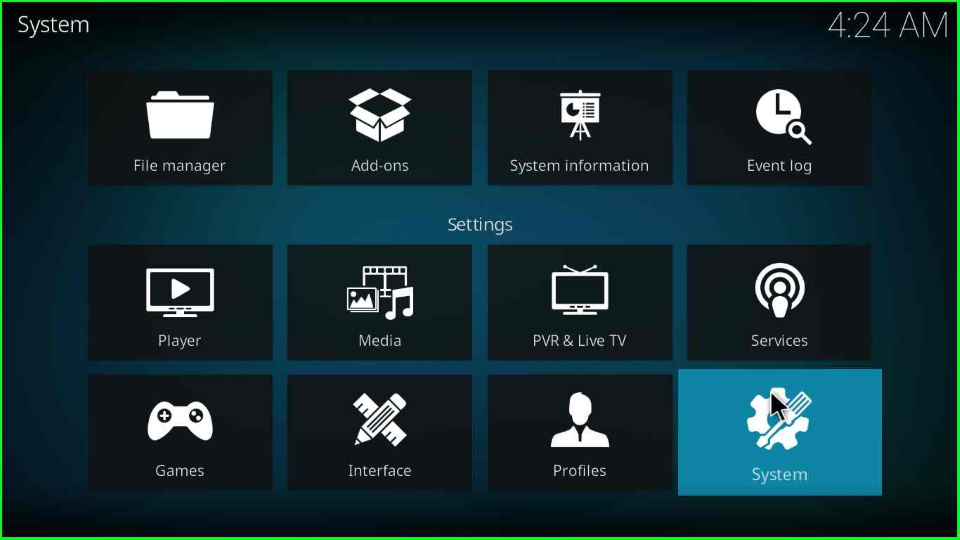
Now, the page displays a list of tabs; find the “System” tab and press the enter button.
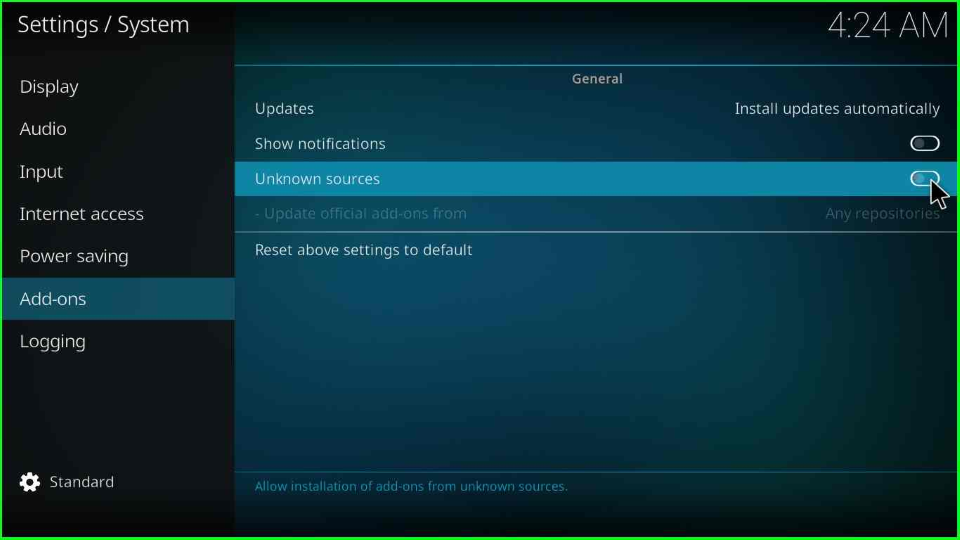
After selecting the System tab, choose the “Add-ons” option below the Power saving option. After that, enable the “Unknown sources” button available on the right side of the page.
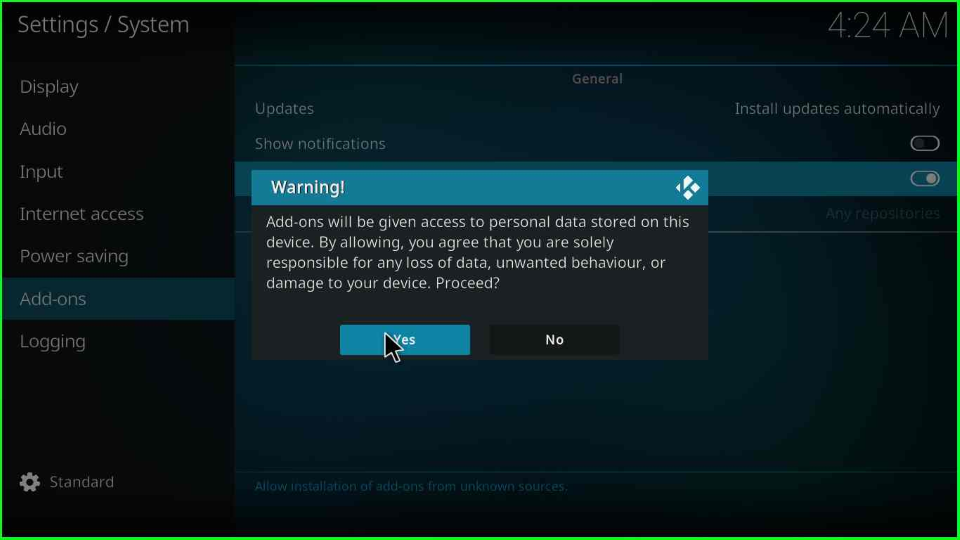
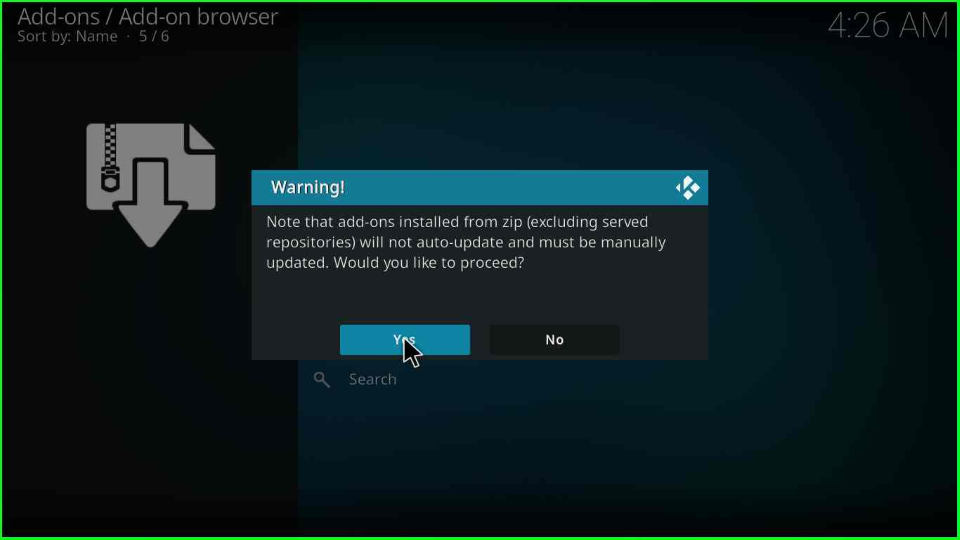
The Add-ons screen shows a warning popup; click “Yes”.
Add Media Source and Repository
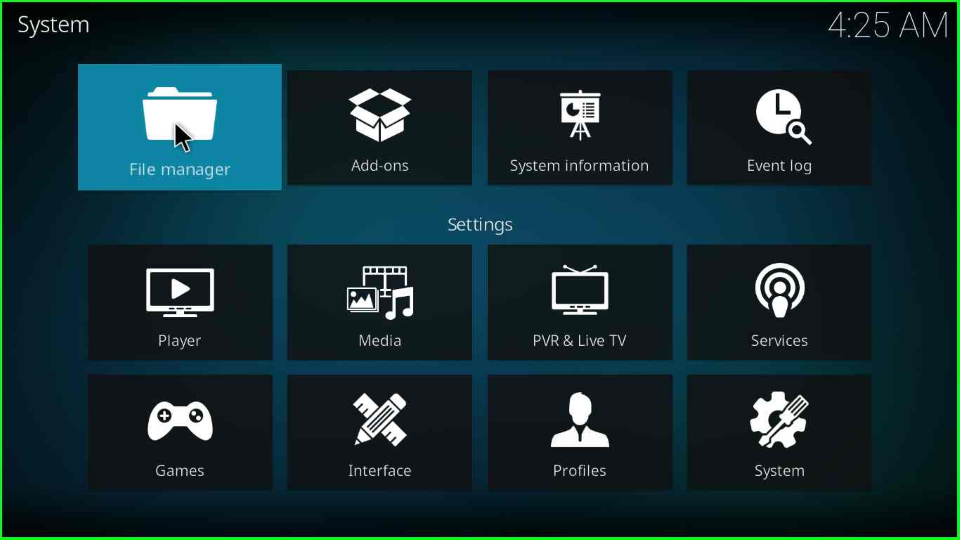
Go to the Kodi Settings and select the “File manager” tab from the left of the window.
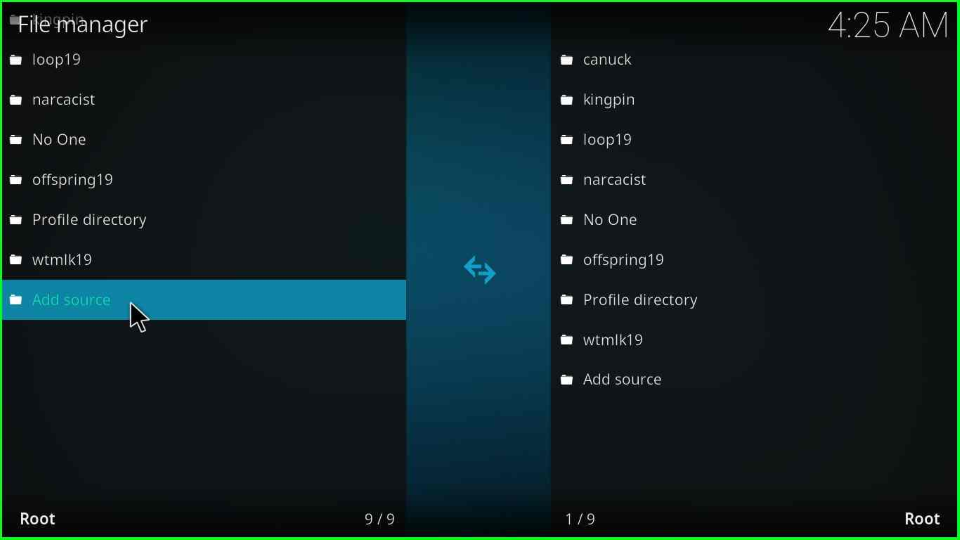
Click the “Add source” option to move forward.
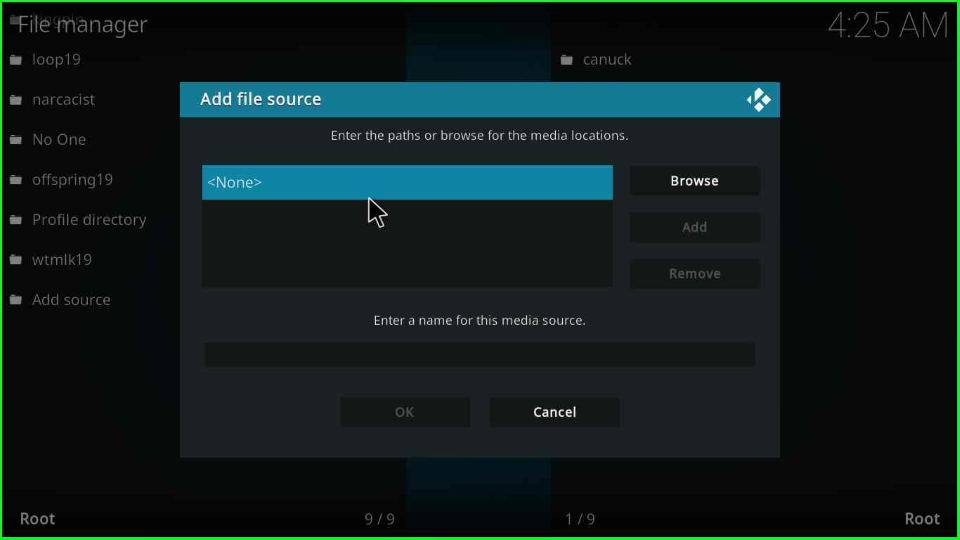
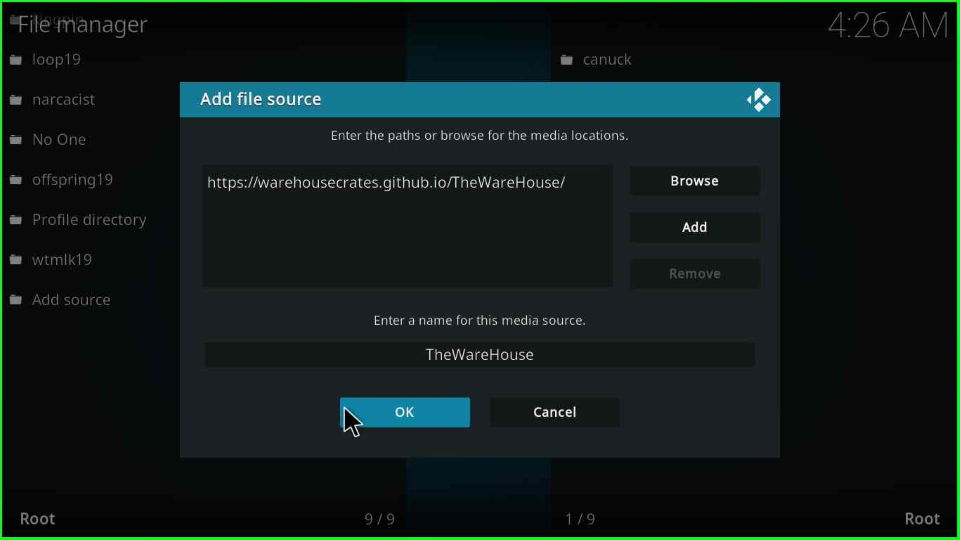
Click on the “<None>” option.
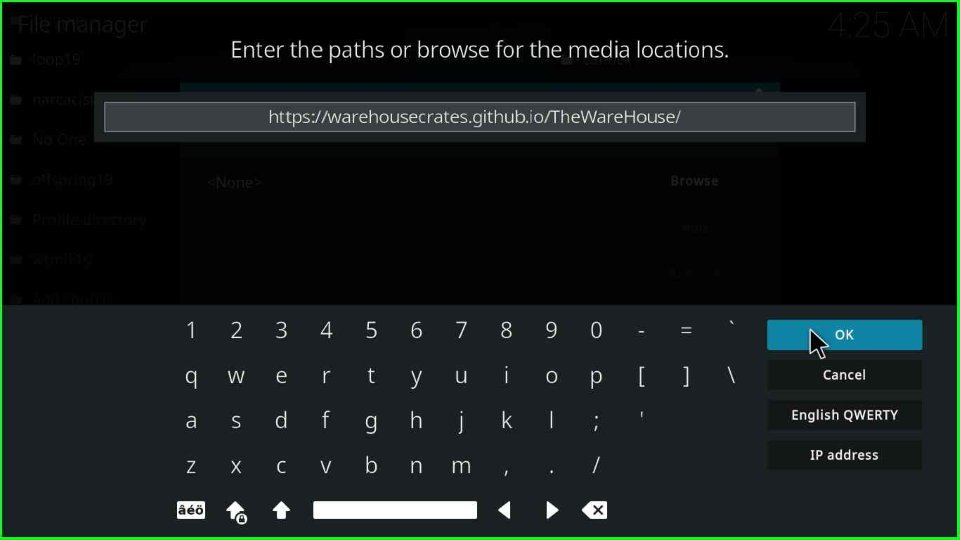
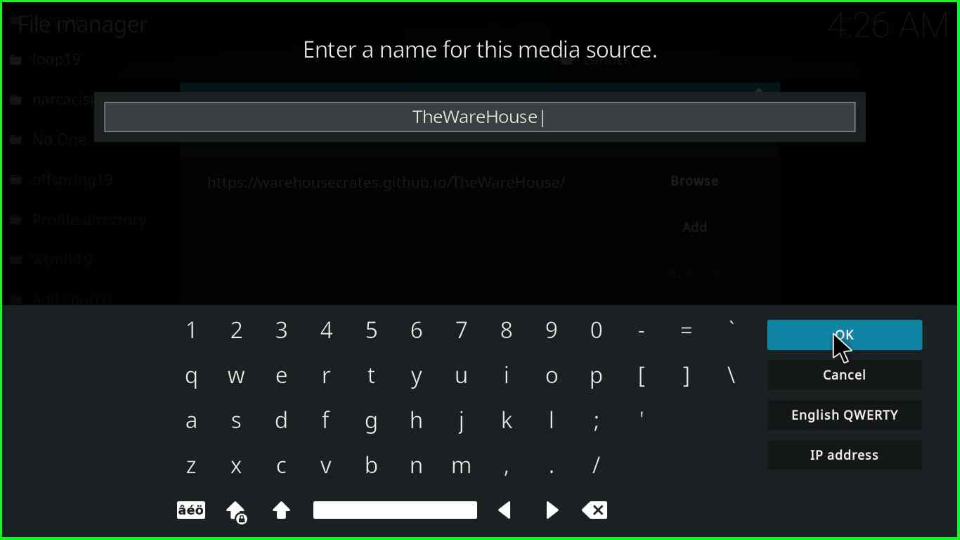
Write the URL “https://warehousecrates.github.io/TheWareHouse” for The Promise addon and press the “OK” button.
Type the media source name as “TheWareHouse” and tap “OK”.
Check the URL and source name again and hit the “OK” tab.
Install from Zip File
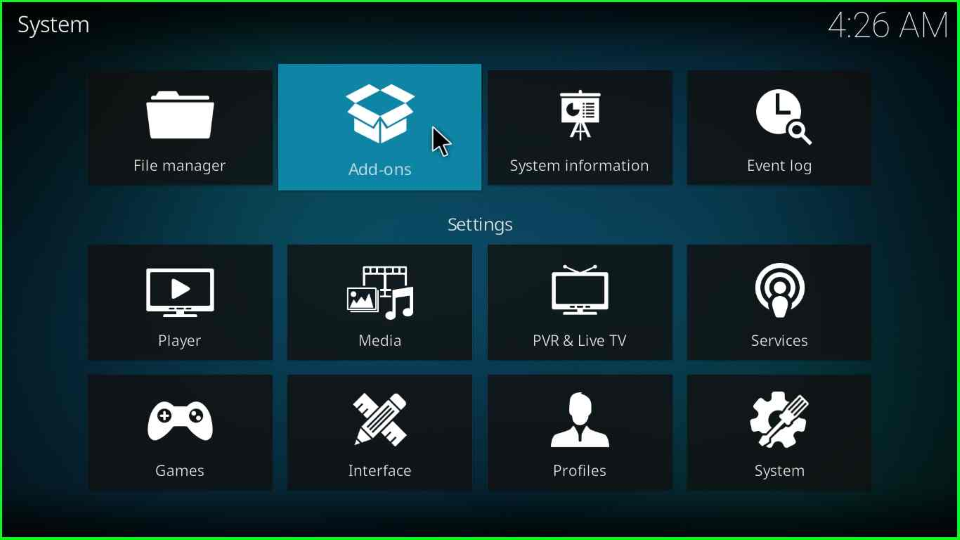
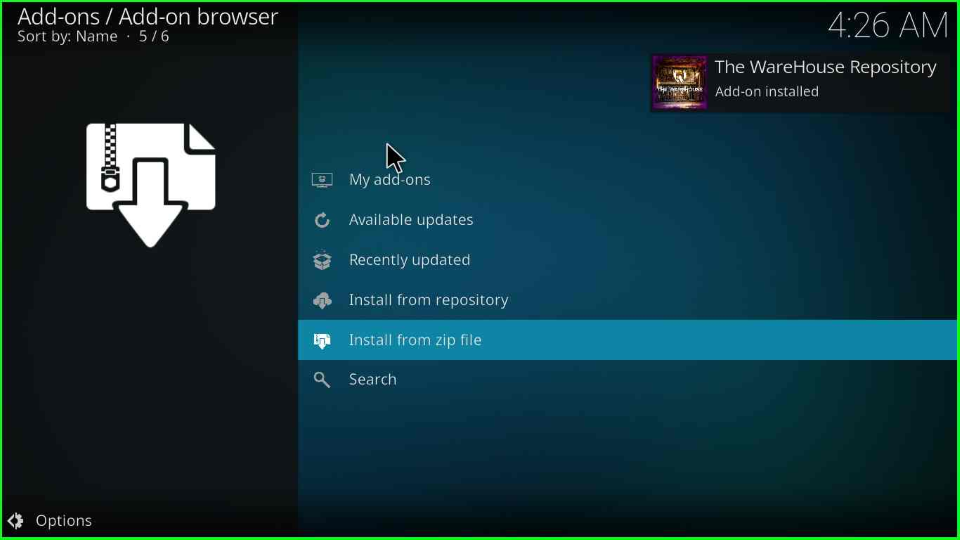
After performing the above steps, go back to the previous screen and open the second option, “Add-ons”, after the File Manager option.
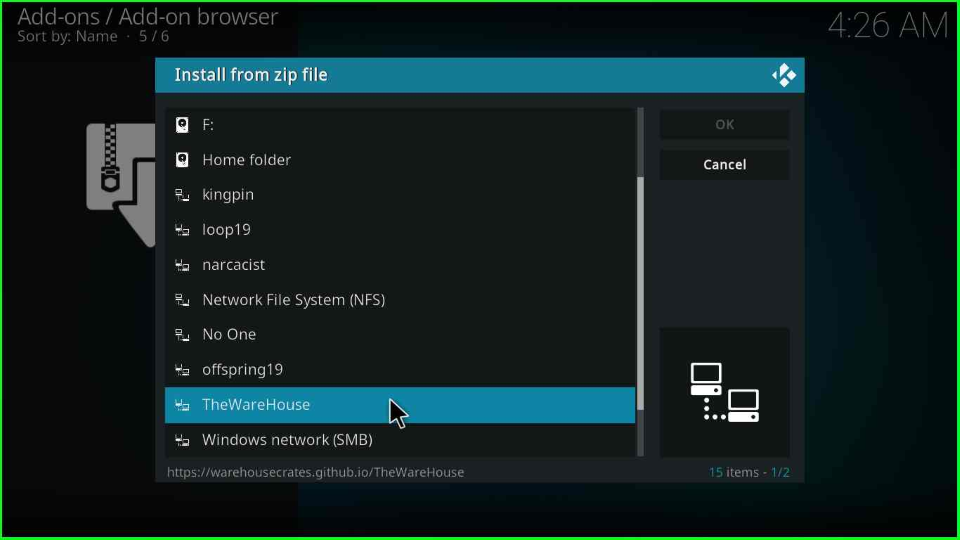
Select the “Install from zip file” option to install the Promise addon repo.
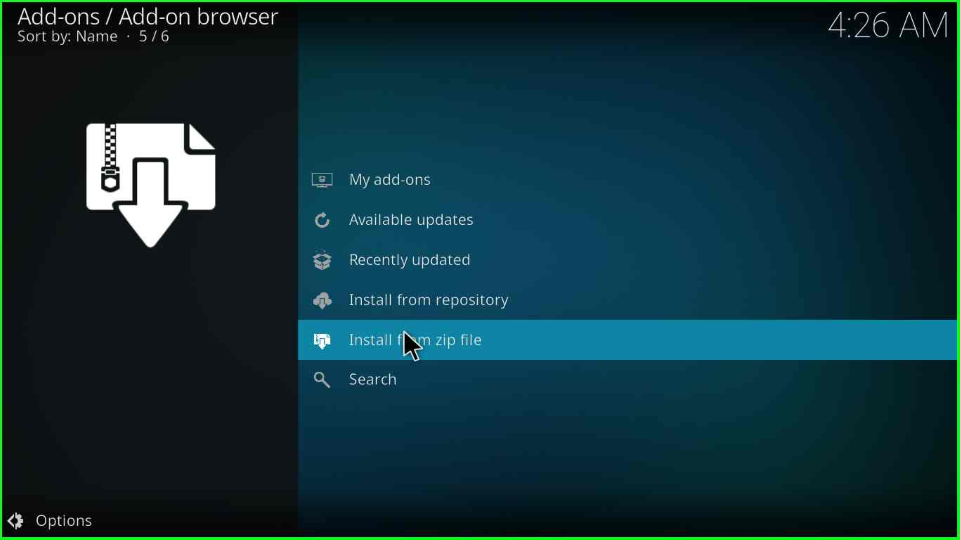
A box will open that says to manually update the add-on afterward because the add-on will not get the update automatically. Press “Yes” to proceed.
Click on the “TheWareHouse” folder.
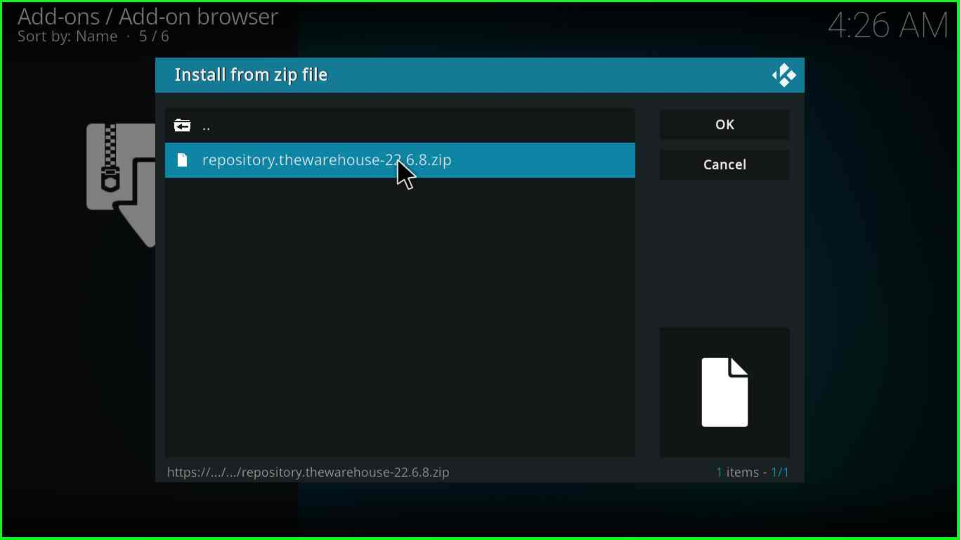
Choose the “repository.thewarehouse-x.x.x.zip” file.
After a few seconds, the screen will show the message “The WareHouse Repository Add-on installed”.
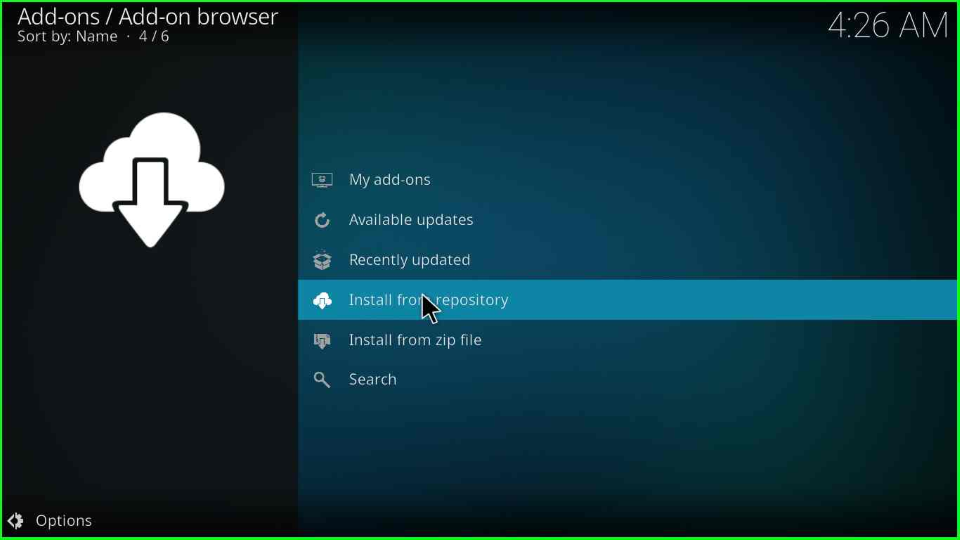
Install from Repository
Next, go to the “Install from repository” option.
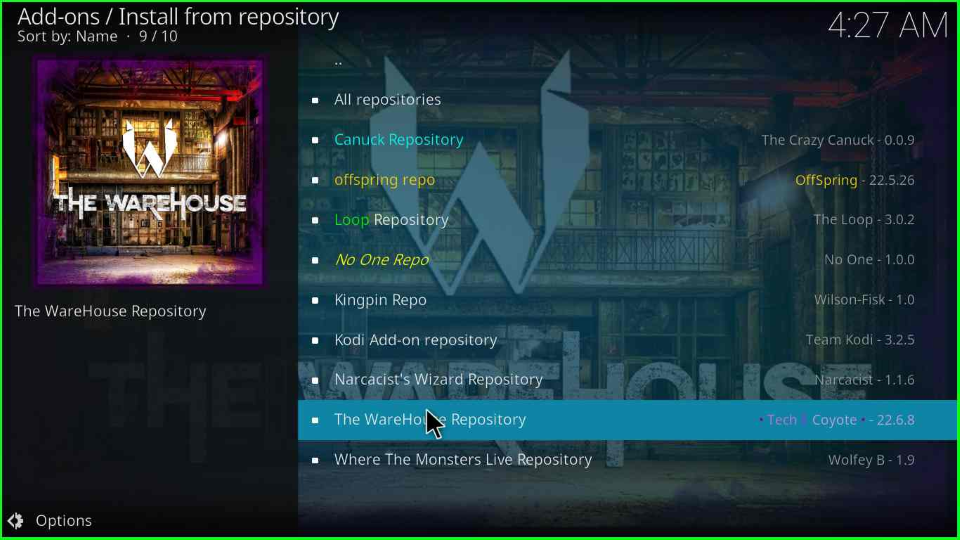
Hit the “The Warehouse Repository” tab on the repository screen.
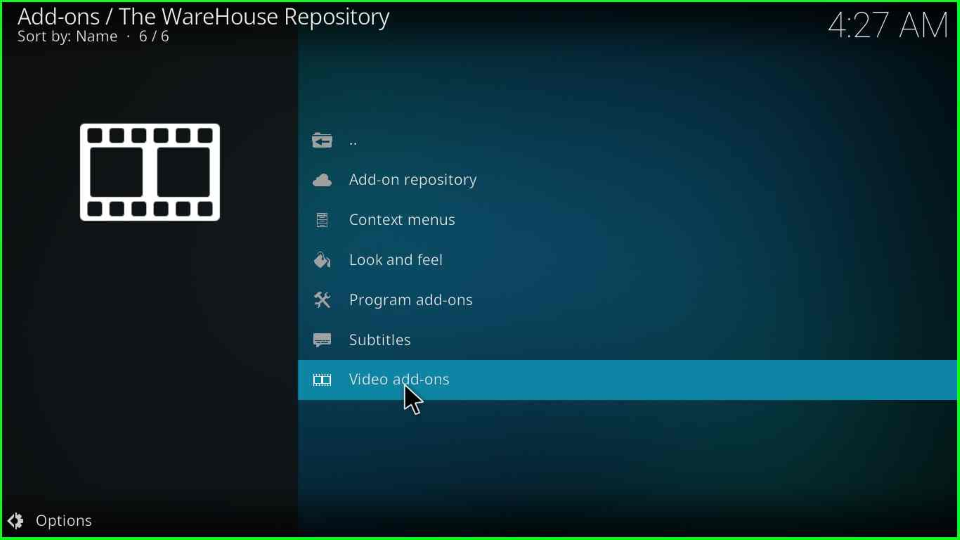
Select the “Video add-ons” just after the Subtitles tab.
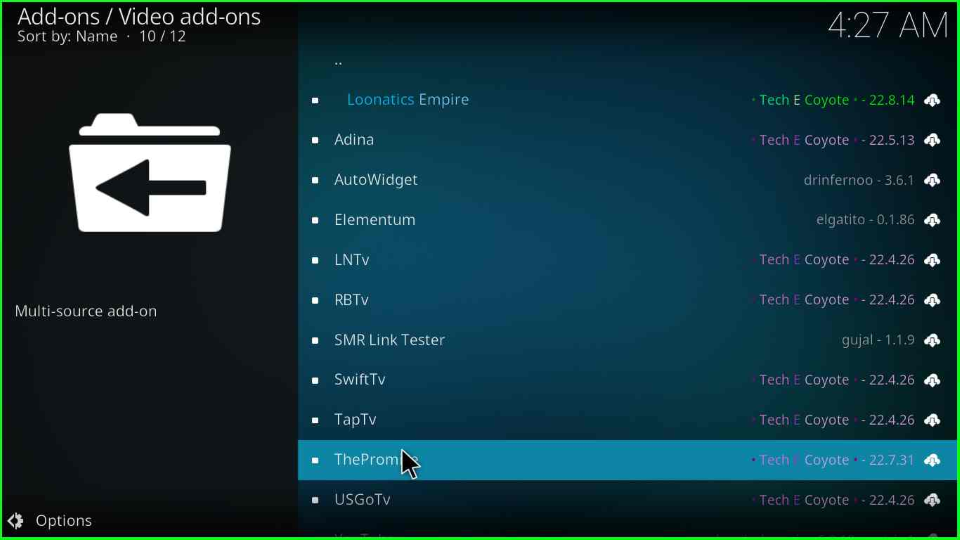
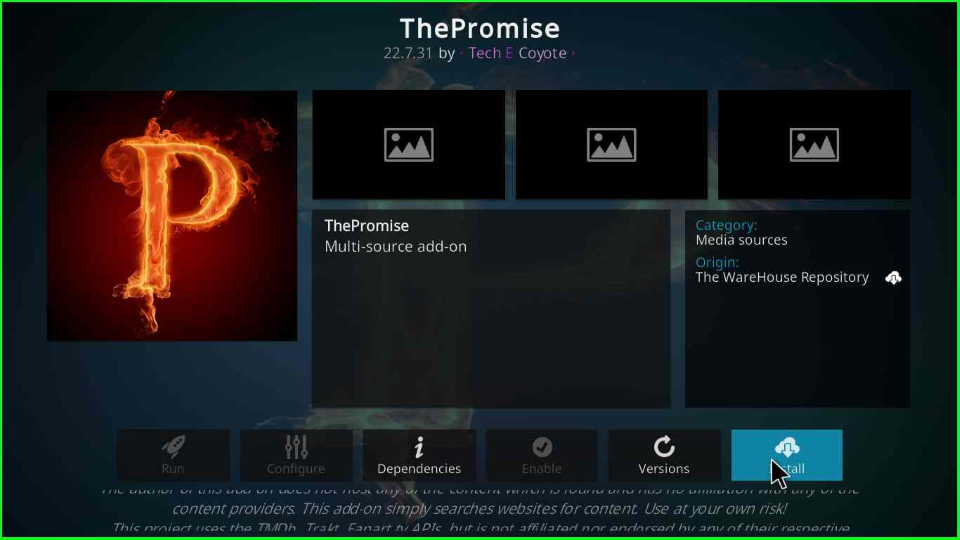
Choose “The Promise” Kodi addon.
The Promise Home page will appear. Press the “Install” key to move next.
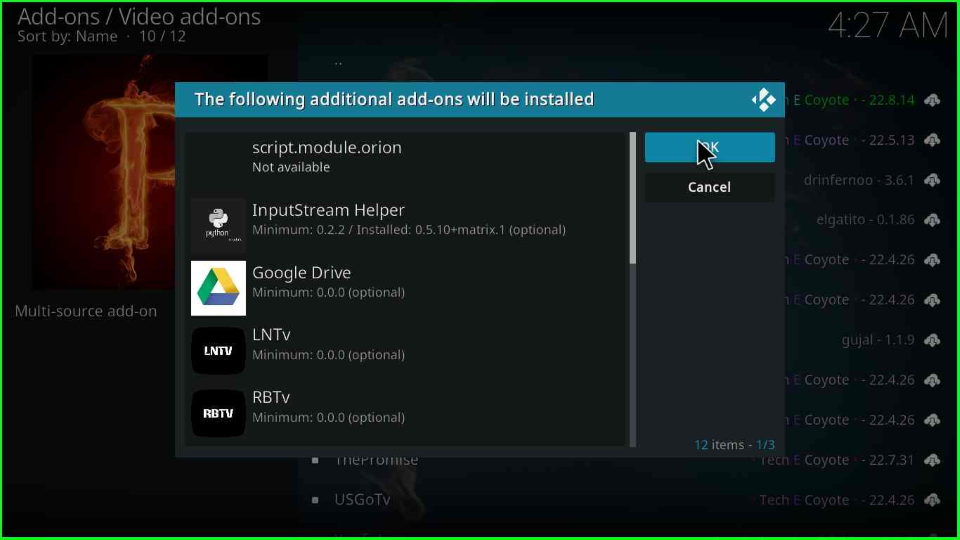
Click “OK” to install the additional add-ons.
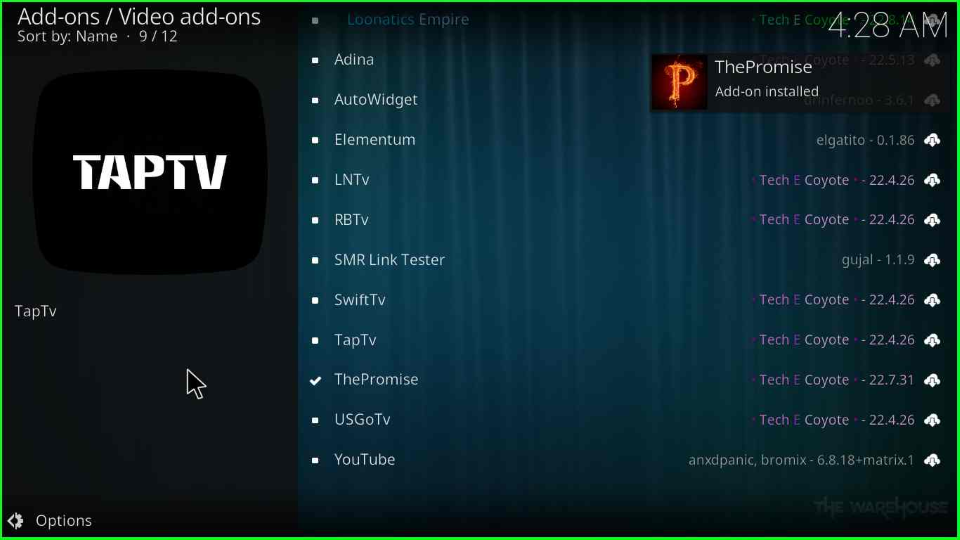
Wait for the installation of The Promise addon.
Again, click on The Promise addon and now choose the first option, “Open”.
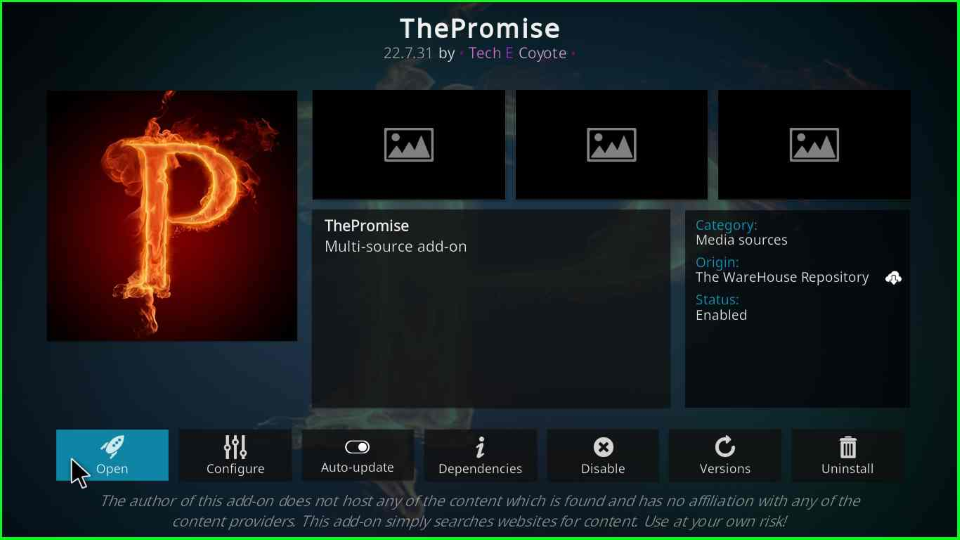
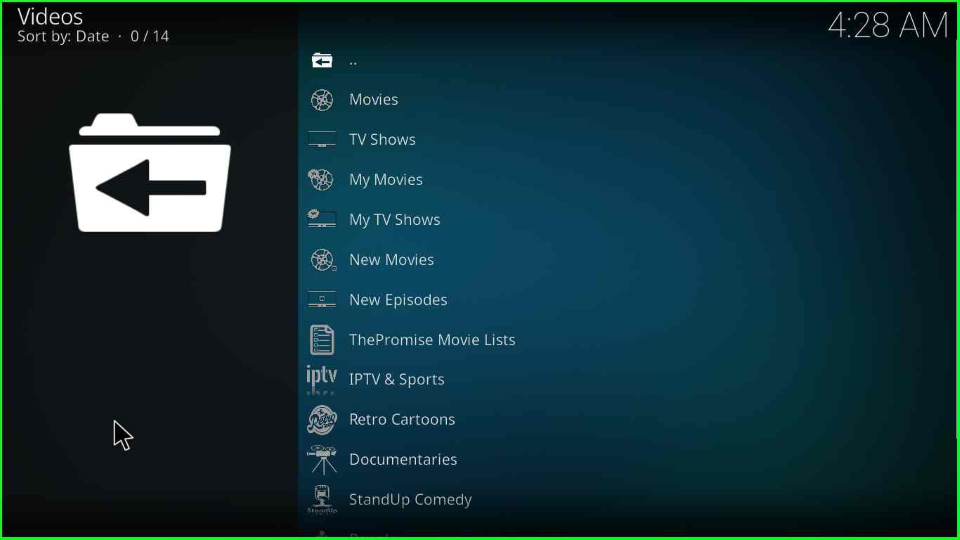
The screen will show the list of all streaming categories of The Promise addon.
Promise Kodi Addon Not Working Reason
If the Promise Kodi Addon does not work, then the following may be the reasons:
- Older Kodi Version
- Slow Network Connection
- Incorrect Repository URL
The Promise Video Addon Questions
The Promise addon consists of a lot of streaming categories which are as shown below:
Movies
TV Shows
Documentaries
My Movies
My TV Shows
IPTV&Sports
New Movies
New Episodes
The Promise Movie Lists
Retro Cartoons
Standup Comedy
Yes, you can set up a free Real Debrid account for streaming services like Youtube, and Dailymotion. But to use premium services like Netflix and Hotstar, you need to buy a subscription plan.
Wrap Up
In this article, we have discussed the Promise add-on installation steps and related questions and answers. Try installing the add-on using the above-mentioned steps. Tell us what you liked about The Promise Kodi add-on through the comment section.
Related Guides:
Hi Emma. Thanks for the how-to. 🙂 Unfortunately, The Warehouse repo is now down. Very sad to see The Promise go.