Loop Kodi Addon
In this article, we will learn how to install Loop Kodi Addon on Firestick step by step. This guide will work on almost all devices, including Android, Firestick (4K, Max, Lite), Android Box, iOS, and other supported Kodi devices.
The Loop is one of the best live sports add-ons for Kodi users that lets you stream from many sports categories and channels. Loop add-on focuses on Football, Cricket, Baseball, Soccer, Golf, Rugby, and, Darts sports, therefore, it is the best alternative to the Fox sports add-on.
In addition, the Loop add-on offers many sports channels such as NFL, Racing TV, NBA, Sky Sports, UFC, NHL, and, MMA. The addon doesn’t require sign-up and is free to stream any sports.
Some popular Kodi add-ons like The Loop are Netflix, Disney+, HBO Max, 4K, Alvin, Wolf Pack, Insomnia, Crazy Canucks, Asgard, No One, Magic Dragon, etc.
The Loop Kodi Addon Installation Steps
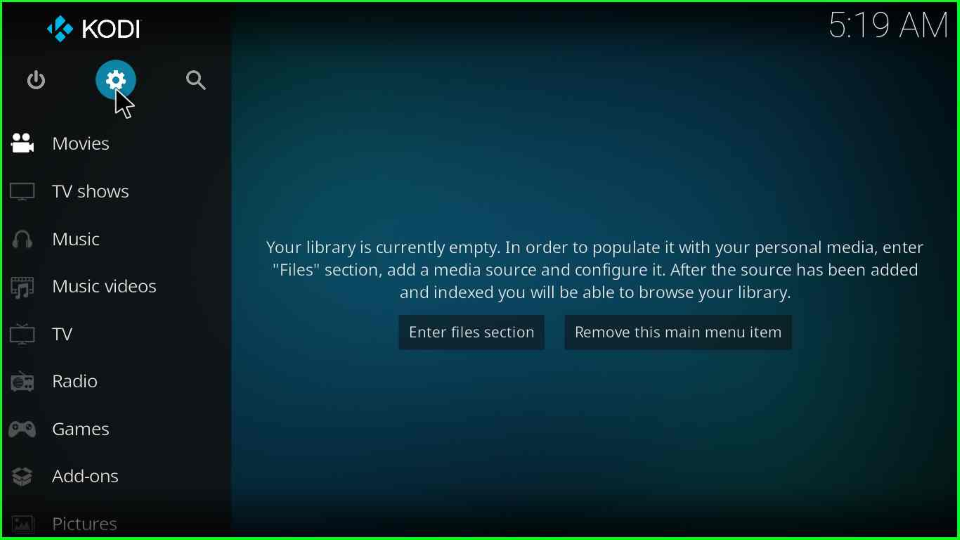
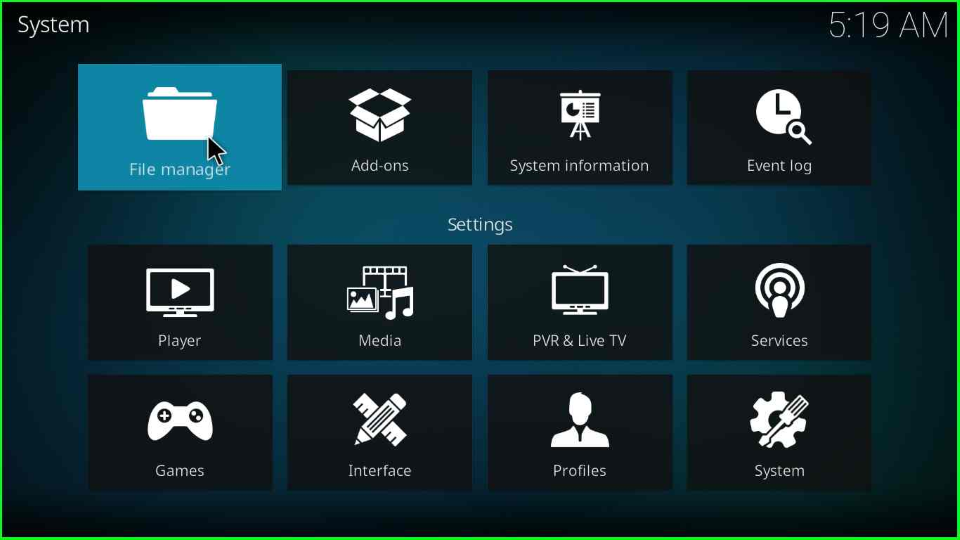
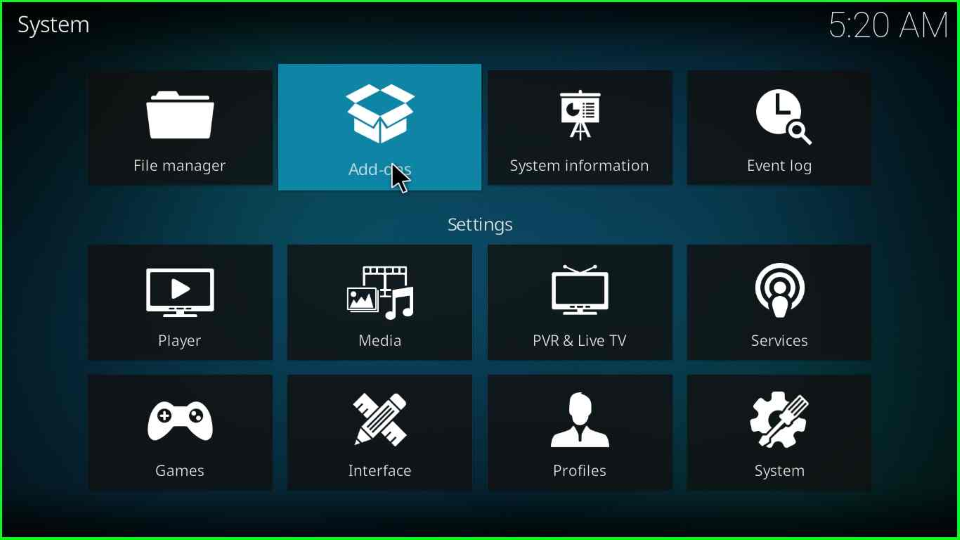
Start the Kodi and take the pointer toward the “Settings” tab.
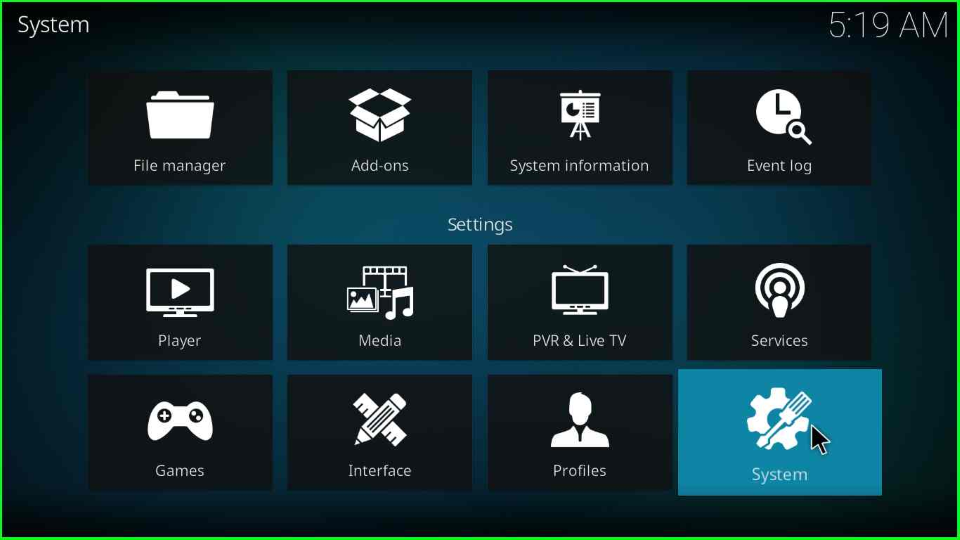
Run towards the “System” icon and hit enter.
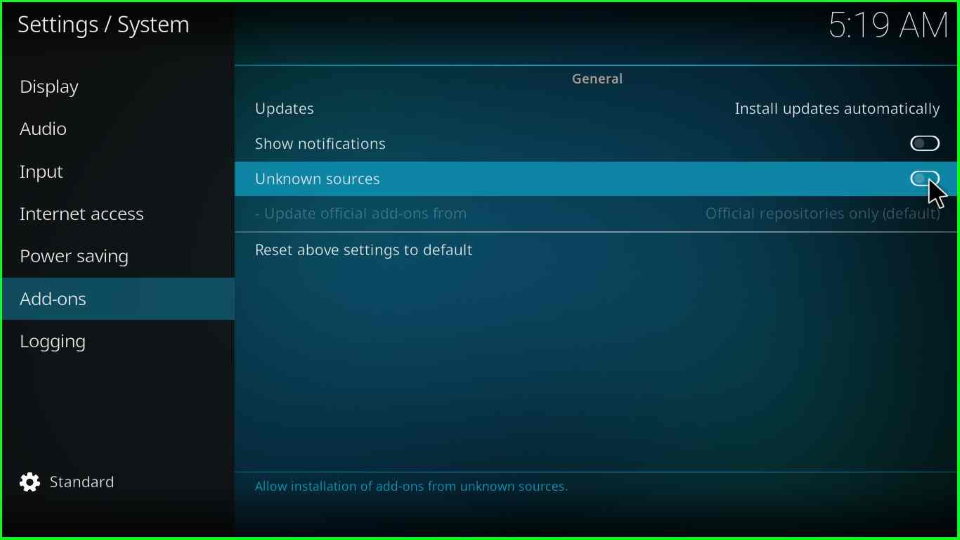
Now, search the “Add-ons” tab and enable the “Unknown sources”.
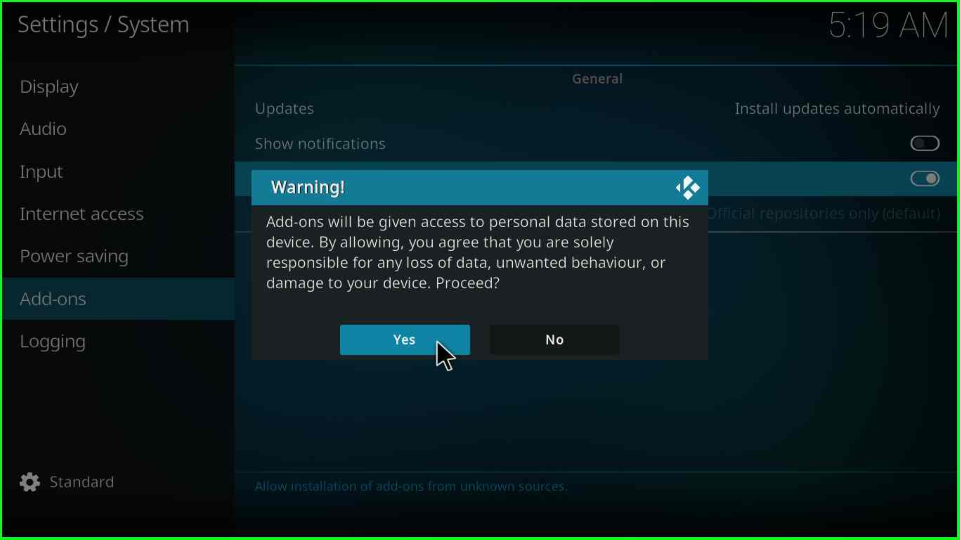
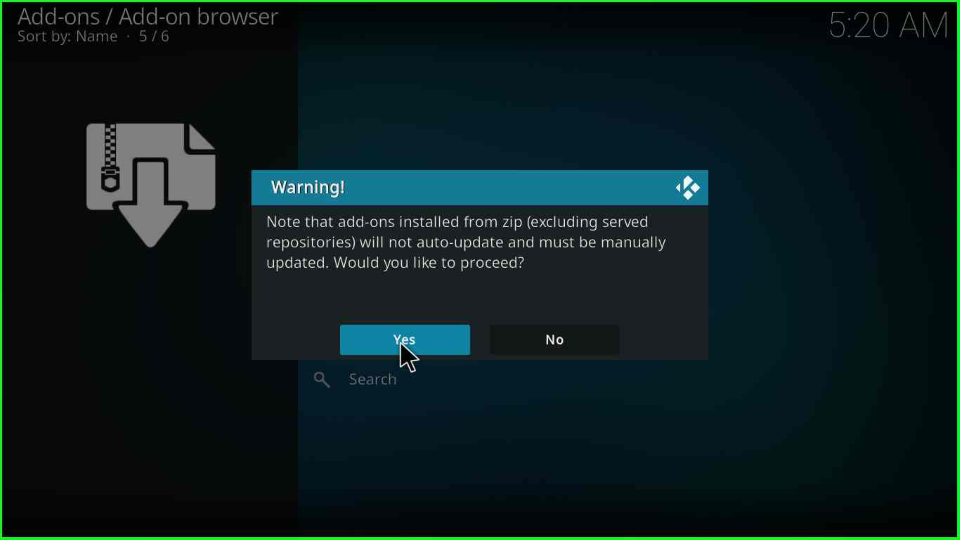
The window displays a warning message; click on the “Yes” option.
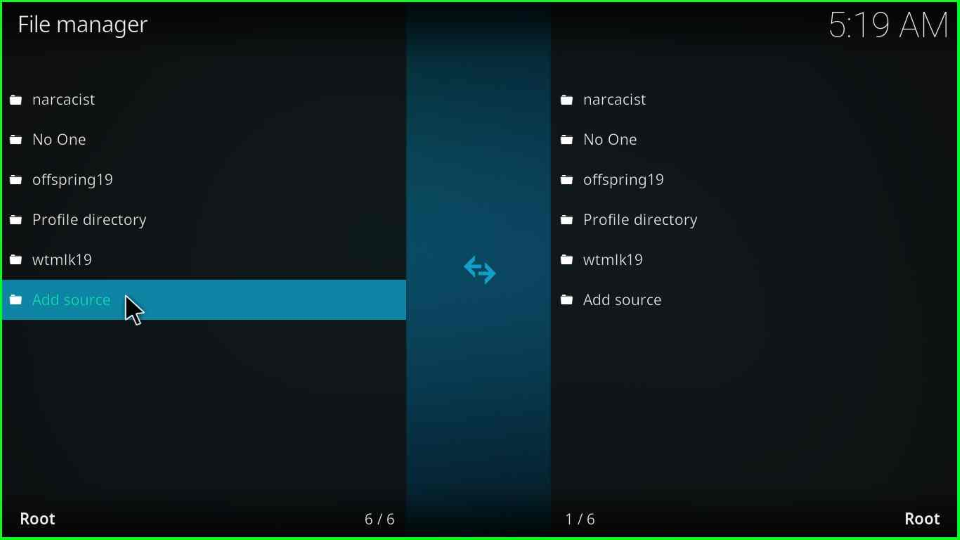
Add Media Source and Repository
Click on the “File Manager” icon from the top of the screen.
Add the new source for the Loop repository by clicking on the “Add source” option.
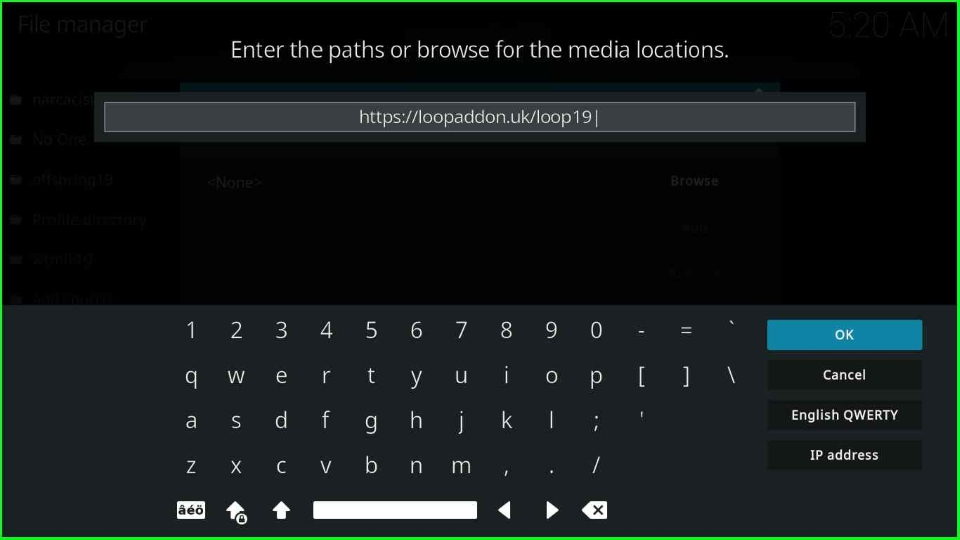
Then, click the “<None>” tab.

Type the Loop addon URL as “http://loopaddon.uk/loop19” and hit “OK”.
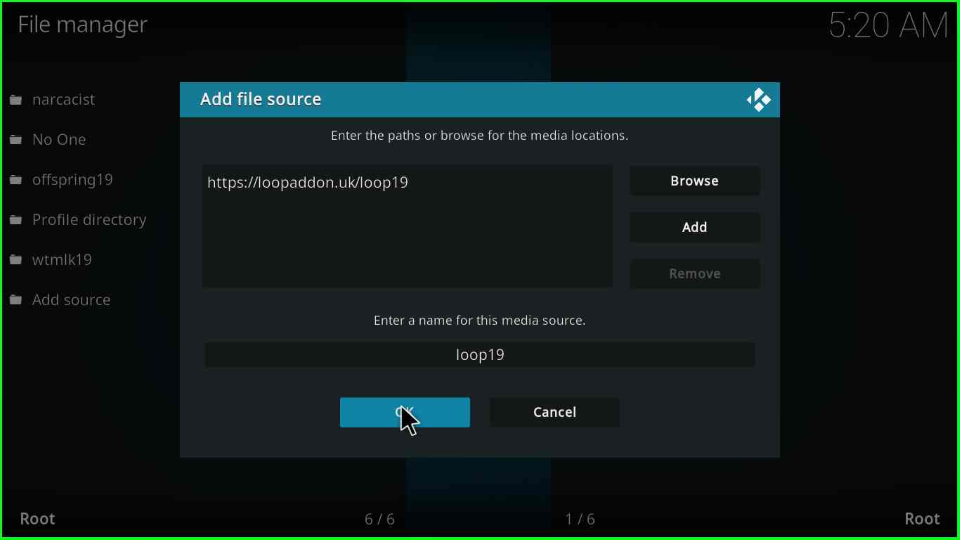
Remain the source name “loop” and press the “OK” tab.
Install from Zip File
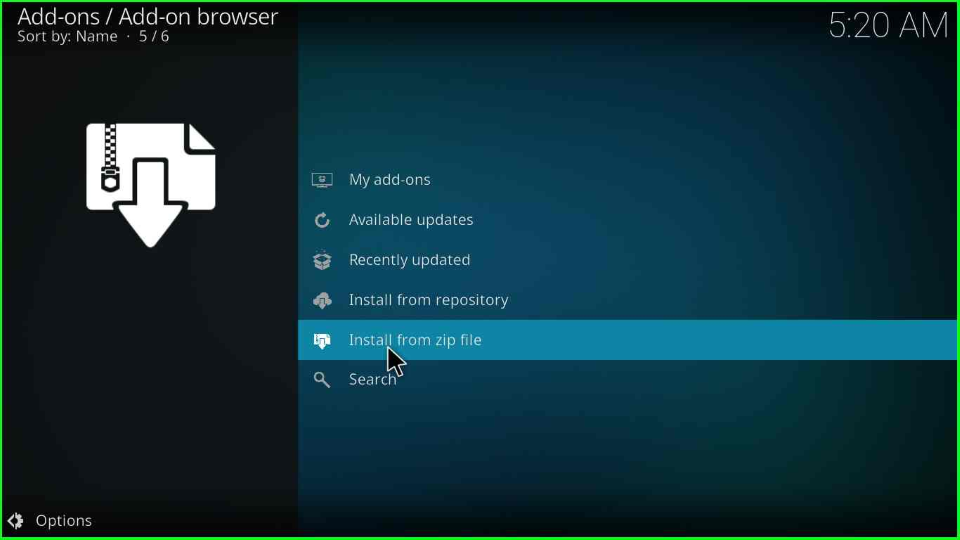
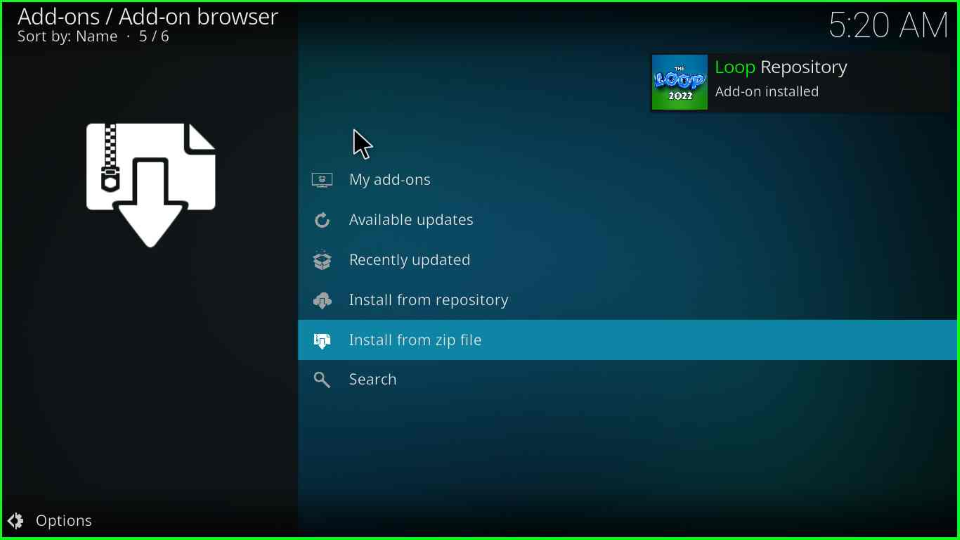
Turn back to the screen and flick the “Add-ons” sign.
Put the cursor on the “Install from a zip file” option.
Select the “Yes” option that appears in the warning popup.
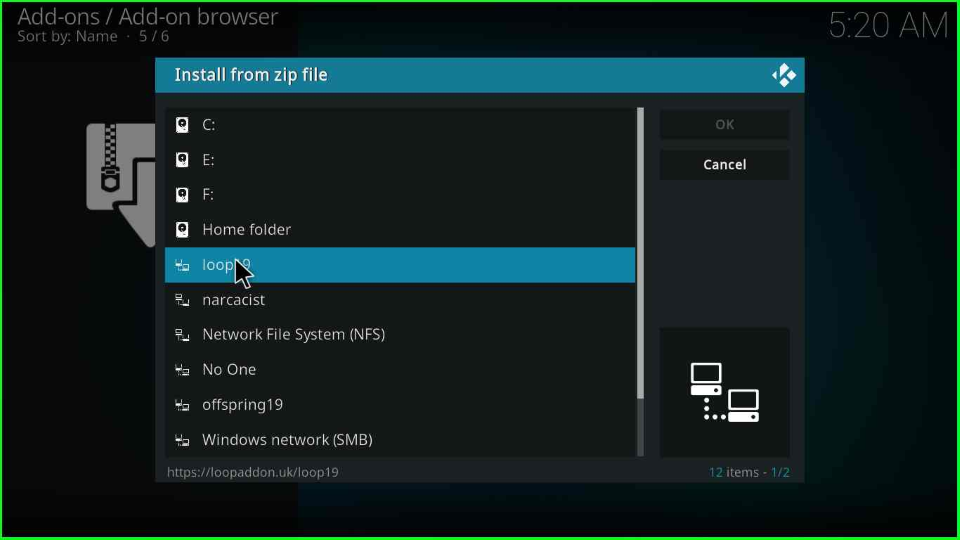
Choose the “loop19” directory.
Click on the “repository.loop-x.x.x.zip” to install the loop repo.
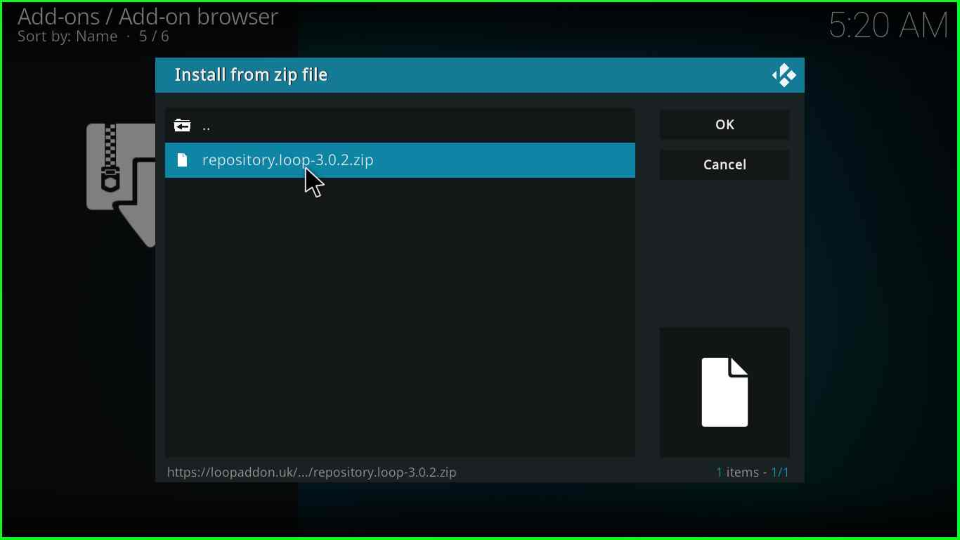
After the click, the page starts downloading the Loop repository with all the necessary files. Wait until its message appears on the screen.
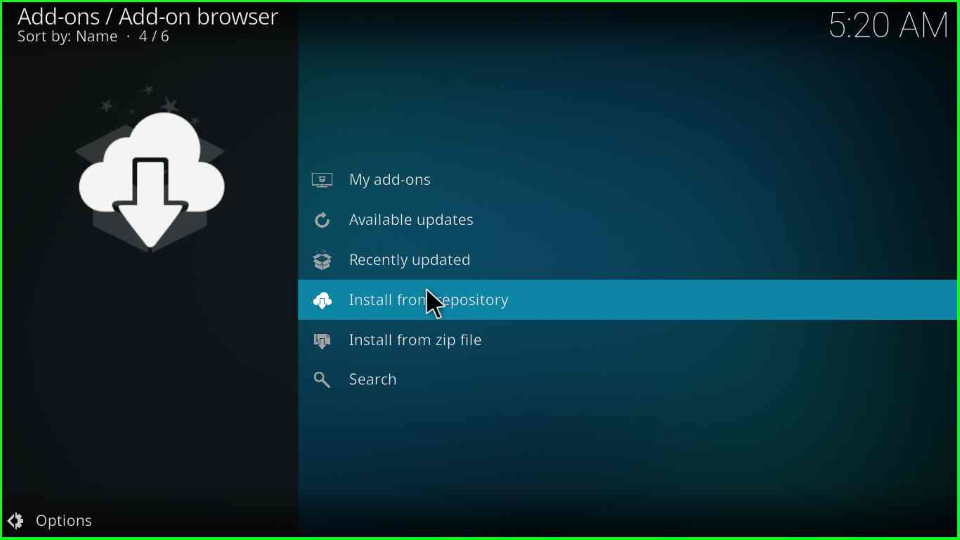
Install from Repository
On the same page, tap on “Install from repository”.
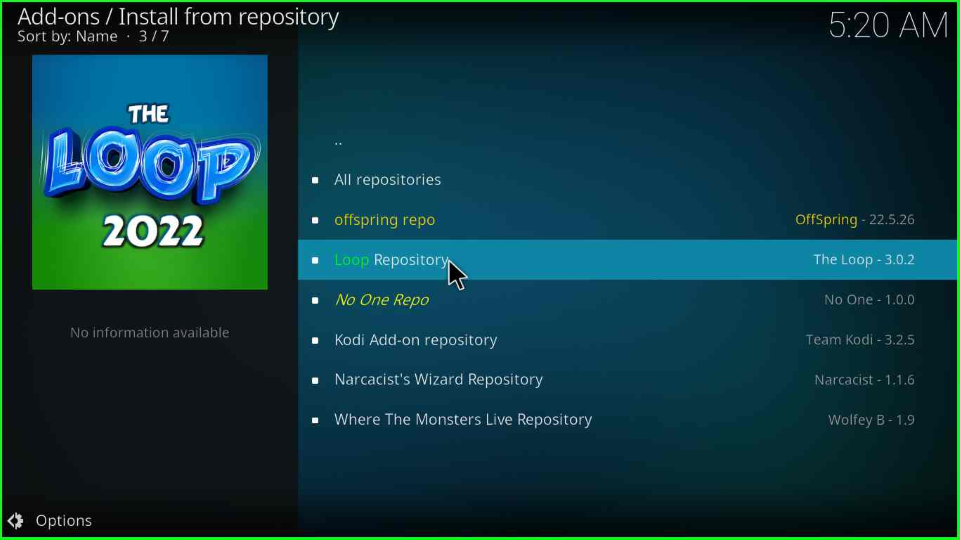
Now, find the “Loop Repository”.
Open the “Video add-ons” label.
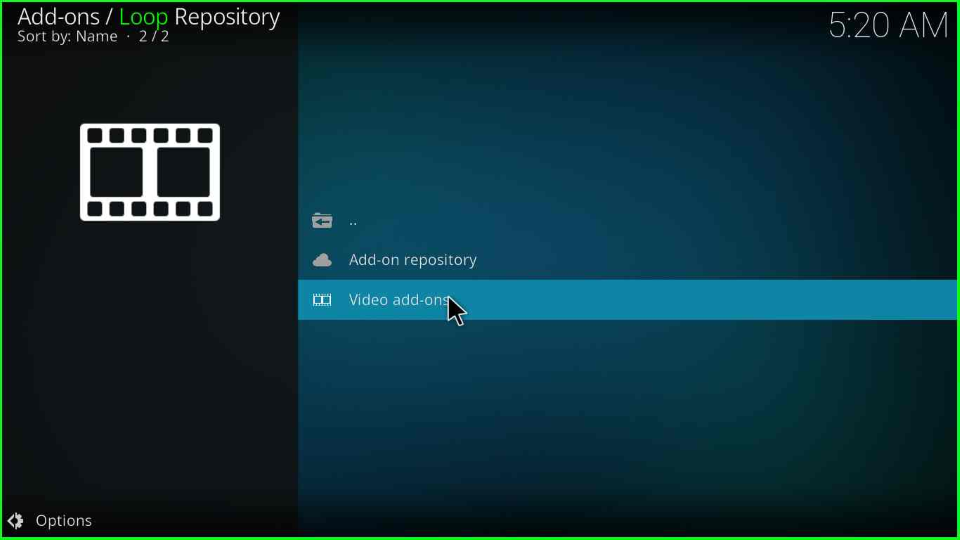
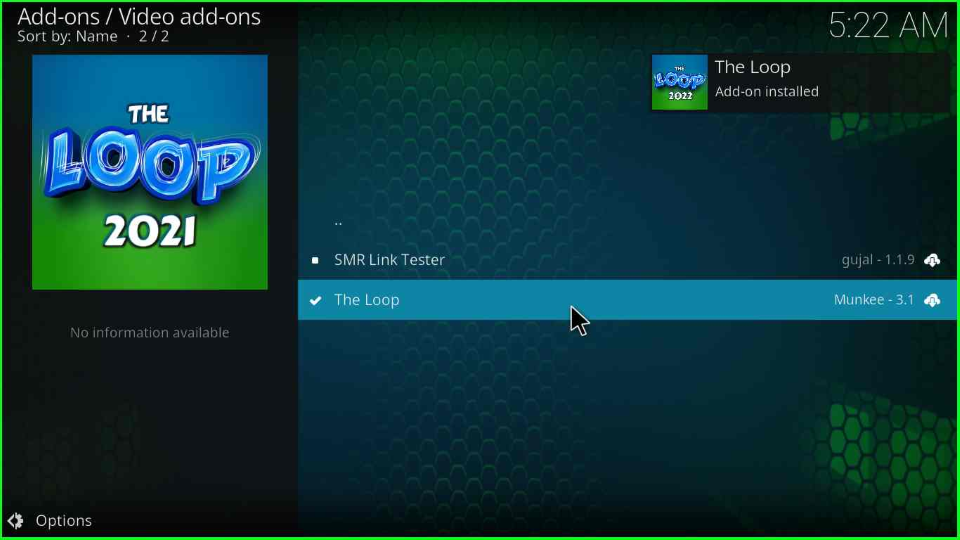
Inside it, you will see “The Loop addon”.
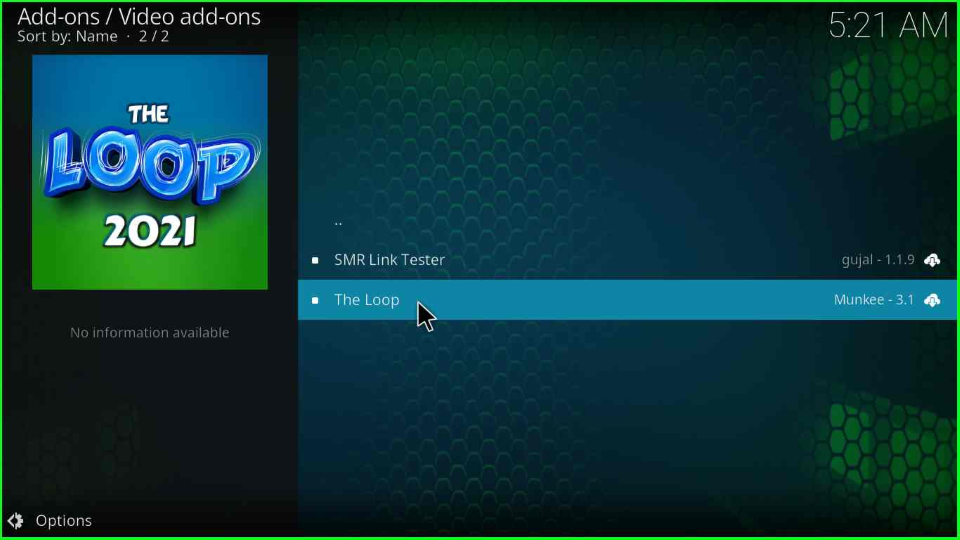
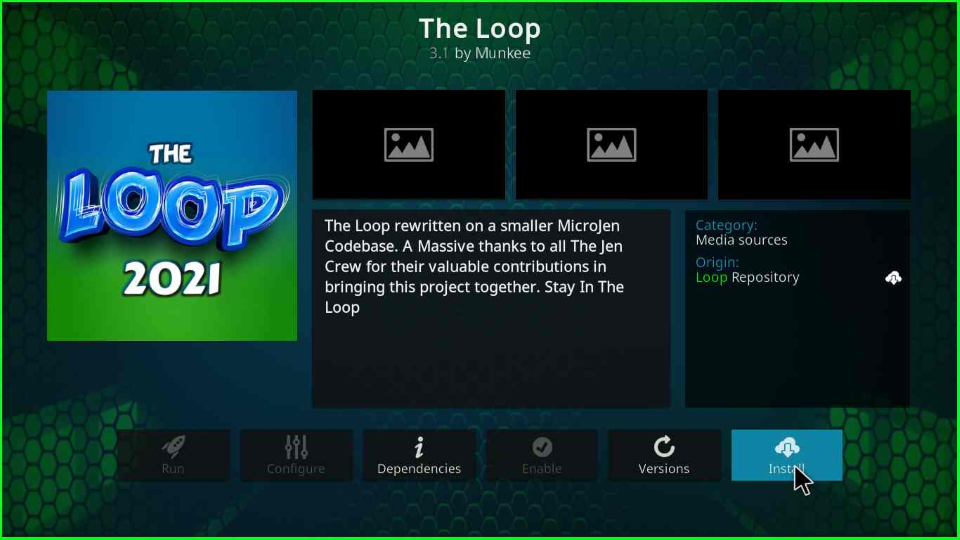
Hit the “Install” key to install the addon on your Firestick.
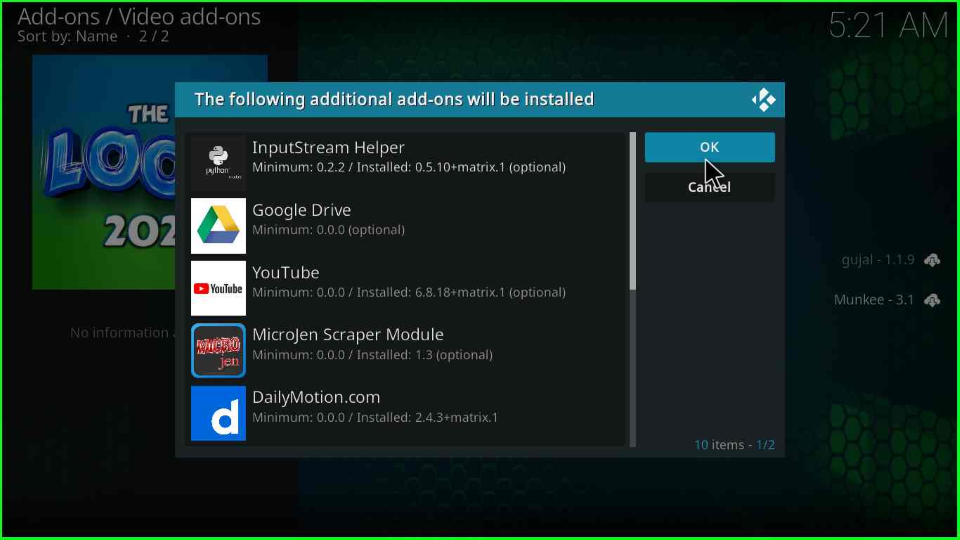
The page displays the list of dependencies and extra addons installed with The Loop. Click “OK” to install.
After installing, again click on the “The Loop” option.
Press the button to open the “Open” menu.
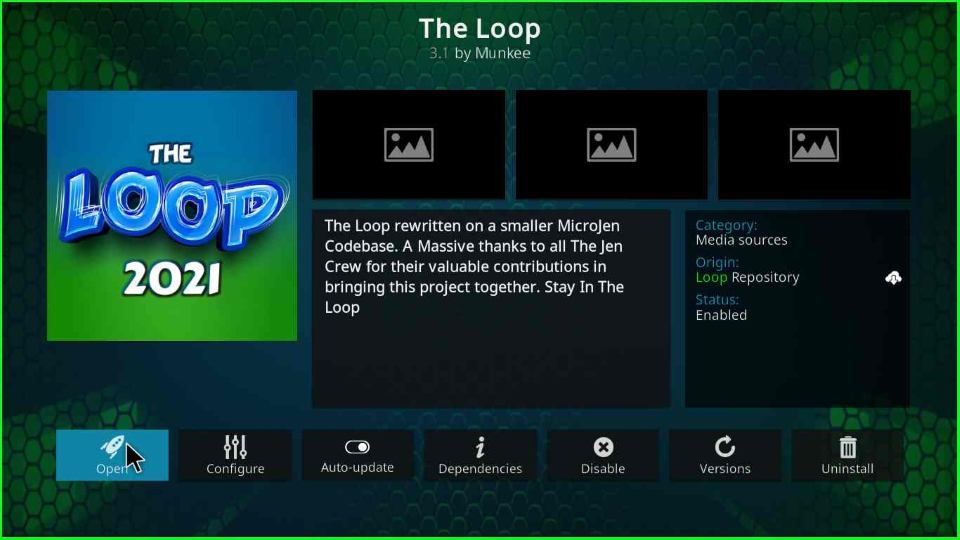
Open the “The Loop” addon and stream your favorite section.
The Loop Kodi Addon Questions
Which type of content categories does The Loop addon offer?
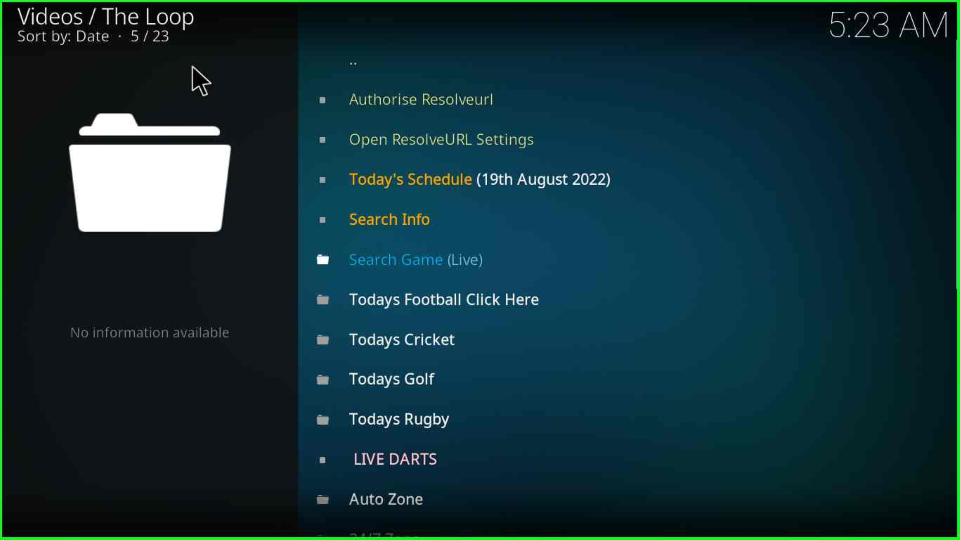
The Loop addon offers the following sports categories viz-
- Auto Zone
- Fan Zone
- LIVE DARTS
- Fight Zone
- Today’s Schedule
- NCAA Zone
- Search Game(Live)
- MLB Zone
- Open ResolveURL Settings
- NBA Zone
- Soap Zone
- NFL Zone
- Test Zone
- Score Zone
- NHL Zone
Is The Loop addon only made for sports lovers?
No, The Loop addon also offers many News and Radio channels with a Sports section.
Wrapping up
In this article, we have covered the Loop add-on installation steps and frequently asked questions. We hope you enjoyed the steps while installing it on your Firestick. Apart from that if you want to suggest more about the article and ask something, write a comment in the below section.
