This tutorial will teach us how to install the Alvin Kodi add-on in 2-3 minutes. Undoubtedly Alvin is among the top Kodi add-ons even in 2024. Interestingly, it is a lightweight Kodi add-on with around 500KB.
Though Alvin is not from Kodi’s official repository, developers regularly update the Alvin add-on library. Alvin add-on, the fork of the Exodus add-on, supports torrent streaming and full HD Videos.
Alvin is a lightweight Kodi add-on with simple, user-friendly navigation and layout. You can have buffering-free and fast video streaming on the Alvin add-on. Like the TheOath Kodi add-on, you can integrate Real-debrid with the Alvin add-on.
How to Install Alvin Kodi Addon
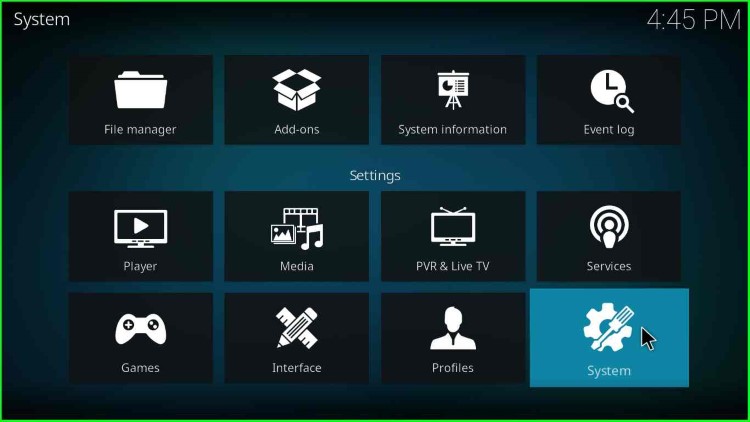
1. First, we need to allow installation from unknown sources. Therefore, go to the Kodi settings by clicking on the gear icon at the top-left of Kodi’s home screen.
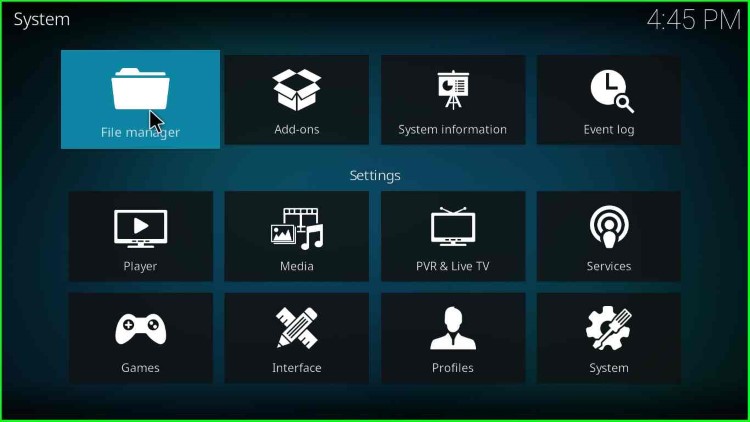
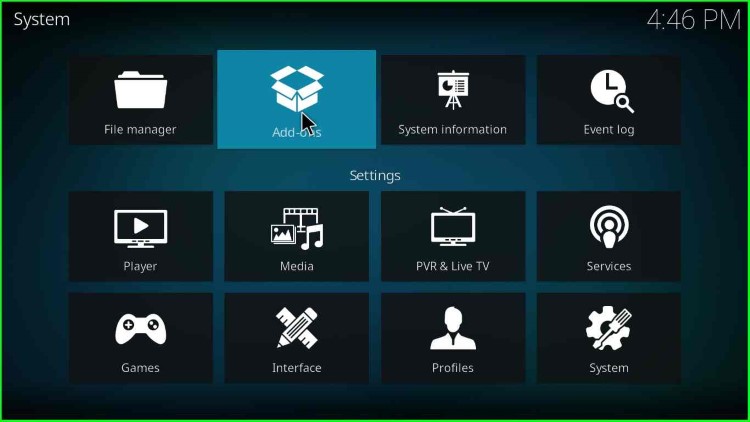
2. In the settings menu, you will find many options: file manager, Add-ons, System information, Event log, etc. Moreover, in settings, we have Player, Media, PVR & Live TV, Services, Games, Interface, Profiles, and System. Click on the System option.
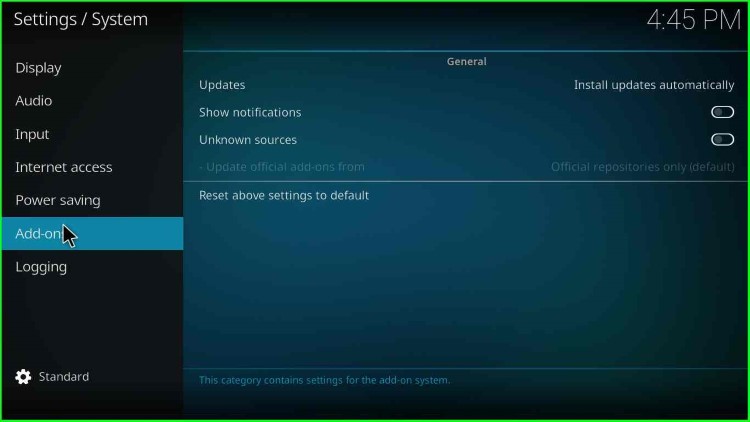
3. On the left sidebar, you will find the Add-ons option, the second last option. Click on the Add-ons option.
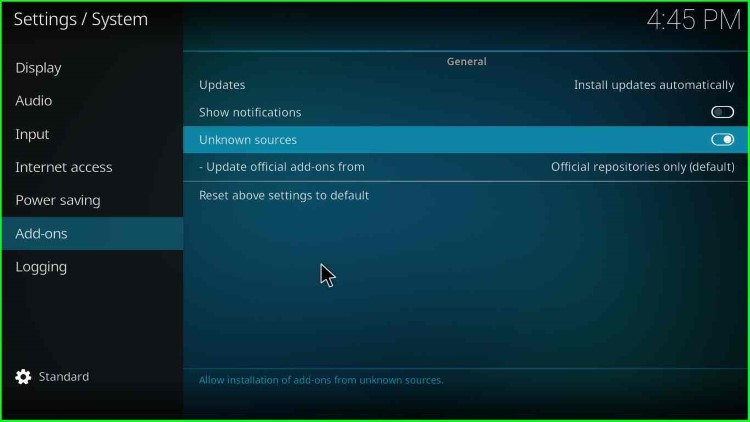
4. Then, on the radio button named Unknown sources.
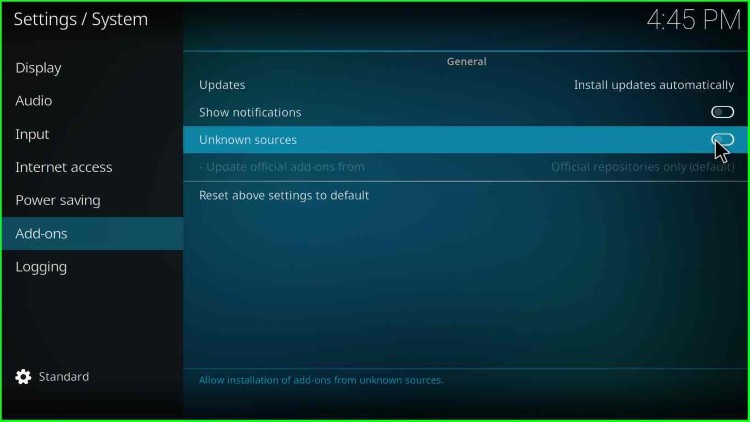
5. Click on the Yes button.
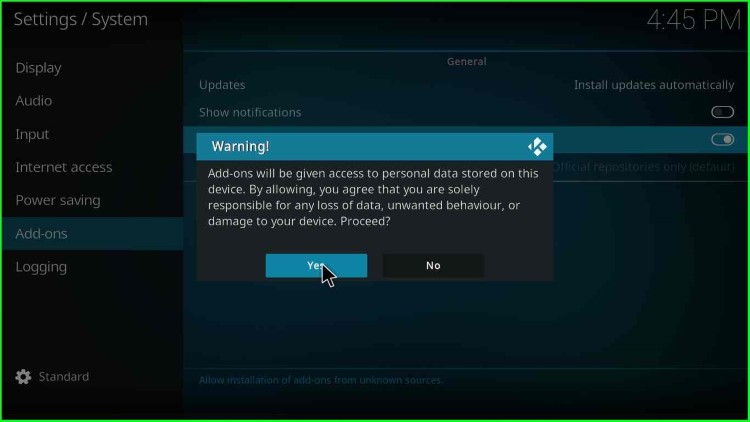
6. Once you click the Yes button, the dialogue box will close.
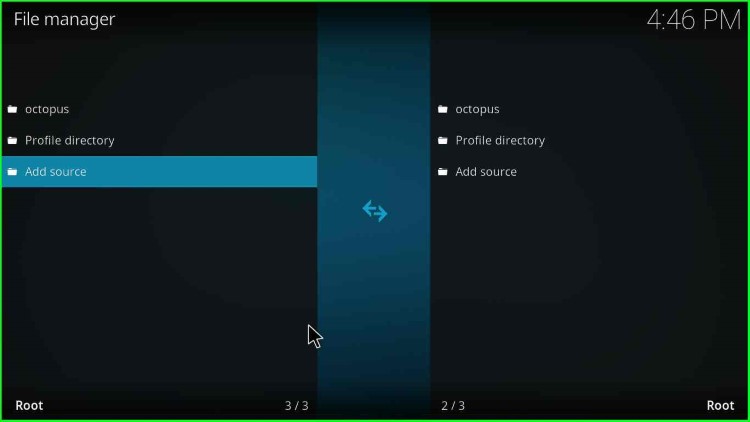
7. Then go to the File manager option.
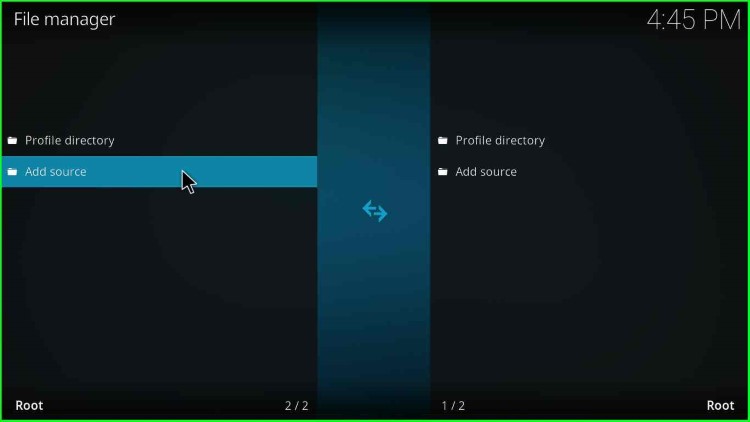
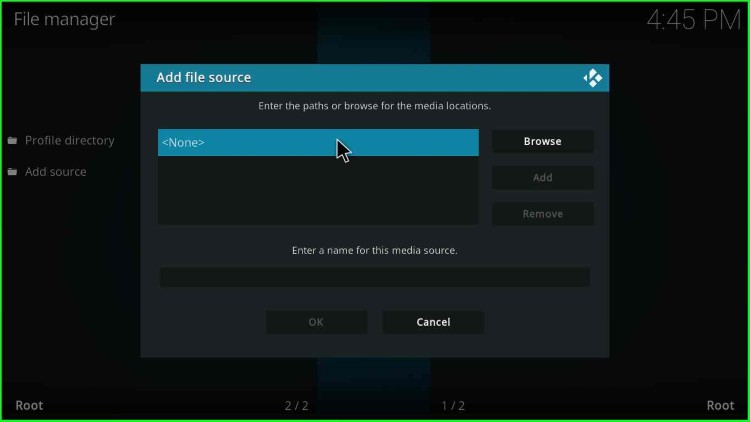
8. Click on the Add source button to add Alvin’s source.
9. Then click <None>.
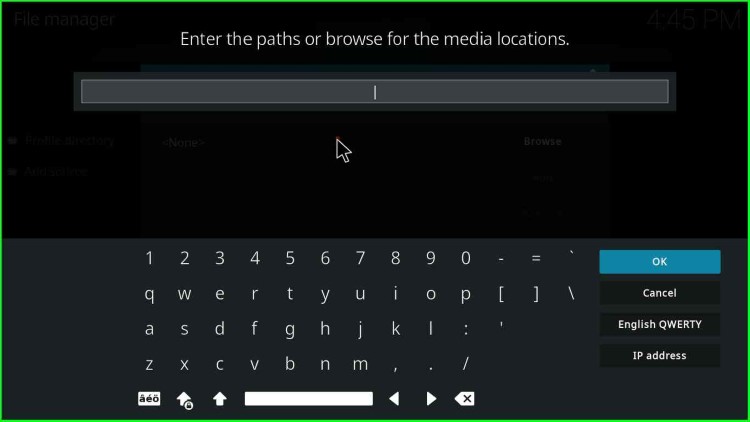
10. Enter the Alvin add-on media source location.
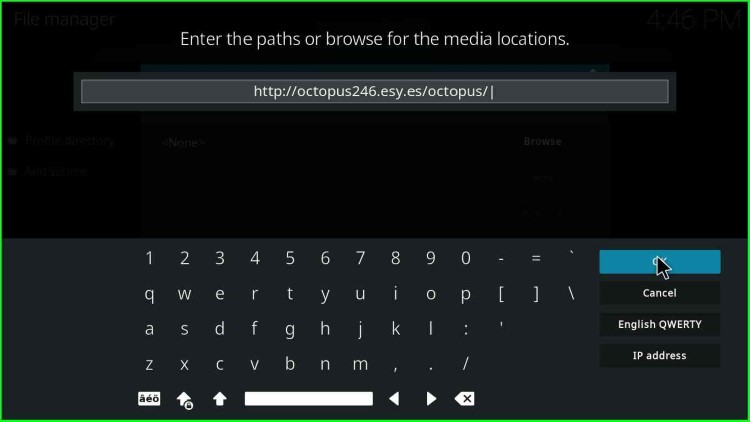
11. The media location for installing the Alvin Kodi add-on is http://octopus246.esy.es/octopus/.
12. By default media source name will be the octopus. Leave it as it is; there is no need to change.
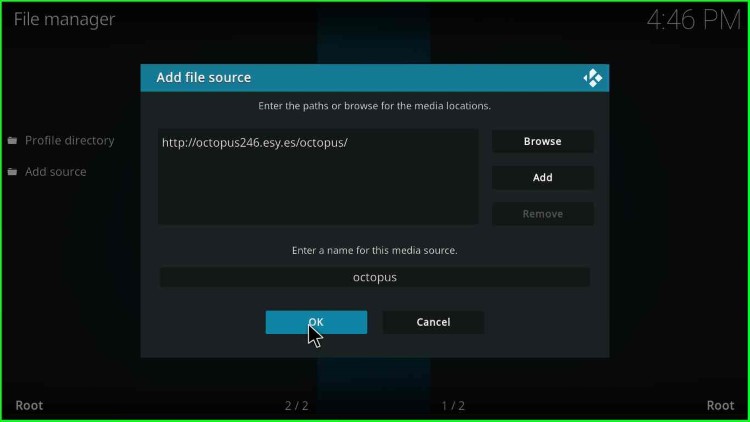
13. Click the OK button and go back.
14. Now click on the Add-ons option.
Alvin Addon Installation From Zip File
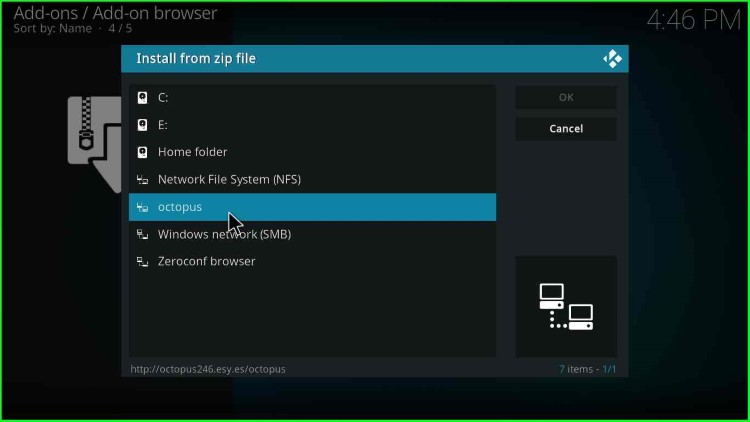
15. Next, click on the Install from zip file option.

16. Click Yes when a warning popup appears.

17. Click on the octopus option (the same option we added earlier).
18. Click on the repository.octopus-x.x.xx.zip option.
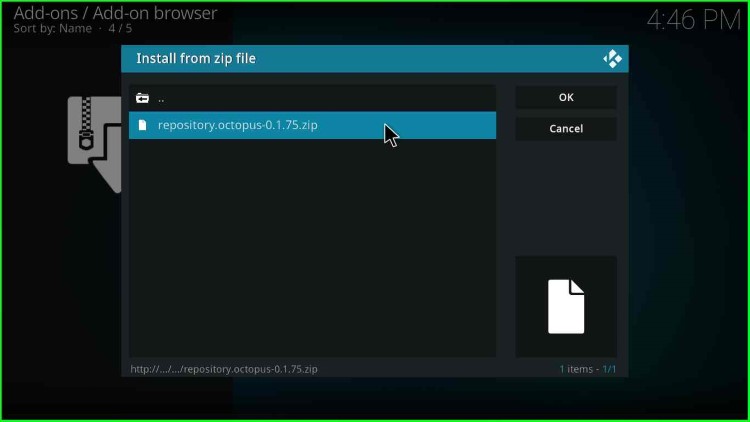
19. The Octopus Repository installation starts, so wait until the “Octopus Repository Add-on installed” message appears.

Install Alvin From the Repository
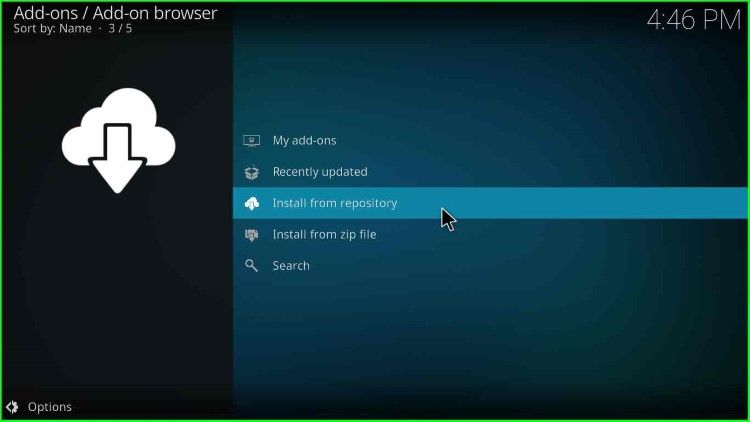
20. After that, click on Install from repository.
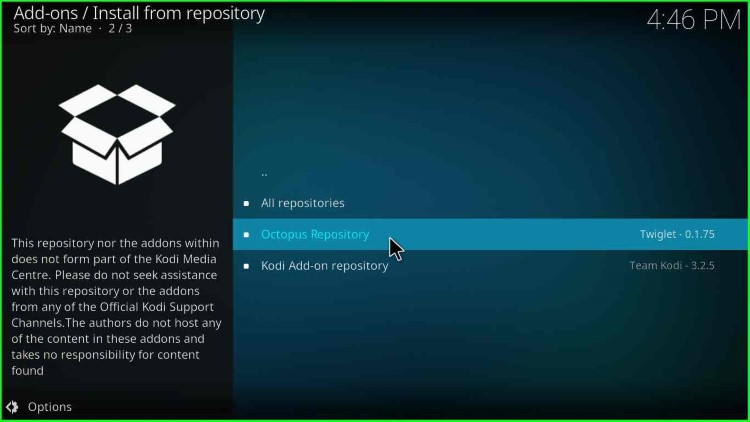
21. Next, you will find three options All repositories, Octopus Repository, and Kodi Add-on repository. So click on Octopus Repository.
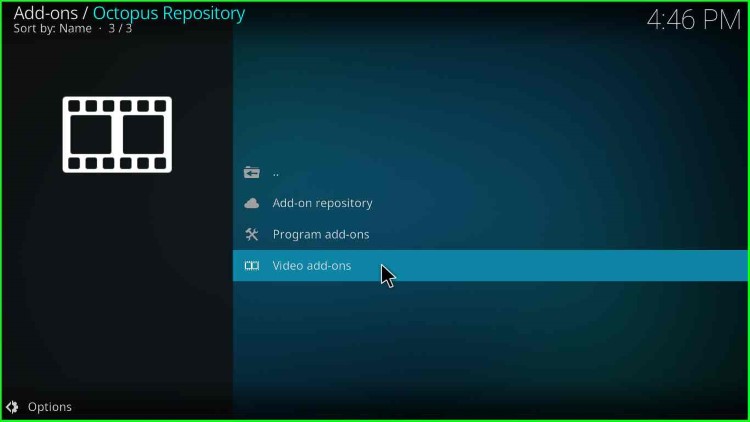
22. Then select Video add-ons.
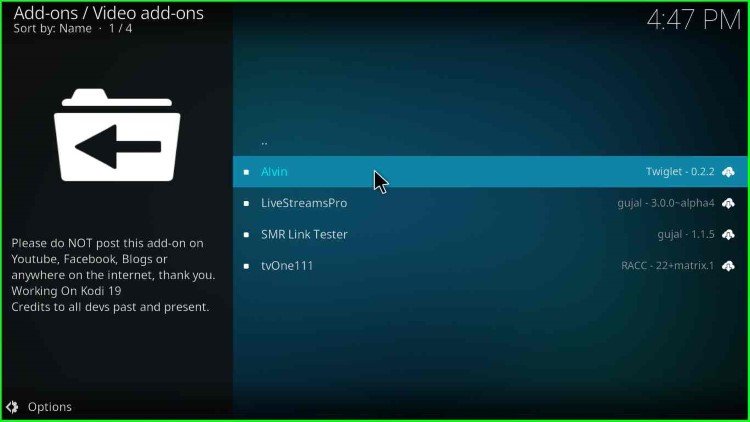
23. Wow! You have your favorite add-on available here. Yes, the Alvin. Hurry up and click on Alvin.
24. Next, click on the Install button.

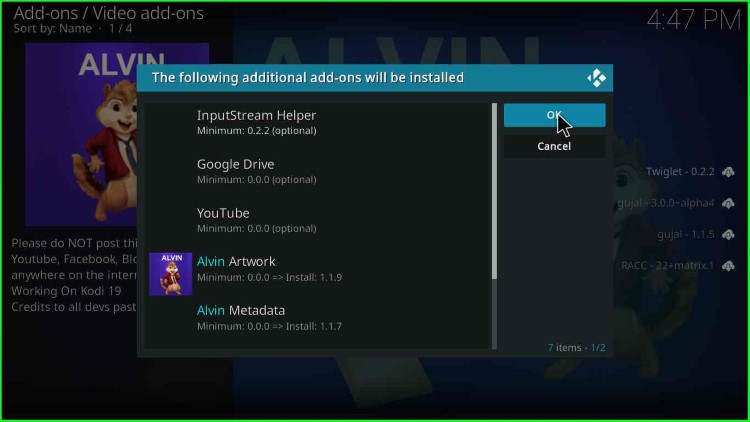
25. Click the OK button when a pop asks to install additional add-ons.
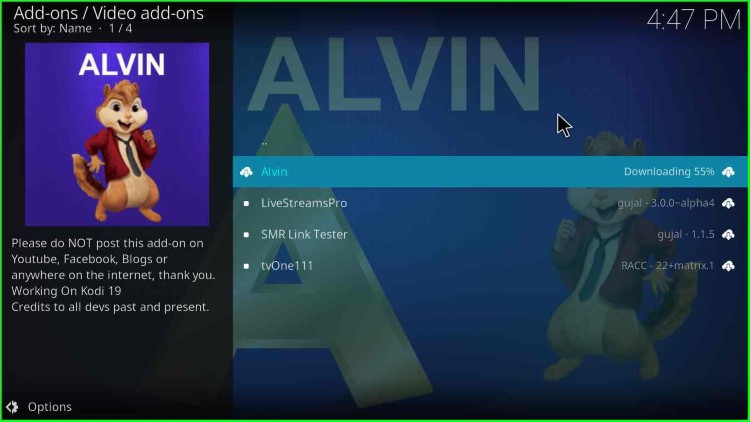
26. Alvin Kodi add-on downloading starts; you can see the progress on the right side.
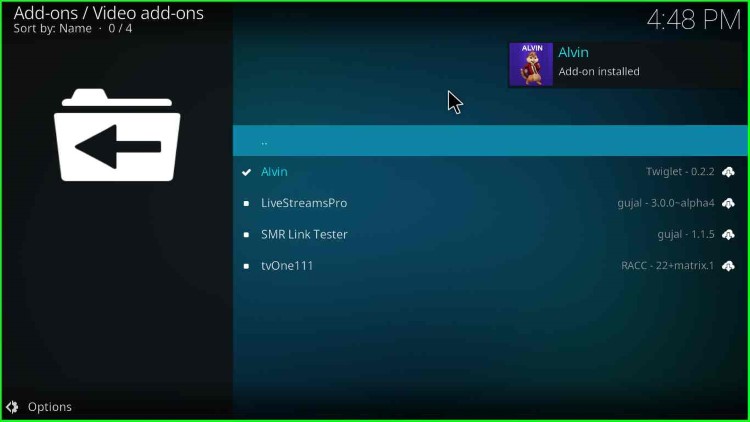
27. A message appears as “Alvin Add-on installed” after a few minutes.
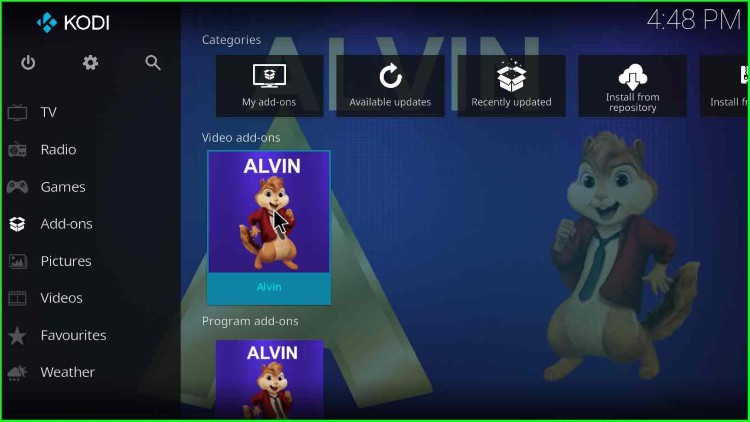
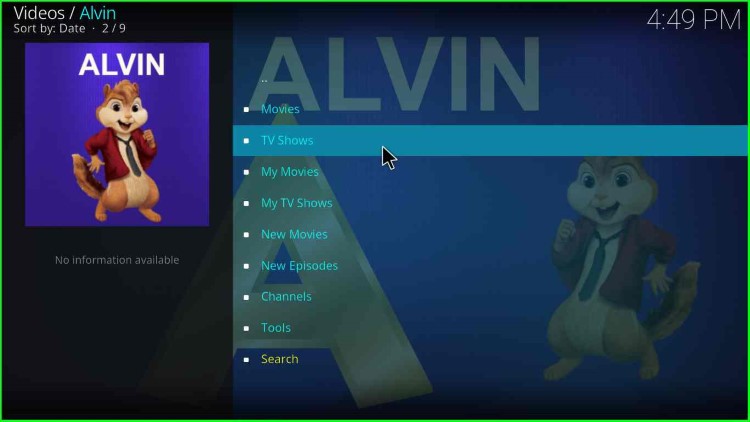
28. Go to the Add-ons option available on Kodi’s home screen. Open the Alvin add-on.
29. You will have many categories like Movies, TV Shows, My Movies, My TV Shows, New Movies, New Episodes, Channels, etc.
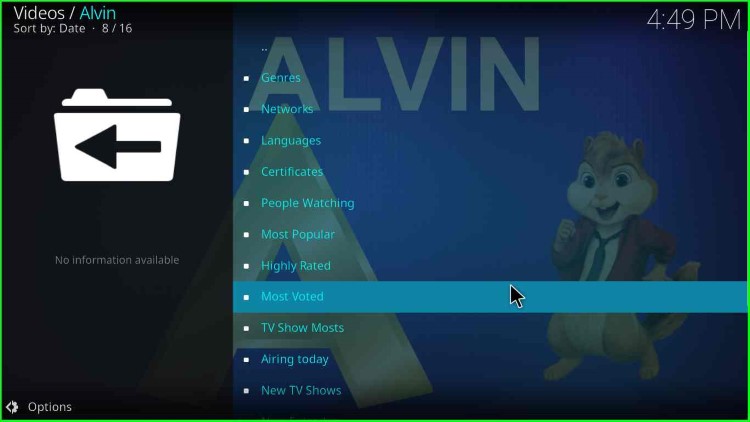
30. When you click on TV Shows, a list of many categories appears. For example, genres, Networks, Languages, Certificates, People Watching, Most Popular, Highly Rated, Most Voted, TV Show Mosts, Airing Today, New TV Shows, etc.
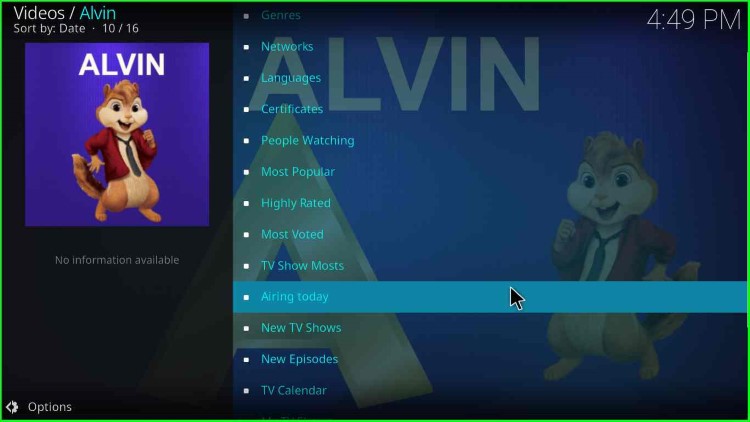
31. When you scroll down Alvin add-on TV show categories, you will find even more categories. For example, airing today, New TV Shows, New Episodes, TV Calendars, etc.
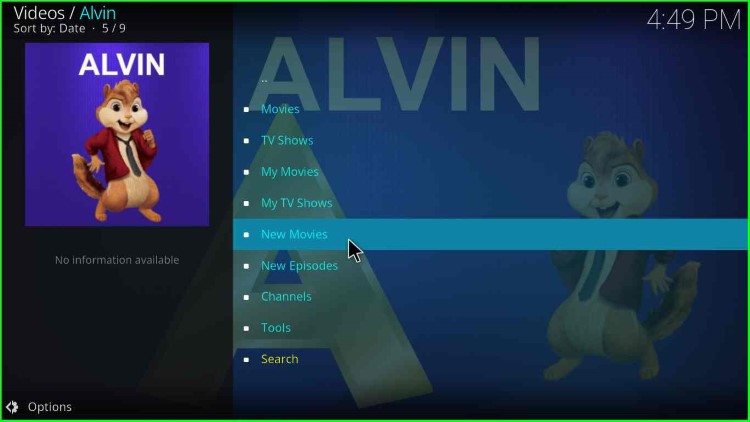
32. If you want to watch a movie on the Alvin Kodi add-on, select the “New Movies” option from the category list.
That’s all; the Alvin add-on installation process is complete. After that, you can start streaming on the Alvin Kodi add-on.
