This tutorial will teach us how to install and uninstall the TheOath Kodi addon. This guide is for all who use Kodi on any device, viz. Fire TV Stick, Android Box, Fire TV Stick 4K, FireTV Cube, Raspberry Pi, Nvidia Shield, PC, etc.
The TheOath addon is among the Kodi addons and builds that work with Kodi 19 matrix. Undoubtedly, this is the best Kodi addon for Movies and TV Shows. TheOath has many categories for streaming movies and TV shows which we have mentioned in the tutorial ahead.
Moreover, like the magic dragon Kodi addon, you can integrate Real-debrid and Trakt with TheOath to amplify your streaming experience on Kodi.
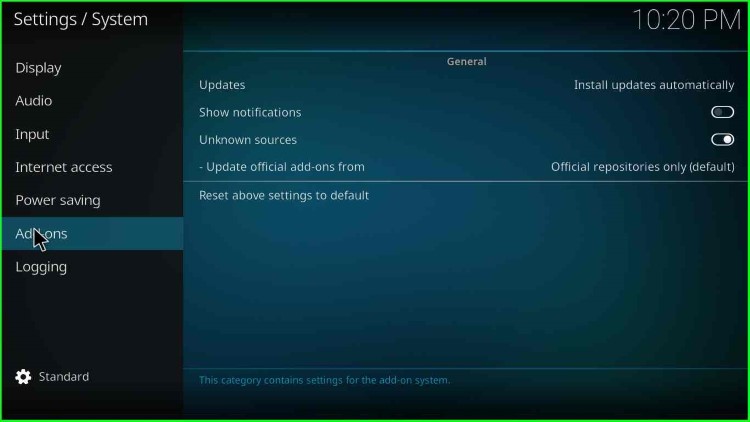
Another key point is that TheOath is unavailable in Kodi’s official repository and belongs to the host505 repository. Hence, you must allow installation from unknown sources in your Kodi before installing TheOath Kodi addon.
How to Install TheOath Addon
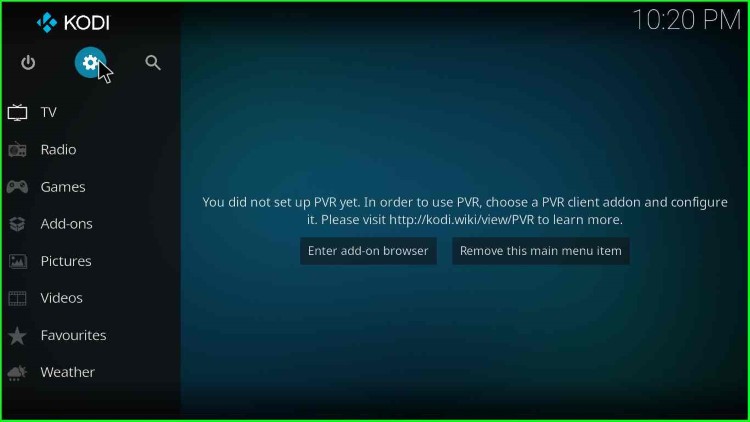
1. Go to the Kodi settings by clicking on the gear icon.
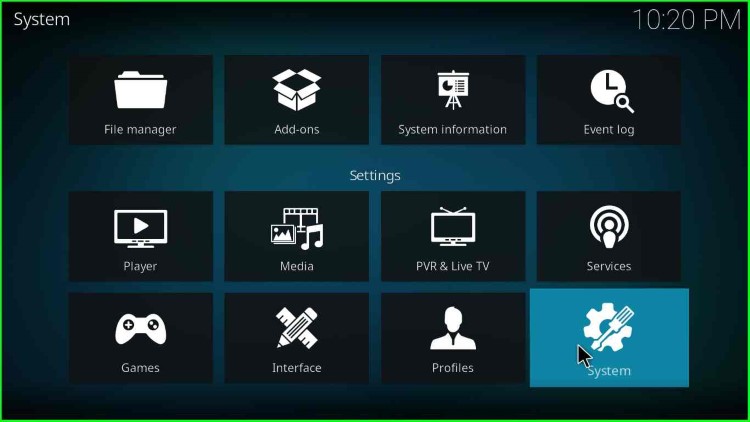
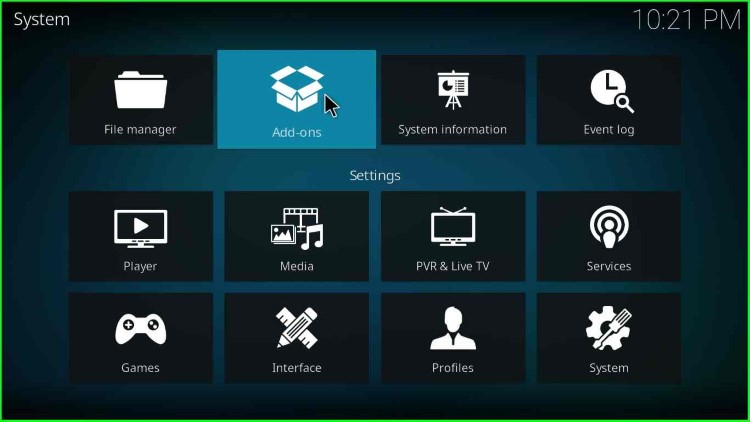
2. Then, on the bottom-right corner, click on System.
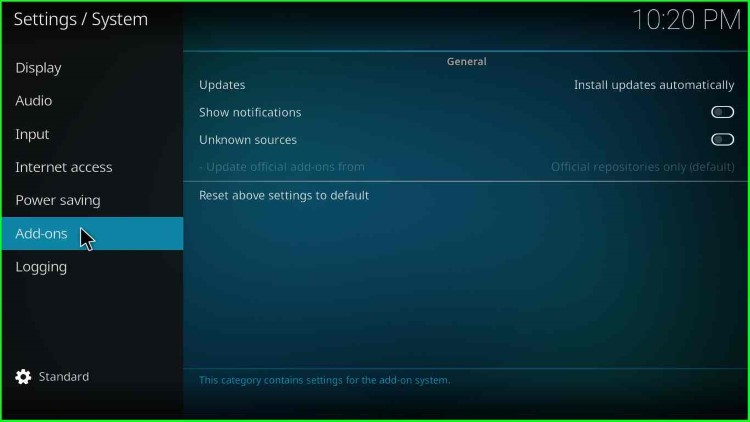
3. In the left sidebar, click on the Add-ons option.
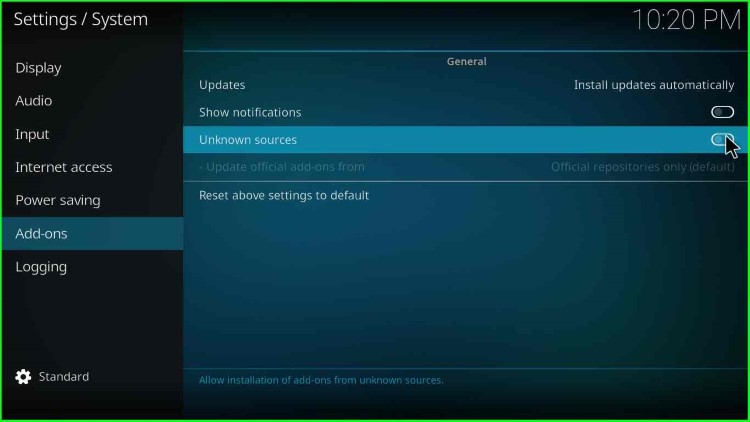
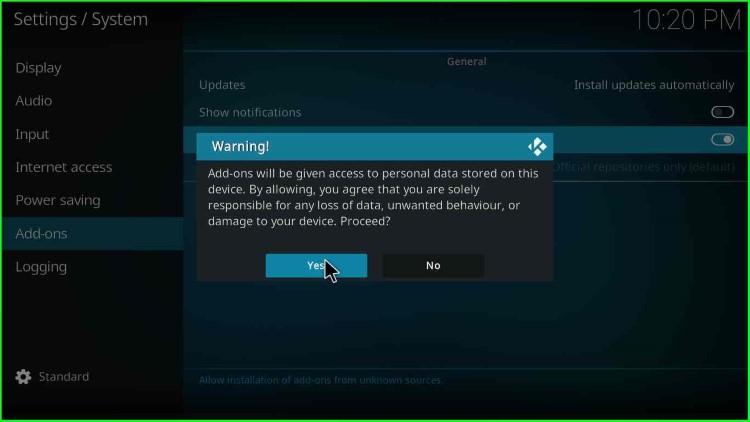
4. On the right side, you will find an option named Unknown sources; click on the radio button available.
5. A box warning about access to personal data states, “Add-ons will be given access to personal data stored on this device; by allowing, you agree that you are solely responsible for any data loss, unwanted behavior, or damage to your device. Proceed?”. Don’t get afraid; The Crew Addon is safe to use; click on Yes.
6. Then, go back.
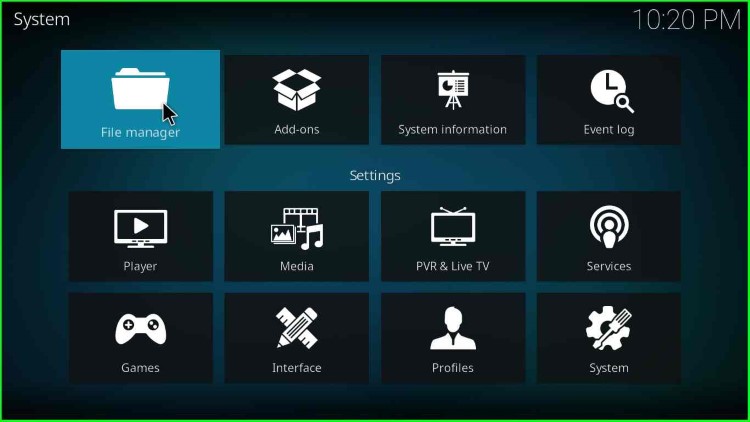
7. Click on the File manager option.
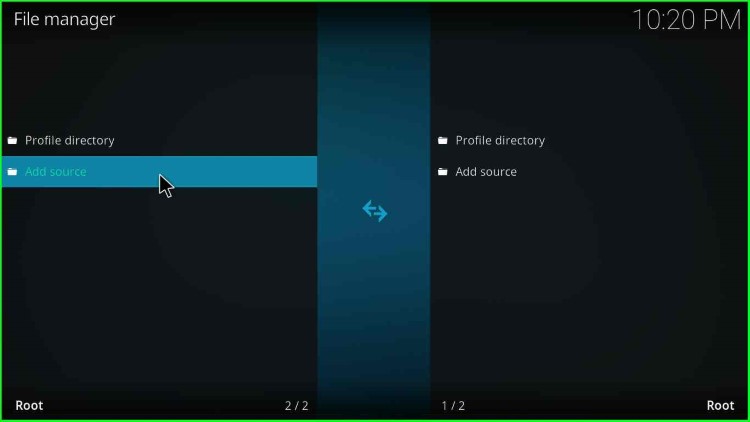
Add TheOath Addon Source
8. after that, click on Add source.
9. Hover over and click on the <None> option.
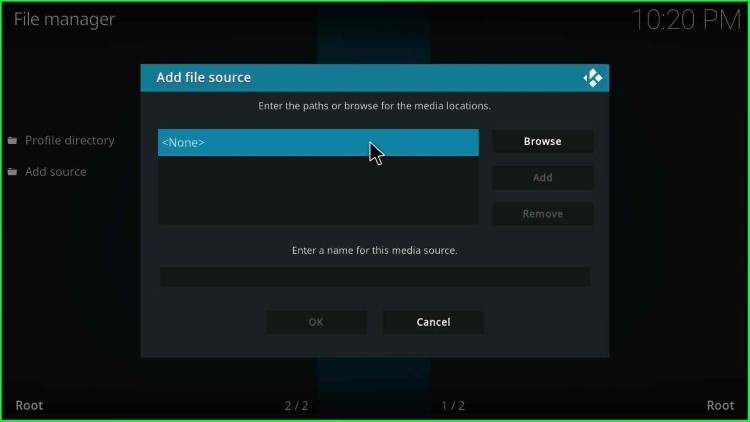
10. You must enter the media location path for the TheOath Kodi addon.
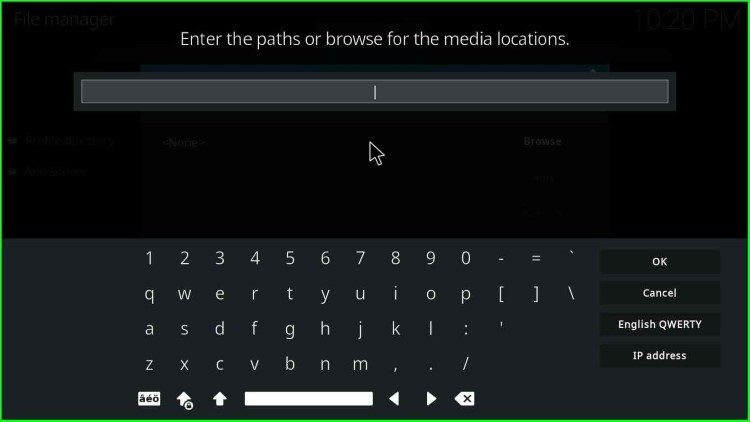
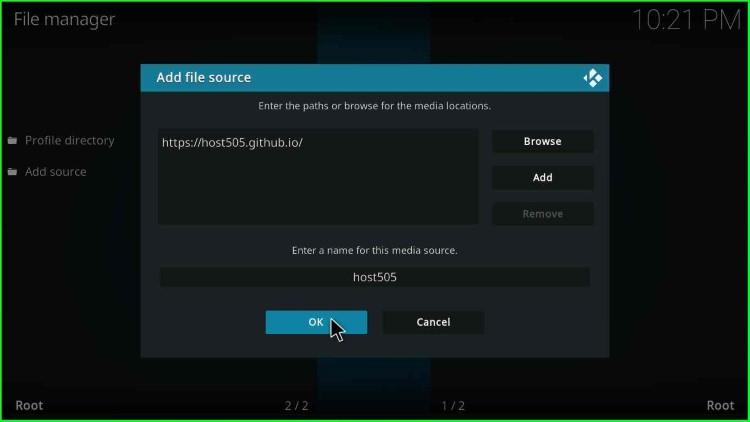
11. Enter the media location path as https://host505.github.io/.

12. Point and click on the media source text box.
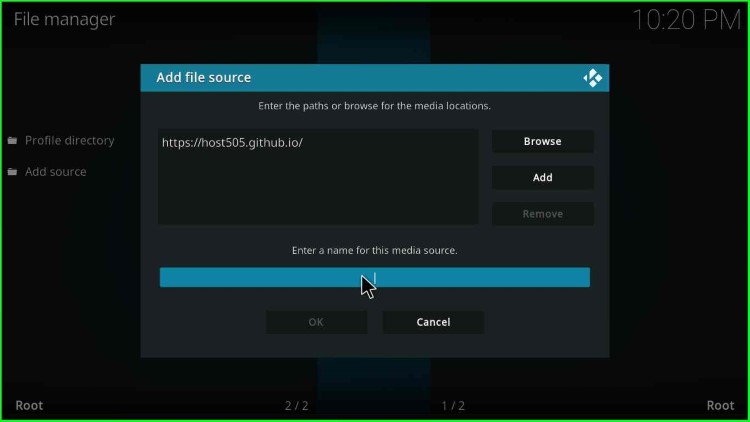
13. Enter the media source name as host505 and click OK.
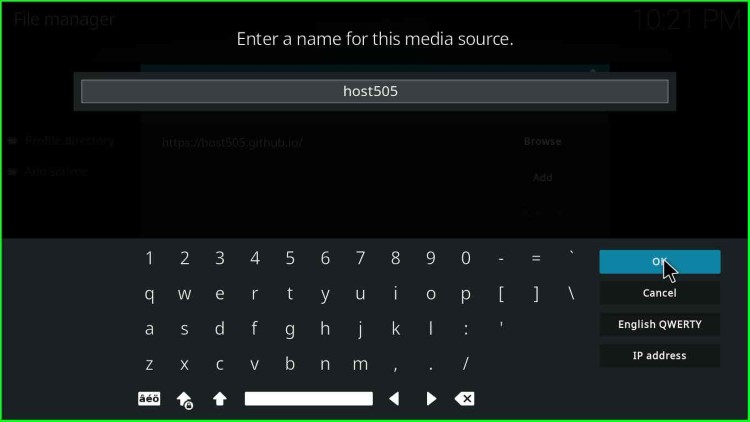
14. Again, click on OK.
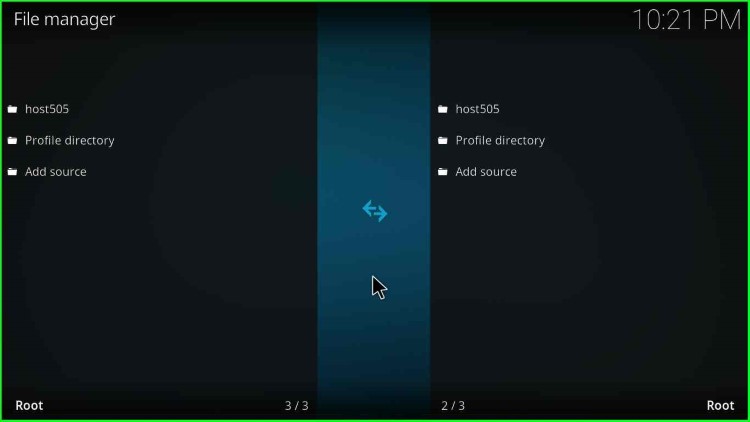
15. Go back and look for the option addon.
16. Click on the Add-ons option.
Install TheOath From Zip File
17. after that, click on Install from zip file.
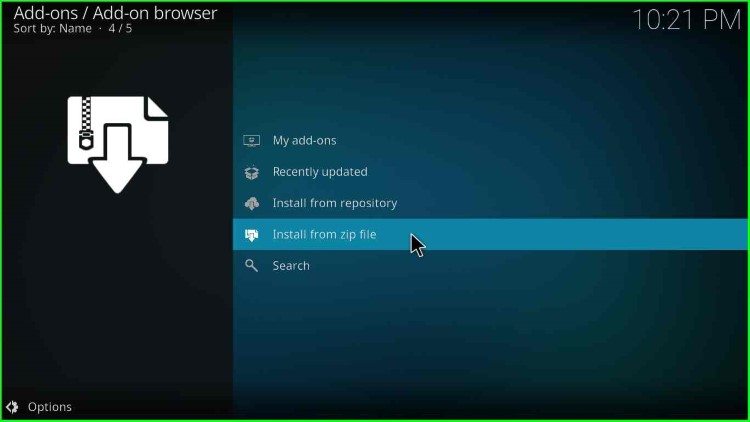
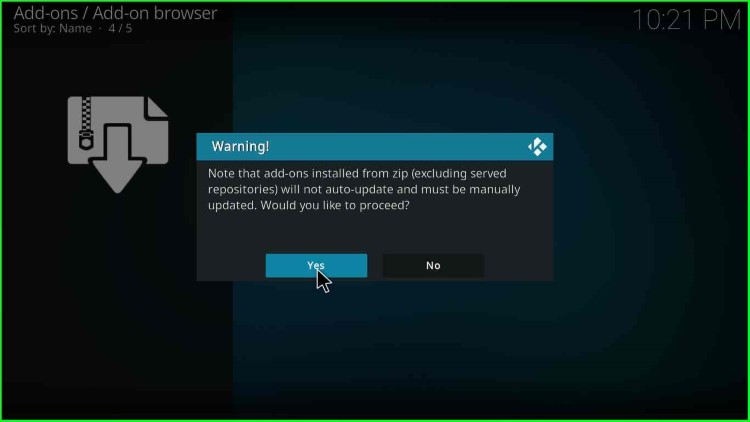
18. A warning box states, “Note that add-ons installed from zip (excluding served repositories) will not auto-update and must be manually updated. Would you like to proceed?”. The message means you must update the add-ons manually, so click on Yes.
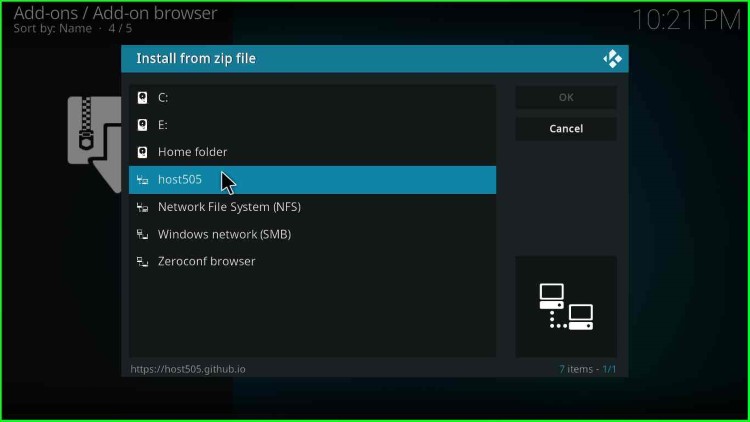
19. Then, click on host505 (name what we defined earlier).
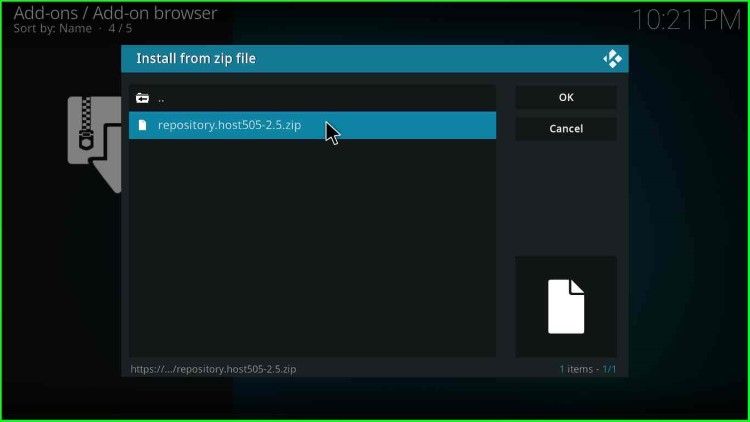
20. Moving ahead on the oath installation process, click on repository.hosts505-x.x.zip. After that, click OK.
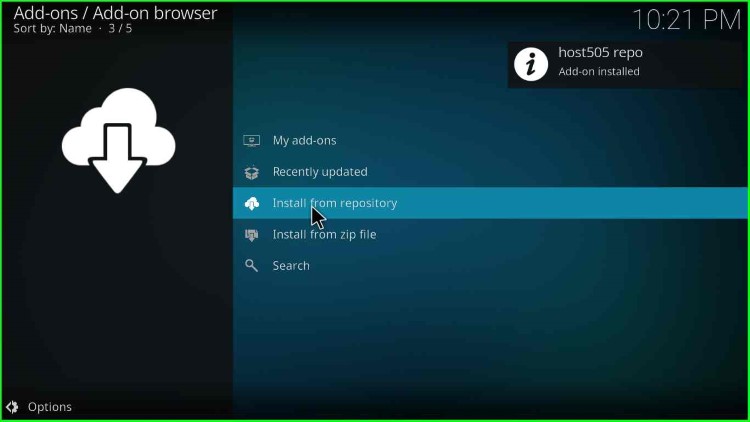
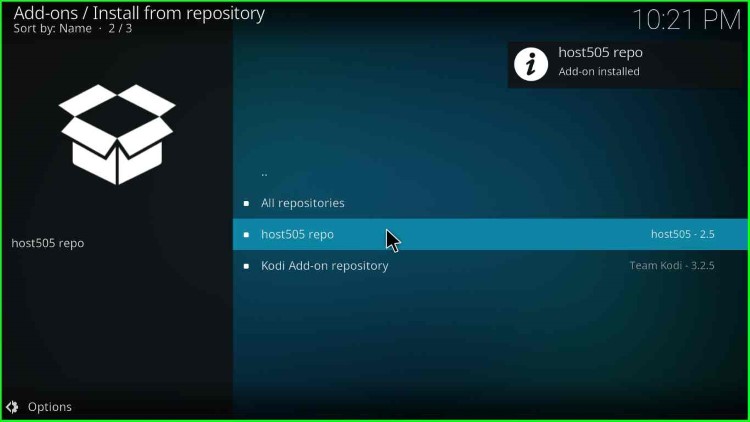
21. On the top-right corner, a message appears as “host505 repo Add-on installed“.

22. Then, click on the Install from repository option.
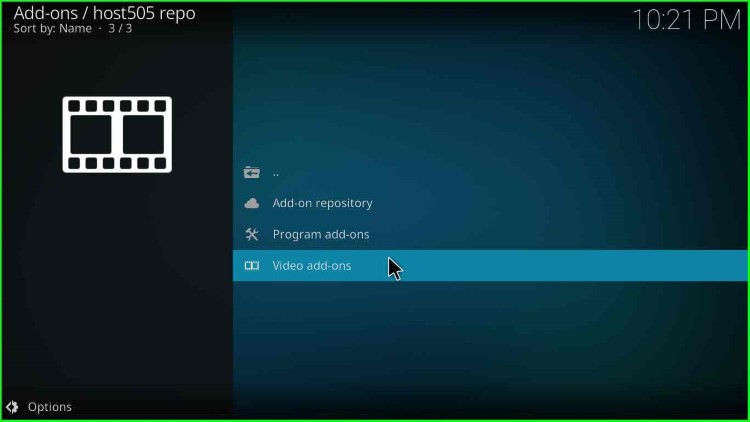
23. Click on the host505 repo.
24. Then, choose the Video add-ons option.
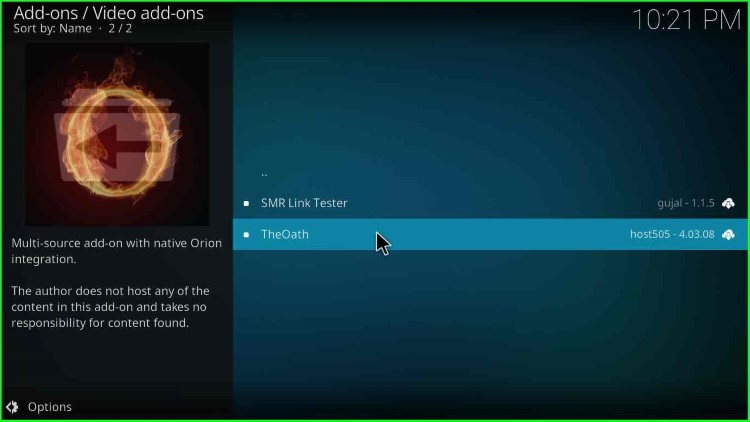
25. On the second number, you will find the TheOath option; click on it.
26. This window shows TheOath Kodi addon options like Run, Configure, and Enable, but these are disabled. Kodi will enable these options once the TheOatch Installation process is complete. For now, click on the Install button. First, however, you can click and check for TheOath dependencies.
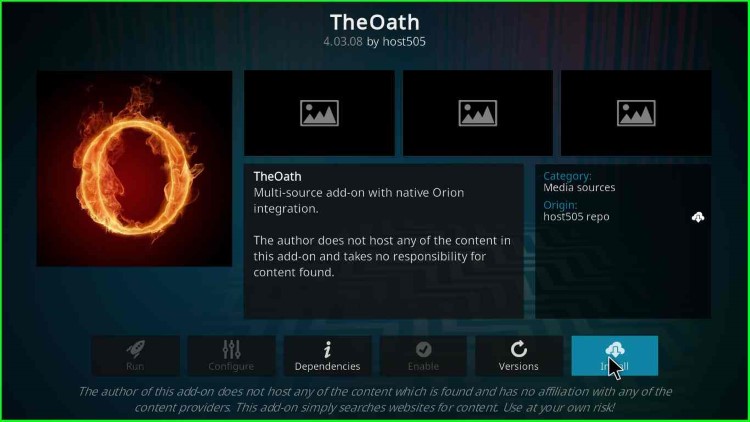
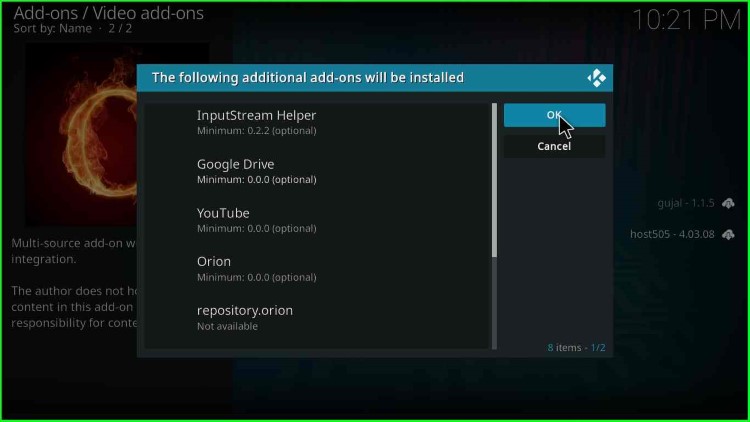
27. Another dialogue box appears to show the installation of TheOath’s additional add-ons. No worries, click OK.
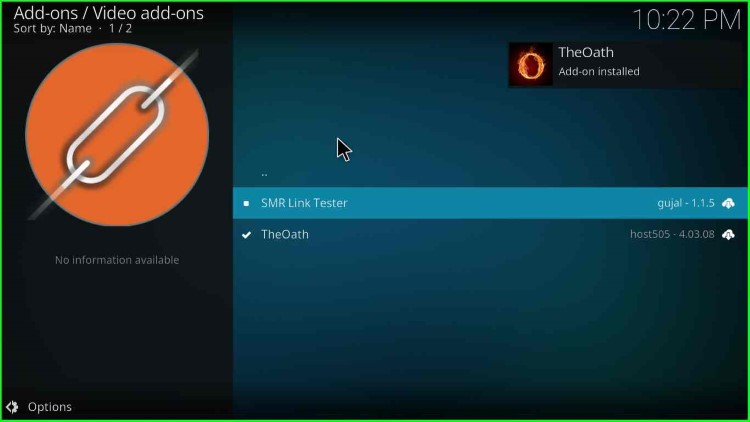
28. Wait for some time; on the right side, you will find a message “TheOath Add-on installed“.
Use TheOath After Installation
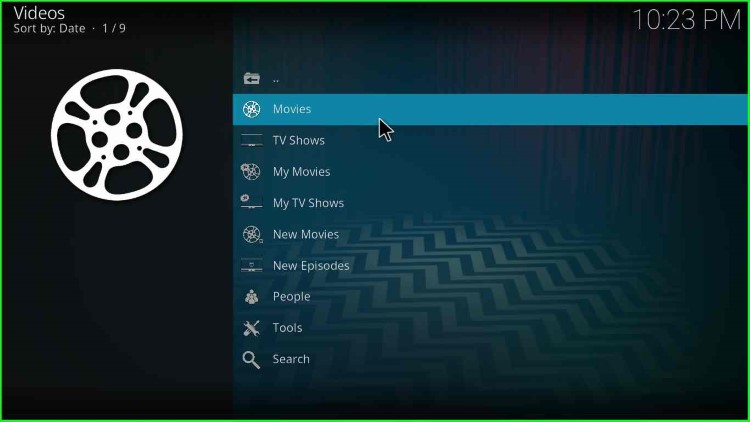
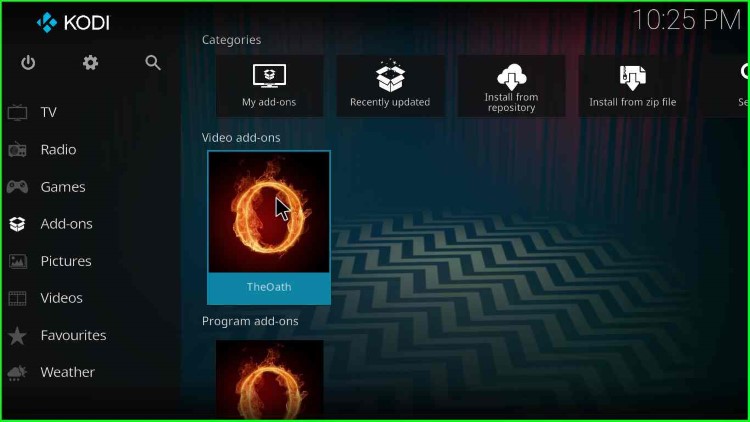
29. Now, go to the Kodi home screen and click on Add-ons; on the right side, you will find two options Video add-ons and Program add-ons. Click on Video add-ons.

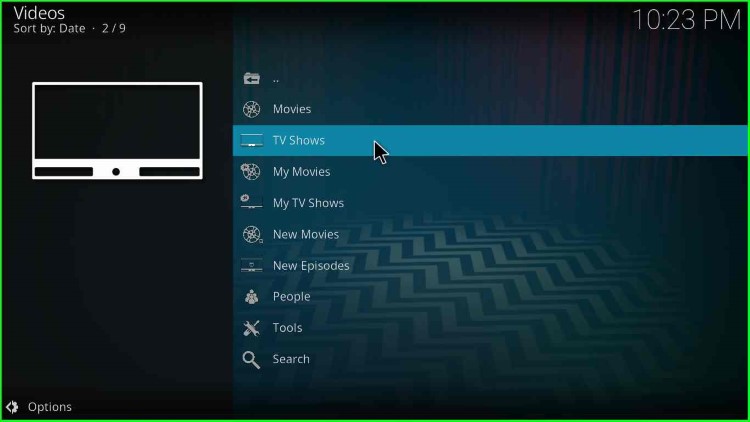
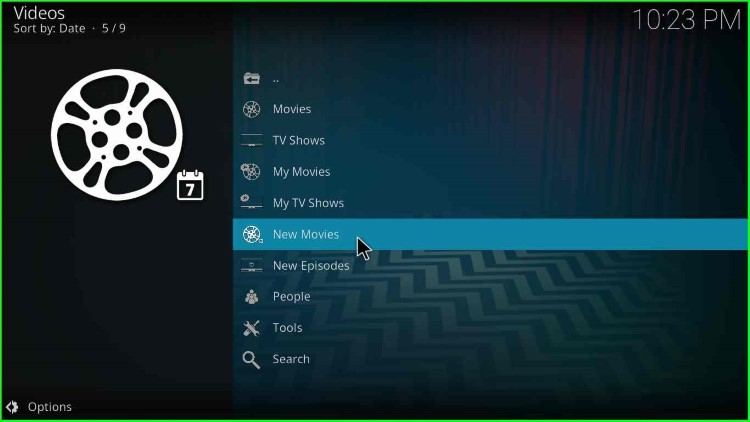
30. Here, you will find many TheOath add-on options like Movies, TV Shows, My Movies, My TV Shows, New Movies, New Episodes, People, Tools, Search, etc.
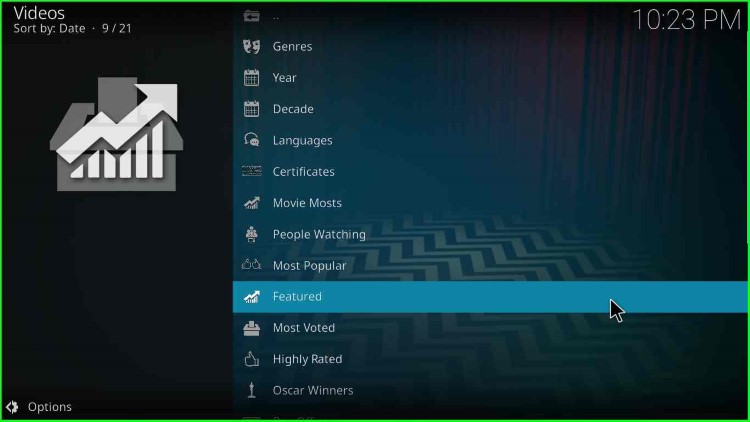
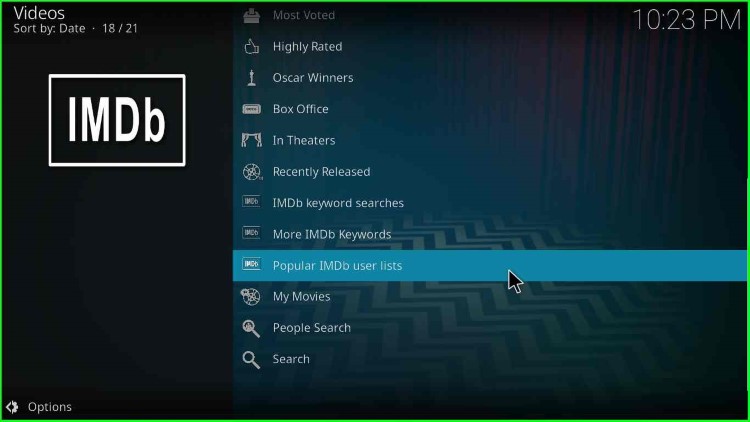
31. When you click on Movies, you will have many categories like Genres, Year, Decade, Languages, Certificates, Movie Mosts, People Watching, Most Popular, Featured, Most Voted, Highly Rated, Oscar Winners, etc.
32. More movie categories like Box Office, In Theaters, Recently Release, etc.
33. after that, if you want to watch TVShows on TheOath Kodi addon, select the TV Shows option.
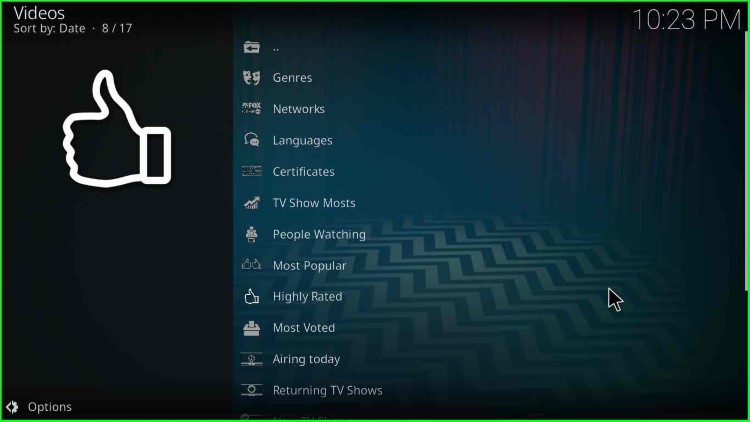
34. In the TV Shows option, you will have many categories like Genres, Networks, Languages, Certificates, TV Show Mosts, People Watching, Most Popular, Highly Rated, Most Voted, Airing today, Returning TV Shows, and more.
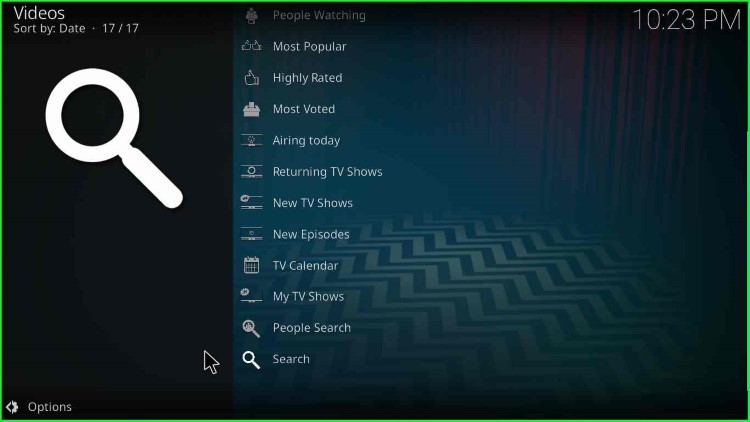
35. Even more TV Shows categories like New TV Shows, New Episodes, TV Calendar, My TV Shows, People Search, Search, etc.
36. If you are interested in more TheOath categories, choose from the list and start streaming.
37. That’s all; these were the easy installation steps for the TheOath Kodi addon.
How to Uninstall the Oath Kodi Addon
There may be a chance that you found other best Kodi addons and want to install them. So, to save space and resource on your device, viz. Firestick, Android TV, Raspberry Pi, you might need to uninstall the TheOath Kodi addon. So, follow these steps on how to uninstall the TheOath Kodi addon.
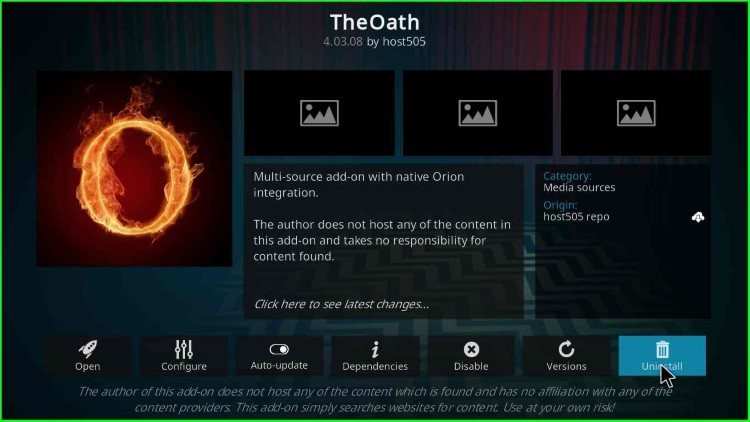
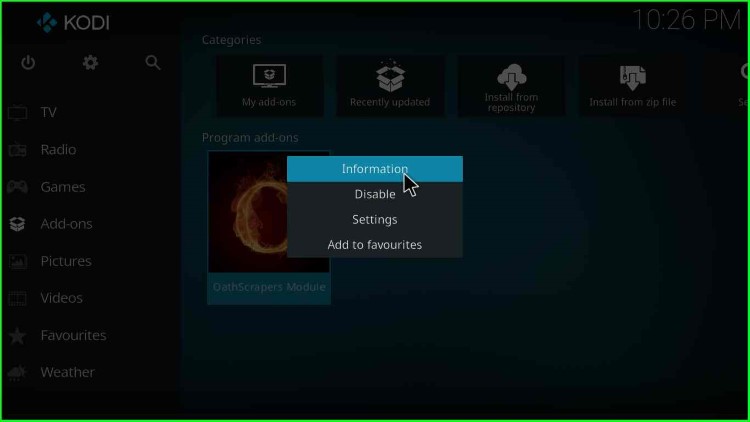
1. Right Click on the TheOath add-on under the Video add-ons option.
2. You will have four options here, viz. Information, Disable, Settings, Add to favorites, etc. Click on Information.

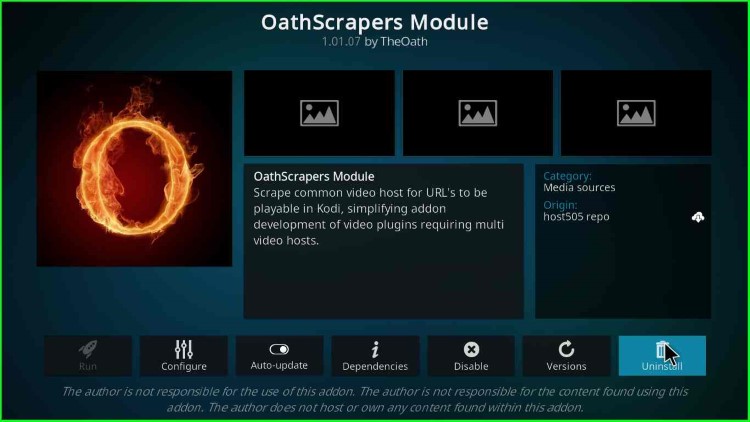
3. Then, click on Uninstall button.
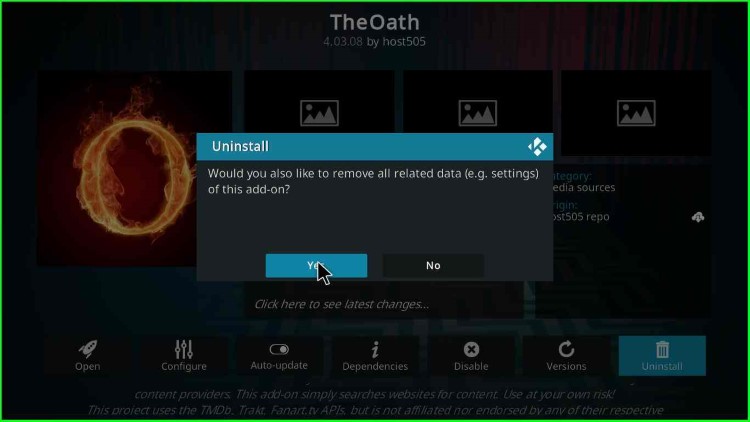
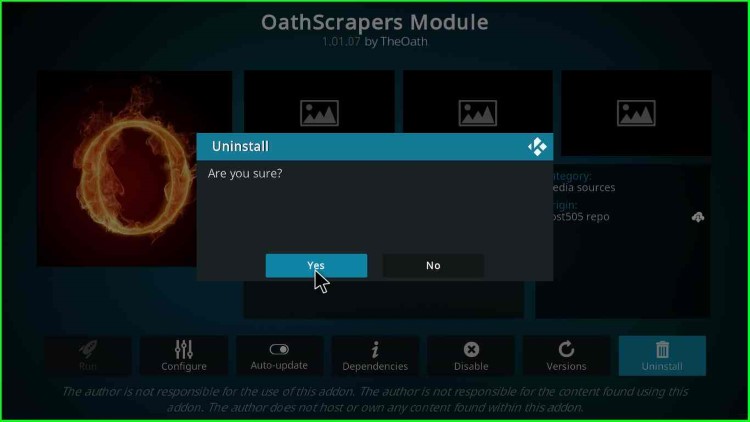
4. A dialogue box appears “Are you sure?“, click on Yes.

5. Another option will appear with a message, “Would you also like to remove all related data (e.g., settings) of this add-on?“. Click on the Yes button.
6. That’s all; you have successfully uninstalled the TheOath addon.
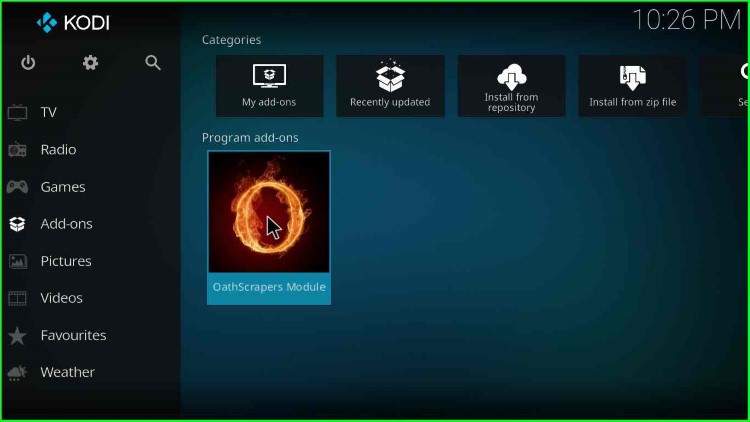
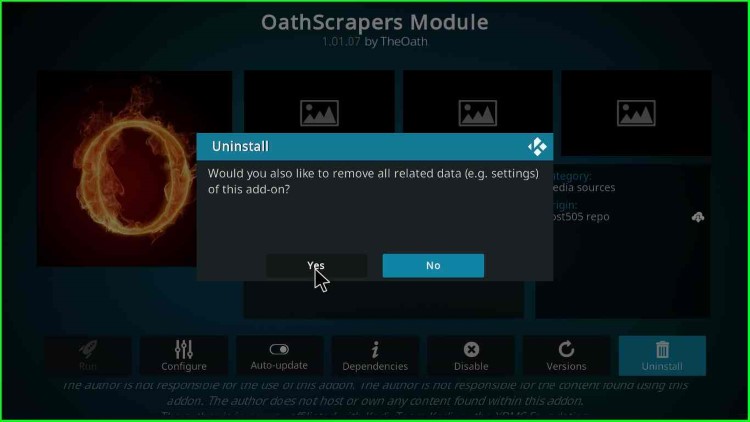
7. Now, you have OathScrapers Module that needs to be uninstalled. Right-click on the icon and select the Information option.
8. Again, the same; click on Uninstall button.
9. Click Yes.
10. Again, click Yes.
11. Now, you have completely uninstalled the TheOath addon.
