This guide will explain everything about the Asgard Kodi add-on in a few minutes. Asgard add-on is a popular Kodi add-on to watch or stream movies and TV Shows on Firestick, Fire TV Cube, and Kodi Boxes.
Additionally, Asgard has many options for watching Documentaries, Kids, Sports, and Standup content.
Asgard add-on belongs to one of the best Kodi repositories, i.e., the Narcacist repository. You have two modes to watch videos on the Asgard add-on, i.e., Real debrid and Non-debrid. If you have not taken a Real-debrid subscription, you can choose the Non-debrid option.
Indeed, before using Asgard, you will have a question “Is Asgard add-on safe and legal?”. Currently, the Narcacist repository does not contain any malicious code and seems to be safe. However, you may double-check that before using the Asgard Kodi add-on.
Steps to Install Asgard Kodi Addon
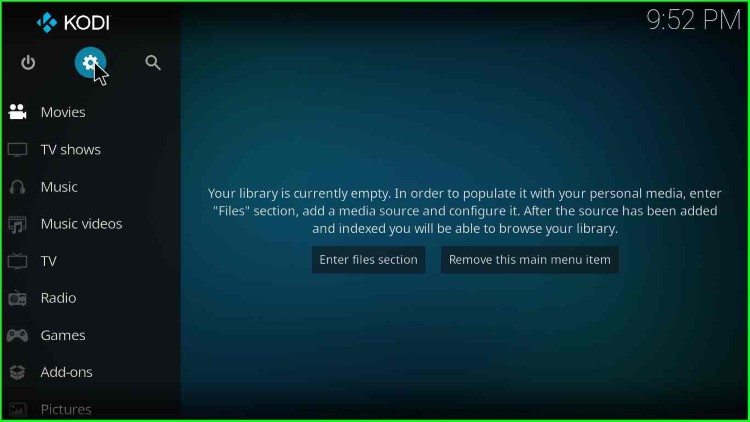
1. Open “Settings” from Kodi’s home screen at the outset.
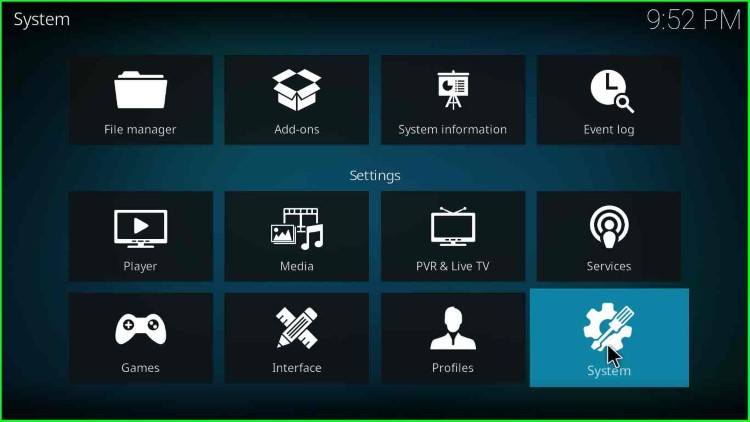
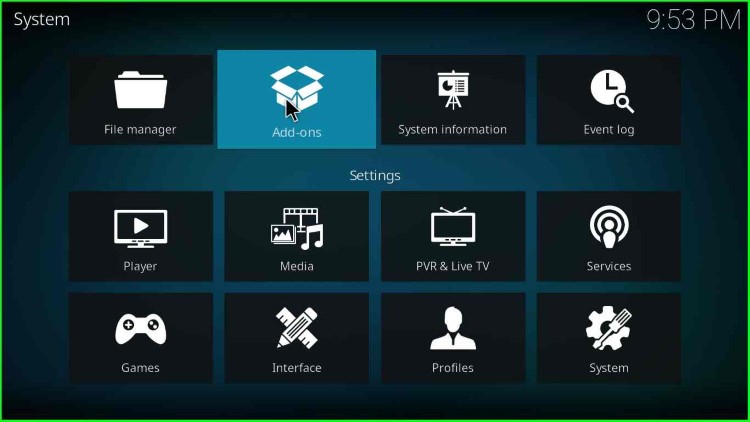
2. Then, open “System” option.
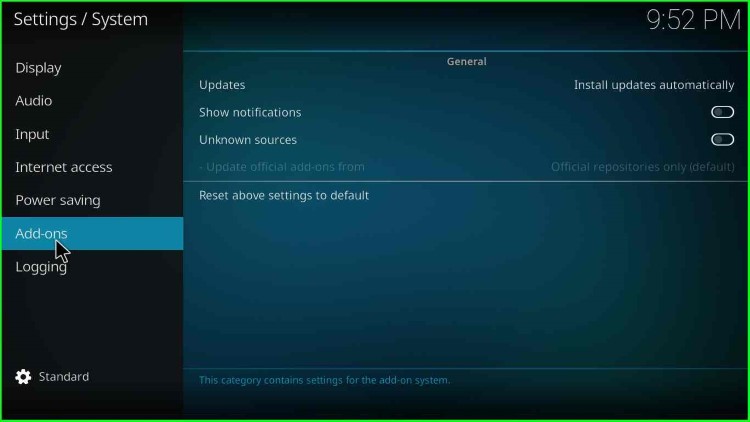
3. From the left pane, select the “Add-ons” option.
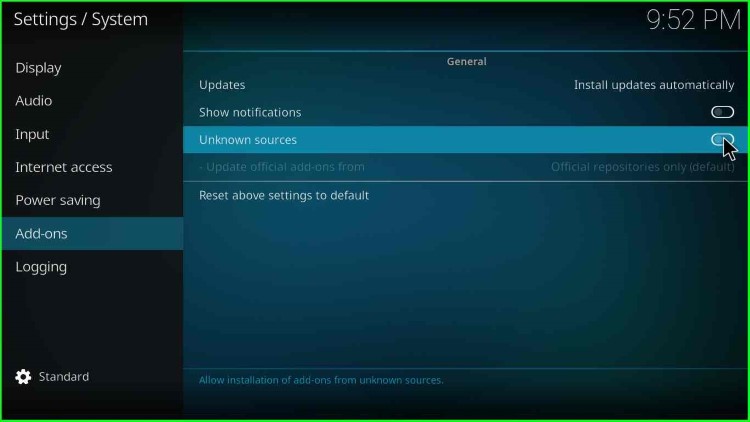
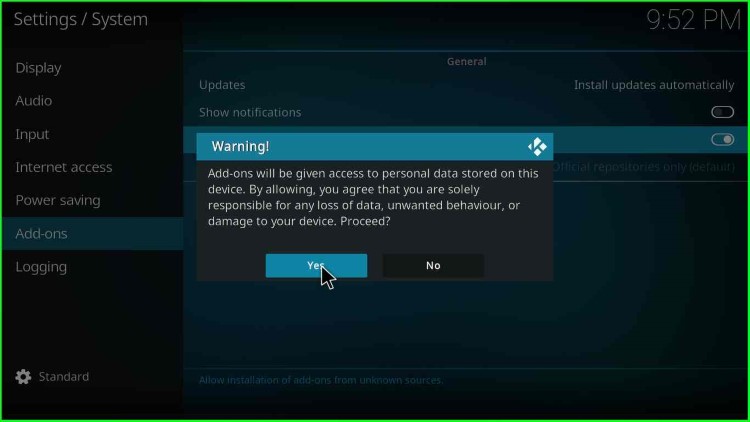
4. Enable the “Unknown sources” radio button.
5. Click on the Yes option when a warning popup appears. The popup warns about your data because add-ons can access your personal from your device, viz—Firestick, PC, iPhone, Android, etc.
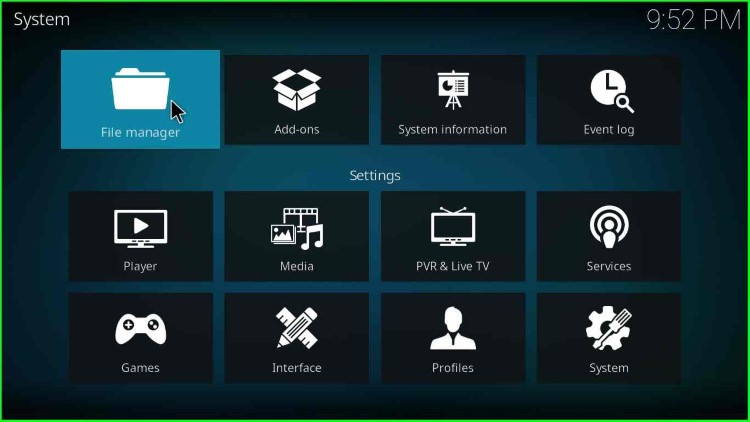
6. Next, click on the “File Manager” option.
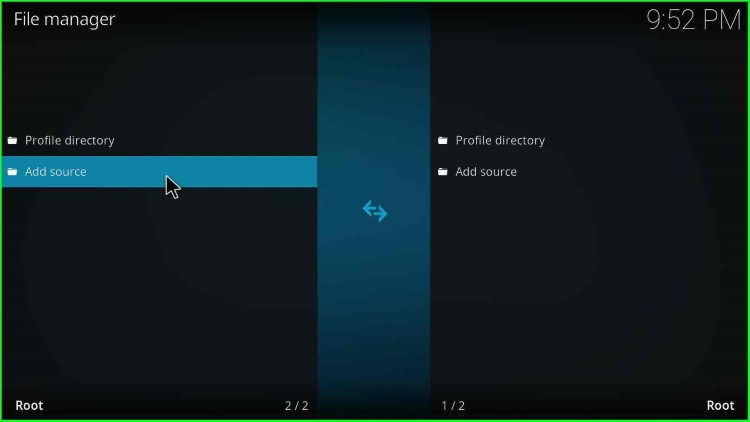
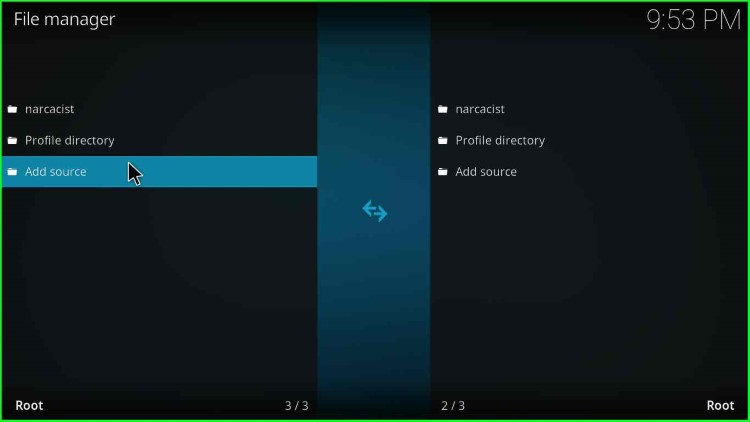
7. After that, click on “Add source“.
8. On the dialogue box, you will find an option “<None>“; select it.
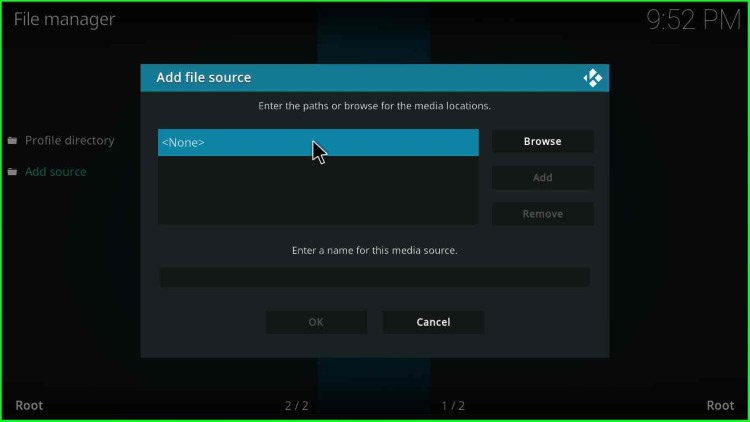
9. Another popup appears asking to enter the Asgard media location path.
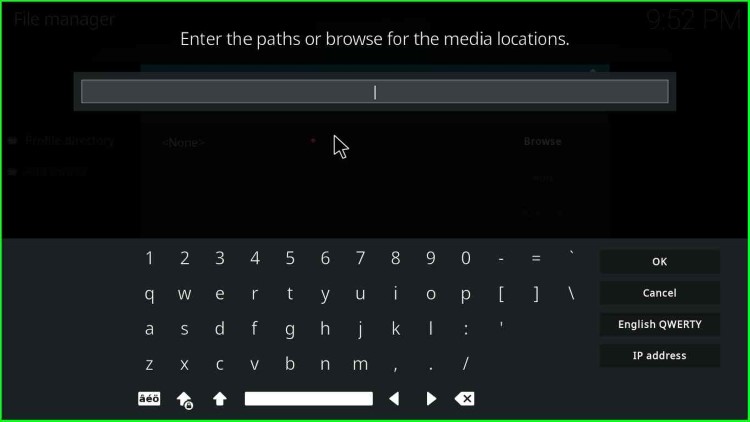
10. The Asgard add-on belongs to the Narcacist repository, so enter https://mylostsoulspace.co.uk/repo/ as a media location.
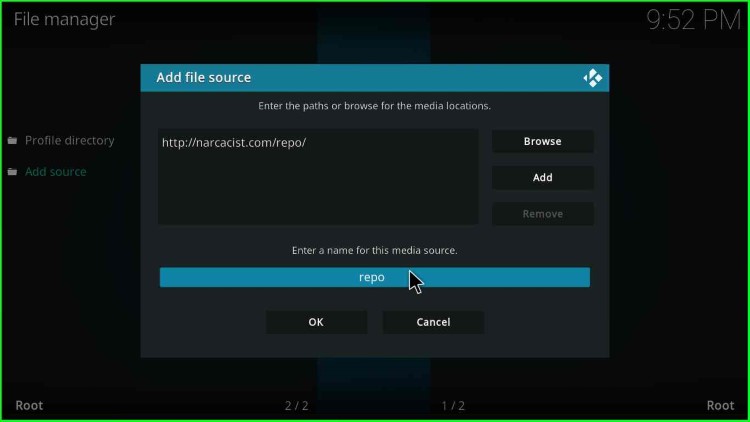
11. Then, hover down and enter the media source name as narcacist.
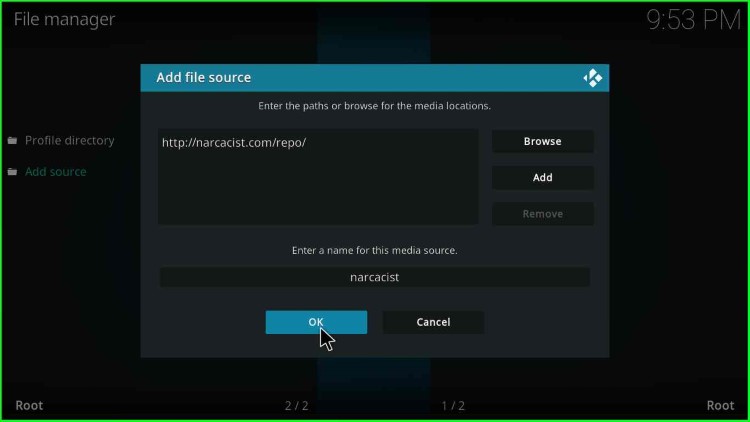
12. Click the OK button.
13. In the next step, click on the Add-ons option.
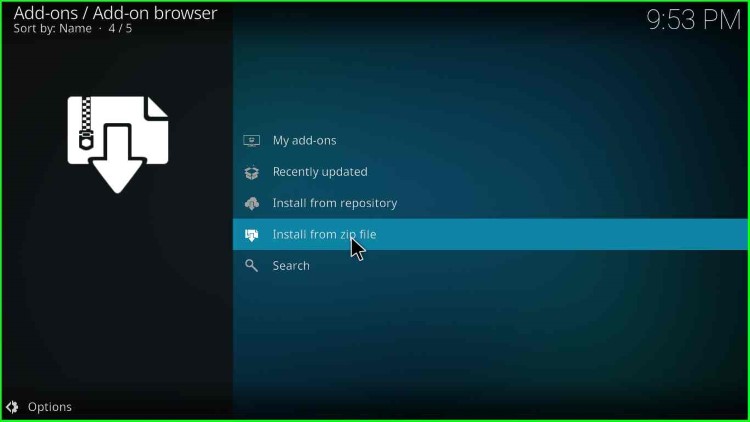
Install Asgard From Zip File
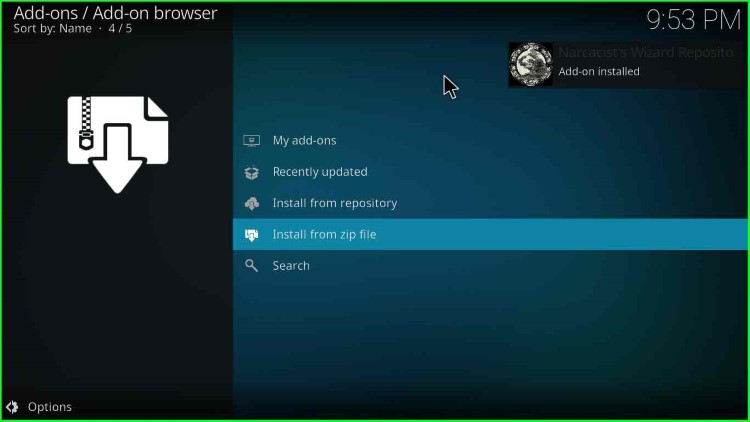
14. Click on the “Install from zip file” option.
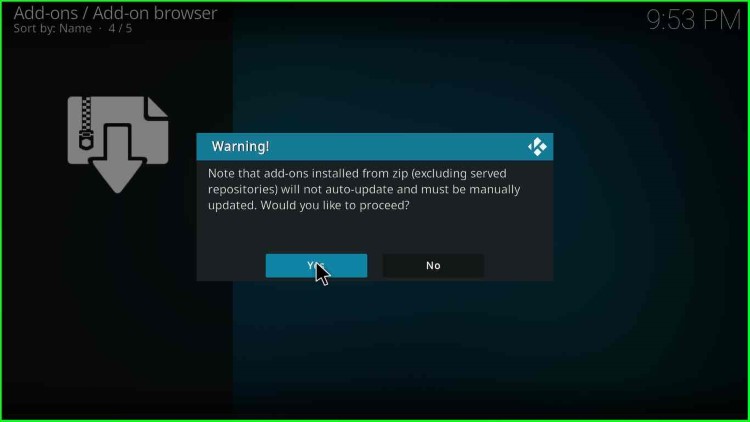
15. A warning display box states, “Note that add-ons installed from zip will not auto-update and must be manually updated. Would you like to proceed”. So click the Yes button. But make sure you update the zip file when there is a new version.
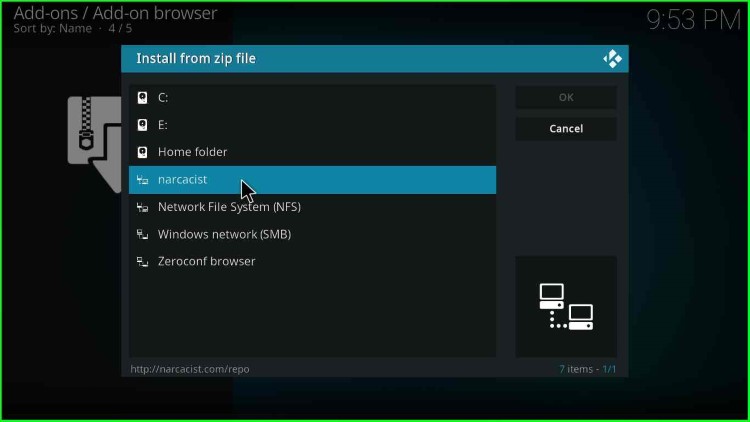
16. Now, click on the “narcacist” option.
17. After that, click on the “repository.NarcacistWizard.zip” option.
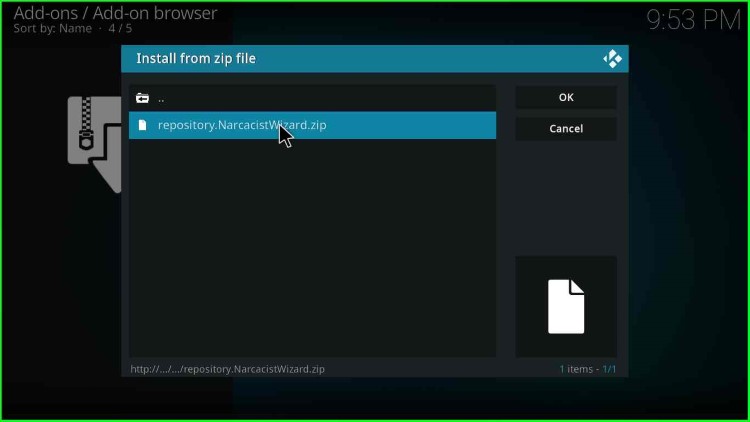
18. Then, wait for some time; on the top-right corner, a message will appear as “Narcacists Wizard Repository Add-on installed.”
Asgard Installation From Repository
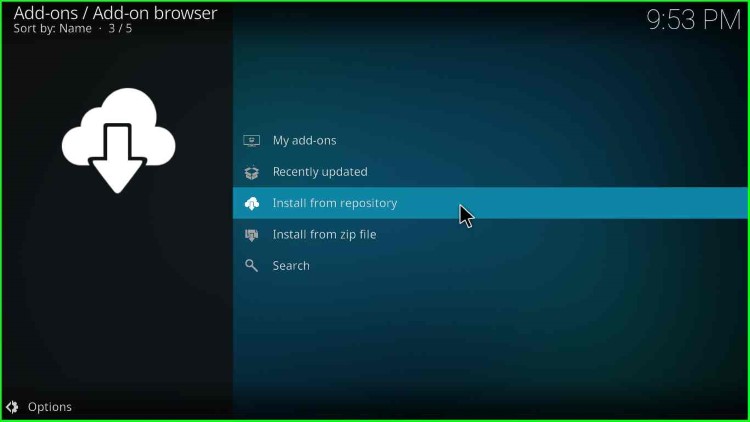
19. Next, click on “Install from repository“.
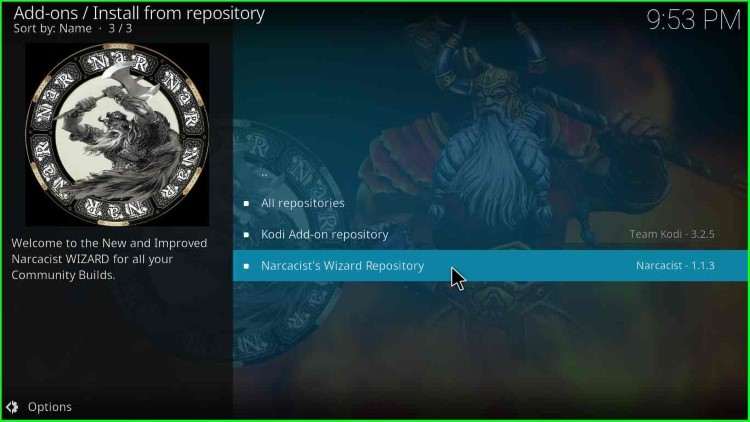
- Select the “Narcacist’s Wizard Repository” option.
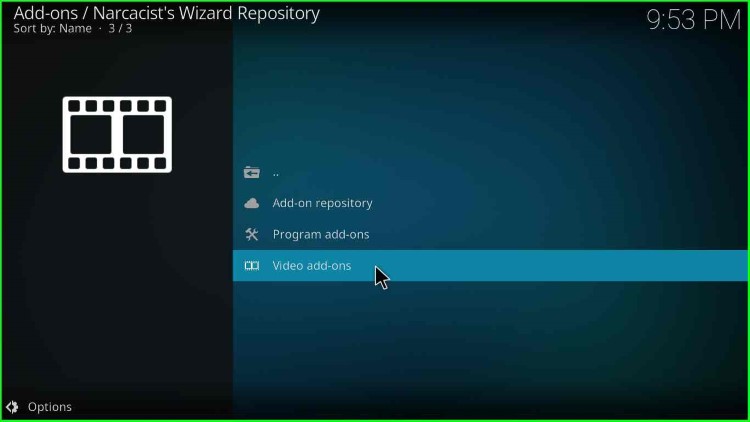
21. Choose the “Video add-ons” option.
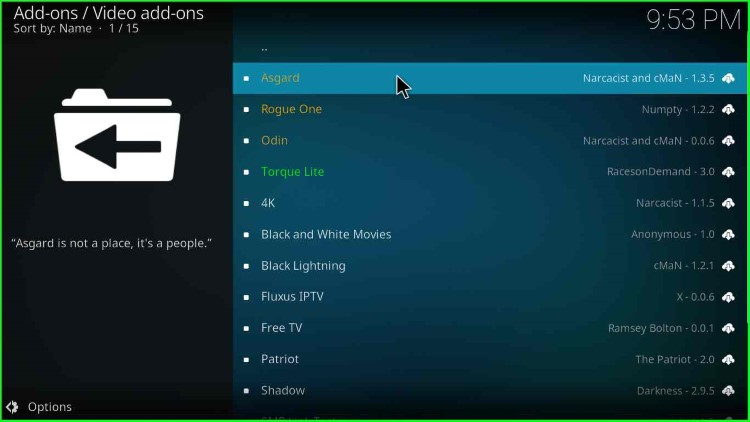
22. Yeah! Here you find your best add-on, i.e., Asgard; click it.
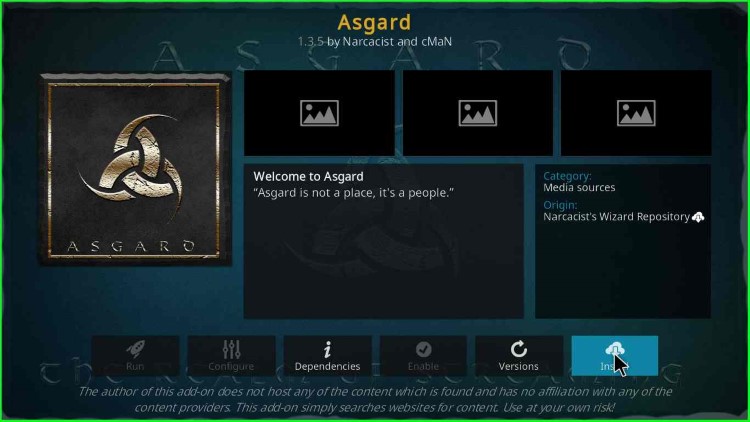
23. Next, click on the Install button. Do not forget to read a nice line “Welcome to Asgard; Asgard is not a place; it’s a people”.
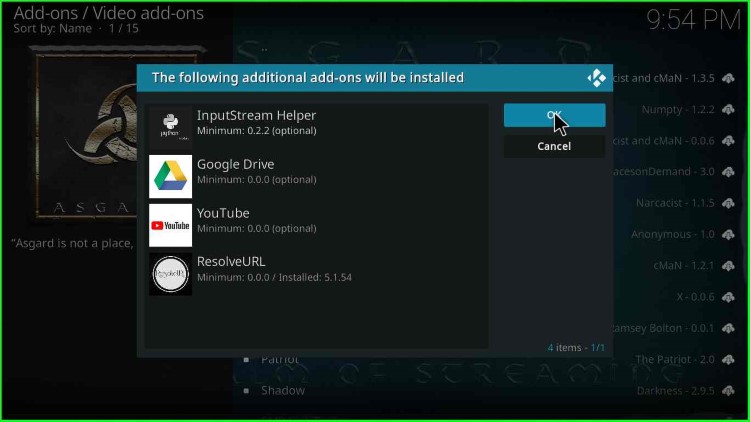
24. A message appears “The following additional add-ons will be installed“, you will find InputStream Helper, Google Drive, YouTube, ResolveURL, etc. Just click on the OK button.
25. Then, a message “Asgard Add-on installed” appears.
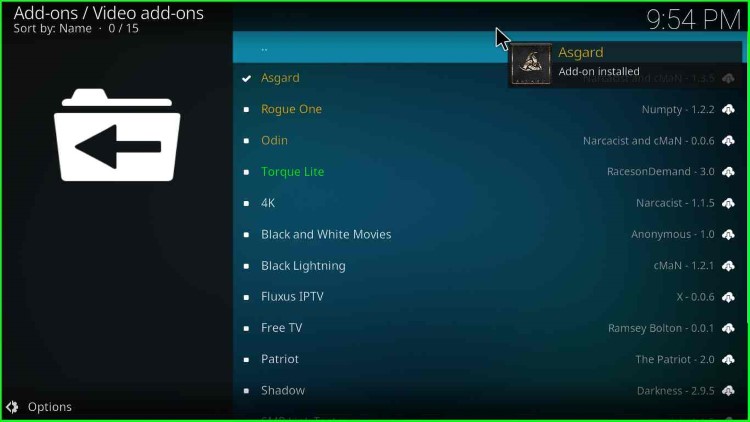
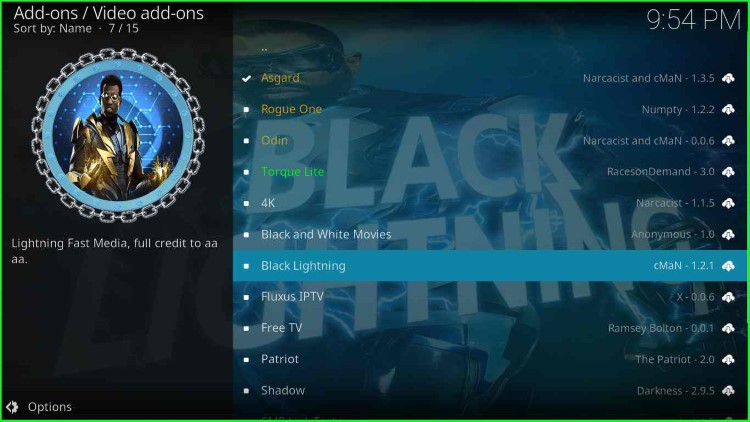
26. You can see the list of add-ons from Narcacist and cMan repositories.
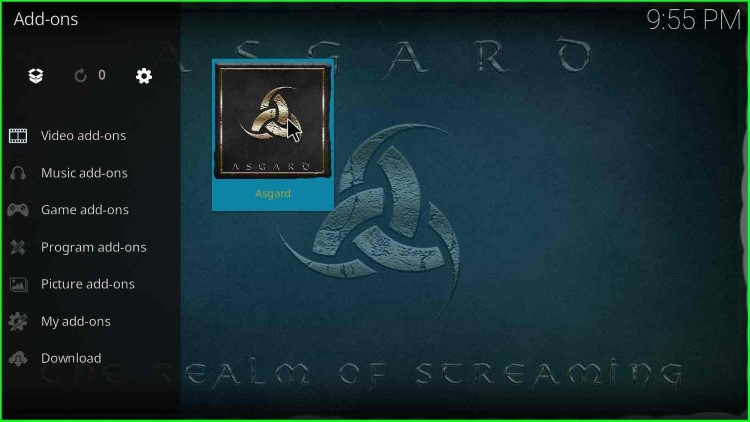
27. To open the Asgard add-on, go to Kodi’s home screen and click on the Add-ons option.
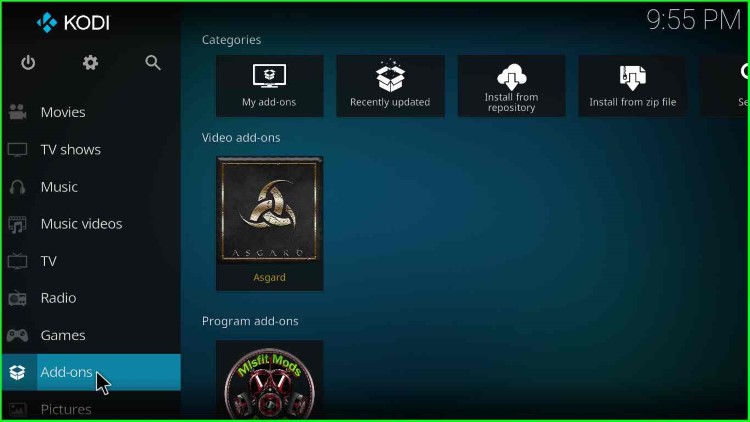
28. You will find the Asgard add-on option on the right side.
29. Click on the “No Debrid Section“, if you have not subscribed to Real-Debrid.
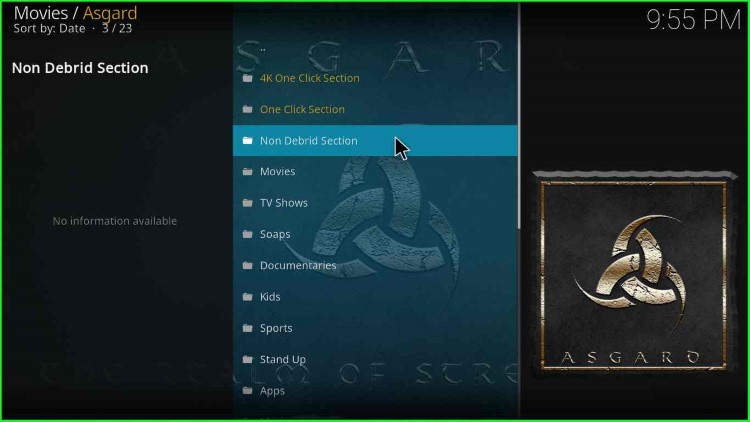
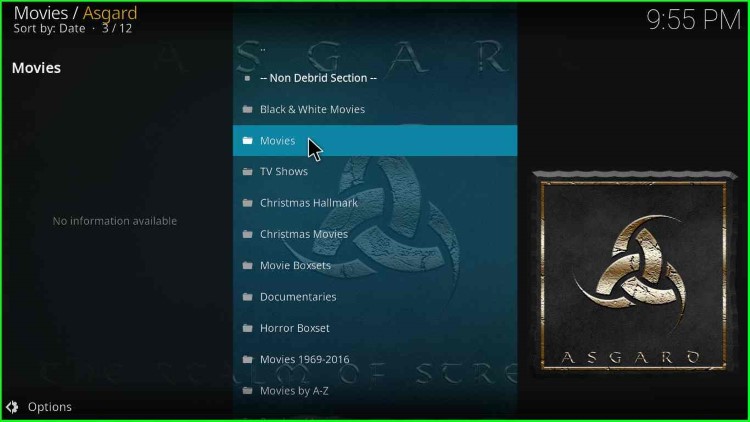
30. You have many options viz—movies, TV Shows, Documentaries, Black & White Movies, etc. Click on Movies if you want to watch movies on the Asgard add-on.
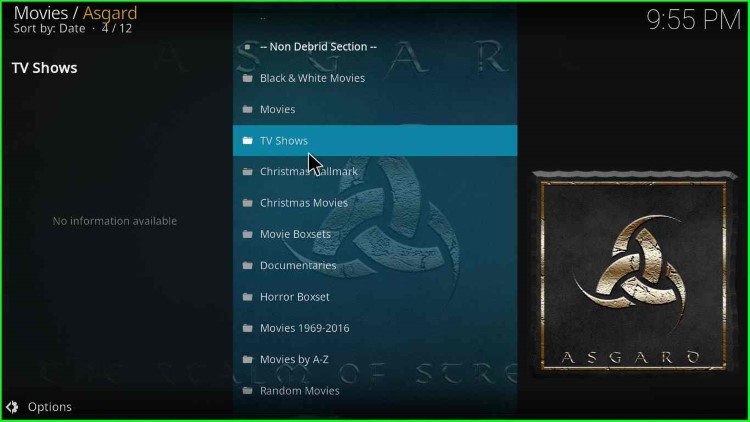
31. You can watch TV Shows.
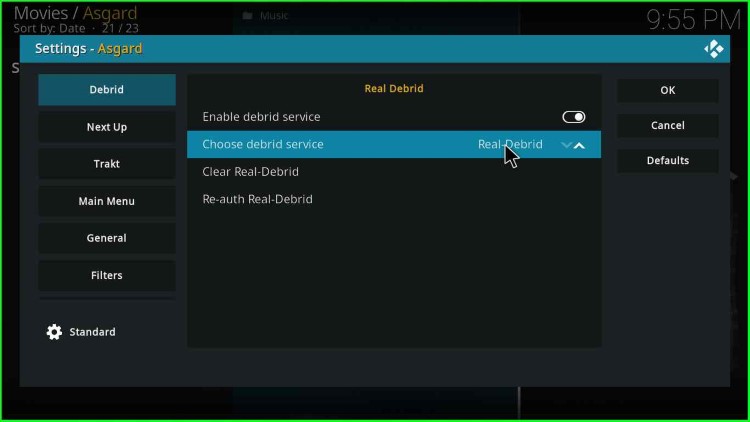
Integrate Real-Debrid on Asgard Kodi Addon
32. Go to settings in the Asgard add-on.
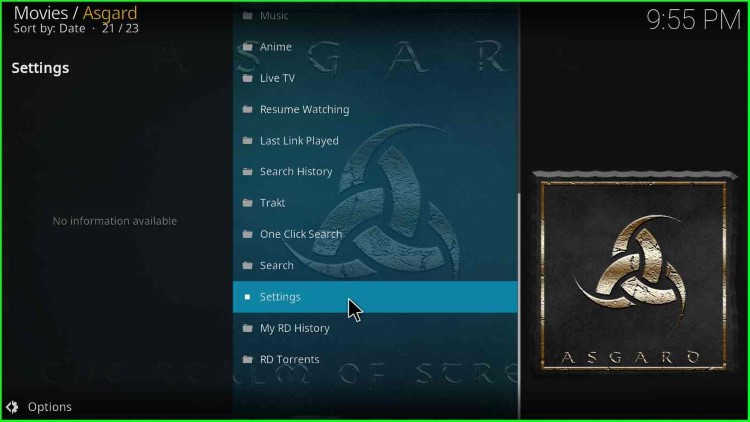
33. Here, you find many options viz. Enable debrid service, Choose debrid service, Clear Real-Debrid, Re-auth Real-Debrid, etc. So, here we choose debrid service as “Real-Debrid“.
34. After that, click OK.
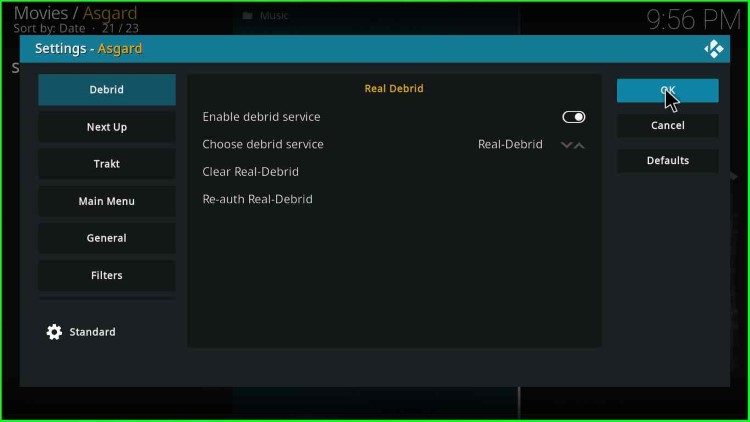
35. Bravo, you have successfully installed the Asgard add-on.
