Save 75% - IPVanish VPN (Limited Time Offer) X
Home » Kodi » How to Install Serenity Kodi Build on Firestick (4K, Max, Lite)

How to Install Serenity Kodi Build on Firestick (4K, Max, Lite)

In this article, I will show you how to install Serenity Kodi Build on Firestick, Firestick Lite, Firestick 4K, Firestick 4K Max, Fire TV Cube, etc. The steps mentioned here work on all Kodi-supported devices, including Android TV Box and Nvidia Shield, etc.

Serenity is the best Kodi Build that provides on-demand content for a variety of Movies and TV Shows. Apart from movies and TV shows, it also allows you to stream sports and live TV content in 4K and 1080px quality.

Also, you can integrate Real Debrid with the Build for high-quality streaming content. You can find the Build on the well-known 709 Repository.

Attention! Before You Move Ahead.

I want to warn you that whatever you stream online is visible to the Government, ISPs, and Third Parties. Personally, I do not like someone snooping on my streaming activities.

Currently, your IP address 34.204.172.188 is visible to everyone.

Hence, I suggest using the most secure VPN, i.e. IPVanish VPN which has military-grade encryption. Also, IPVanish enables buffering-free streaming, hides your IP address and location, and bypasses geo-restrictions and bandwidth throttling.

American Football, Percentage Savings & Limited Time Offer
Till 26th Sep 2023: Only $2.99/Month

Note:- Streaming copyrighted content without a license is illegal and may land you in legal trouble. VPNHacks.com does not encourage piracy in any way.

Following are the steps to install Serenity Kodi Build on Firestick.

Installation Steps

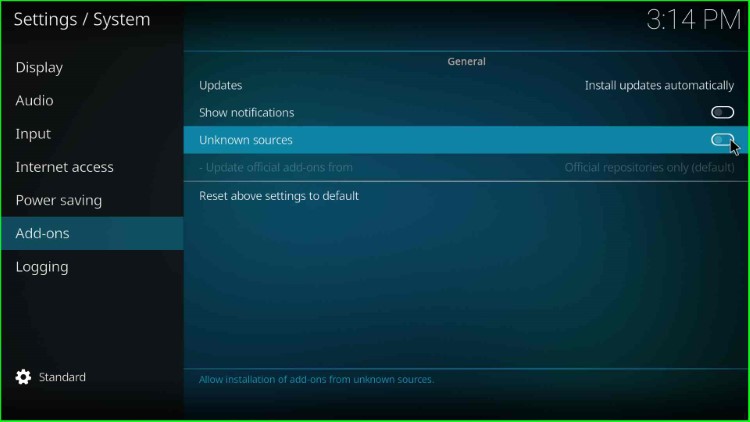
Step 1: Enable Unknown Sources

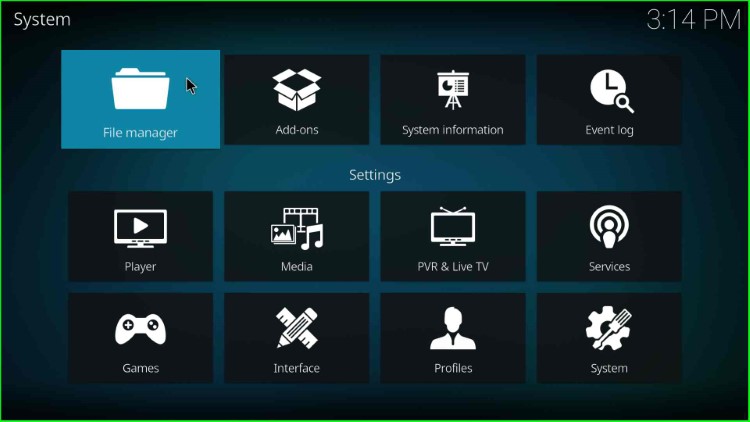
Go to the Kodi Home screen and choose the Settings option.

Open Kodi Settings

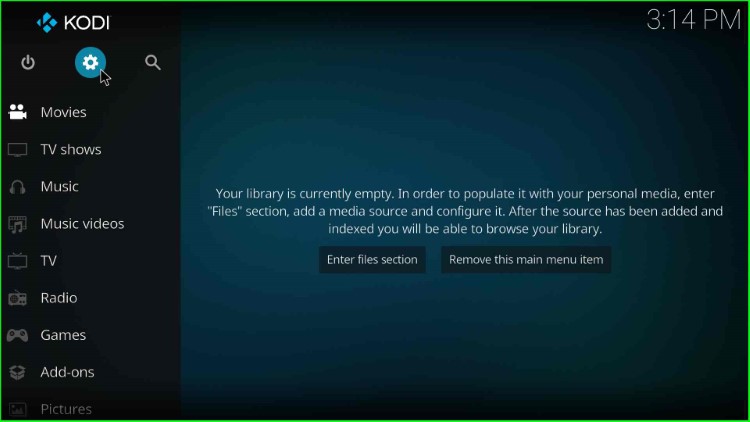
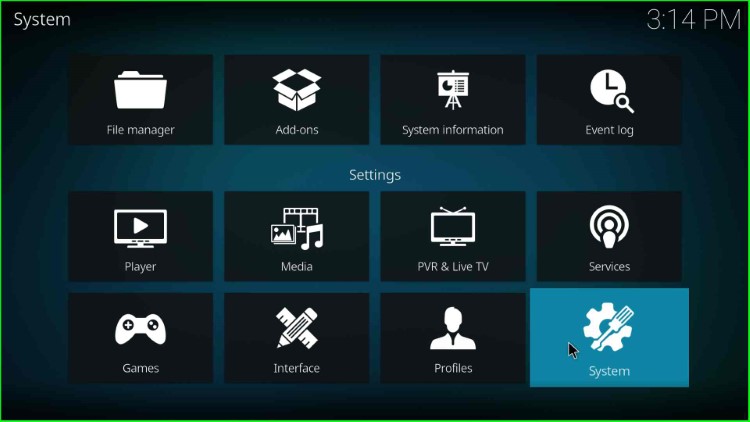
Select the System option from here.

Tap on System icon

Tap on the Addons tab and enable the Unknown Sources.

Turn on Unknown sources

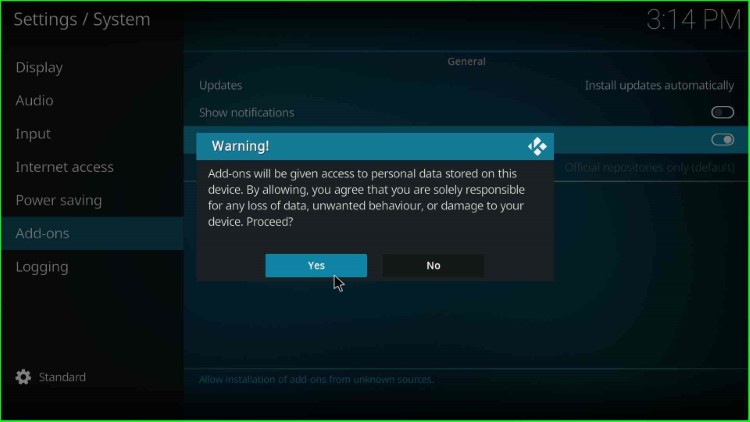
A popup appears; click Yes to agree with it.

Click on Yes

Step 2: Add Media Source and Repository URL

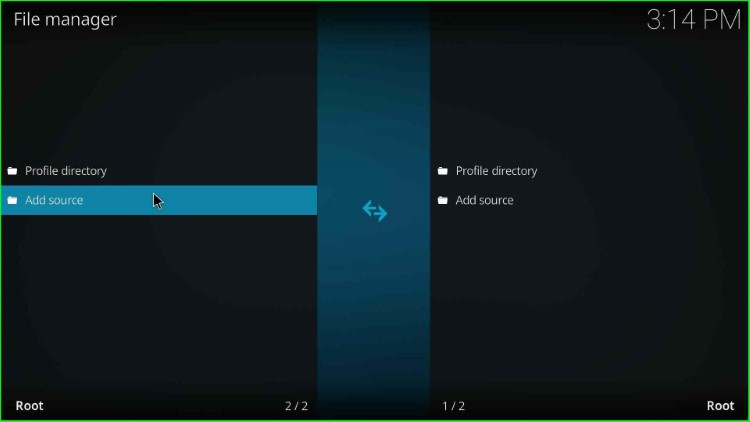
Go to the Settings and click on the File Manager.

Go to File Manager

Tap on the Add Source tab.

Tap on Add source option

Choose <None>.

Select None

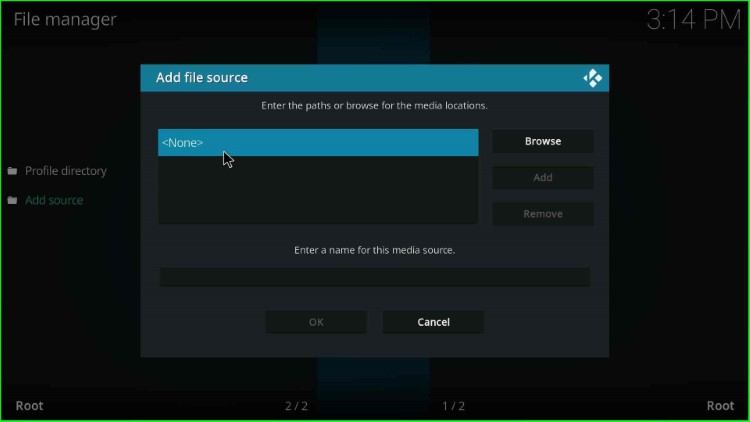
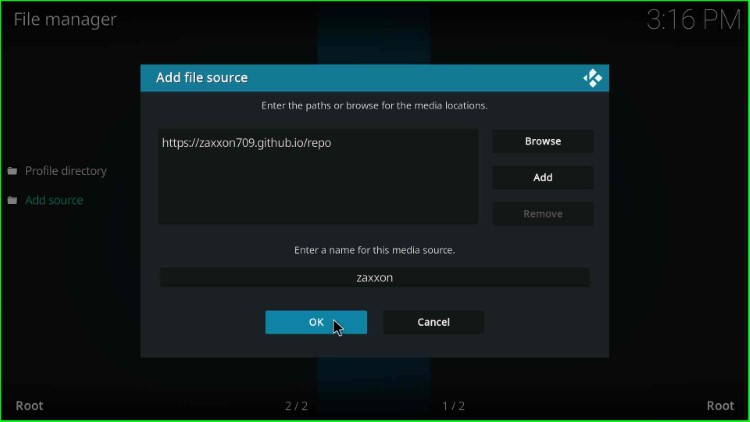
Here, you need to enter the repository path.

Enter the path for media location

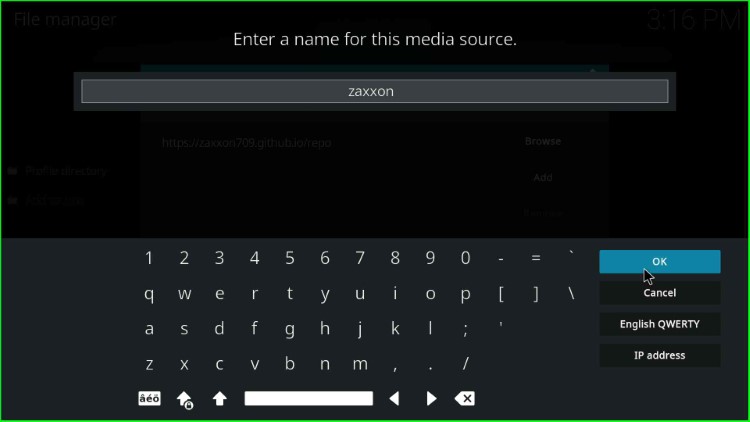
Enter the repository path as https://zaxxon709.github.io/repo and submit the OK button.

Type 709 Repo URL

Now, give the source name zaxxon and hit OK.

Enter source name zaxxon

Check the overall entries again and click on the OK button.

Check all the entries and click OK

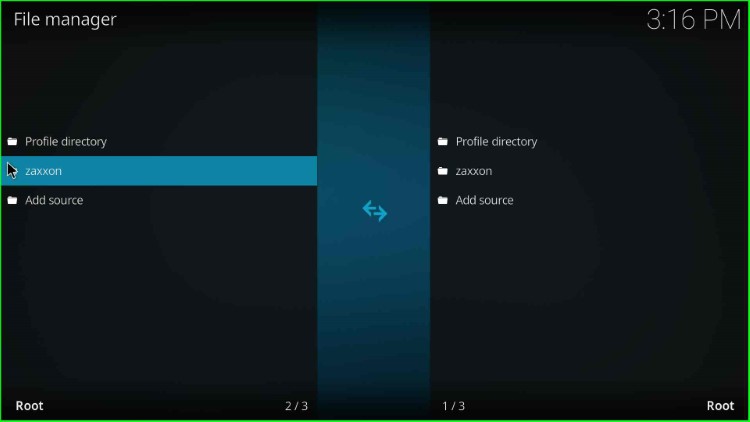
On the File Manager, you can see your media folder, zaxxon.

Media source zaxxon added successfully

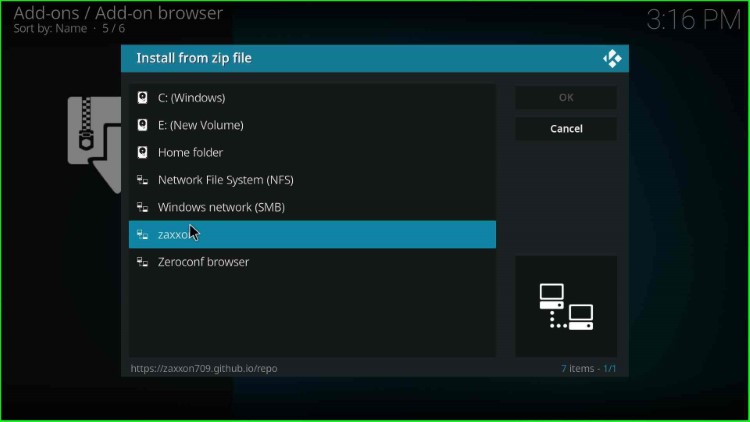
Step 3: Install from Zip File

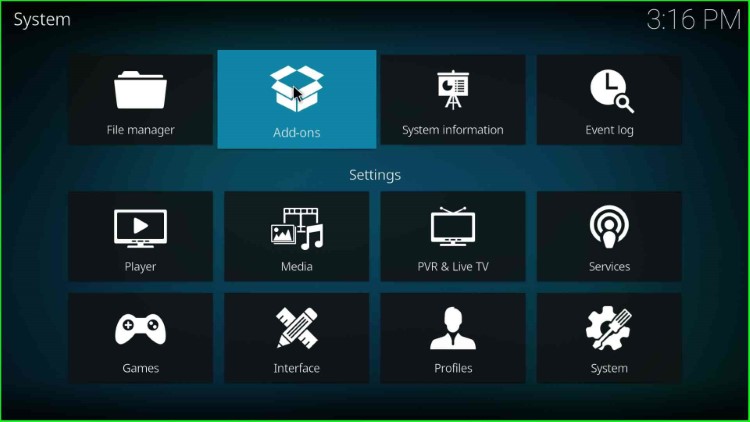
Press the ESC to navigate to the Kodi Settings page and tap on the Addons icon.

Click on Addons icon

Here, select Install from zip file.

Select Install from zip file

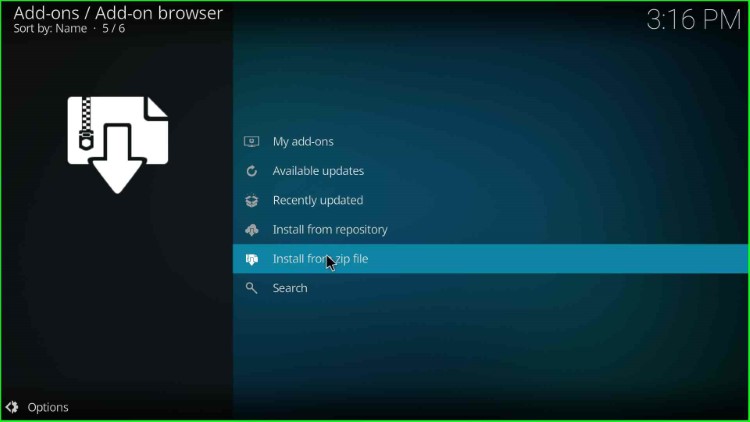
Choose the recently added media source, zaxxon.

Choose the zaxxon source

Click on the repository.709.zip file.

Select the 709 Repo zip file

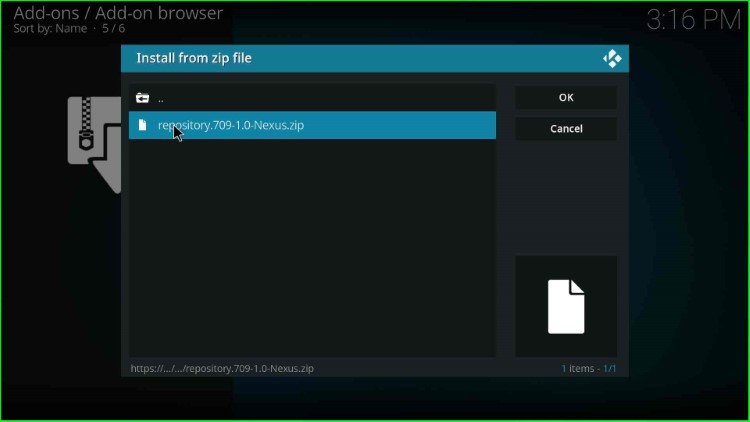
Wait for the 709 repository installation message on the page.

Wait for the 709Repo installation message

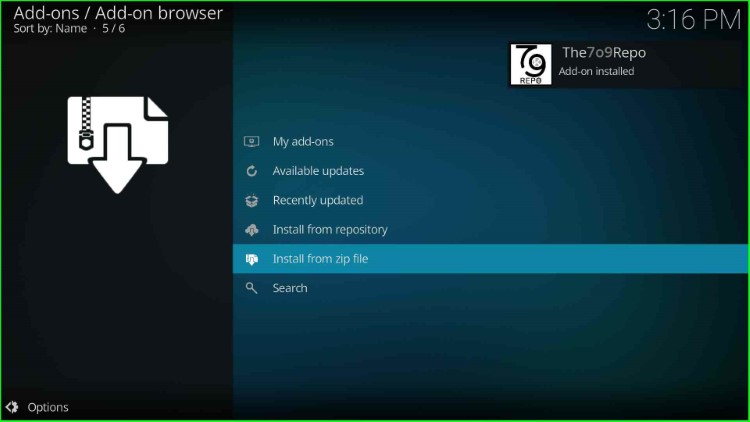
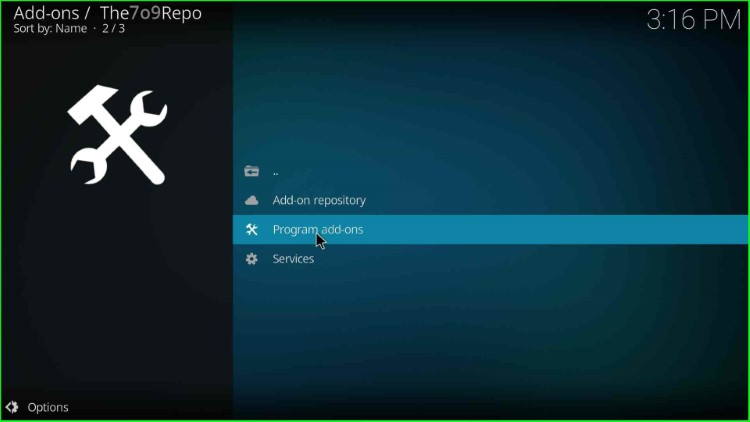
Step 4: Install from Repository

Now, select the Install from repository tab.

Click on Install from repository

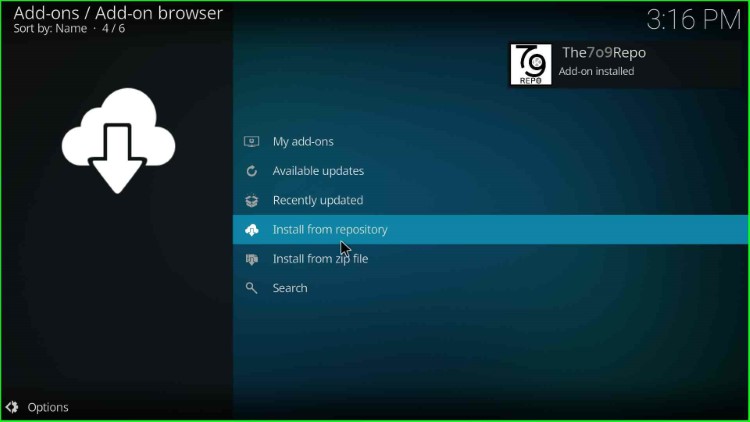
Open The 709 Repo as shown on the screen.

Select The709 Repo

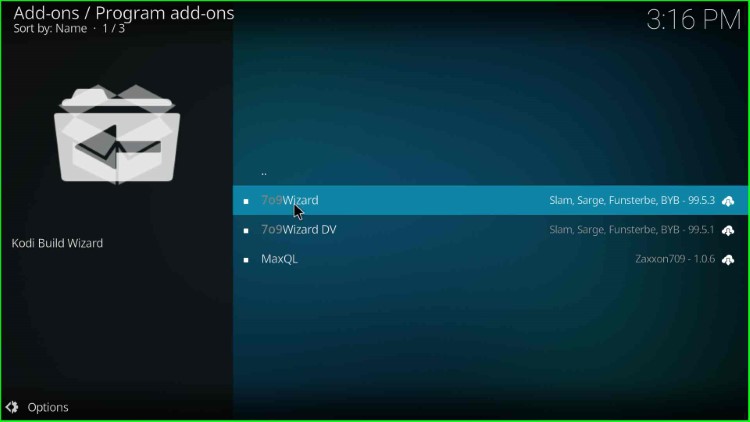
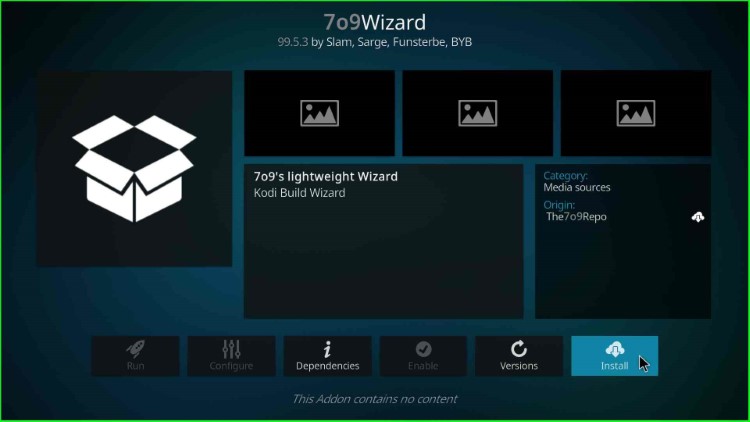
Step 5: Install 709 Wizard

Tap on Program add-ons.

Choose Program add-ons

Choose the 709 Wizard.

Open 709Wizard

Hit the Install key.

Choose Install button

Wait until the “709 Wizard add-on installed” message appears on the screen.

Wait for the 709 Wizard installation message

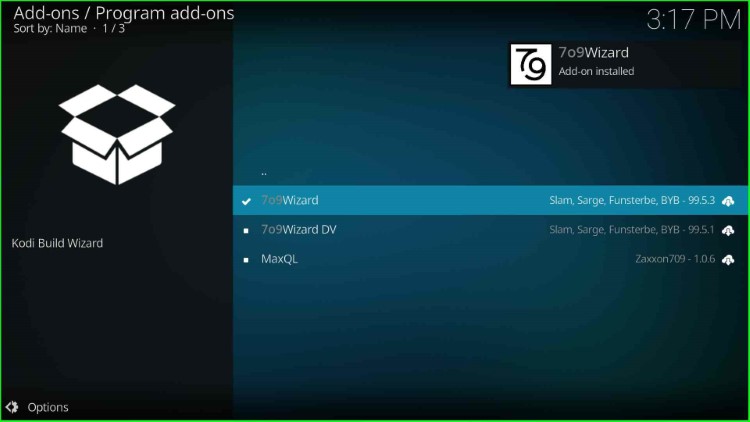
After that, a popup window will appear; tap on the Close button.

Click on Close

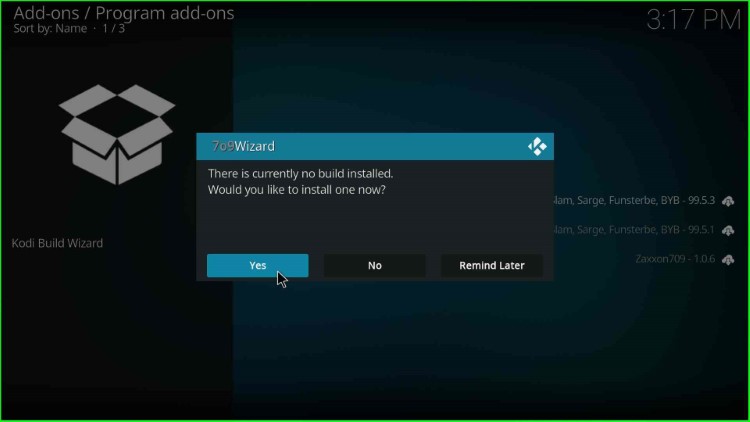
Step 6: Install Serenity Kodi Build

Here, click Yes to proceed with the Build installation.

Hit Yes

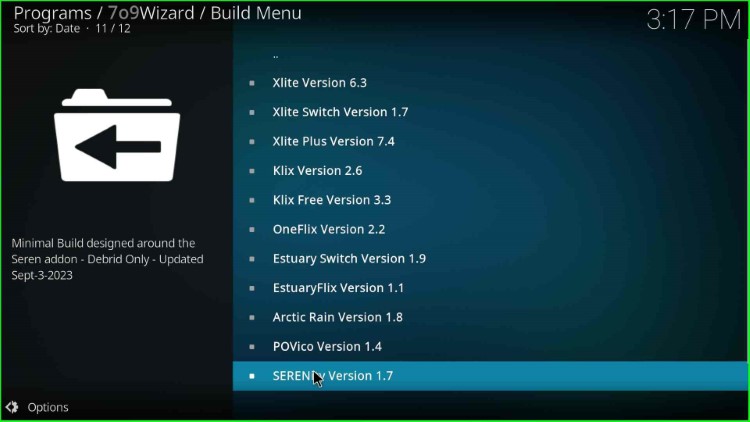
In this step, select the last-second Build, SERENity.

Select the Serenity Build

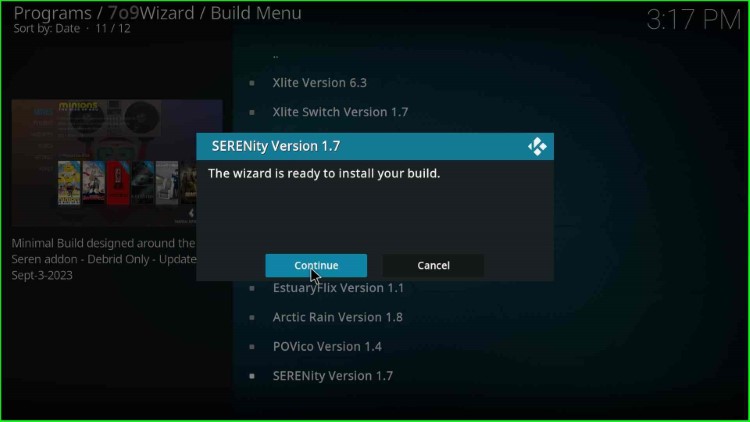
Click Continue to install the Build.

Tap on Continue

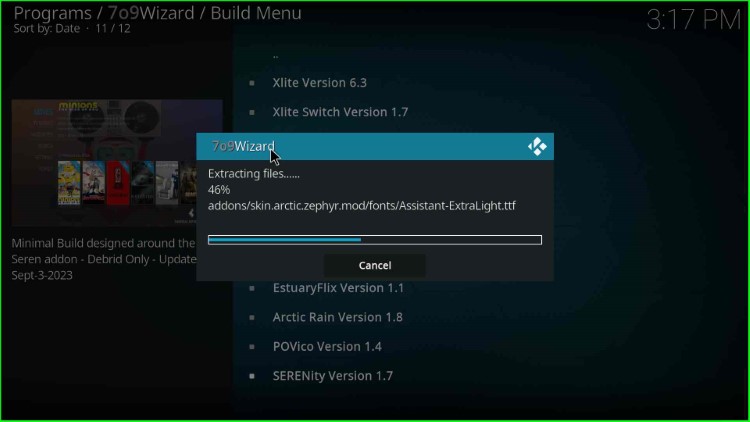
Wait a few seconds to install the Serenity Build completely.

Wait for downloading the Serenity Build

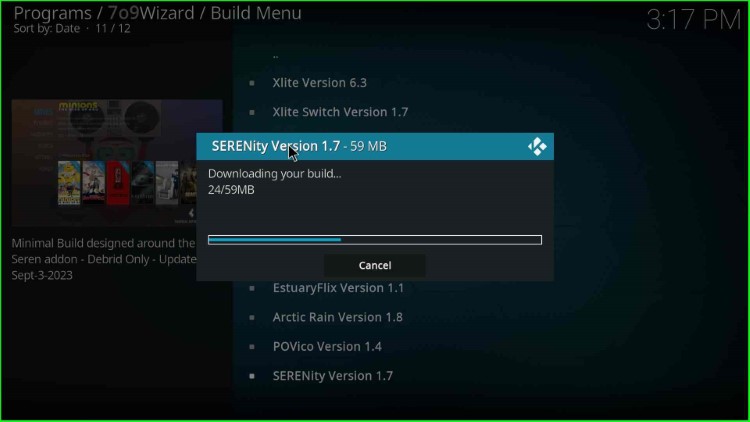
The file extraction process starts.

Serenity Build starts extracting files

After completing the installation, hit the OK button to close the Kodi screen.

Click OK

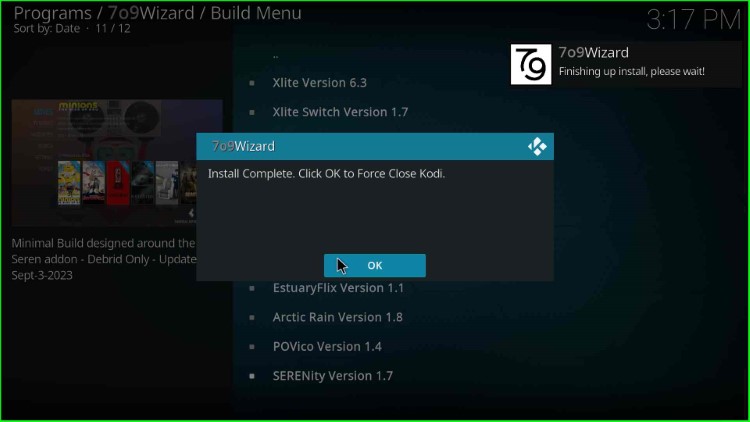
So, finally, we have installed the SERENity Build successfully.

Final Words

Overall, we have discussed all the required steps regarding the installation of the Serenity Kodi Build. So, install the Build by following the steps and screenshots. Also, feel free to ask if you find any errors during the installation.

Related Guides:

Before you start streaming on Firestick Apps/Websites, I would like to warn you once again that we do not know from where these Apps, Websites, Kodi Repositories, Wizards, Builds, and Addons fetch the streams.

The content you stream on Firestick Apps may be copyrighted and may land you in legal trouble even if you stream them unintentionally. Most of all, ISPs, Government, and authorized companies may monitor your online activities like streaming copyrighted movies, videos, TV shows, live shows, animes, etc.

To stay protected, and to get an exceptional streaming experience, I suggest you use IPVanish which is the fastest, most secure, and military-grade encryption VPN for Firestick. In addition, IPVanish hides your original IP address, encrypts your internet connection, and bypasses bandwidth throttling and geo-restrictions.

I have been personally using IPVanish for a couple of years and what I can say is that IPVanish is the best VPN for Firestick Apps in all aspects for all devices because the VPN unlocks geo-restricted streams and enhances my streaming experience.

Disclaimer: VPNHacks.com does not support or encourage piracy and copyright infringements in any form. You should abide by the rules and regulations in your country. We just want to protect you because sometimes you may end up streaming copyrighted content unintentionally.

American Football, Percentage Savings & Limited Time Offer
Till 26th Sep 2023: Only $2.99/Month

Taking an IPVanish VPN Subscription is really simple.

1.       First, subscribe to IPVanish by clicking here.

Most of all IPVanish comes with a 30-day money-back guarantee. You can get a full refund if you are not satisfied (I do not think you will be) with IPVanish and they do not ask for any reason.

2.       Once you subscribe to IPVanish, download the IPVanish app and open it. Enter your e-mail and password and click on the “Log In” button.

Login to IPVanish App

3.       Once you are signed in, select the VPN Server location that you want to connect to and click on the connect option.

Choose the VPN Location

4.       After that, you will see that your IP address has been changed. This way, you can protect your privacy and have an exceptional streaming experience.

Connect the Server

Grab IPVanish Hot Deal: Subscribe for as low as $2.99/Month

James is the Co-founder of VPNHACKS.COM. He is a streaming geek and a privacy expert. James streams over different devices like Firestick, Kodi, Roku, Shield, Boxes, Google Chromecast, and Apple TV. IPVanish VPN is his favourite VPN for streaming. more...

Leave a Comment

American Football IPVanish VPN offer