This article provides all the necessary steps to Install Estuary Switch Kodi Build on Firestick Lite, 4K Max, and Android Boxes.
Estuary Switch is a great Kodi Build that mainly uses the Estuary Skin and has a size of nearly 64MB. Here, you can find every kind of Movie and TV show in full HD quality.
Also, it has a lot of top add-ons like Homelander, POV, and Umbrella. Here, POV and Umbrella work great after integrating with the Real Debrid Service. Needless to mention Homelander allows you to stream content for free.
Here, are the steps to install Estuary Switch Build on Kodi.
Installation Steps
Step 1: Enable Unknown Sources
First, launch Kodi and tap on Settings.
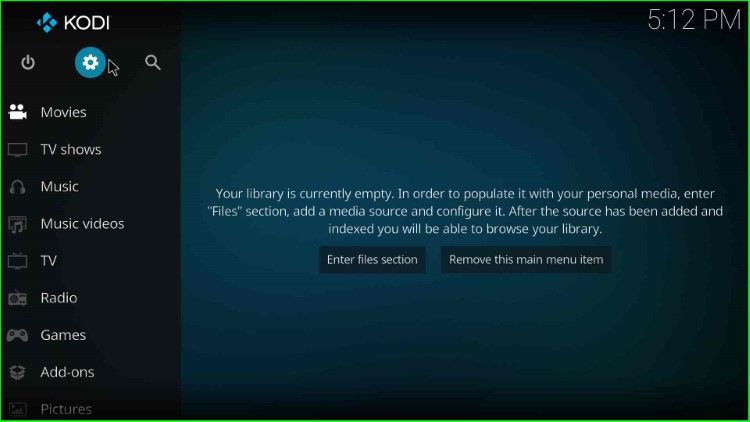
Click on the System icon available at the bottom right corner.
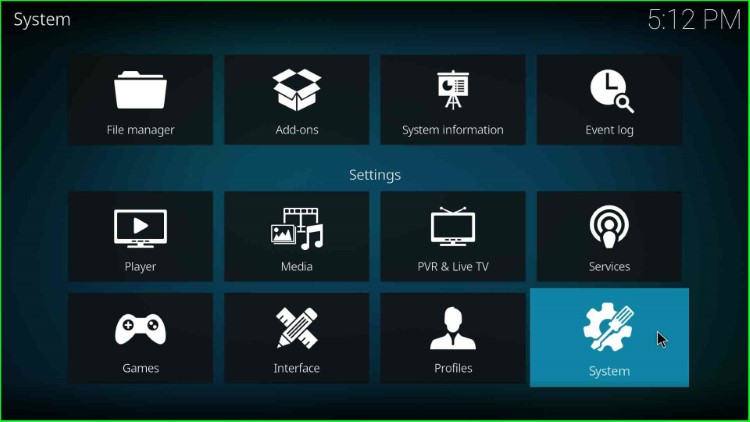
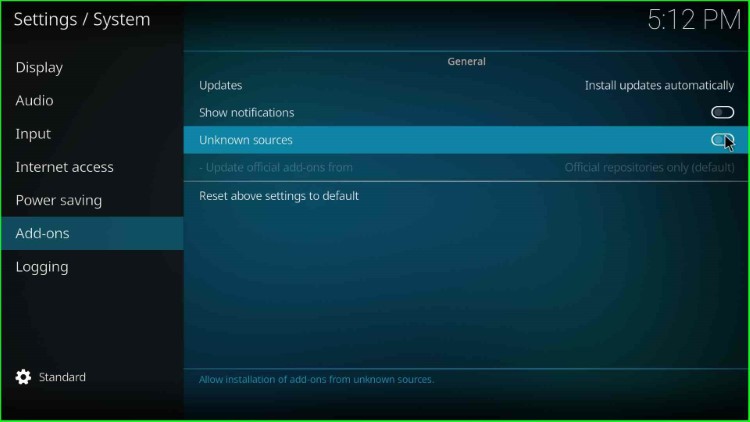
Choose the Add-ons option and enable Unknown Sources to allow the installation from unknown sources.
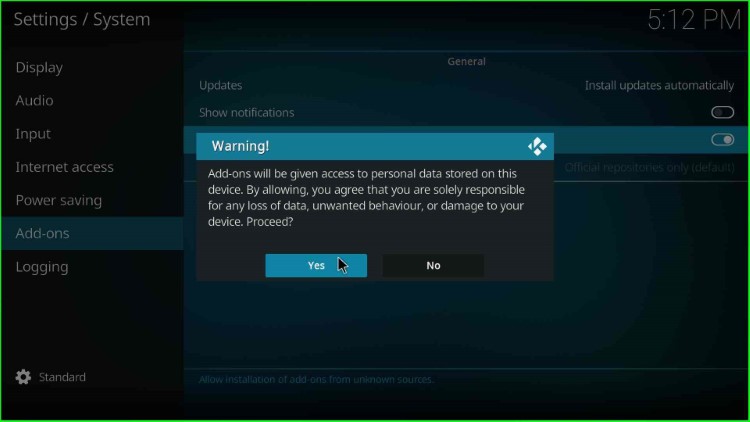
A prompt will appear, where you just tap Yes to proceed.
Step 2: Add Media Source and Repository
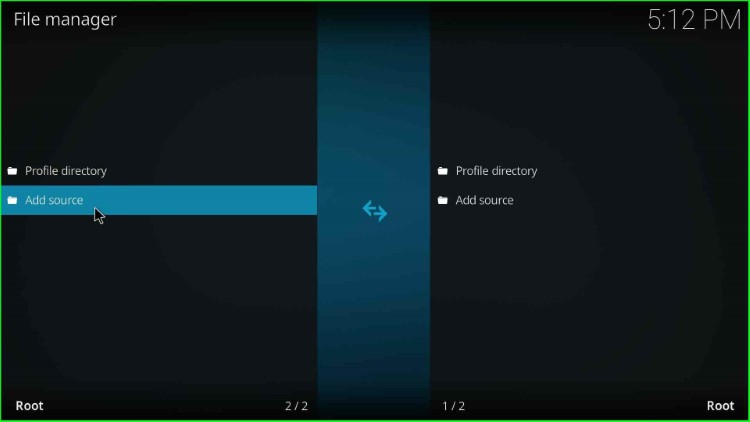
Go to the Kodi Settings page and select the File Manager icon.

Tap on the Add source option.
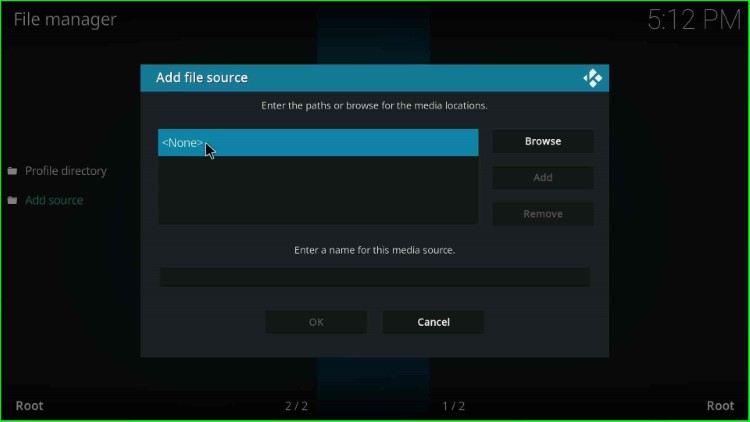
Here, select <None>.
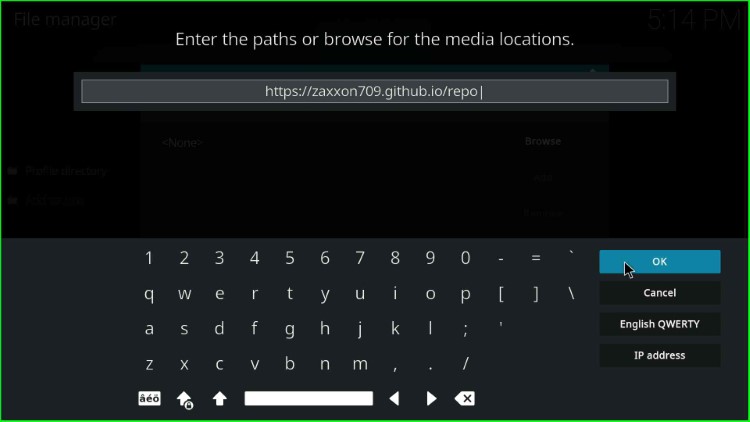
Type the URL path: https://zaxxon709.github.io/repo and press the OK key.
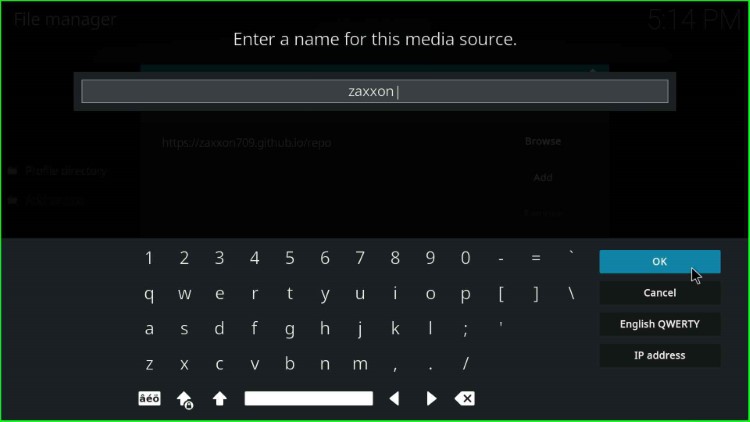
Now, tap on the below section to enter a name for the media source.
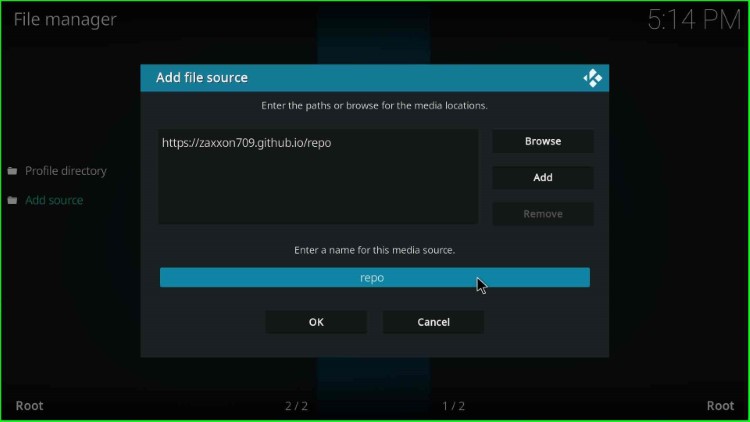
Here, enter a name for the media source as zaxxon, and tap OK.
Check all the entries carefully and click OK to save them.
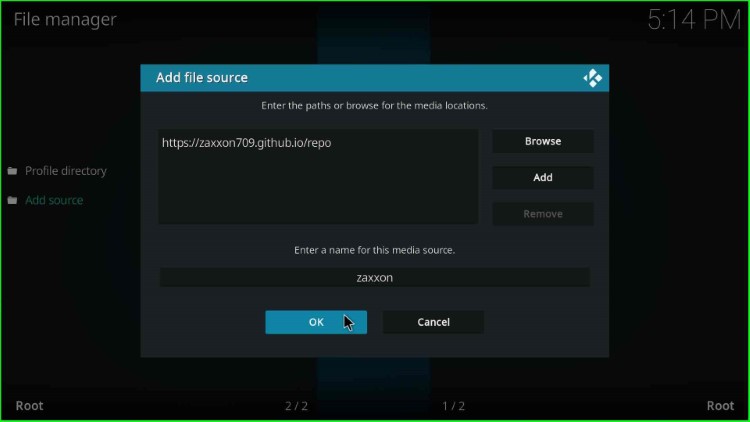
Your URL path and media source are added on the File Manager screen.

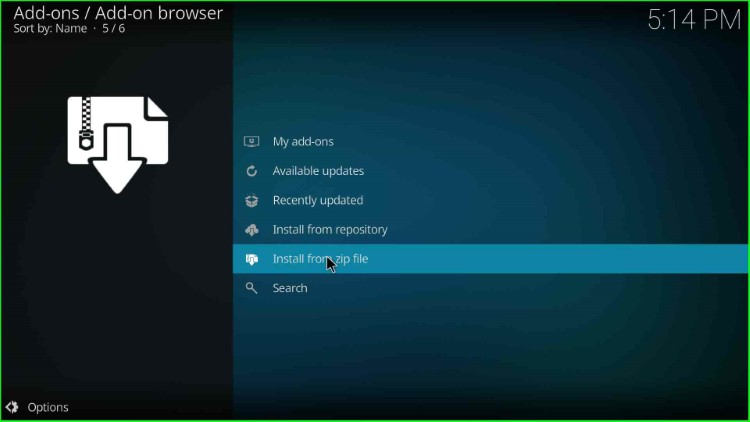
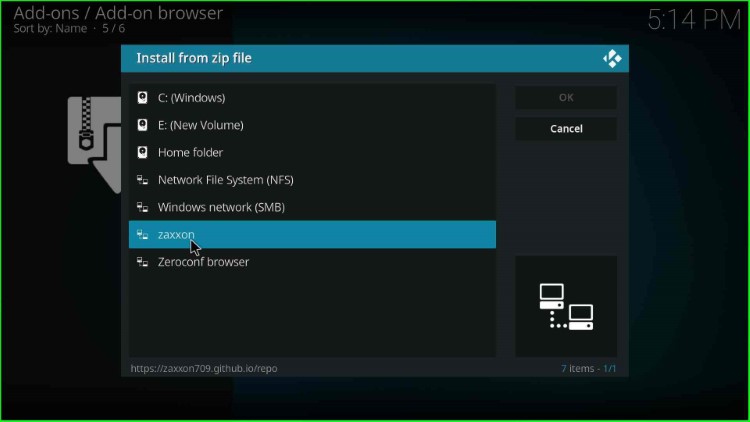
Step 3 : Install from Zip File
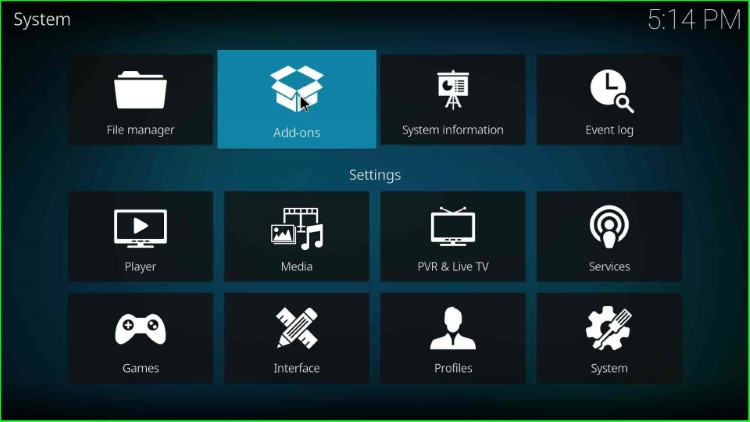
Go to the Settings page again and choose the second icon, Addons.
Select Install from zip file option.
Choose the media source, zaxxon.
Tap on the repository.709.x.x.Nexus.zip file.
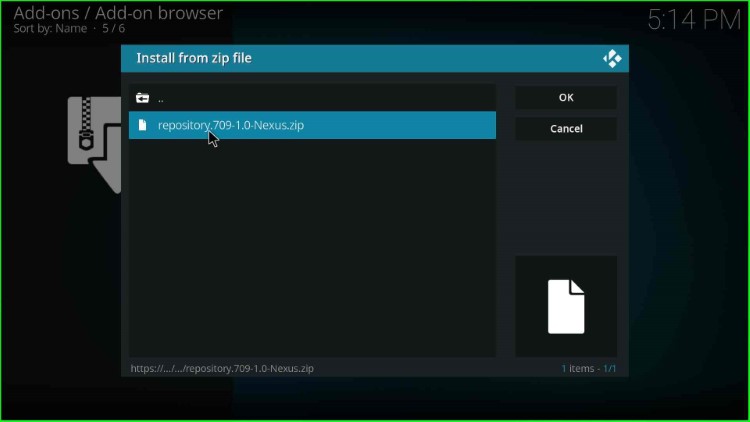
Wait till The7o9Repo Add-on installed notification appears on the Addons screen.
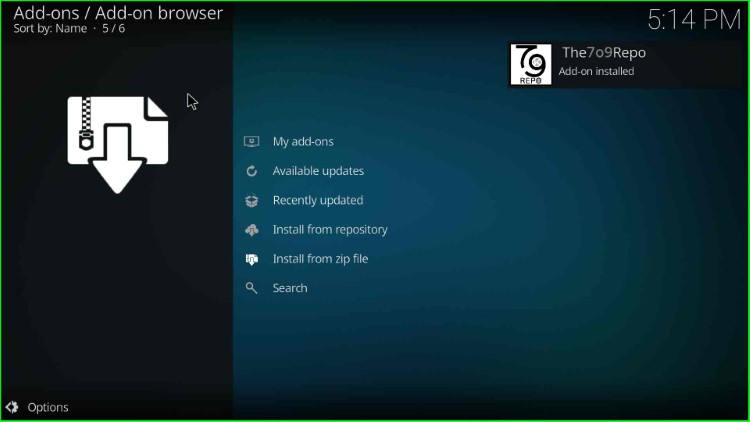
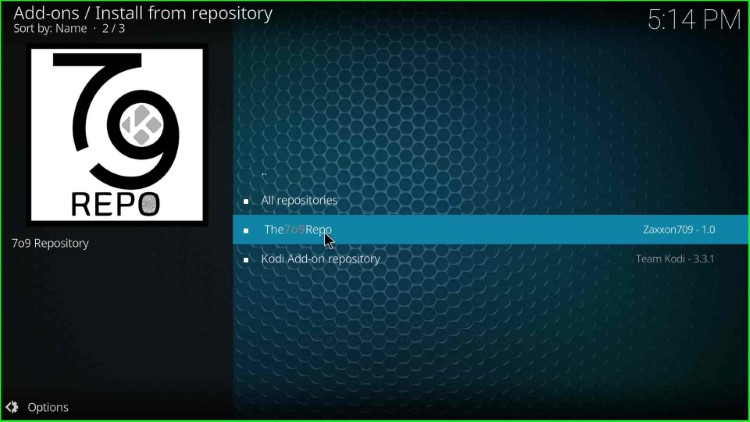
Step 4: Install from Repository
Thereafter, Choose the Install from Repository.
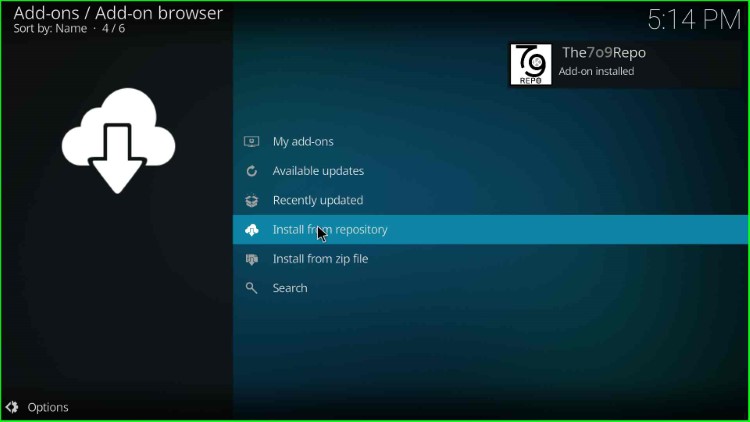
Select The7o9Repo.
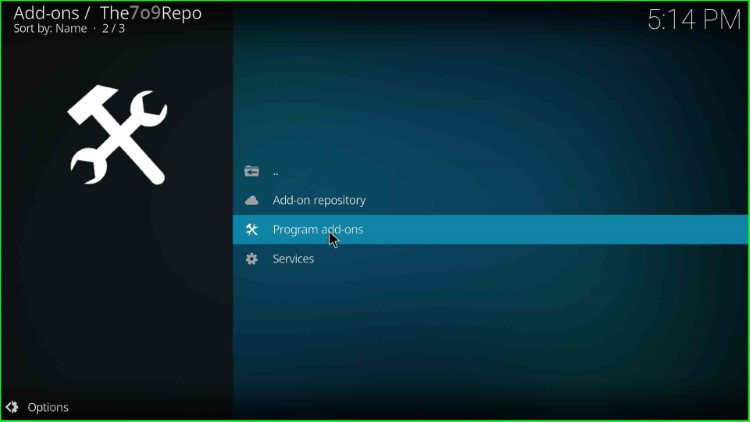
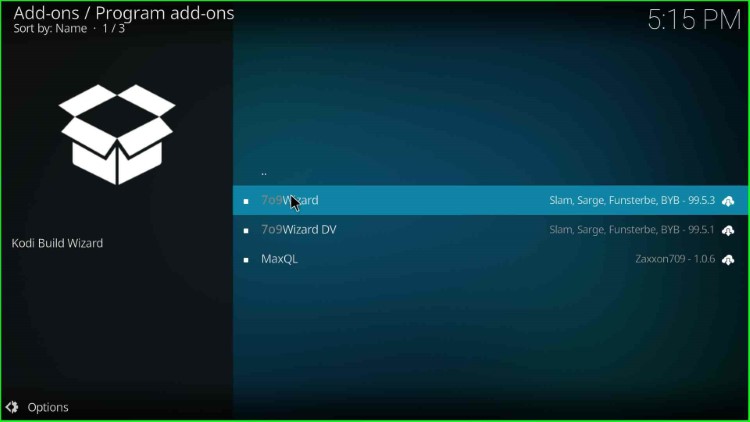
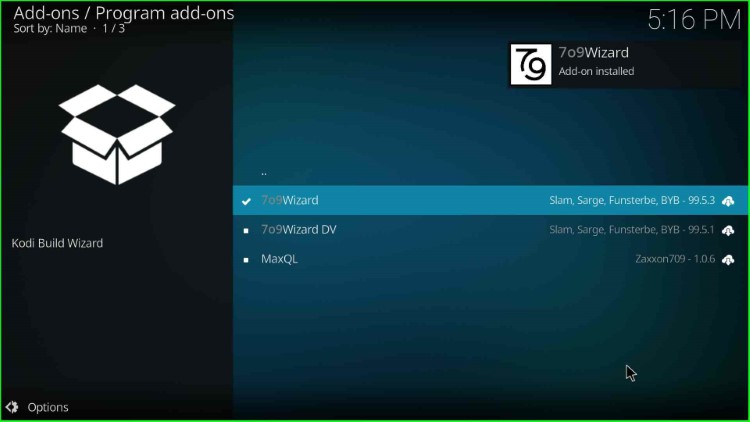
Step 5: Install 7o9 Wizard
Click on Program add-ons here.
Choose the 7o9Wizard.
Tap on the Install button.
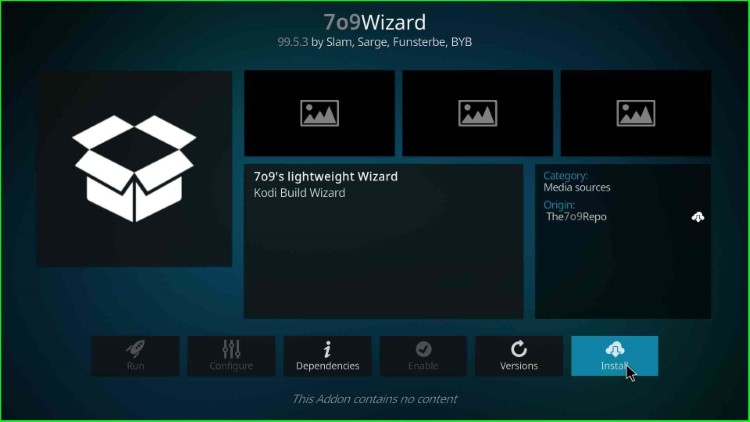
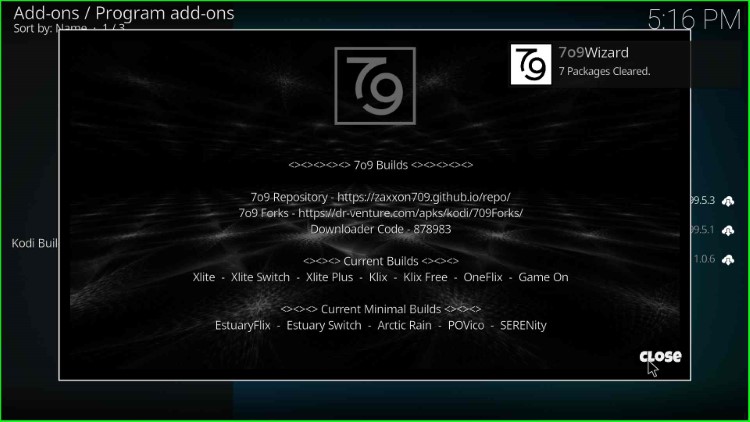
After a few seconds, the “7o9Wizard add-on installed,” message automatically appears on the screen.
After installing the wizard, a prompt will appear; click on the Close button.
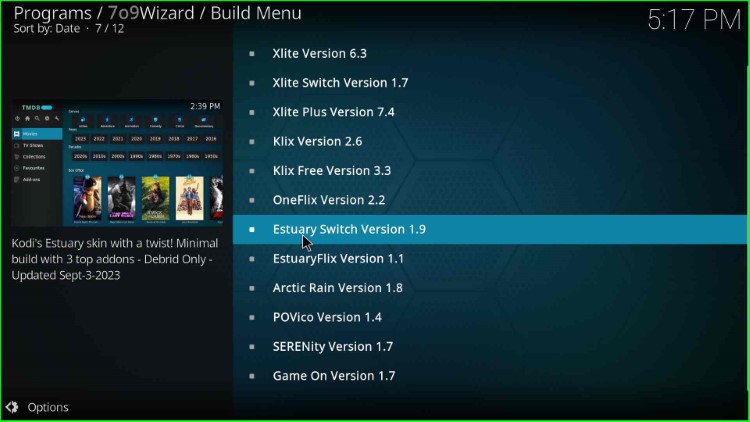
Step 6: Install Estuary Switch Build
Now, click on Yes to install the Build from the 7o9 Wizard.

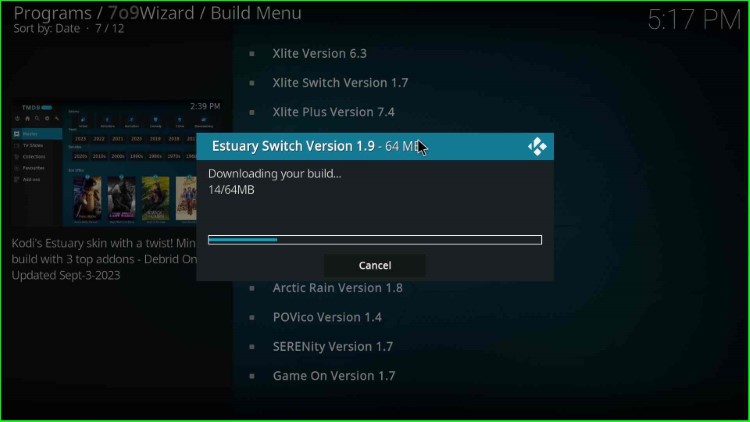
Here, select the Estuary Switch Build.
Click on Continue.
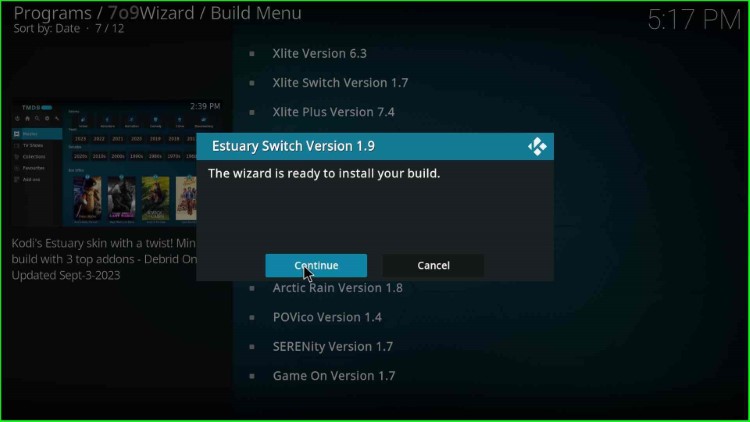
Wait for the downloading of Estuary Switch Build.
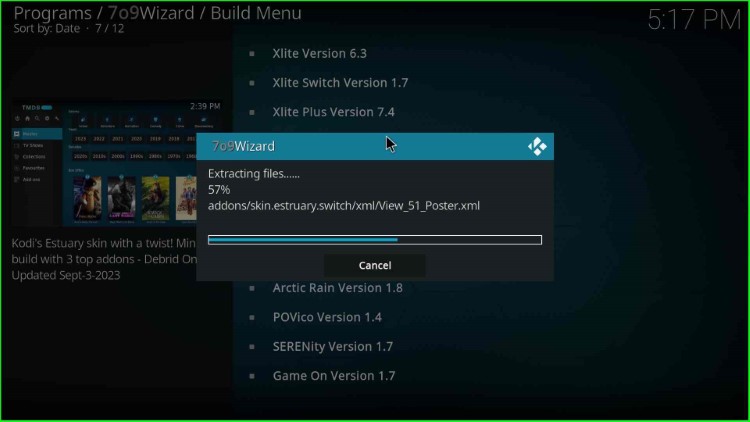
Now, the Build starts extracting the files.
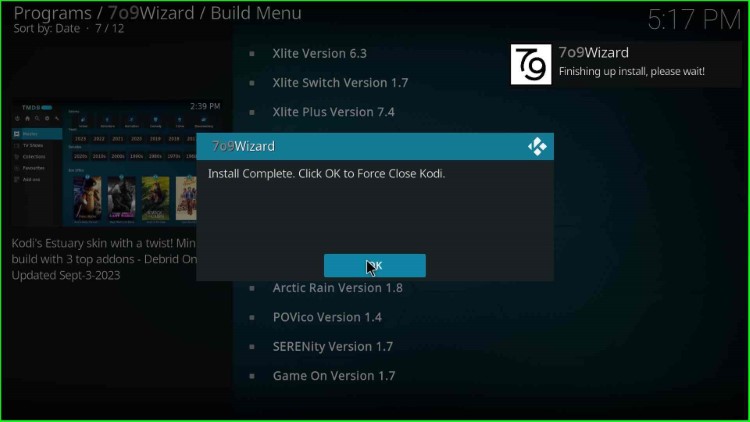
After installation, Click OK to force close Kodi.
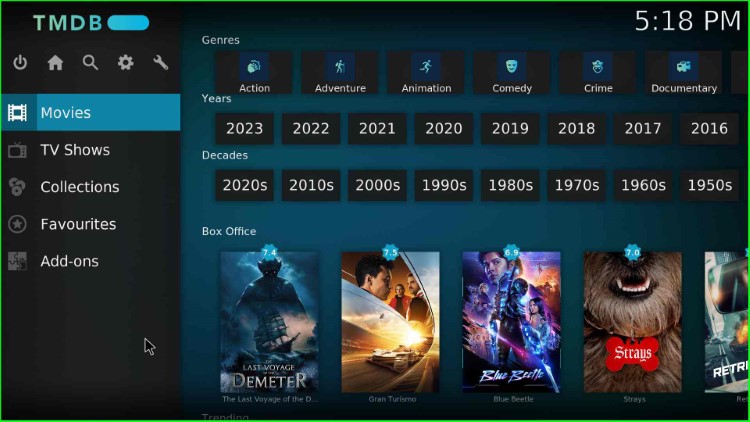
At last, reopen Kodi and enjoy the streaming on the Estuary Switch Build.
Final Words
Overall, Estuary Switch is a Kodi Build that enables users to stream both free and subscription-based content. So, follow the steps given above and stream your favorite content through the Estuary Switch Build. Drop a comment below, if you have any questions related to the Build.
