This article will provide all the necessary steps to Install Shadow Kodi Addon on Kodi installed on platforms like Windows, Android, Firestick, Chromecast, Mac, iOS, etc.
Shadow is the all-in-one Kodi addon that offers many high-quality Movies and TV Shows online. Its Homepage contains sections like Trakt, Last Link Played, Movie World, Resume Watching, My RD History, TV World, etc.
In addition, you can download this addon easily using the Magnetic Repository. Moreover, the add-on provides various HD streaming links that can be accessed using premium host services like Real Debrid and, Premiumize.
Installation Steps
Enable Unknown Resources
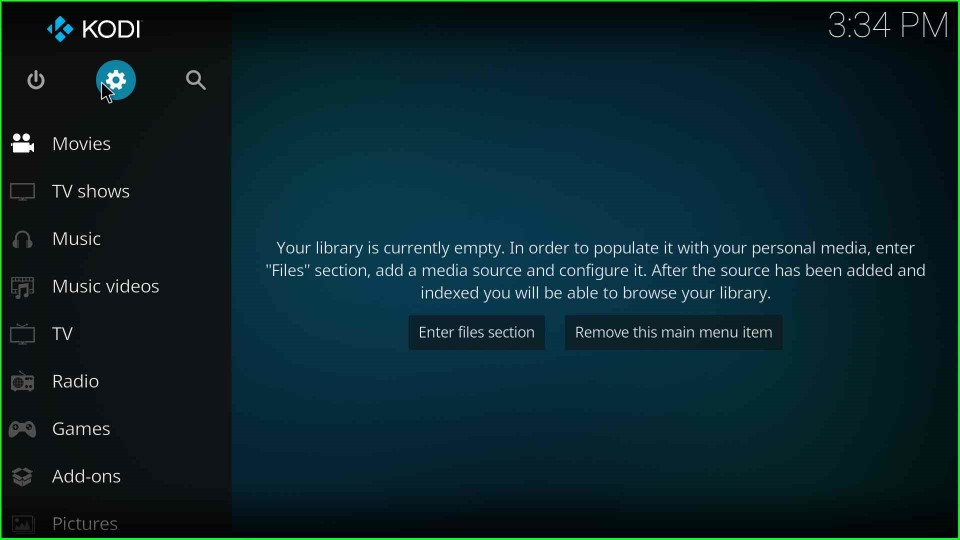
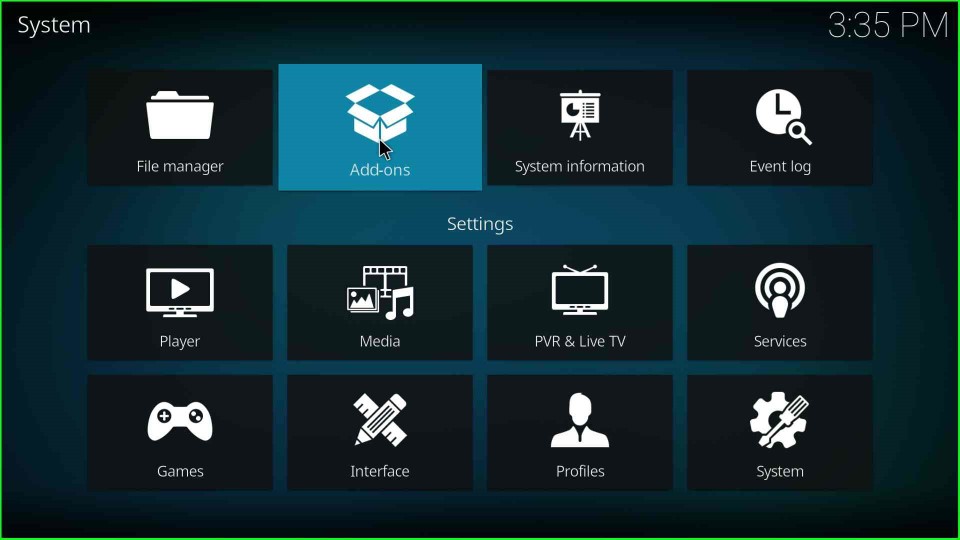
Go to the Kodi app and select the Settings icon available on the page.
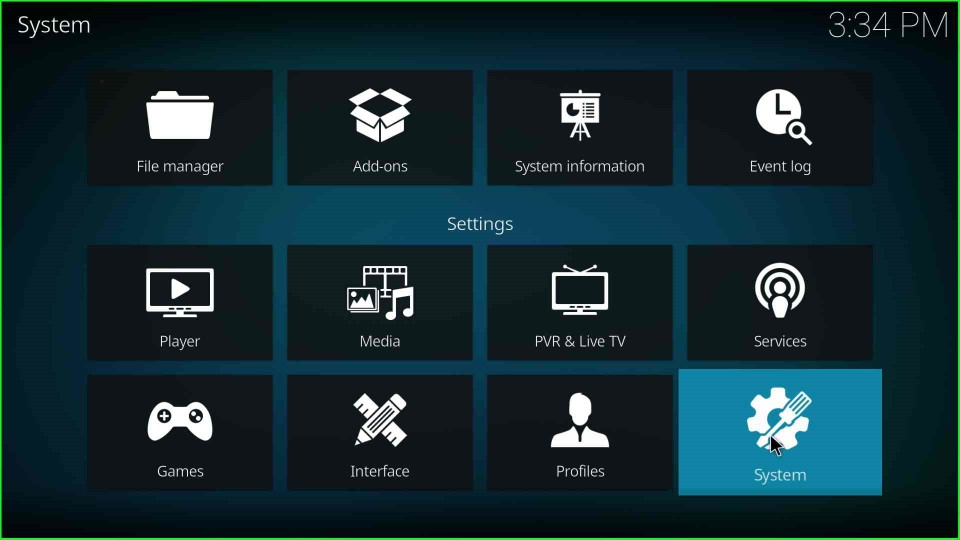
Go to the bottom right icon, System.
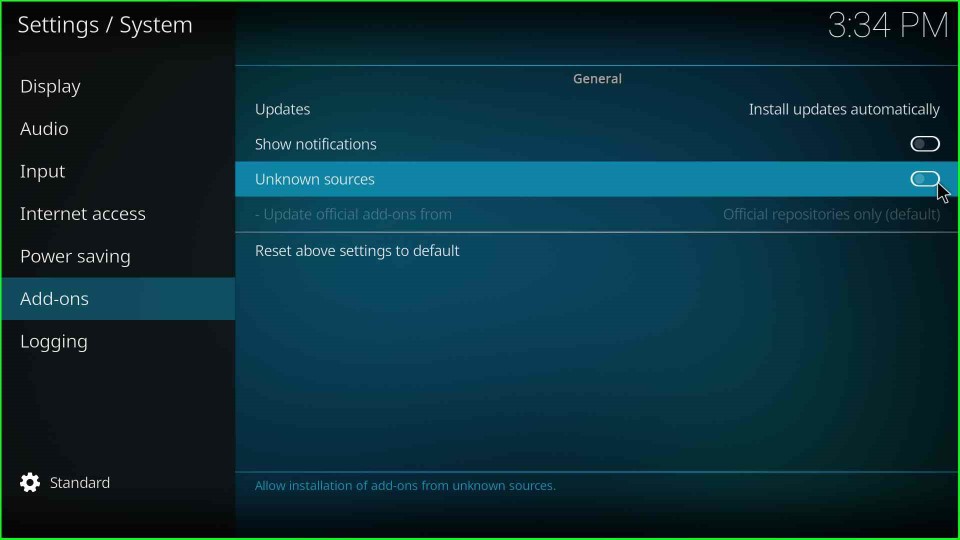
Select the left-side option Addons. Here, switch on the Unknown Sources button.
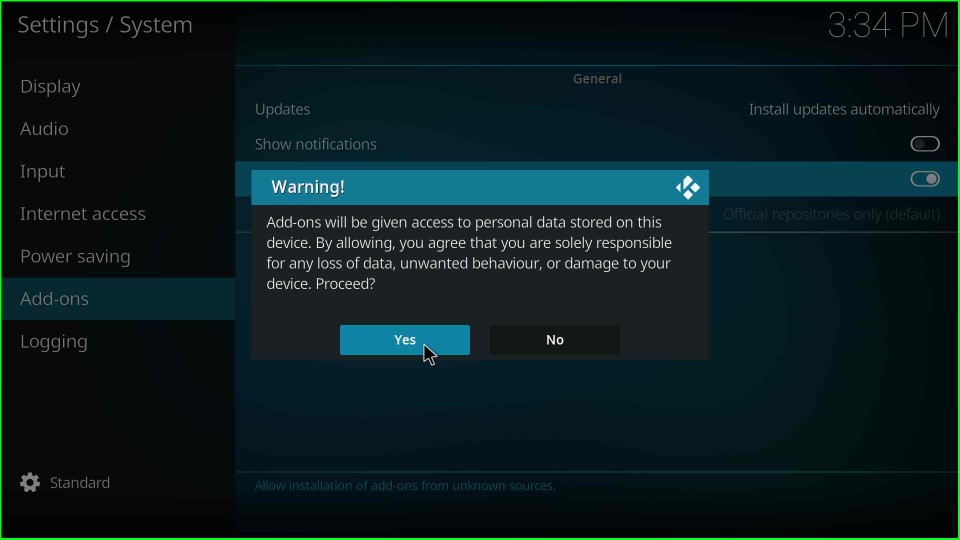
It displays a warning sign; click Yes to agree.
Add Source and URL for the Repository
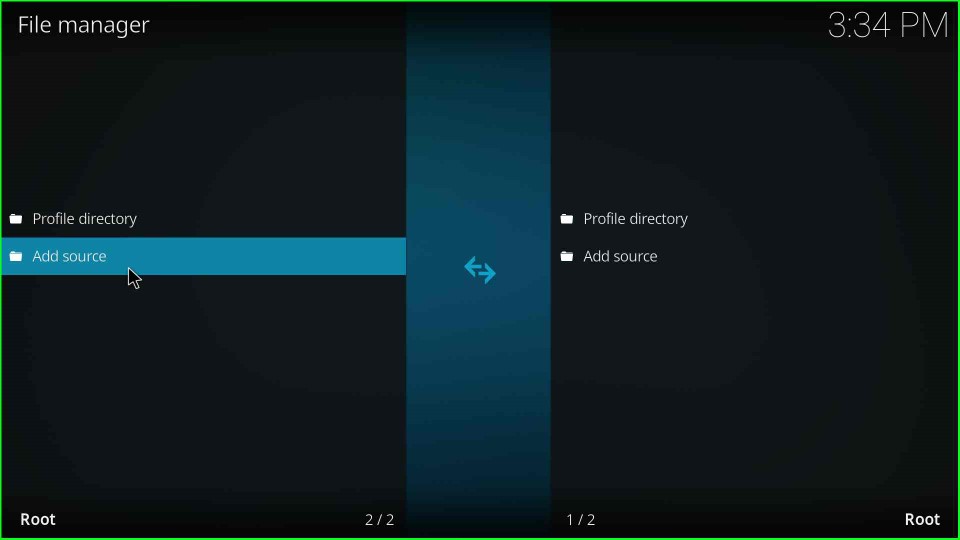
Go to the Kodi Settings screen and click on the File Manager icon.

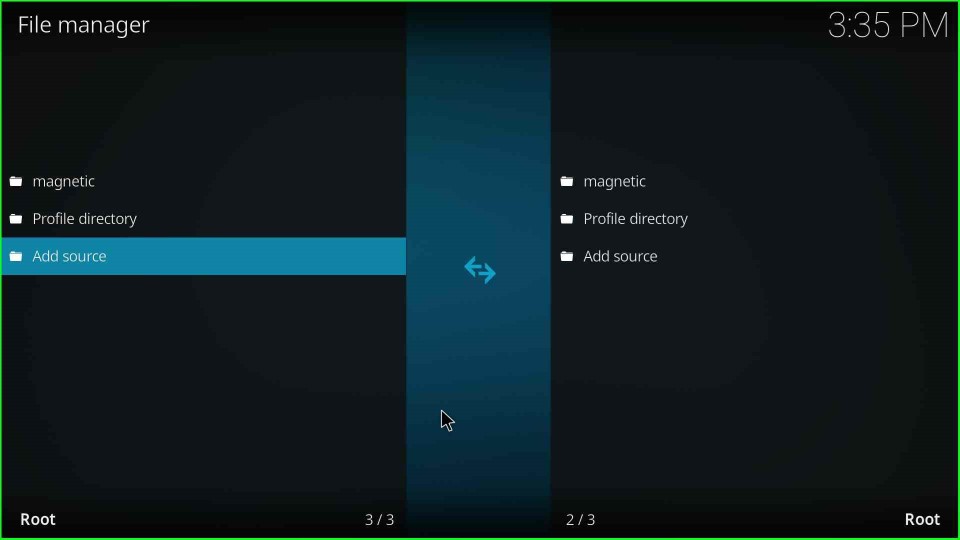
Select the Add source option shown on the page.
Tap on the <None> option.
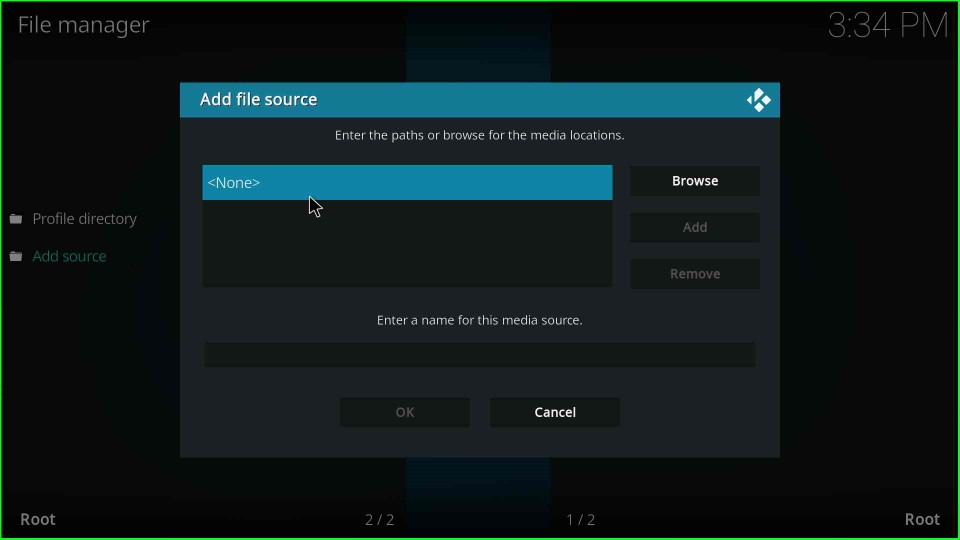
It redirects you to the Enter the paths for the media locations text box.
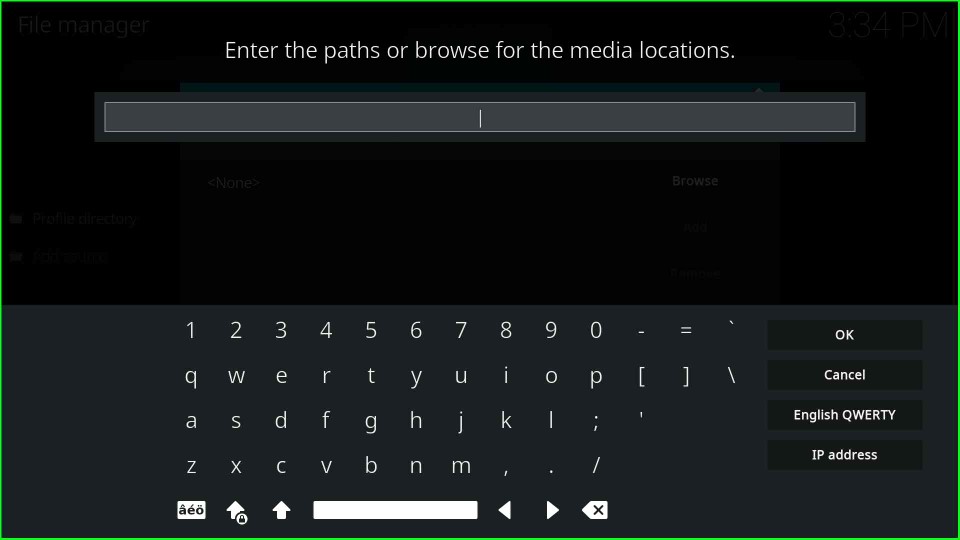
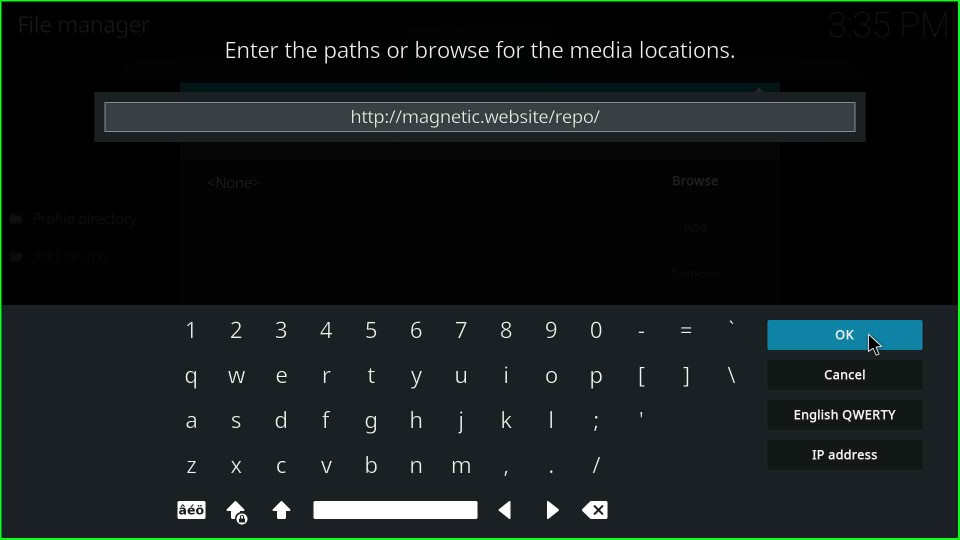
Type the following URL http://magnetic.website/repo/ here then press OK.
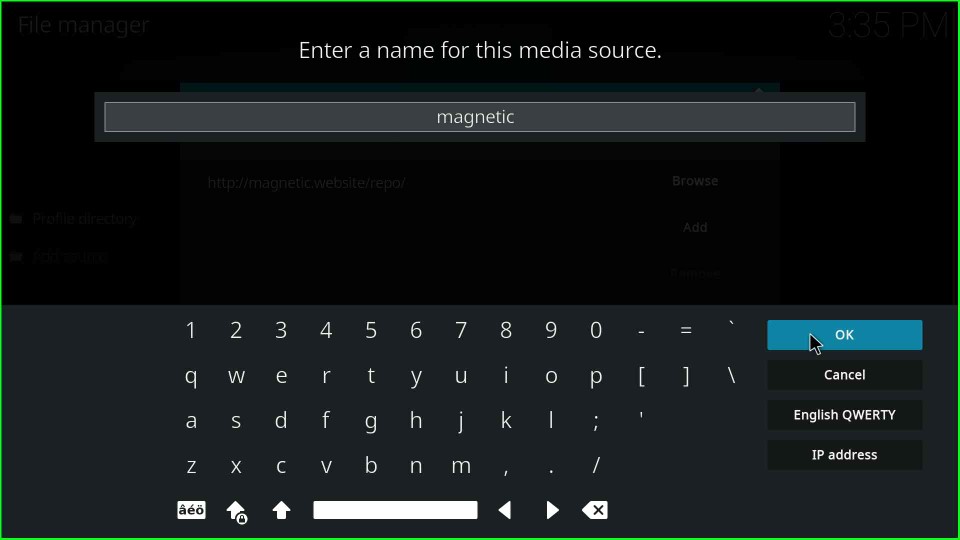
Take the cursor on Enter a name for this media source text box. Here, you see a default name repo.
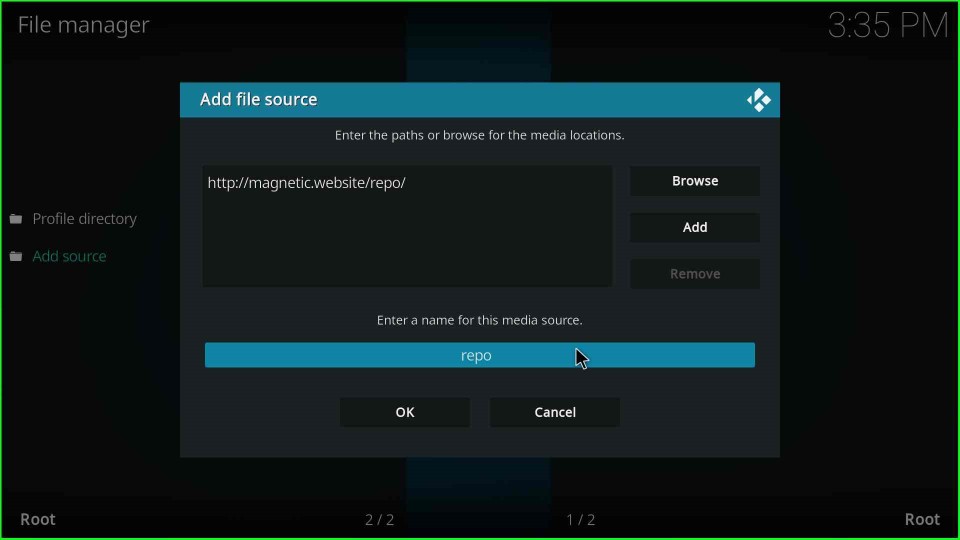
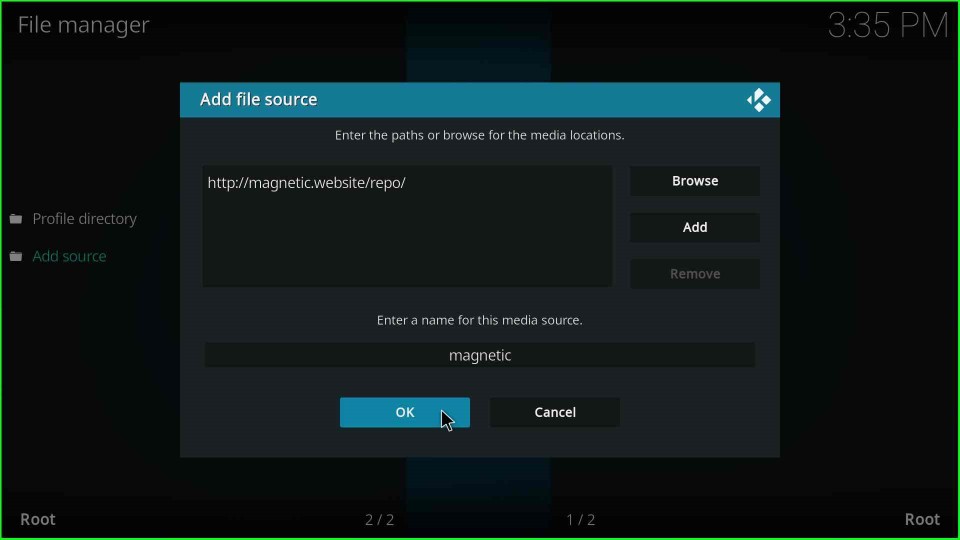
Remove it, give a new name to the media source as magnetic, and hit OK.
Check all the entered details again and press the OK button.
Install from Zip File
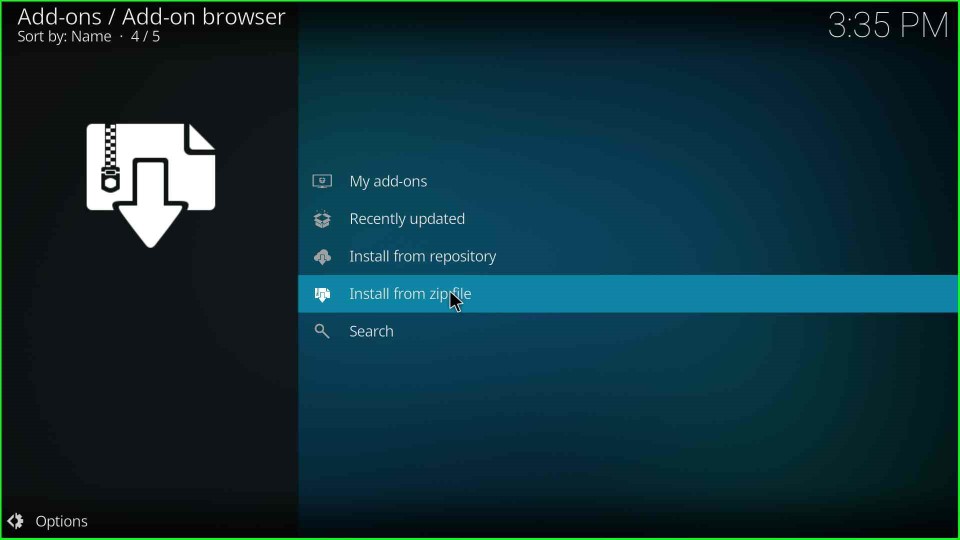
Again, go to the previous Kodi Settings window and click on the Add-ons icon.
This page shows an Install from zip file option; select it.
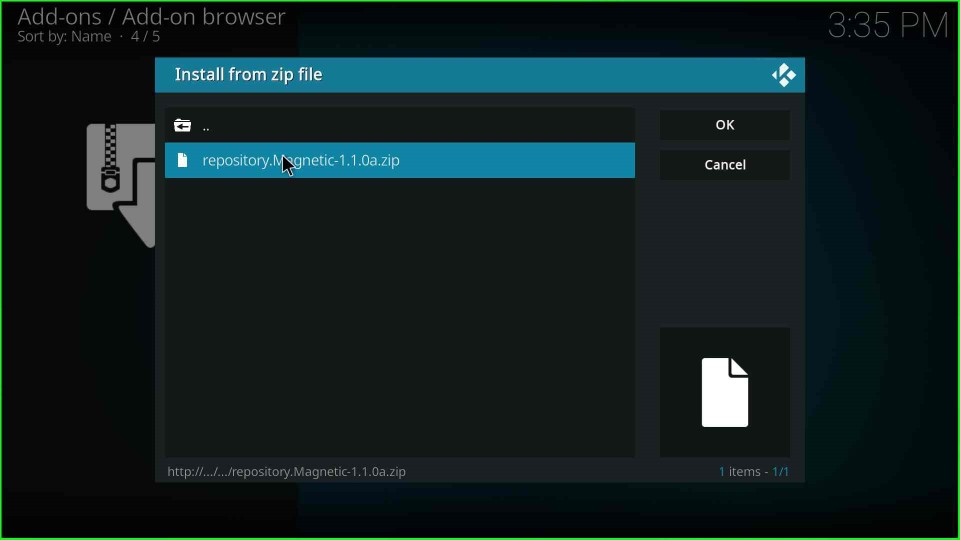
Select the recently added media source magnetic.

Here, click on the repository.Magnetic-x.x.x.zip.
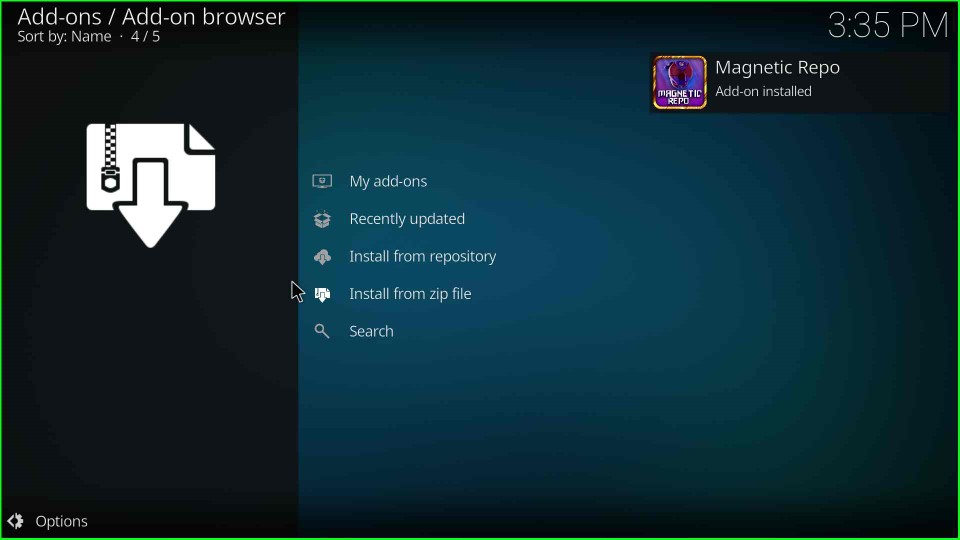
Wait for the Magnetic Repo Addon installed notification on the Addons page.
Install from Repository
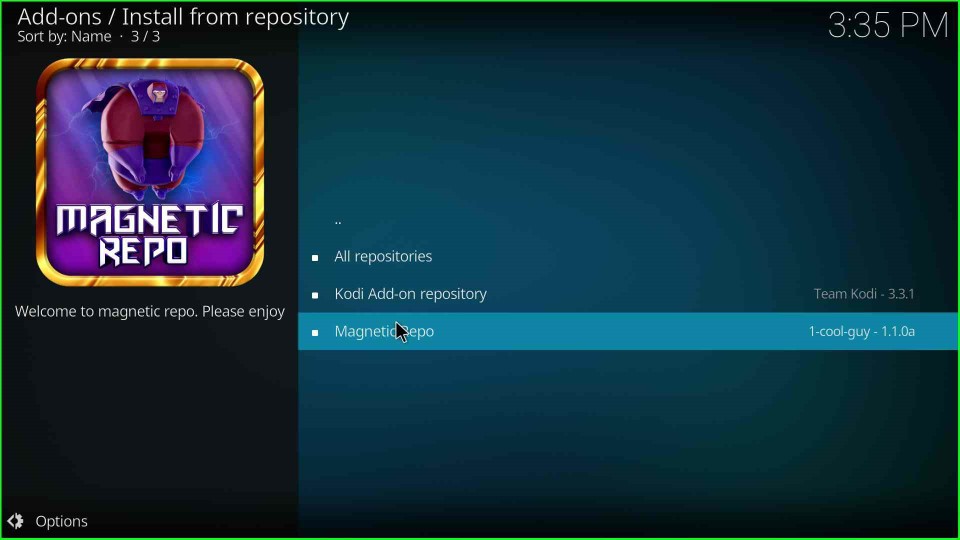
Next, select the Install from repository option.
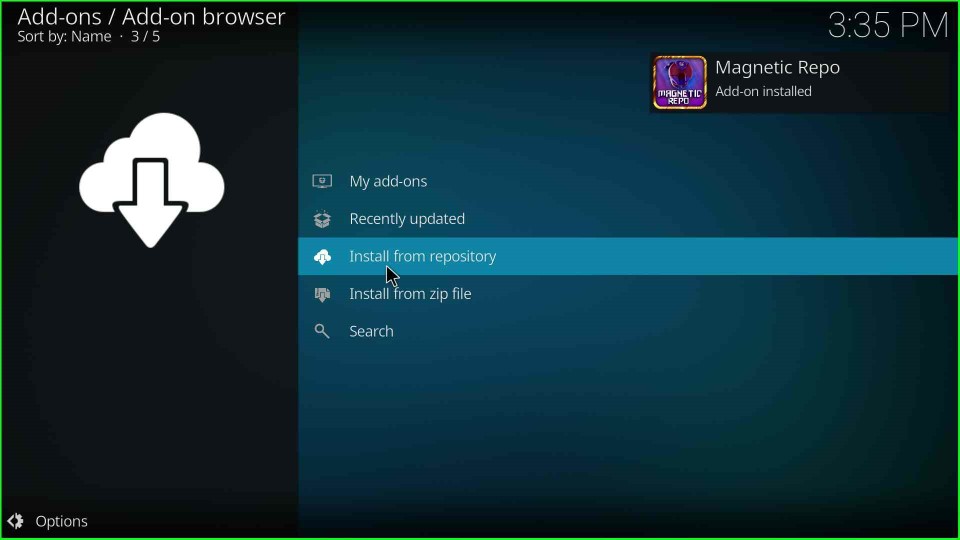
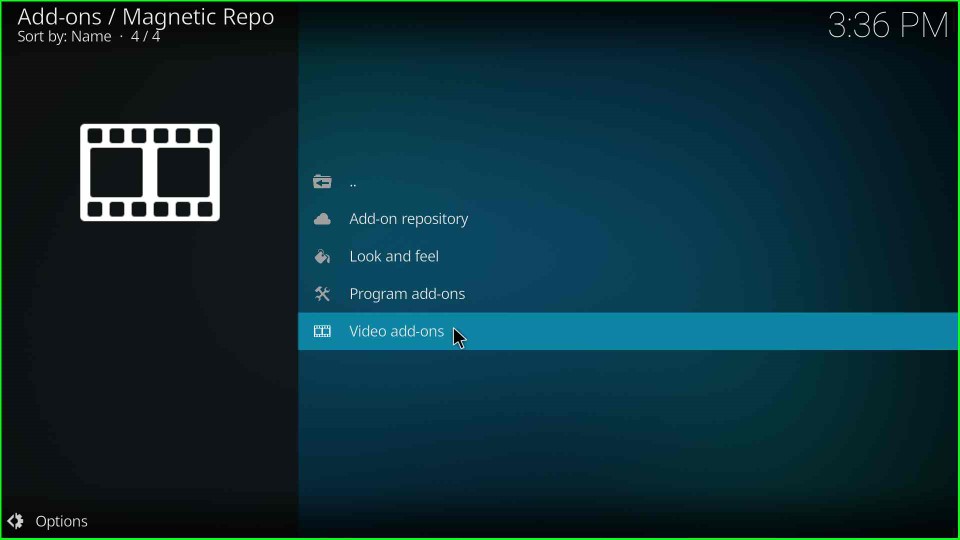
Click the Magnetic Repo option.
Select the Video add-ons.
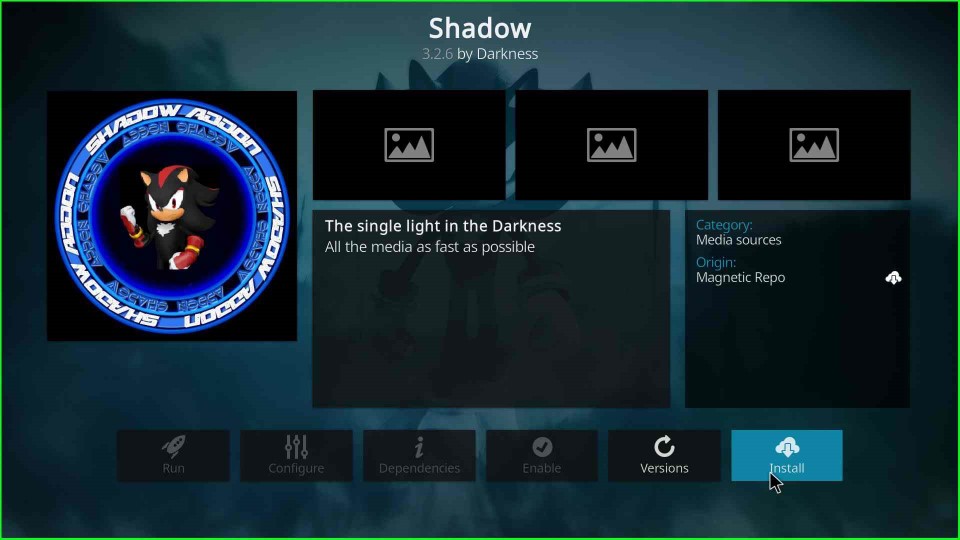
Install Shadow Kodi Addon
After clicking on it, you find a list of some addons, where you have to click on the Shadow addon.
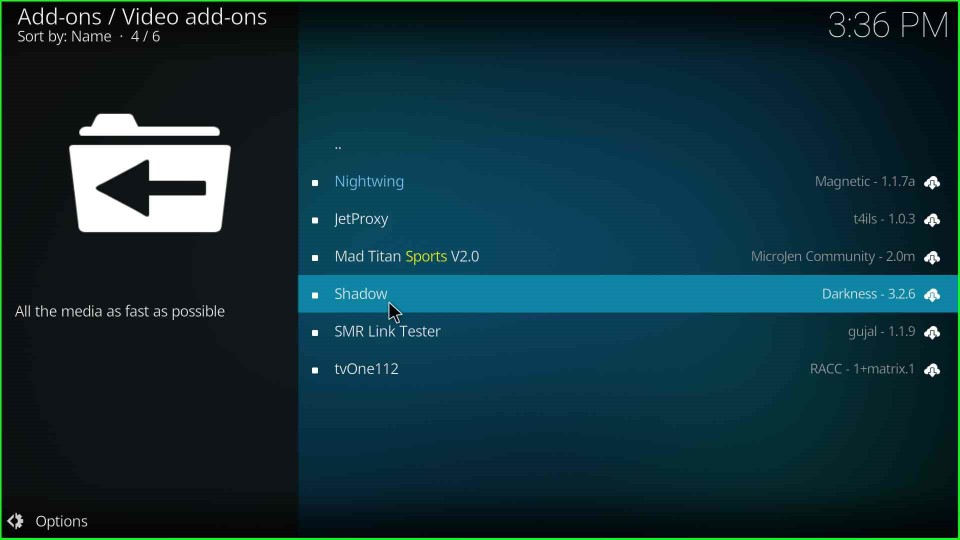
Click on the Install button to install the Shadow addon.
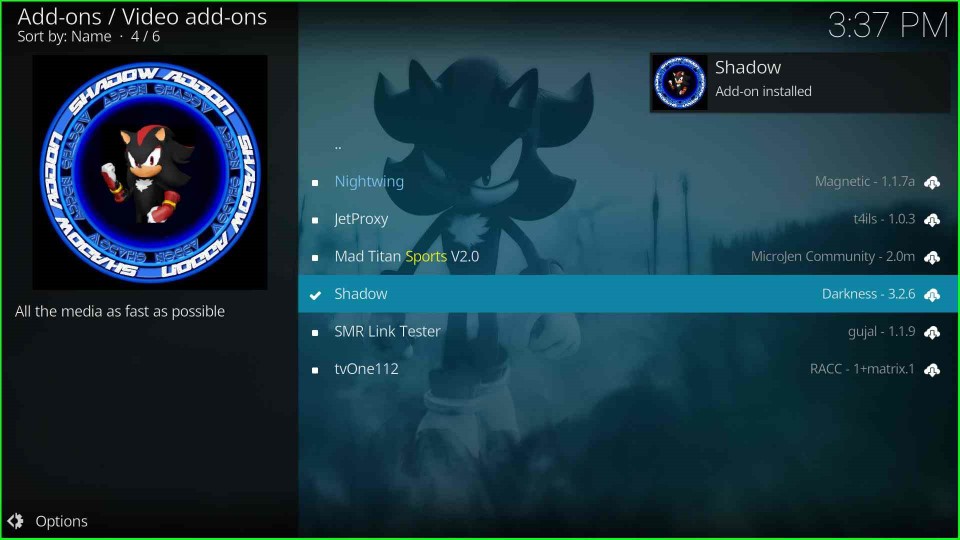
Wait for the confirmation message Shadow Addon installed.
Final Words
This article has listed all the steps to install Shadow addon on your Windows platform. So, try to install the addon using the above steps and share your experience with us. Also, feel free to ask if any doubt occurs.
