In this post, we are going to tell you about the necessary steps to install the Samsung TV Plus addon on the Kodi. You can freely use the steps for other Kodi-supported platforms, including iOS, Firestick, Mac, Linux, Apple TV, Android TV Boxes, Mecool Boxes, Smart TV, Roku, Tablets, etc.
Samsung TV Plus is a free Kodi addon that provides international channels for different countries, i.e., the US, Canada, Spain, Italy, India, Australia, and France. These channels are available in more than 63 categories, including comedy, news, documentaries, crime, etc.
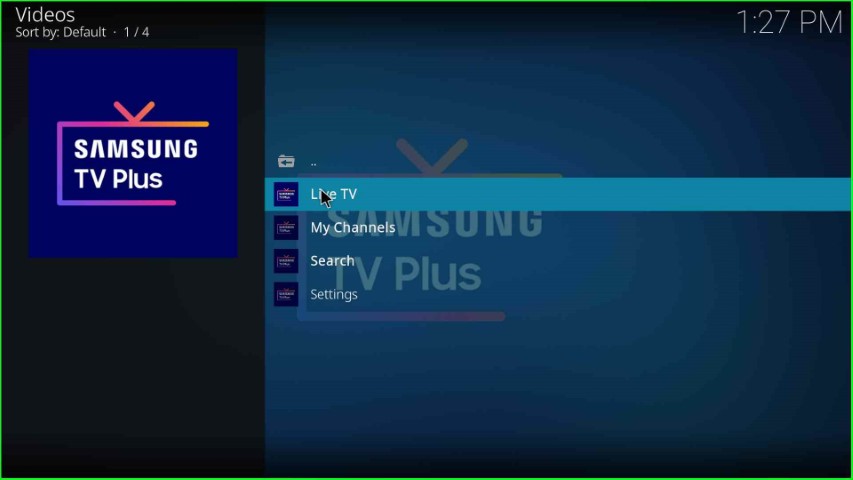
In addition, the addon listed different navigation sections like My Channels, Live TV, Search, and Settings. Moreover, you can install the addon easily through the SlyGuy repository.
Installation Steps
Some of the steps to install the Samsung TV Plus addon are mentioned below:
Enable Unknown Sources
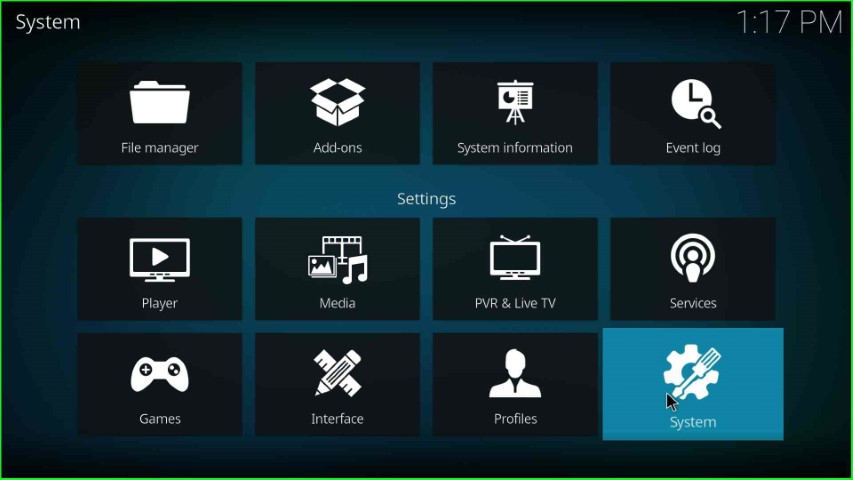
Start Kodi software and go to the Settings tab.
Now, select the System tab from the available options.
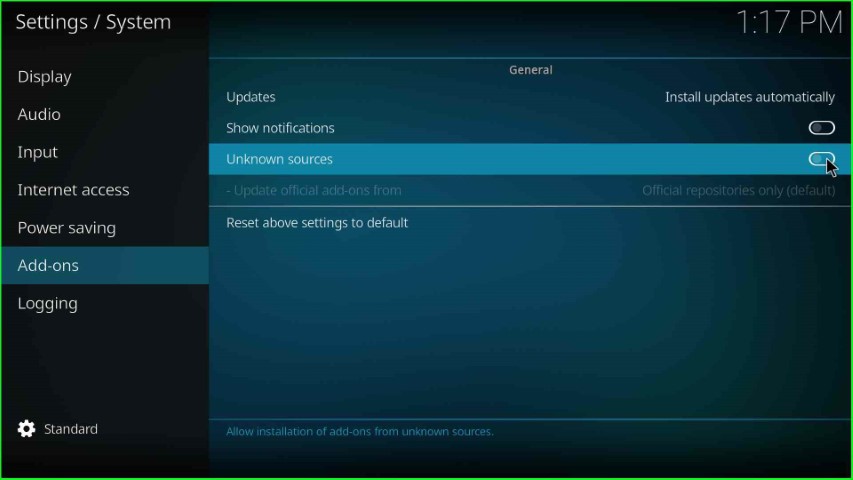
Tap on the Add-ons option and slide right to the Unknown sources key.
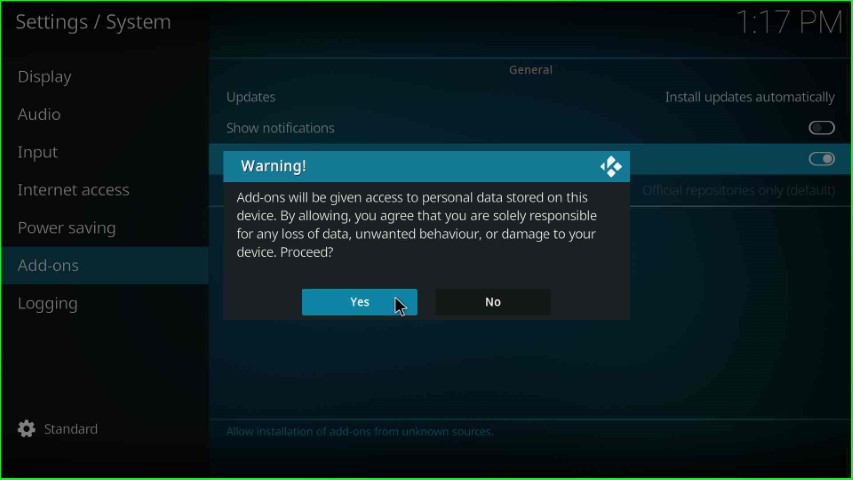
Click on the Yes sign available on the File manager page.
Add Media Source and Repository URL
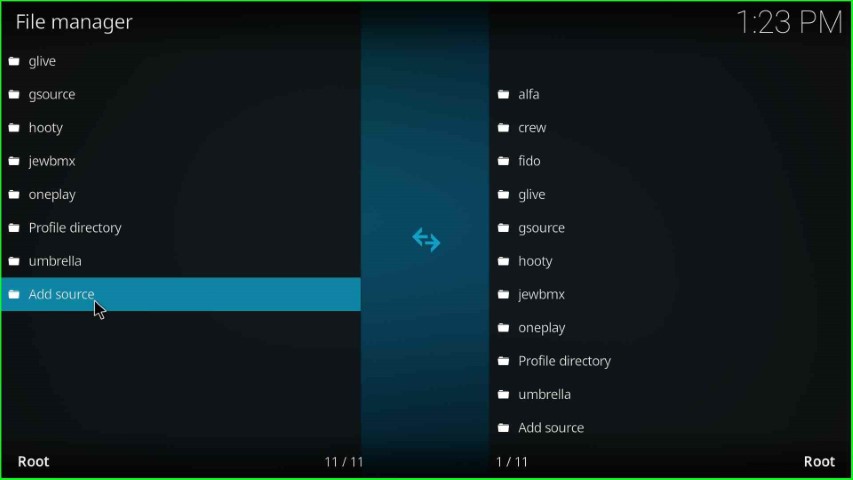
Go back to the System screen and open the File manager icon.

Select the Add source tab and press enter.
Tap on <None>, which appears on the Add file source window.
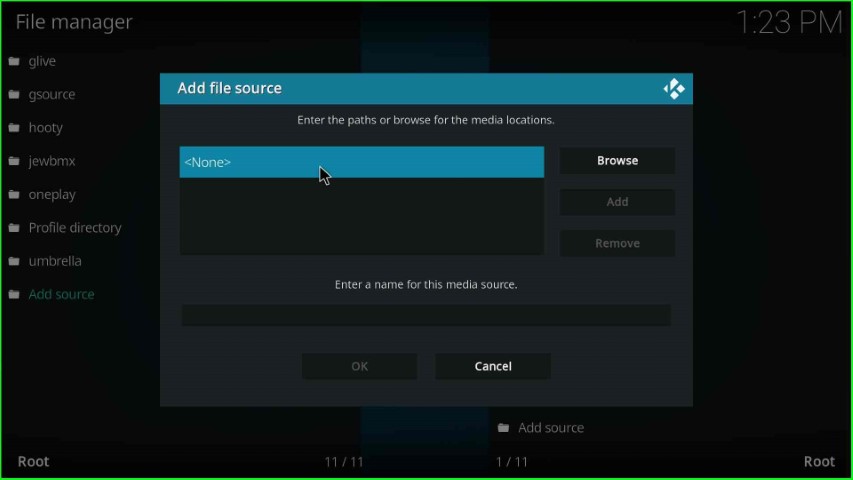
The page redirects you to the Enter Media URL page.
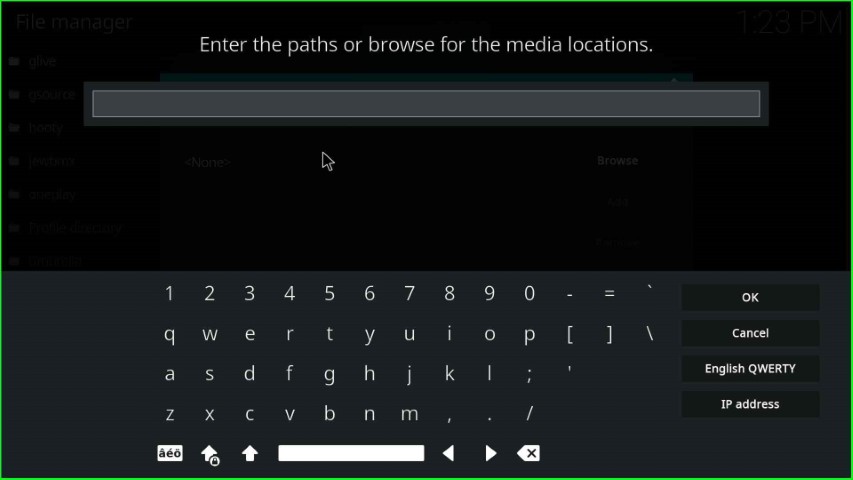
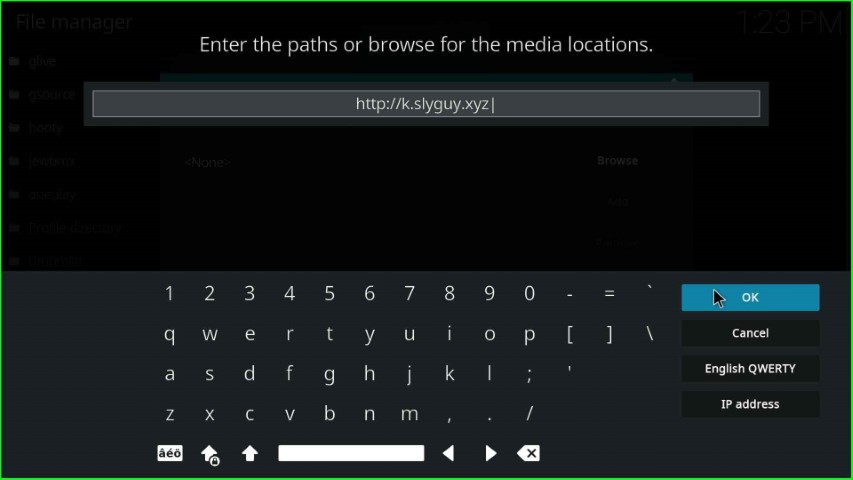
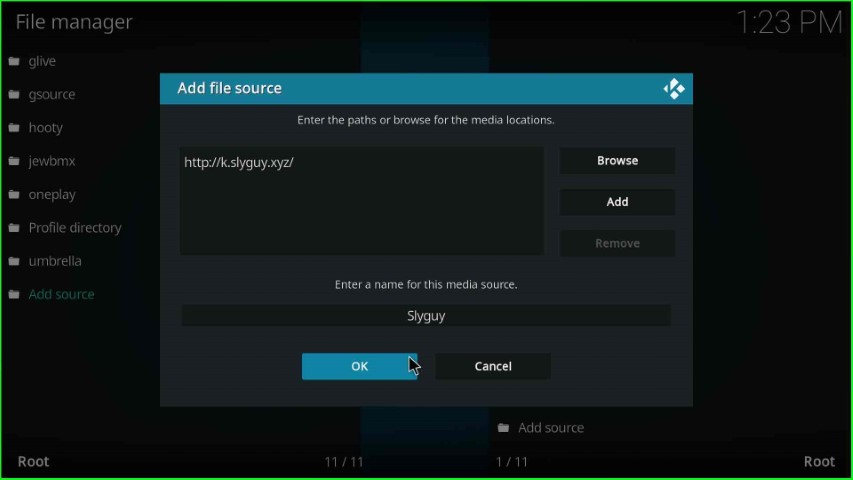
Now, enter the repository URL as http://k.slyguy.xyz and hit the OK button.
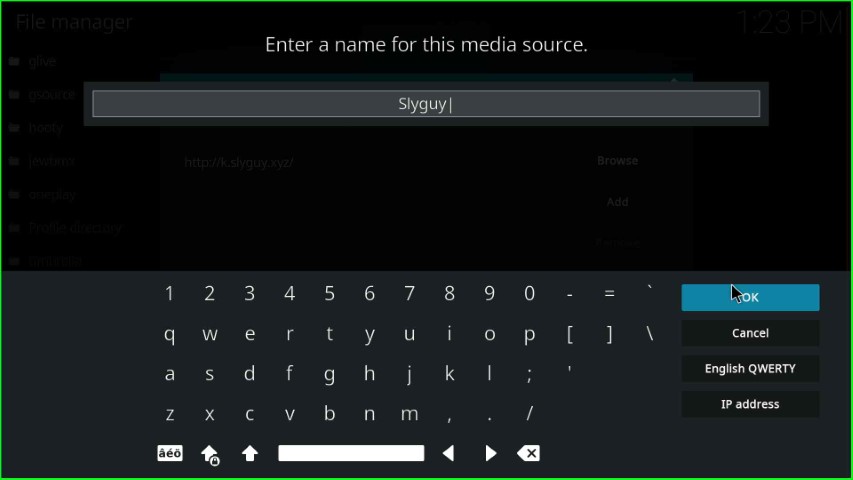
Thereafter, scroll down the cursor and select the media source text box.

Write the media source name, Slyguy, and press the OK button.
Check the repository URL and source name again, and click on the OK button.
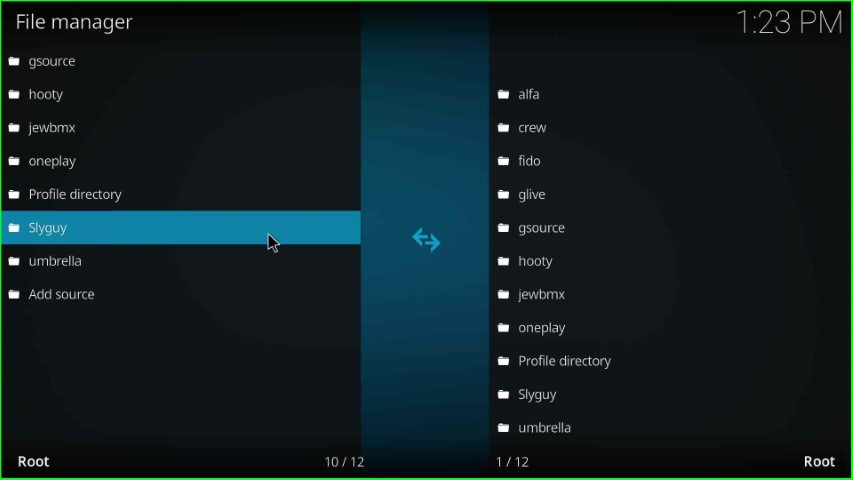
You can see the recently added Slyguy media source on the File manager page.
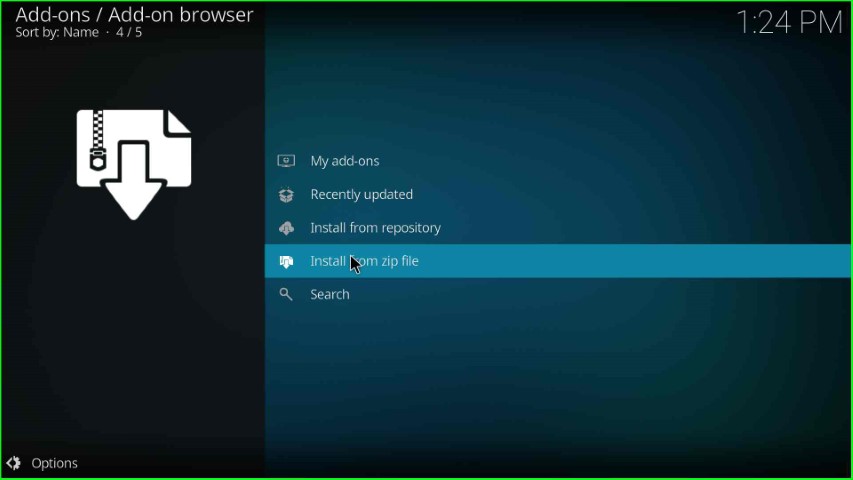
Install from Zip File
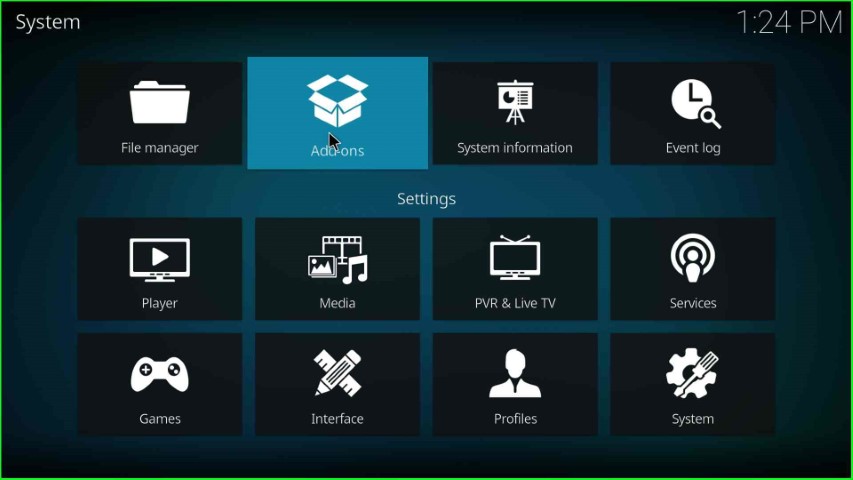
Go to the previous Kodi Settings screen and click on the Add-ons.
Choose Install from zip file tab.
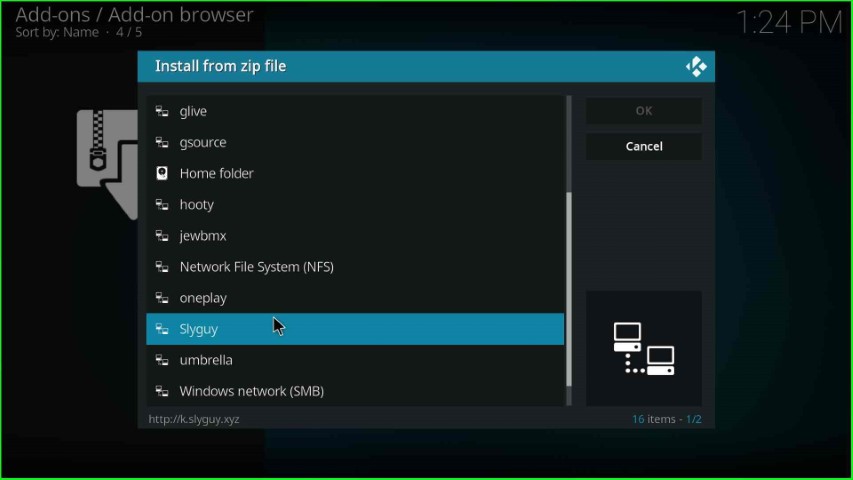
Click on the Slyguy media source.
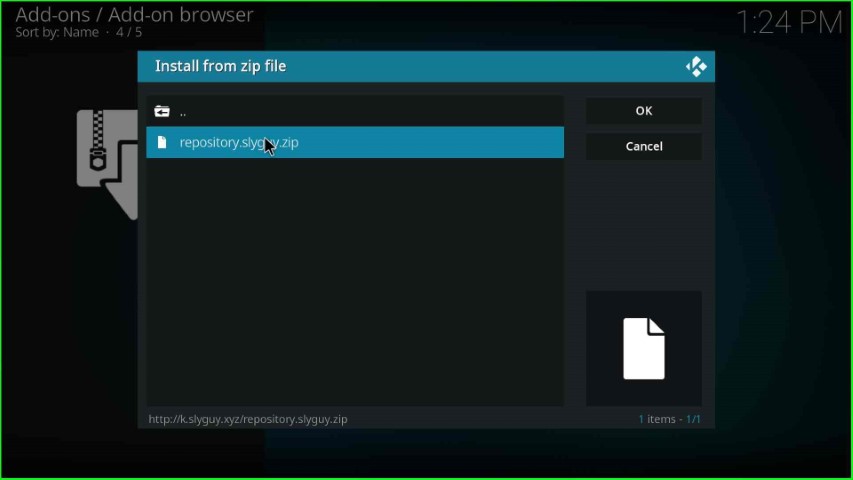
Select the repository.slyguy.zip file.
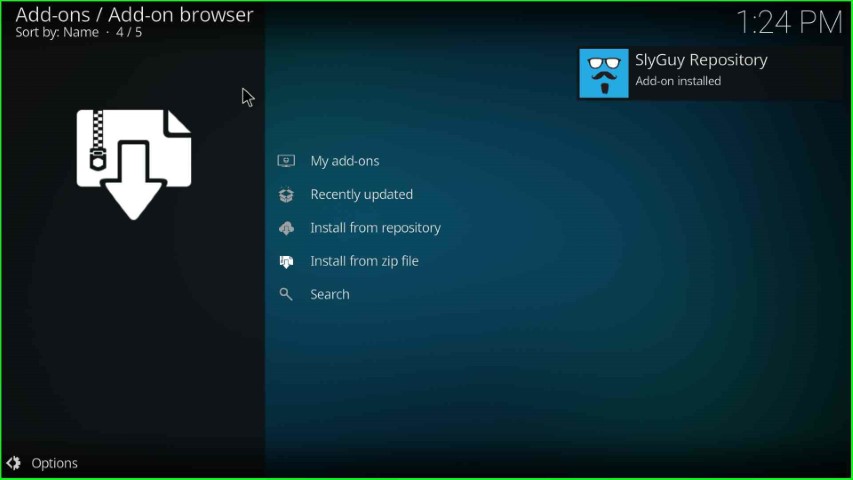
Wait until the SlyGuy Repository Add-on installation completes on the Add-on browser page.
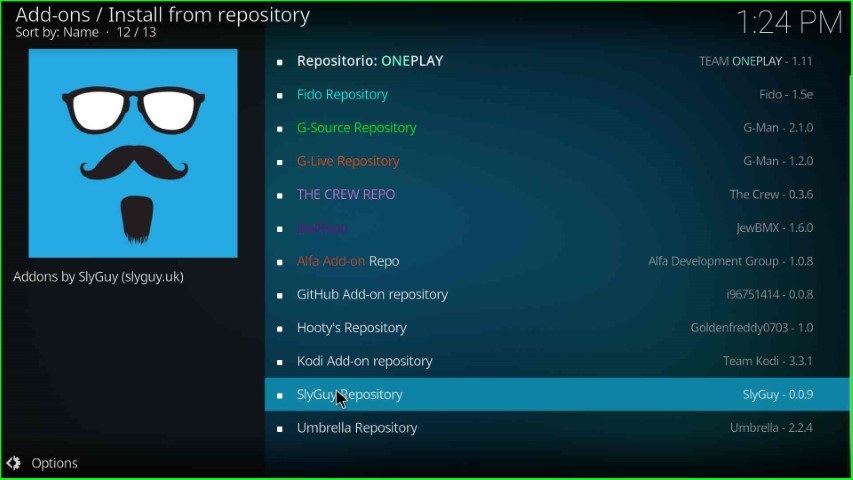
Install from Repository
After installation, select the next option, Install from repository.

Here, scroll down the cursor and select the SlyGuy Repository.
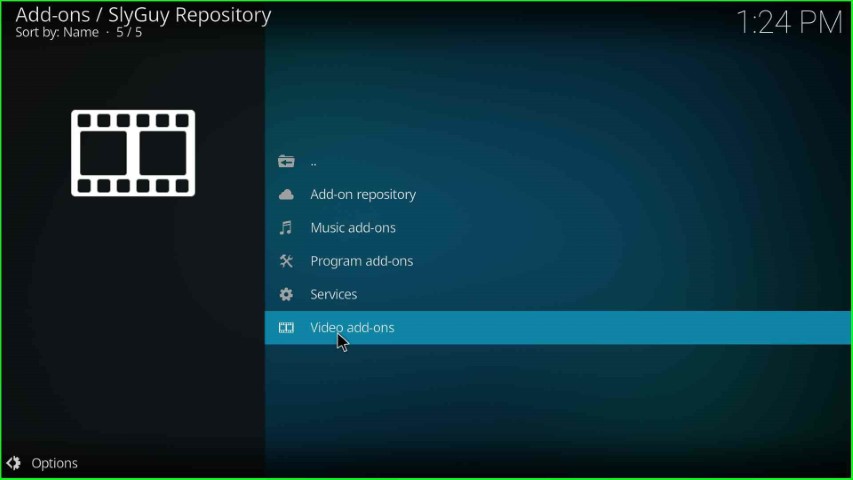
Install Samsung TV Plus Addon
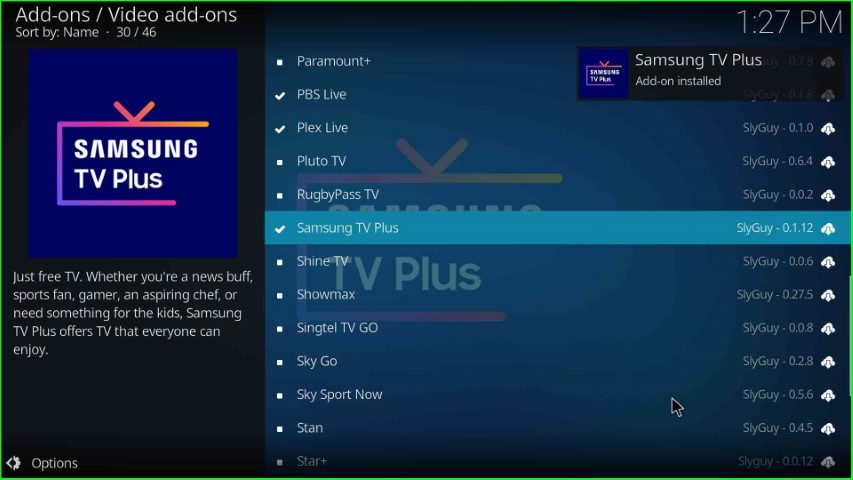
Hit the Video add-ons option.
The page has lots of Video add-ons from which just choose Samsung TV Plus.
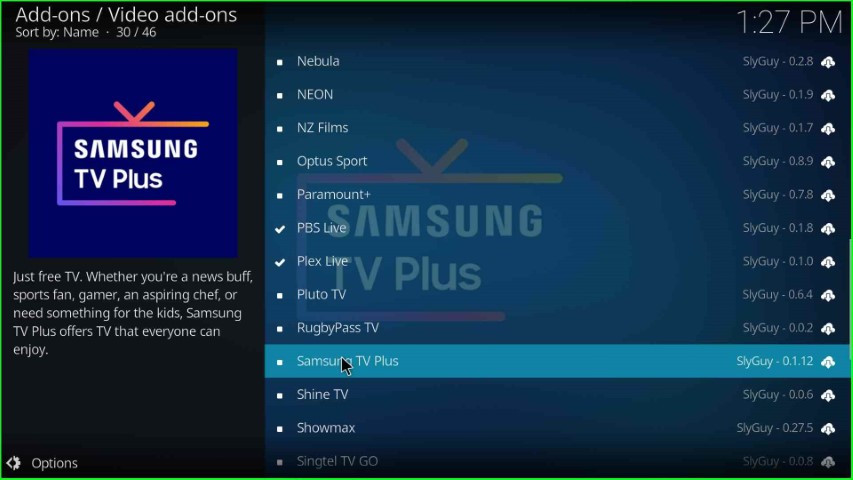
Press the Install button to start the Samsung TV Plus installation.
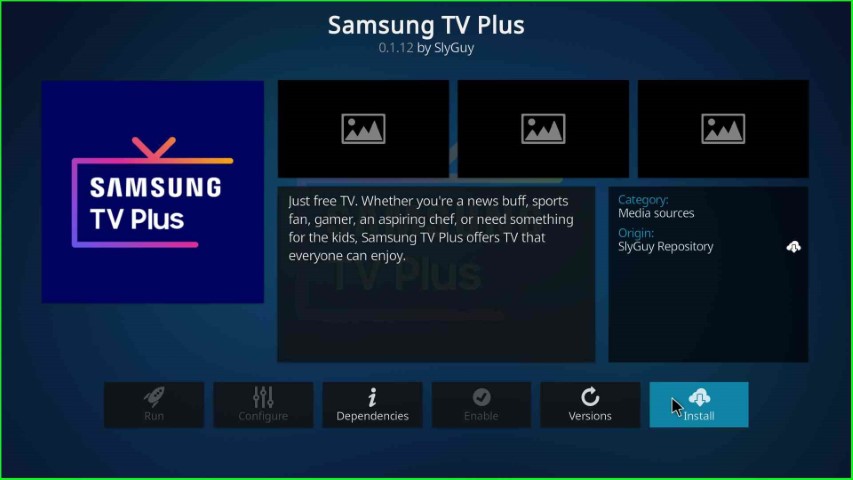
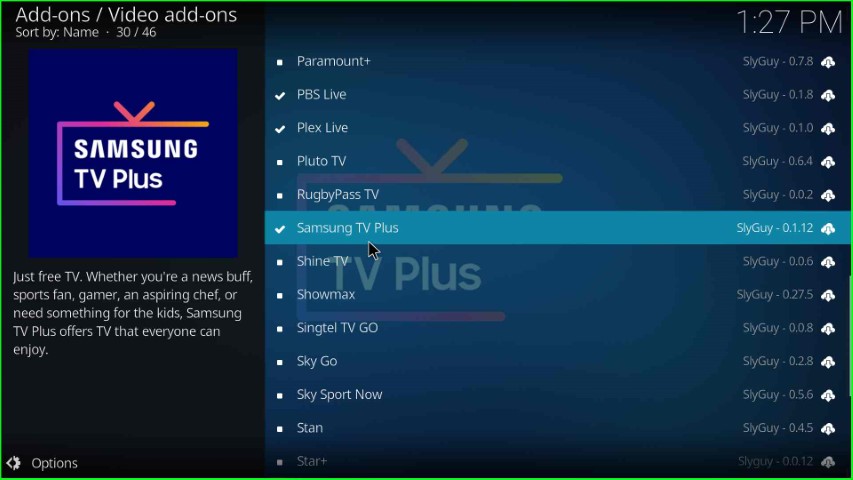
Wait for a few seconds until the Samsung TV Plus add-on installed message appears on the screen.
The Samsung TV Plus addon was installed successfully.
Launch Samsung TV Plus Addon
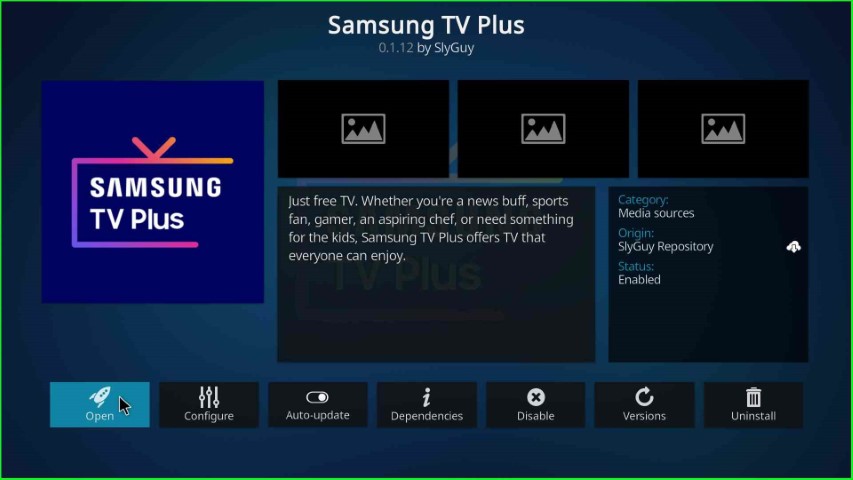
Now, tap on the installed Samsung TV Plus addon.
Click on the Open button.
The Samsung TV Plus screen appears with different navigation options, like Live TV and My Channels. Here, I choose Live TV.
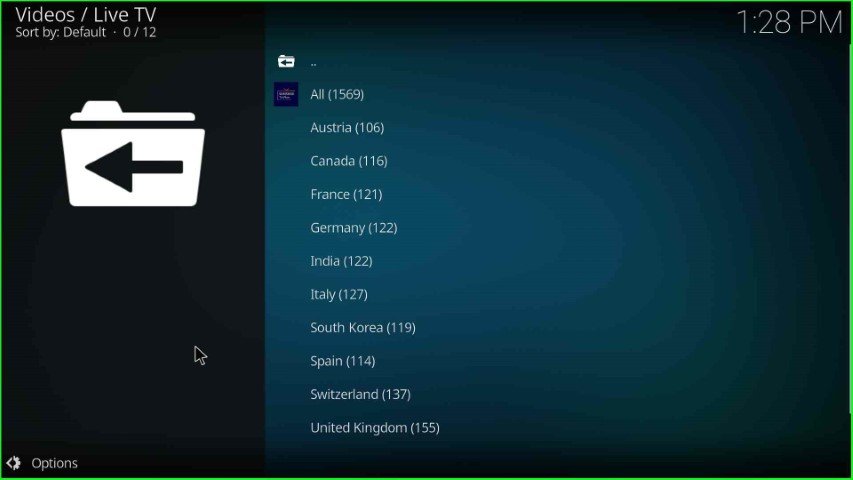
Now, select the country or region and enjoy the streaming without buffering.
Final Words
I hope through the post you can understand the process of installing Samsung TV addon on Kodi. So, go ahead with the installation steps and inform us if you have any doubts in the below comment section.
