This article will guide you on installing the Rising Tides Kodi add-on on Kodi 20.5 Nexus. This guide is helpful if you use Kodi on any device, viz. Firestick, (4K Max, Lite), Fire TV Cube, Raspberry Pi, iOS, macOS, tvOS, Google Chromecast, Android boxes, Windows, etc.
If you are a sports lover and love watching sports on Kodi, the Rising Tides Kodi add-on is for you. Rising Tides offers content from various popular and Live sports channels. Most of all, the add-on community is very active and regularly pushes updates.
You can stream live sports events, including Football and PPV events. In addition, Rising Tides enables you to stream content from channels viz—Real Madrid, NBA TV, Eurosports, NHL Network, etc.
Installation Steps
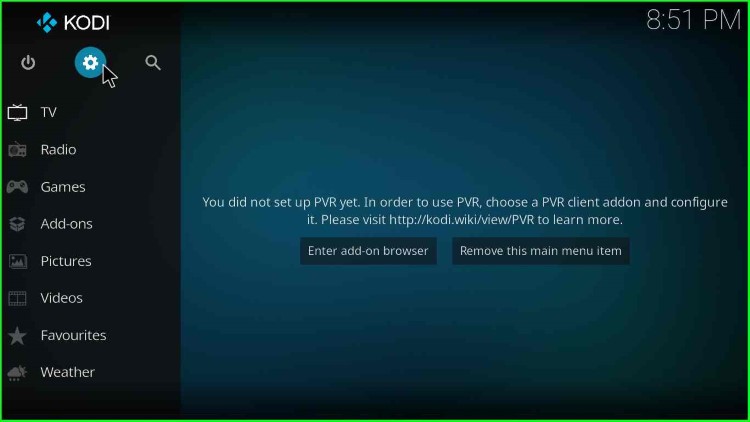
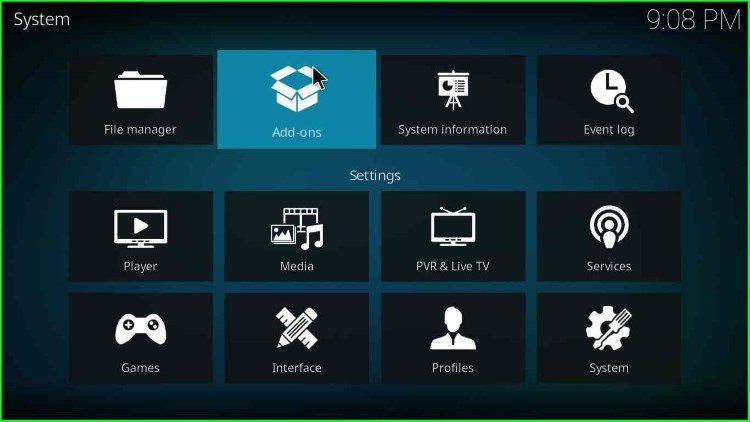
1. Open “Settings” on Kodi.
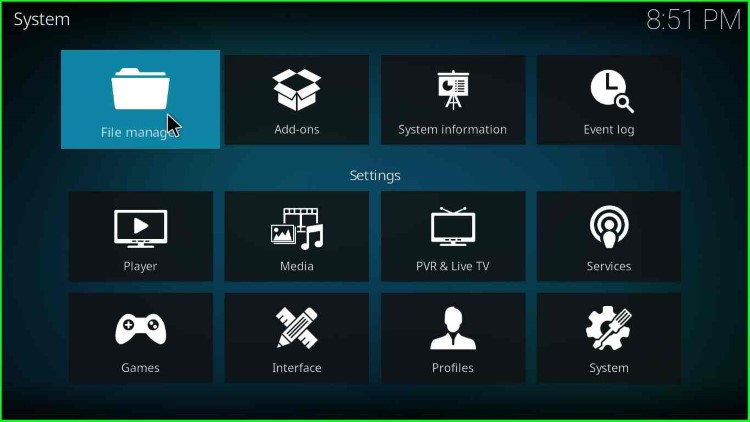
2. After that, go to the “System“.
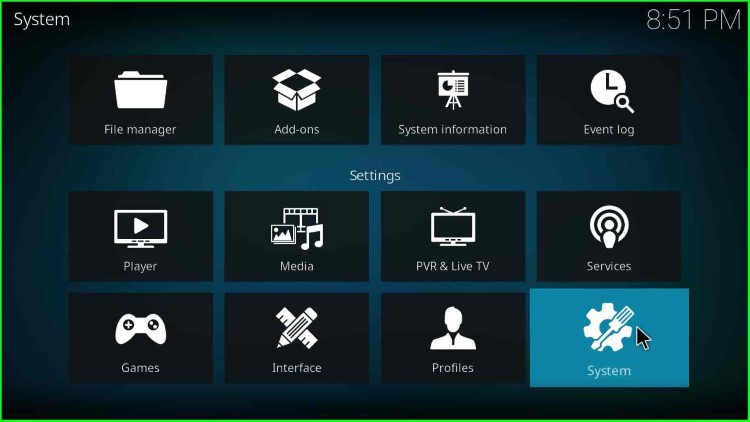
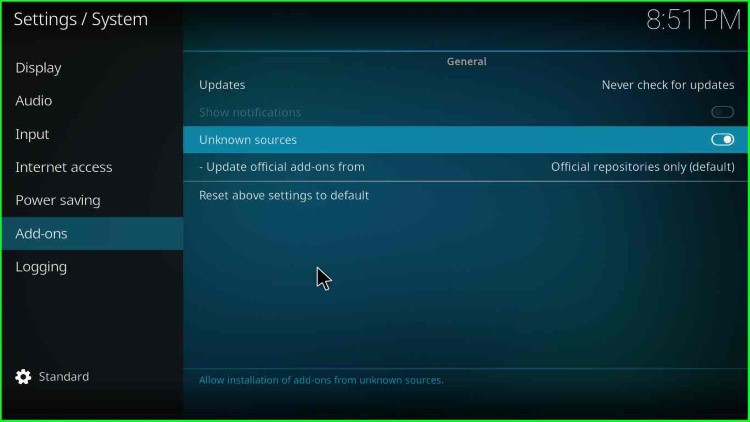
3. From the left pane, select the “Add-ons” option.
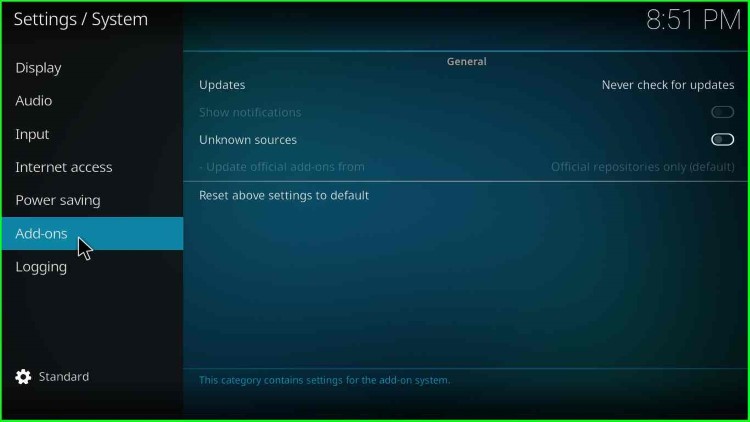
4. Enable the “Unknown Sources” radio button.

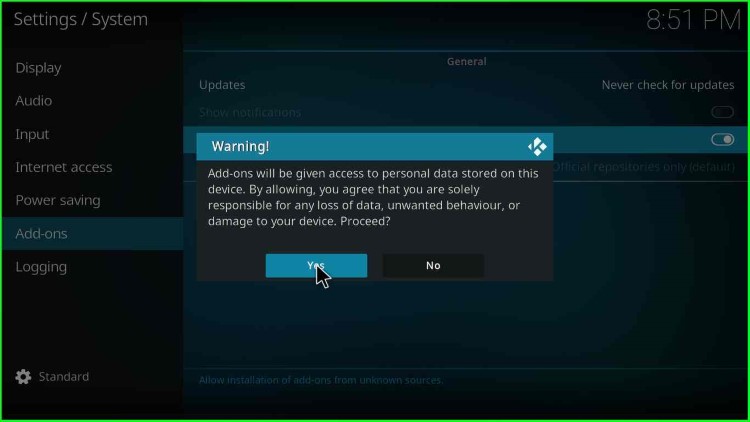
5. Click on the “Yes“ button when a warning popup appears.
6. Then, the dialogue box will close.
7. Navigate and click on the “File Manager” option.
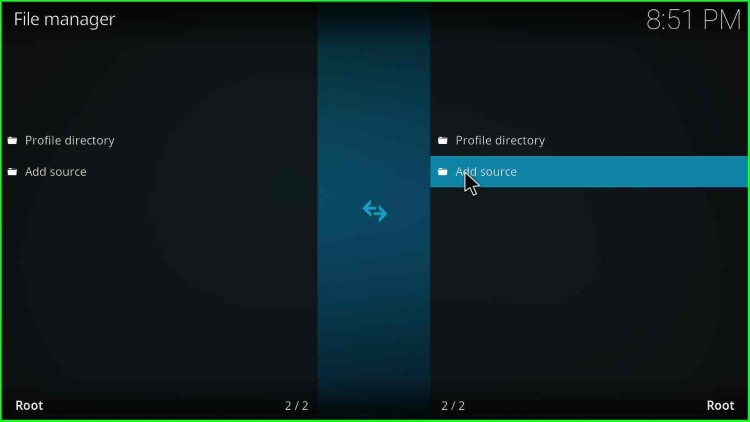
Add Installation Source
8. Click on the “Add source” button.
9. Choose “<None>” button.
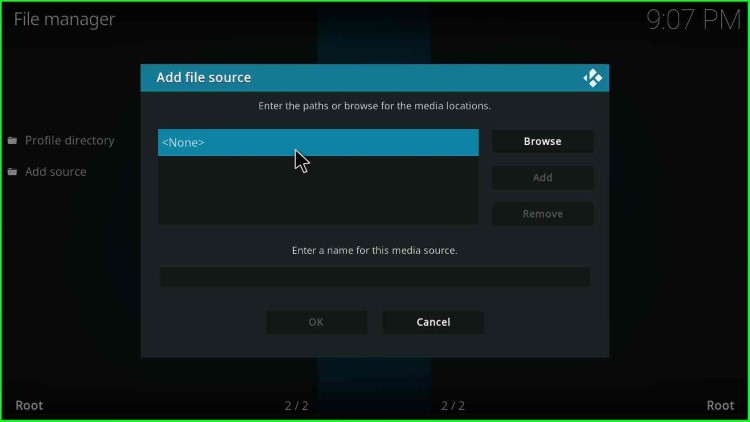
10. A text box appears asking to enter the “media location for the Rising Tides” add-on.
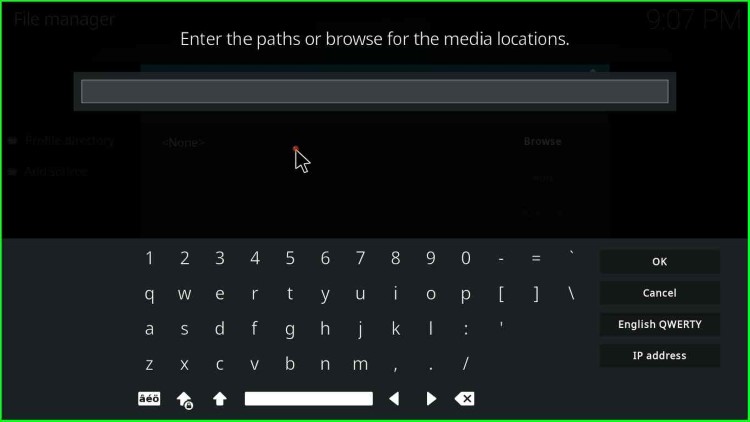
11. Enter the media location as “https://mullafabz.xyz/Repository/K19“.

12. Then, move down and click on the “media source” field.
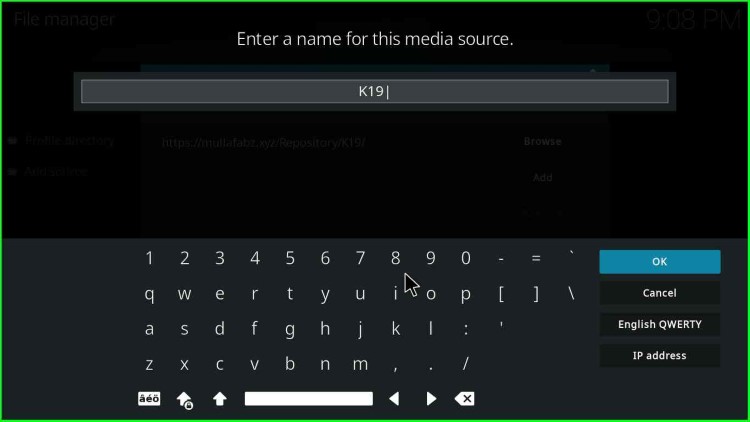
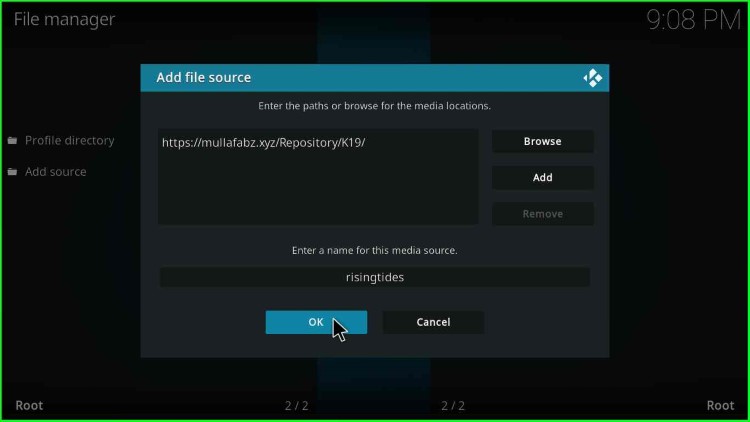
13. You will have a pre-typed media source name as “K19“; delete it and name the media source name as “risingtides“. After that, click the “OK“ button.

14. Again, click on the “OK“ button.
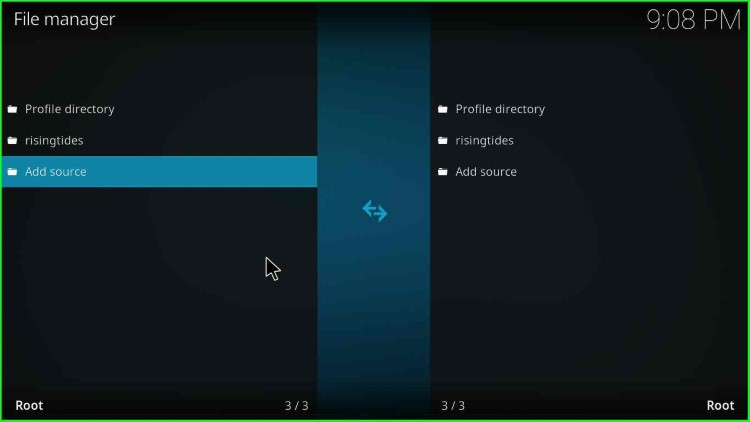
15. The dialogue box will close.
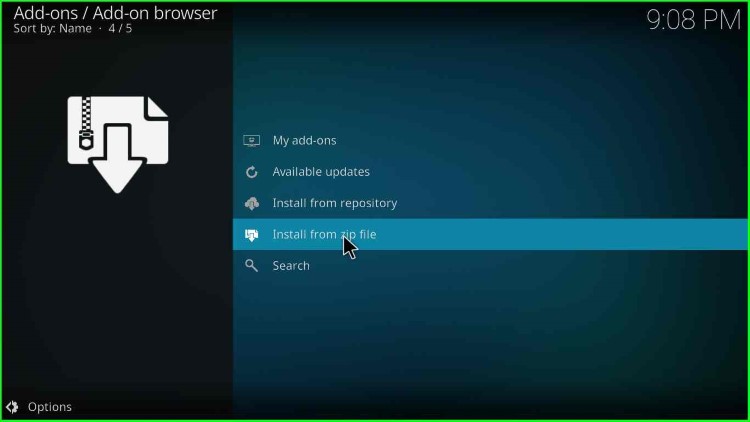
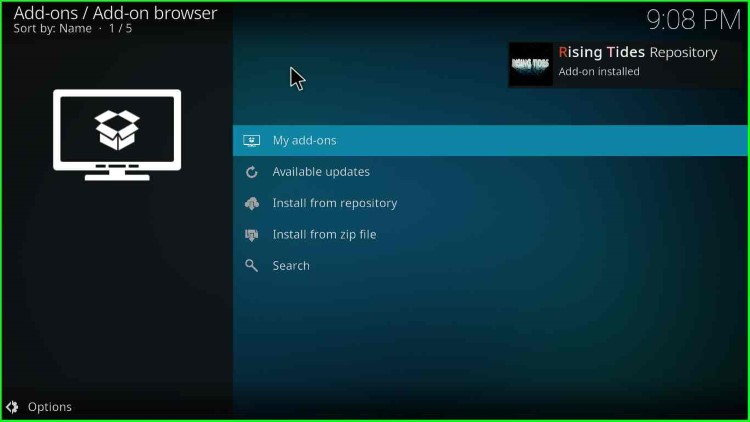
16. In the next step, click on the “Add-ons” button.
Install From Zip File
17. Click on “Install from zip file“.
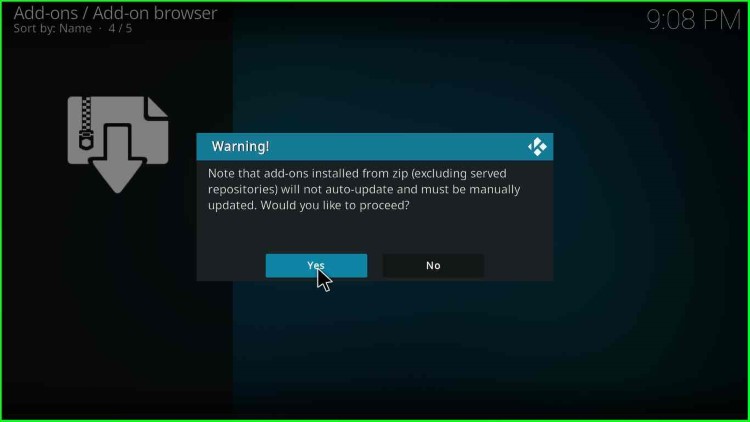
18. A warning popup for the update appears; click the “Yes” button.
19. You will have many options depending on your device. So, here click on “risingtides“.

20. In the next step, click on “repository.Rising.Tides.zip“.
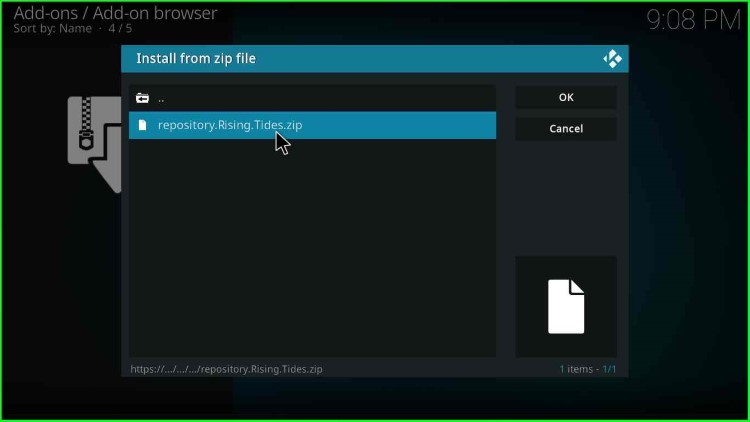
21. Wait for some time, and you will get a message “Rising Tides Repository Add-on installed“.
Rising Tides Install From Repository
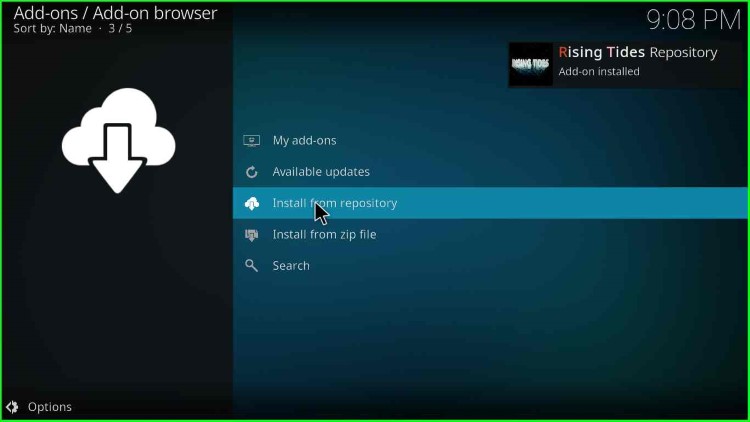
22. Next, click on the “Install from repository” option.
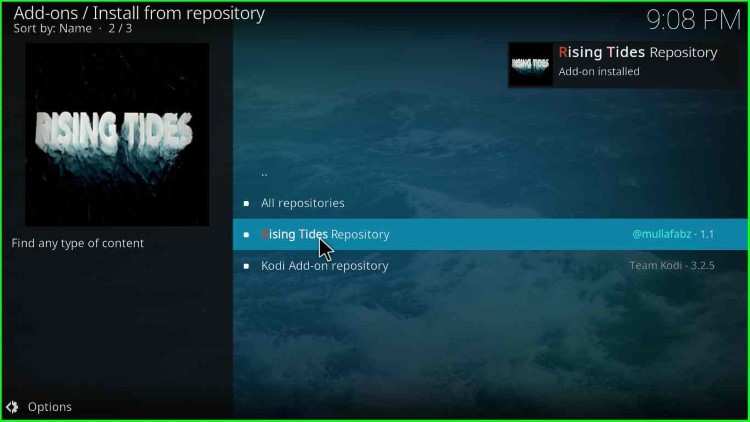
23. Moving ahead in the Rising Tides Kodi add-on installation steps, click on the “Rising Tides Repository” option.
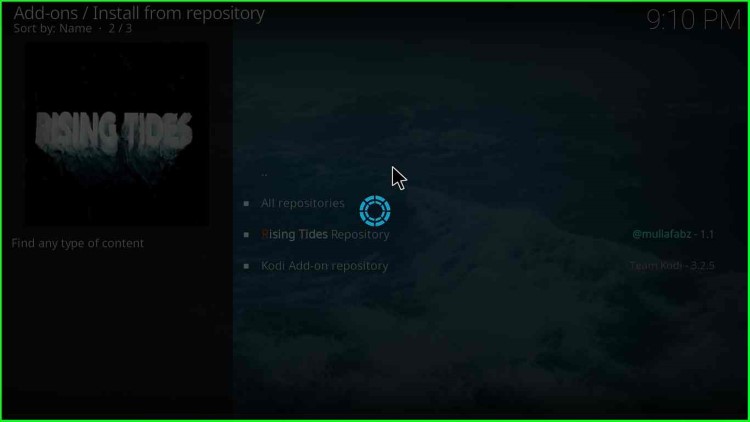
24. Once you click on the option “Rising Tides Repository“, it may take some time to load the options.
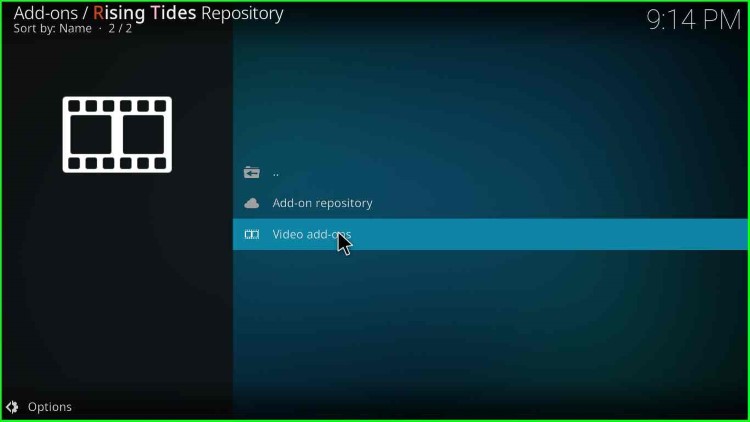
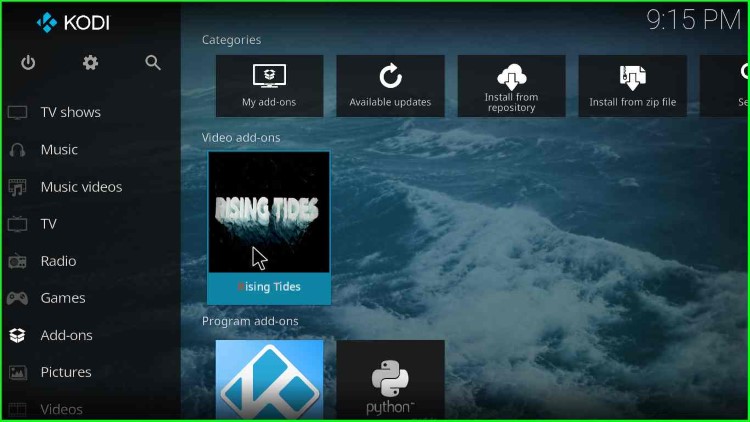
25. Next, click on the “Video add-ons” option.
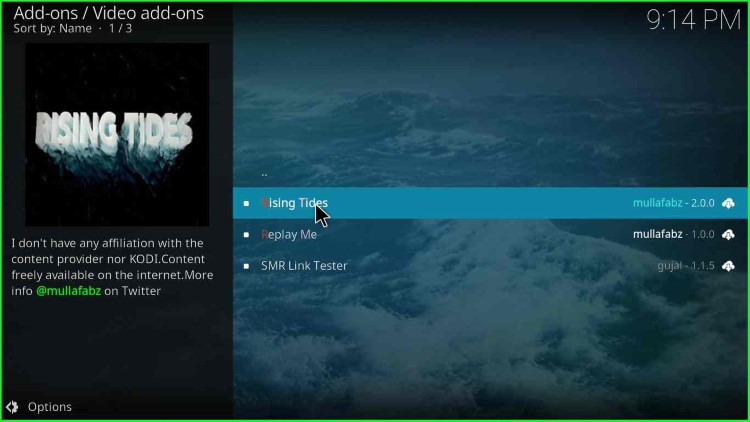
26. After that, select the option “Rising Tides“.
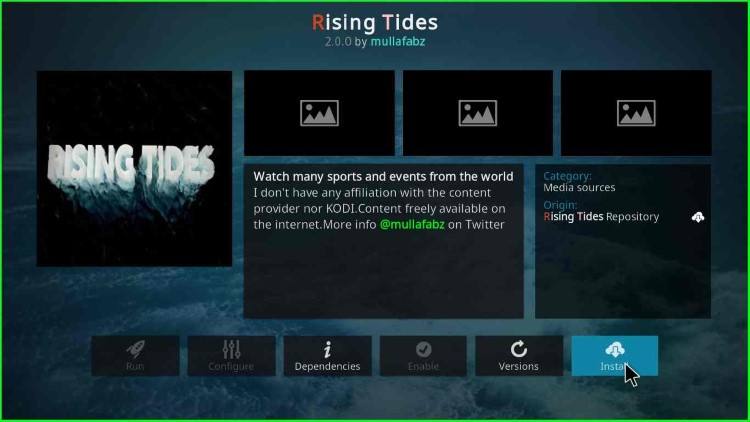
27. On the bottom-right corner, click on the “Install” button.
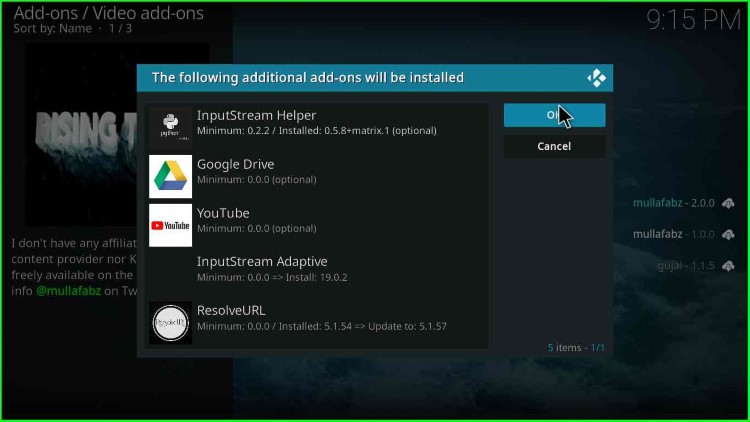
28. A popup will appear asking to install additional add-ons; click on the “OK” button.
29. After some time, you will get a message “Rising Tides Add-on installed“.
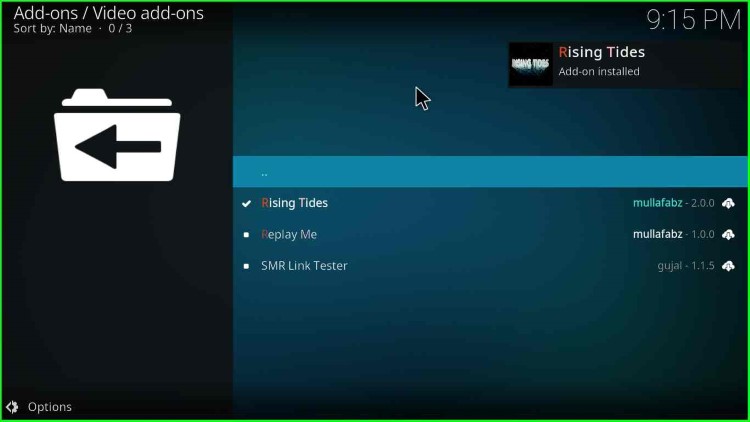
30. Now, the Rising Tides add-on installation is complete. Just go to Kodi’s home screen and start streaming on the addon.
FAQs
Yes, Kodi is a completely legal software. However, streaming copyrighted content on any Build or addon without the consent of the owner is illegal.
Some popular sports events on Rising Tides are football, basketball, baseball, rugby, boxing, etc. There are even more sports categories you can stream.
Sometimes, when you do not enter the repository link correctly, it will not work. So, check the spelling and correct repository URL.
Some Sports add-ons and Builds like cCloud TV, ESPN3, and Sports101 are the close competitors of the Rising Tides add-on because these add-ons offer a huge number of sports events replays.
