In this post, we will tell you how to install the Purely Wrestling addon on Kodi. You can safely install the addon on most streaming devices, including Android TV boxes, iOS, Firestick (4K, Max, Lite), Mac, Android smartphones, and PC.
Purely Wrestling is the Kodi sports addon that provides everything about wrestling matches. Using it, you can enjoy live wrestling, watch replays, and see big archives of older content.
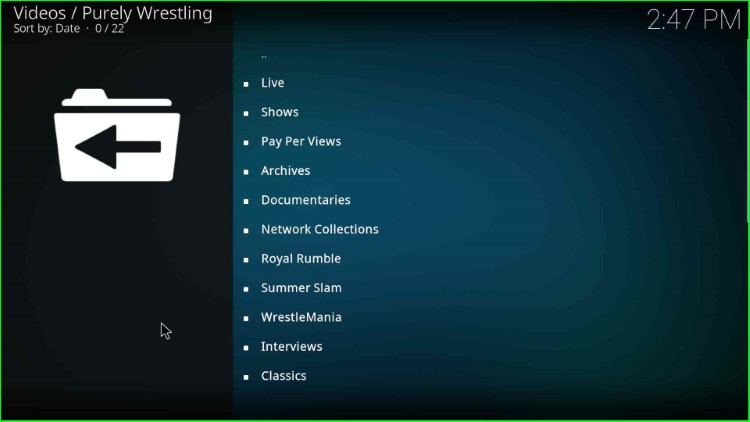
Here, you can find different sections, including Pay Per Views, Summer Slam, Documentaries, Wrestle-Mania, Royal Rumble, Classics, Network Collections, Archives, etc.
However, the addon is available on many third-party repositories; here we will install it using the Crew Wizard repository.
Installation Steps
Enable Unknown Sources
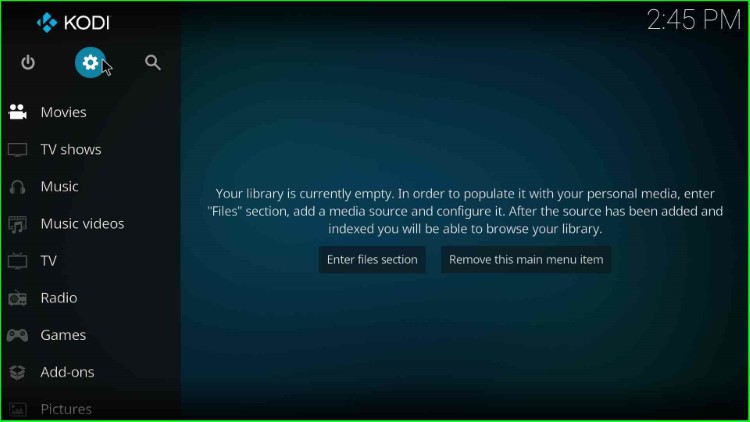
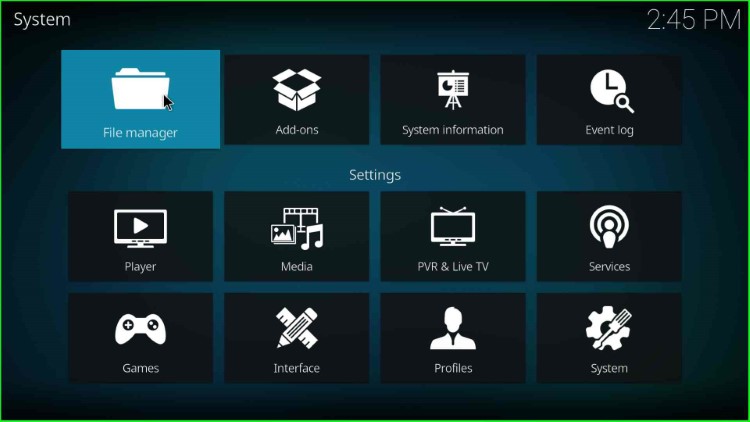
Open your Kodi app and tap on the Settings key.
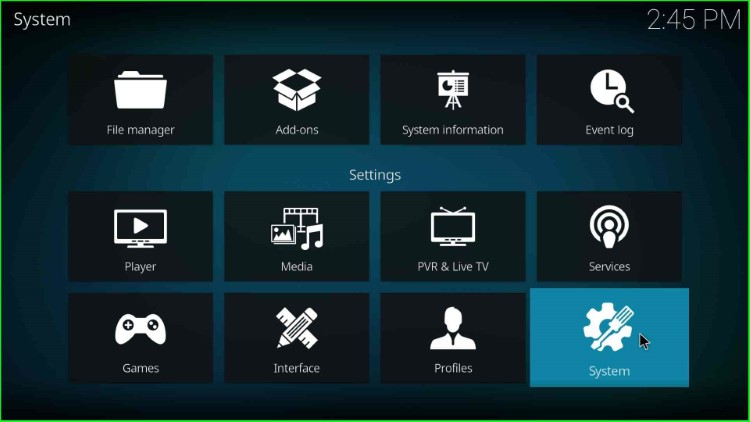
Here, click on the System tab.
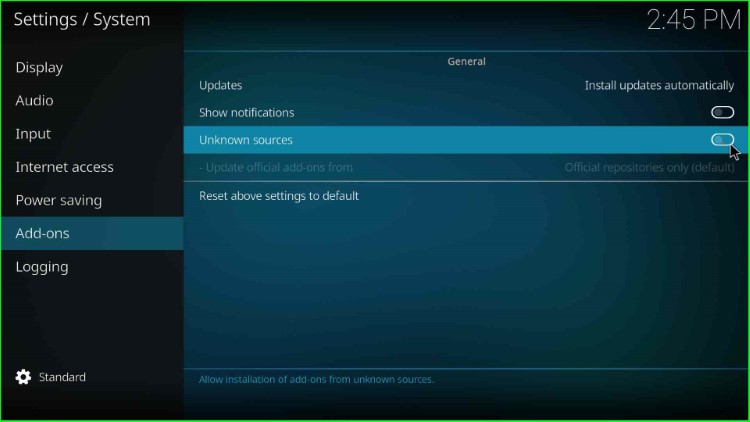
Find the Addons option and slide on the Unknown Sources button.
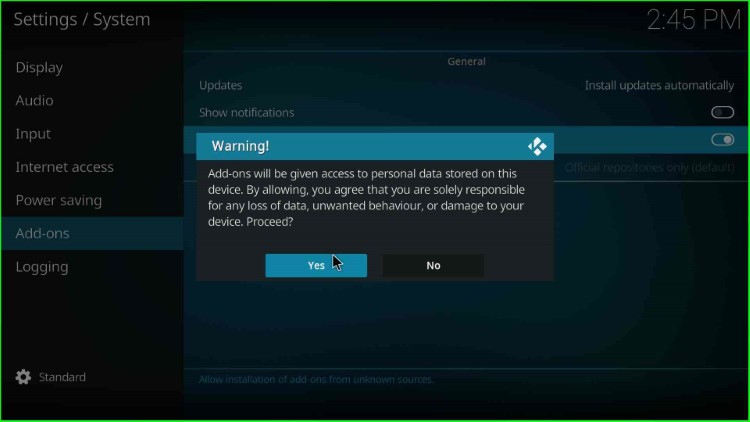
Click Yes to agree with the warning sign.
Add Media Source and Repository
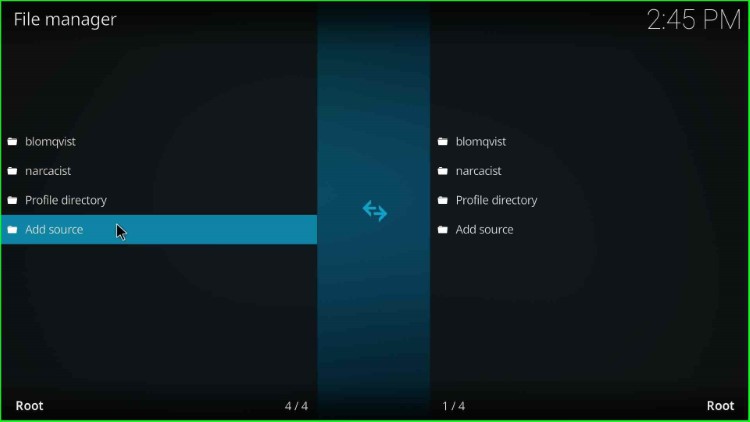
Go back to the Settings window and hit File Manager.
Here, you can see the Add source tab; click on it.
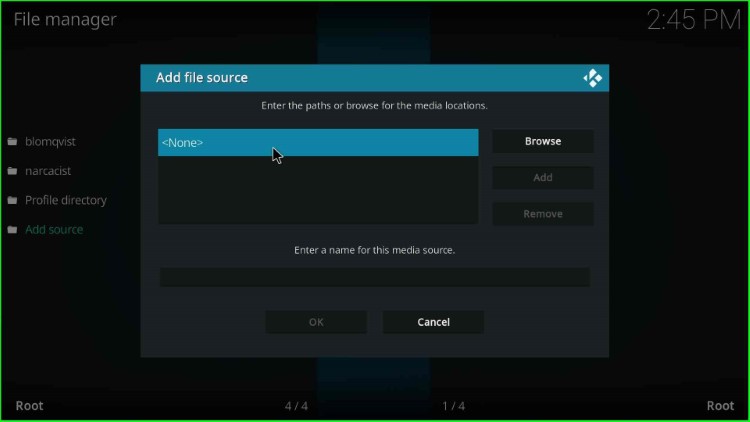
Select <None> to add the path for the repository URL.
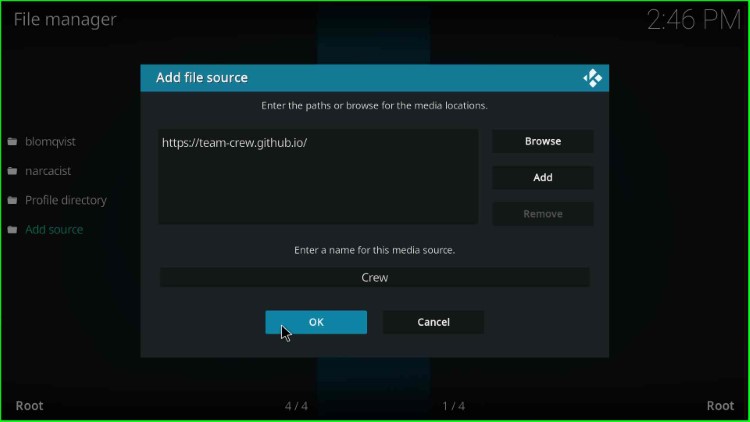
Enter the URL path using a keyboard as https://team-crew.github.io and hit the OK button.

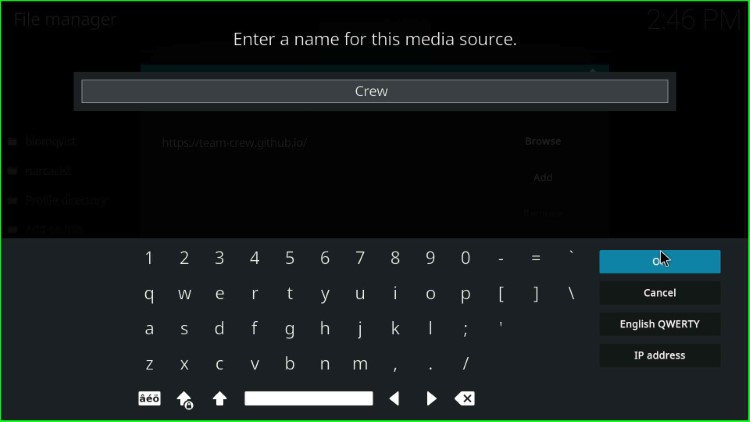
Go to the below section and enter a name for the media source.
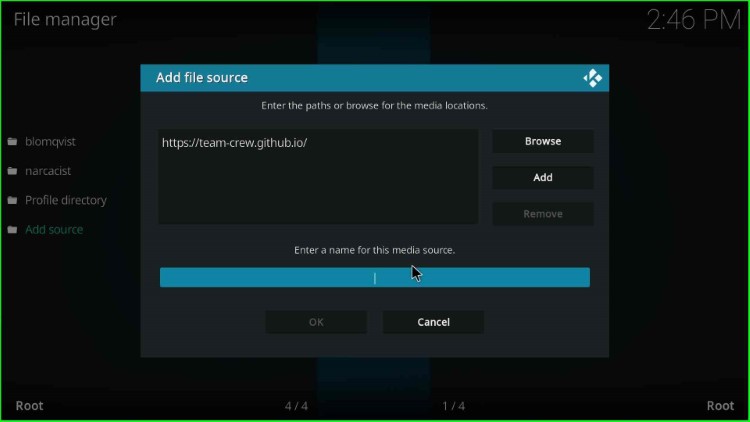
Give any of the source names for the repository, like Crew, and press the OK key.
Check the entries again and click on the OK button.
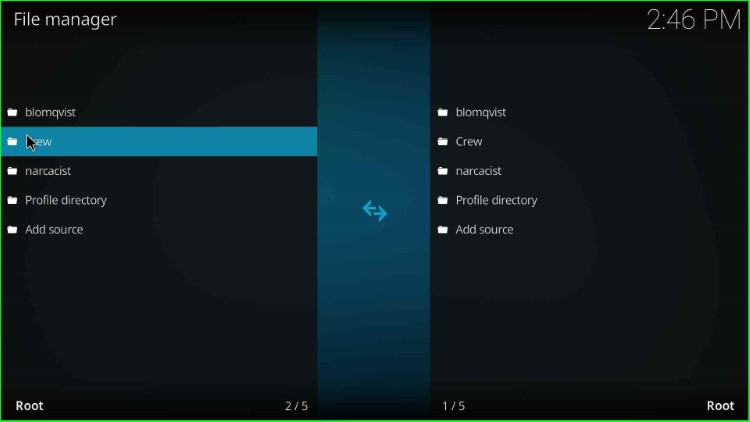
On the File Manager screen, you can look for the media source file Crew.
Install from Zip File
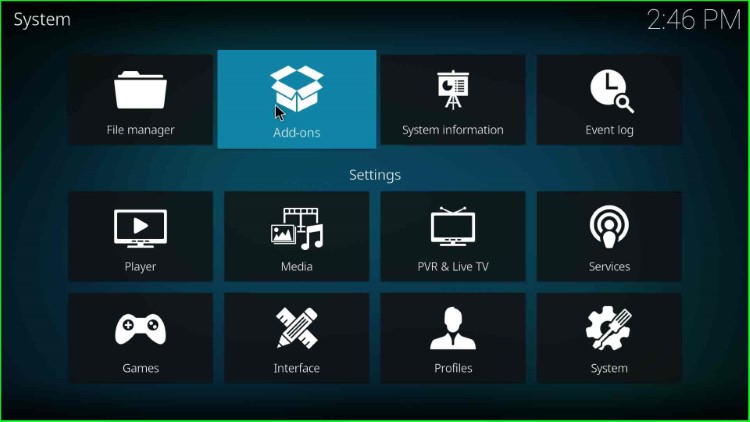
Navigate to the previous Kodi Settings page and select the Add-ons icon.
Next, tap on the Install from zip file.
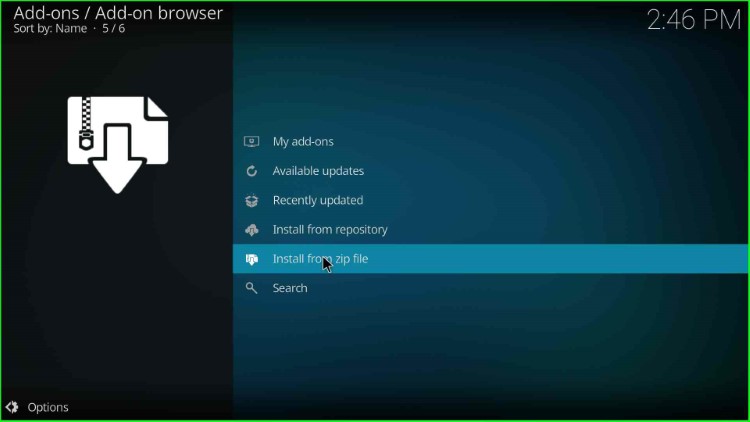
Choose the source crew.
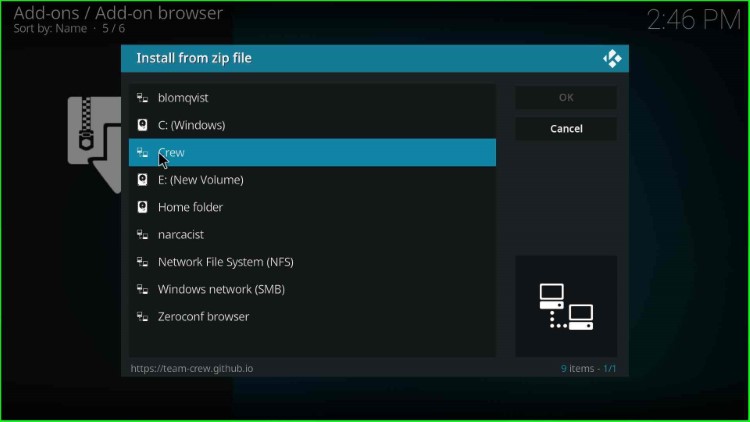
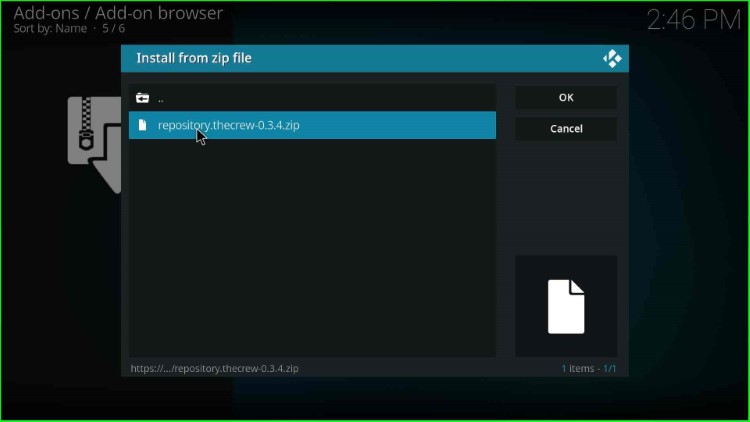
Select the repository.thecrew.zip file.
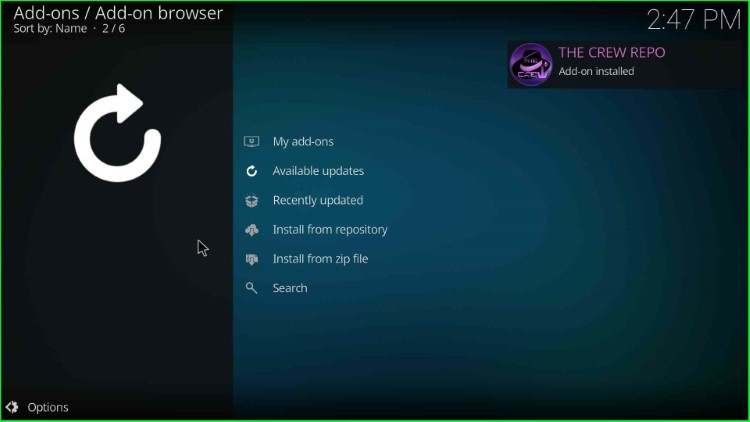
Wait until the Crew Repo Addon installed successfully on the page.
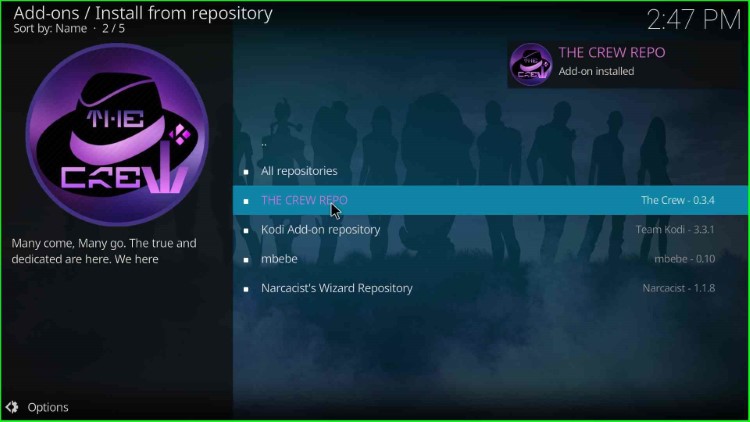
Install from Repository
Move ahead and choose the next option Install from Repository.

Here, the page shows a list of different repositories from which, select the Crew Repo.
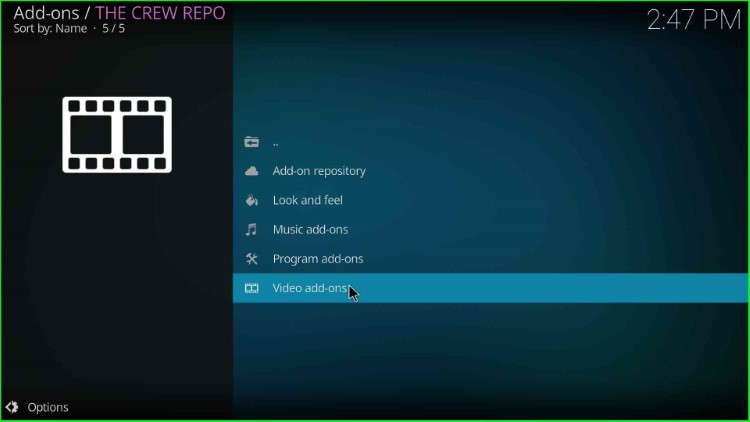
Install Purely Wrestling Addon
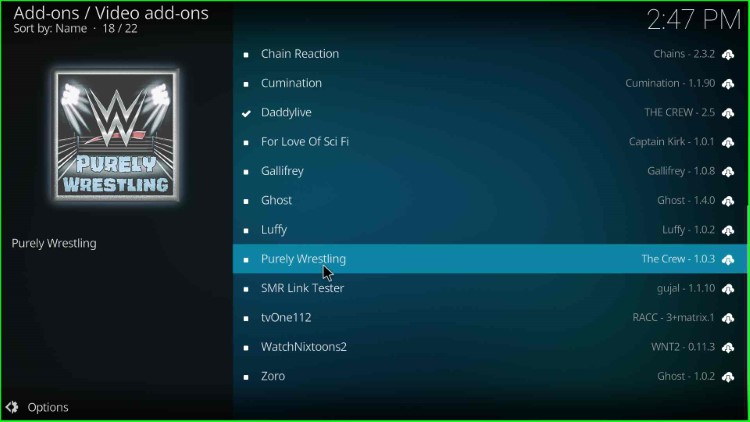
Now, open Video add-ons.
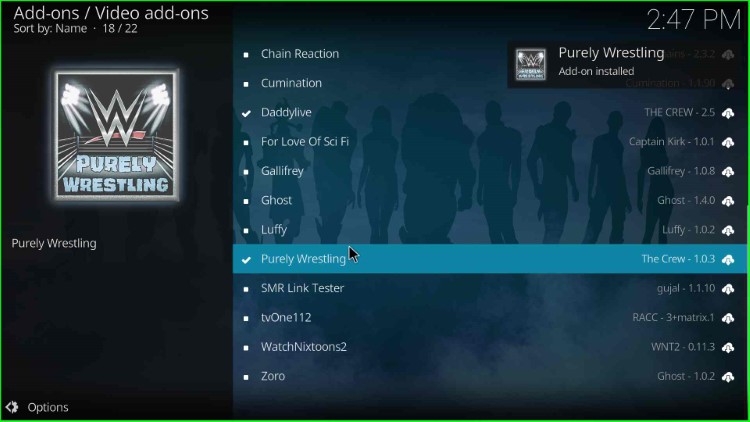
Choose the Purely Wrestling addon from the available addons.
Click on the Install button to install the Purely Wrestling addon on your Firestick.
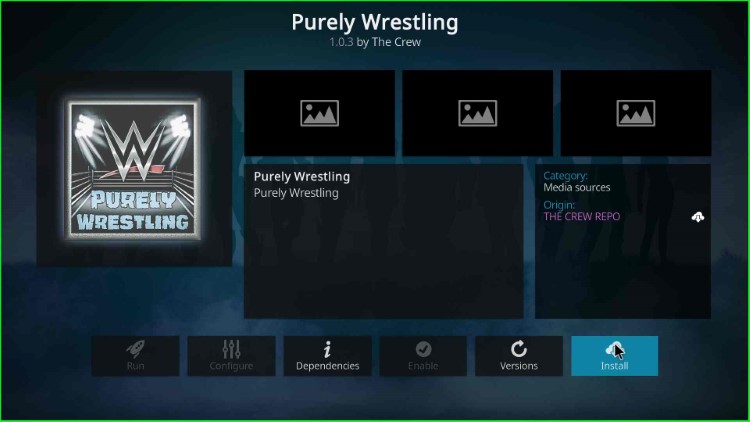
Click OK appears on the prompt screen.
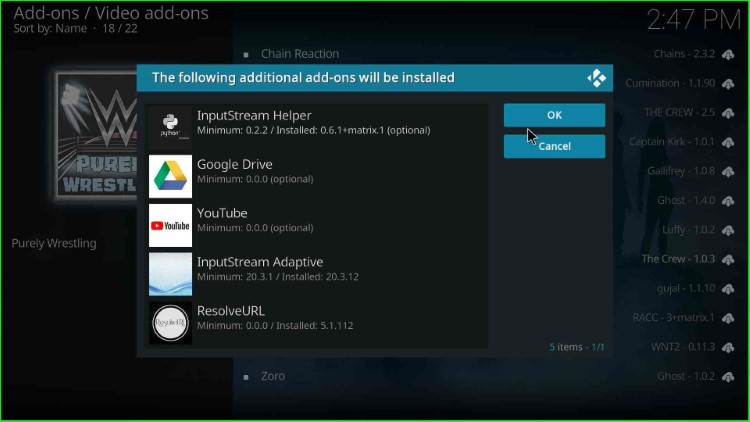
Wait for the installation process of the Purely Wrestling addon.
Launch Purely Wrestling Addon
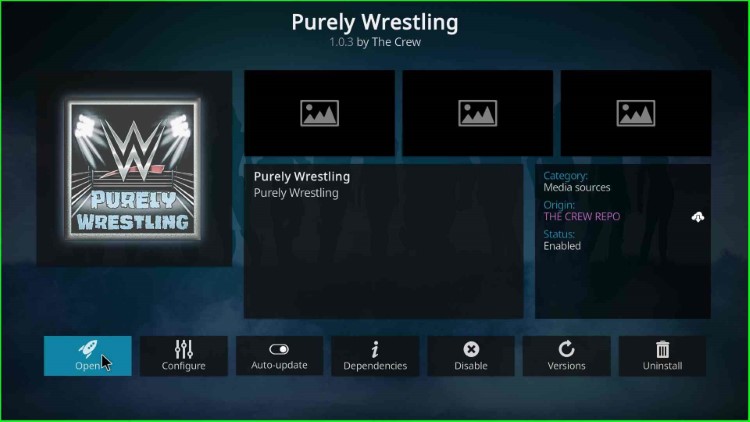
After installation, open the Purely Wrestling addon.
The Purely Wrestling addon screen appears with lots of streaming sections.
Final Words
Overall, Purely Wrestling is the best addon to watch live wrestling sports matches. Using these steps, you can easily install it on Kodi Windows as well as other supported devices. So, try the above installation process and share your experience.
