Home » Kodi » Klix Free Kodi Build – Install on Firestick (Kodi 20 Nexus)

Klix Free Kodi Build – Install on Firestick (Kodi 20 Nexus)

In this post, I will show you how to install Klix Free Kodi Build on Fire TV devices like Firestick, Firestick 4K, Firestick Max, etc. These steps also work for Windows, Android, Nvidia Shield, Raspberry Pi, Roku, Chromecast, iOS, etc.

Klix Free Kodi Build is a great Build from the 709 Repository that offers many free streaming links to stream content from different streaming categories. These categories belong to TV Shows, Movies, Live TV, Sports, etc.

The best part is that you need not integrate Real Debrid from HD links. Some of its top-quality add-ons are The Crew, Scrubs v2, Homelander, The Promise, Ghost, and Gratis.

Attention! Before You Move Ahead.

I want to warn you that whatever you stream online is visible to the Government, ISPs, and Third Parties. Personally, I dislike someone snooping on my online activities.

Currently, your IP address 34.228.52.21 is visible to everyone.

Hence, I suggest using the most secure VPN, i.e. IPVanish VPN which has military-grade encryption. Also, IPVanish enables buffering-free streaming, hides your IP address and location, and bypasses geo-restrictions and bandwidth throttling.

Black Friday Offer: Save 81%: Only $2.49/Month

Note:- Streaming copyrighted content without a license is illegal and may land you in legal trouble. VPNHacks.com does not encourage piracy in any way.

Here are the steps to install Klix Free Kodi Build on Kodi 20 Nexus:

Installation Steps

Step 1 – Enable Unknown sources

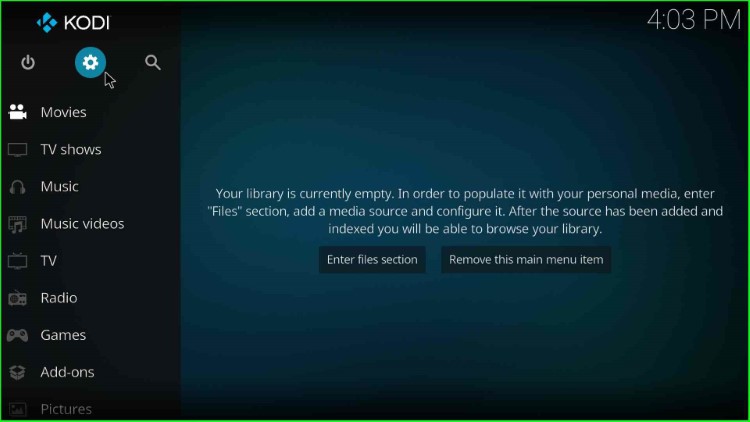
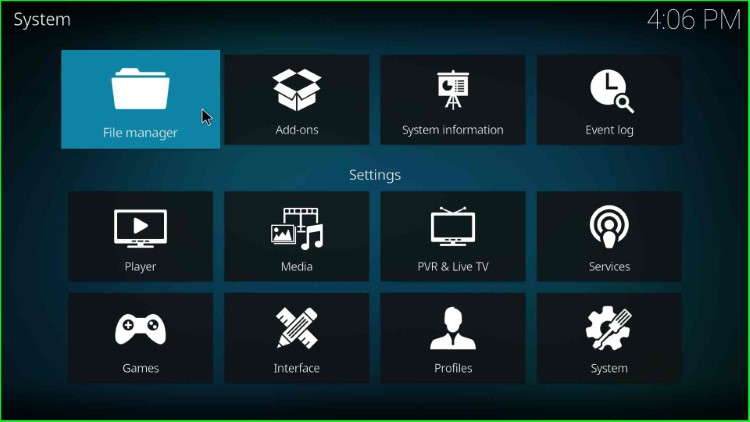
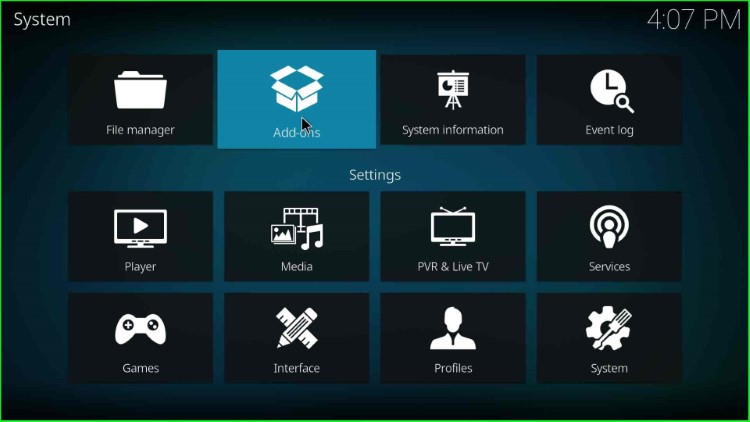
First, tap on the icon, “Settings, available on the Kodi Home screen.

Go to Settings

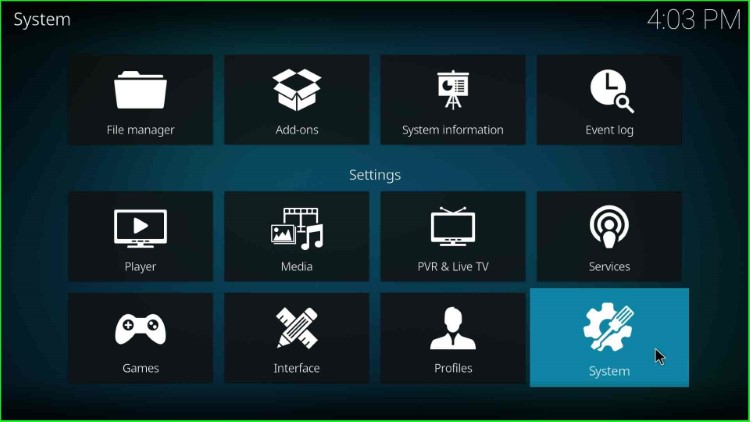
Navigate to the System tab.

Click on System

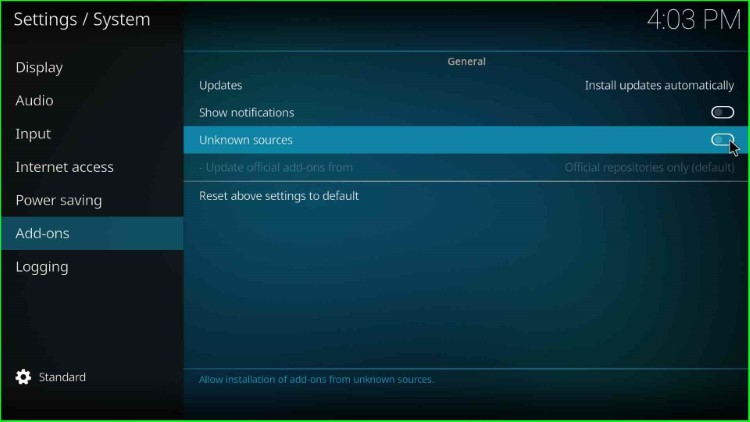
Open the Addons tab and turn on the Unknown Sources mode.

Tap on Unknown sources

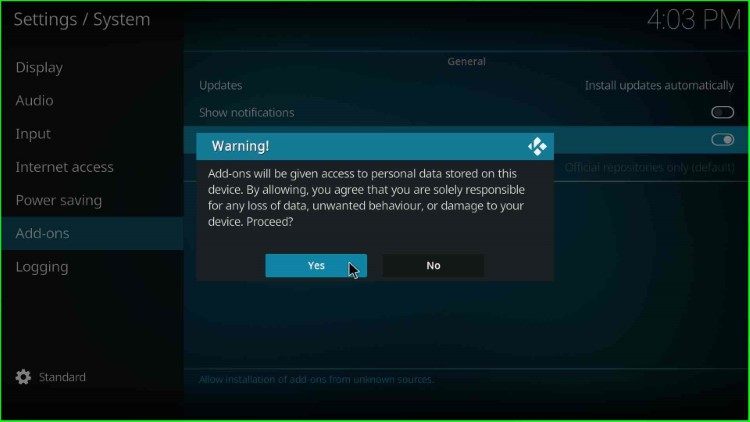
Tap on Yes to allow the installation of an unknown Build.

Tap on Yes

Step 2 – Add Media Source and Repository

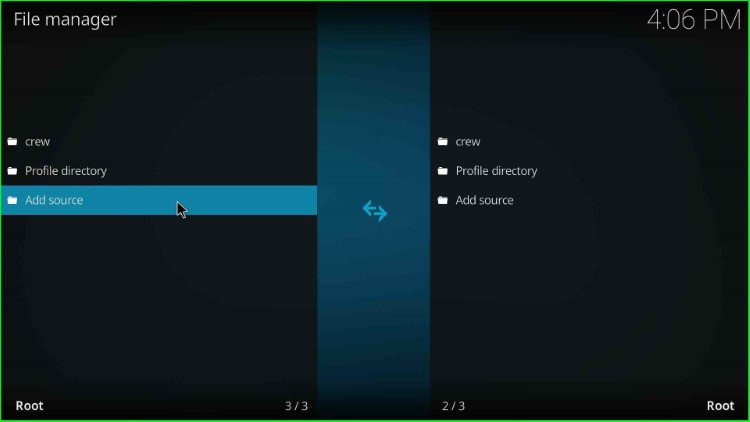
Go to the Kodi Settings page and hit the File Manager icon.

Open File manager

Double-click the Add source tab.

Click on Add source

Tap <None> to enter the new path for the repository URL.

Tap on None

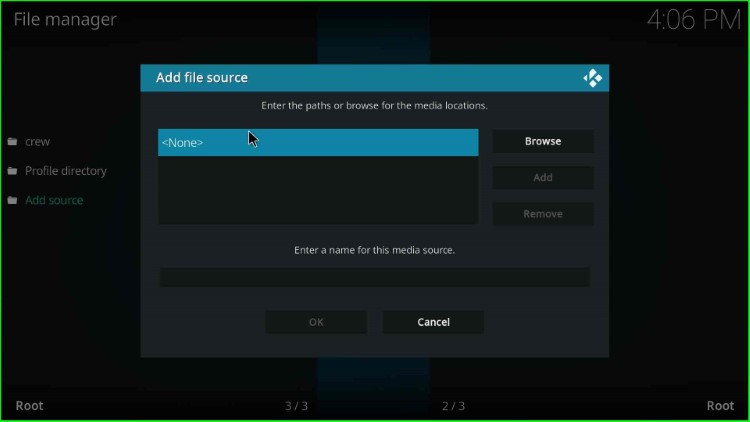
On this page, you need to enter the path or browse for the media locations.

Click on Enter the path for media location

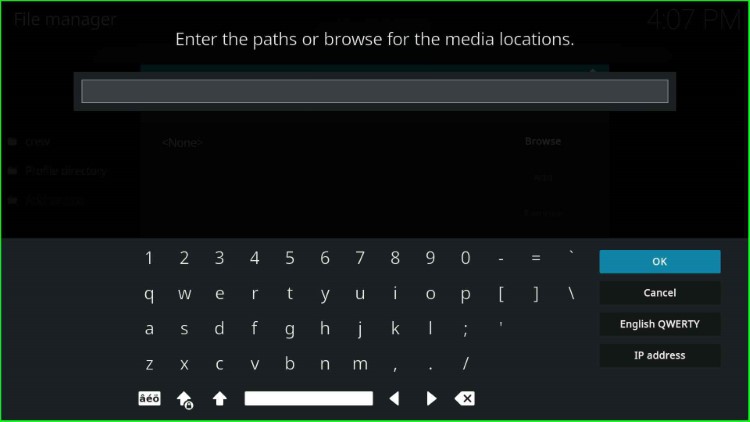
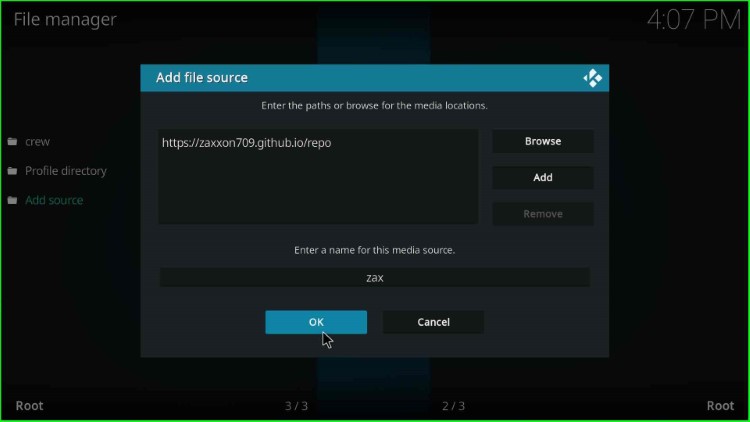
Enter the repository URL as https://zaxxon709.github.io/repo and click on the OK key.

Type 709 repo URL

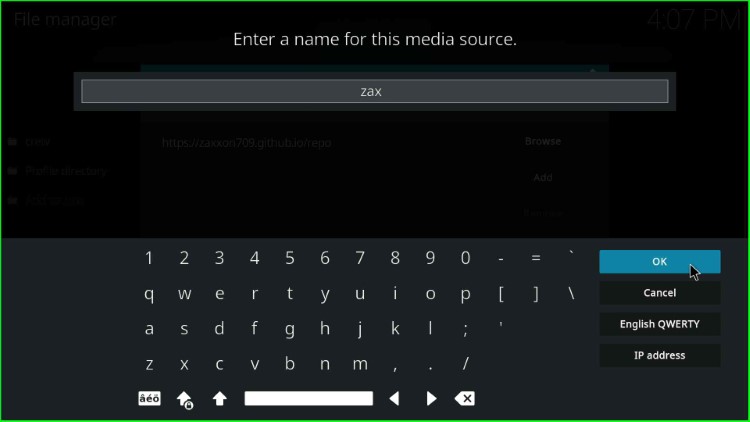
Click on the field “Enter a name for this media source”.

Change the by default media source name

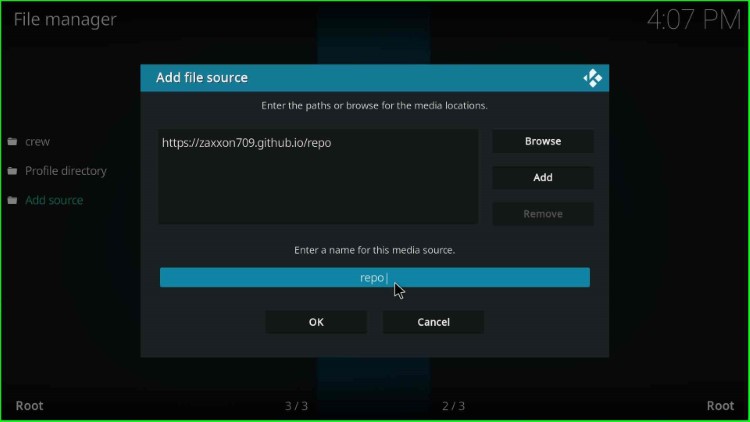
Give a new name to the media source as zax and press the OK button.

Enter media source name zax

Check the repository URL and source name carefully, and press the OK button.

Click OK to save all details

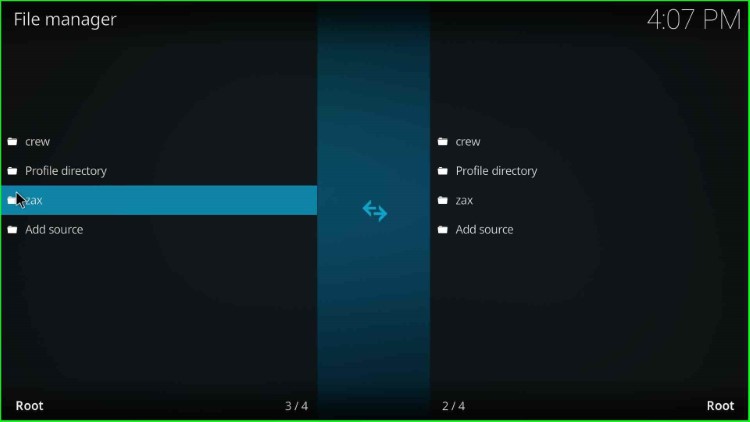
On the File Manager screen, media source zax added.

zax media source added successfully

Step 3 – Install from Zip File

Navigate to the Settings screen and hit the Add-ons icon.

Choose Add-ons icon

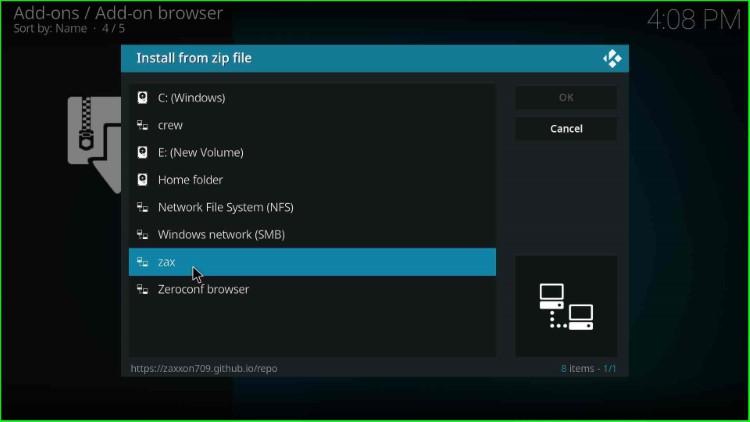
Select Install from zip file.

Select Install from zip file

Click on the media source, zax.

Select media source zax

Tap on the repository.709.Nexus.zip file.

Click on 709 repo zip file

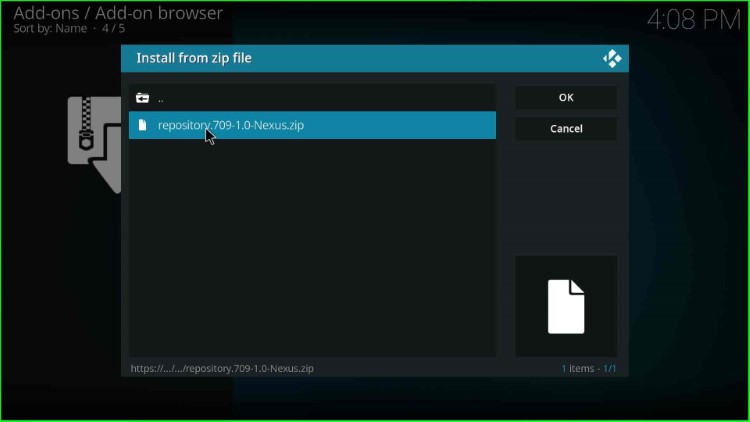
Wait for the “The709 Repo Add-on installed” notification.

Select Install from zip file

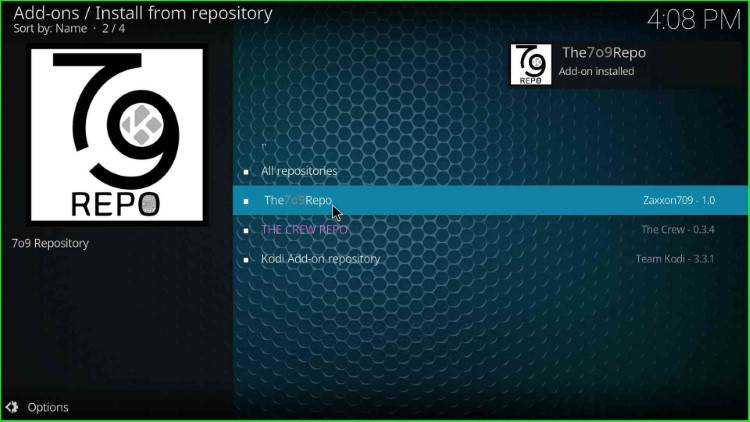
Step 4 – Install from Repository

Hit the Install from repository.

Click on Install from repository

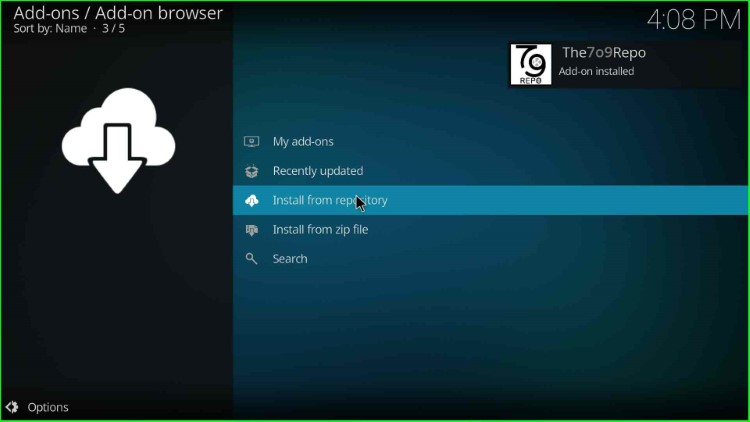
Choose the The7o9 Repo available just after the All repositories option.

Select the 709Repo

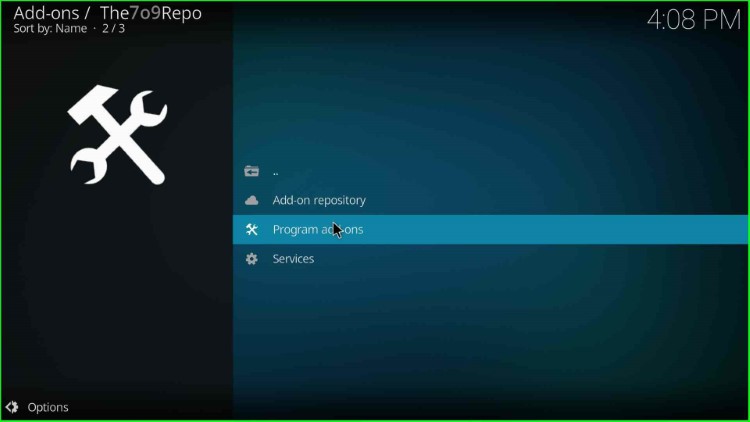
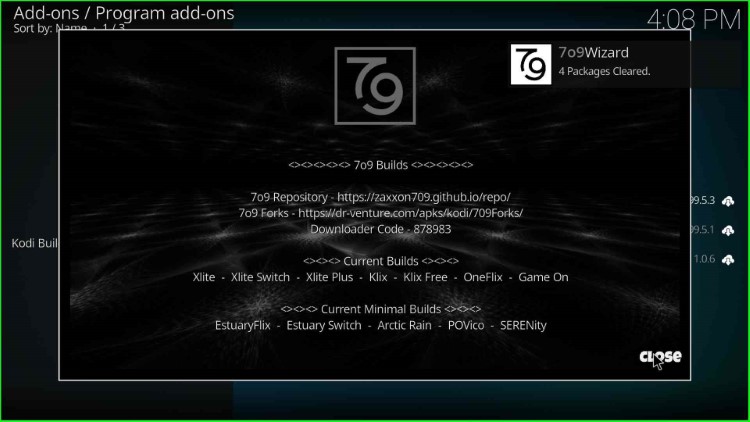
Step 5 – Install 7o9 Wizard

Click on Program add-ons.

Open Program add-ons

Choose the first option, 7o9 Wizard.

Open 709 Wizard

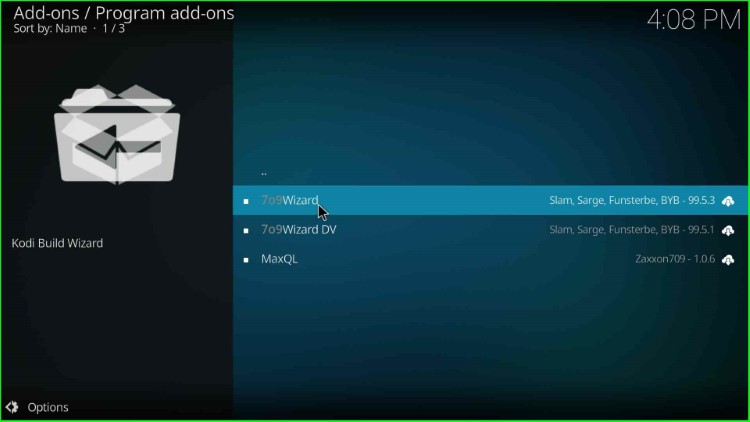
Select the Install button.

Select Install key

Wait for the 7o9 Wizard installation notification on the screen.

Wait for the 709 Wizard installation

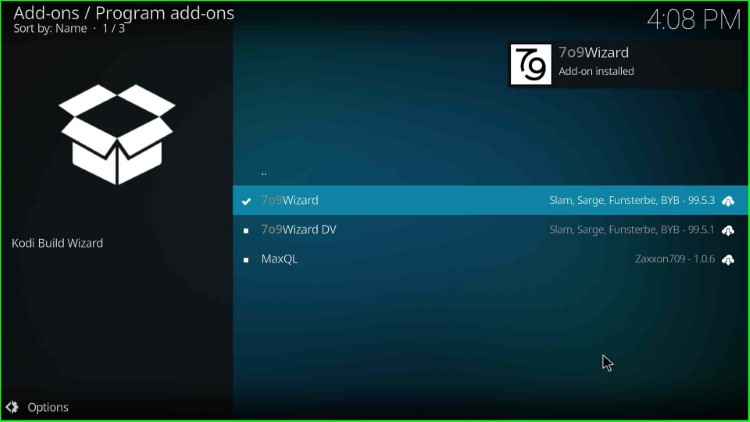
Click on Close to remove the prompt from the screen.

Click on Close

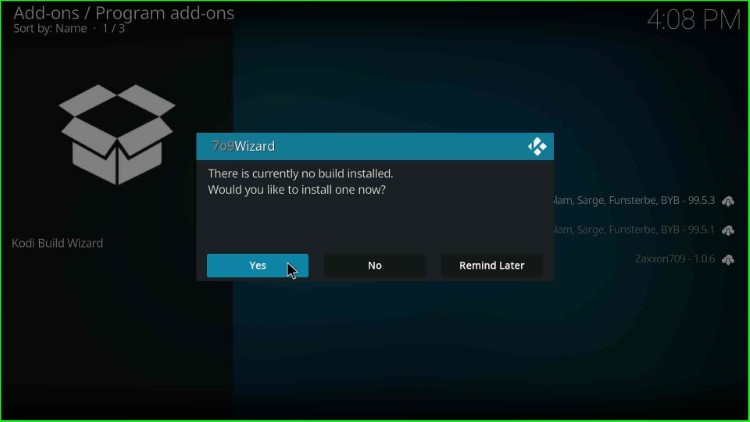
Tap on the Yes button to install the Build.

Tap on Yes

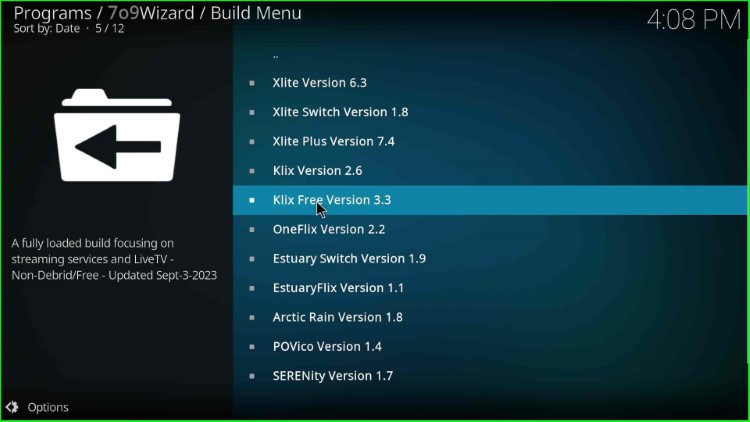
Step 6 – Install Klix Free Kodi Build

Here, search for the Klix Free Version and tap on it.

Click on the Klix Free Build

Select the Continue button.

Select the Continue button

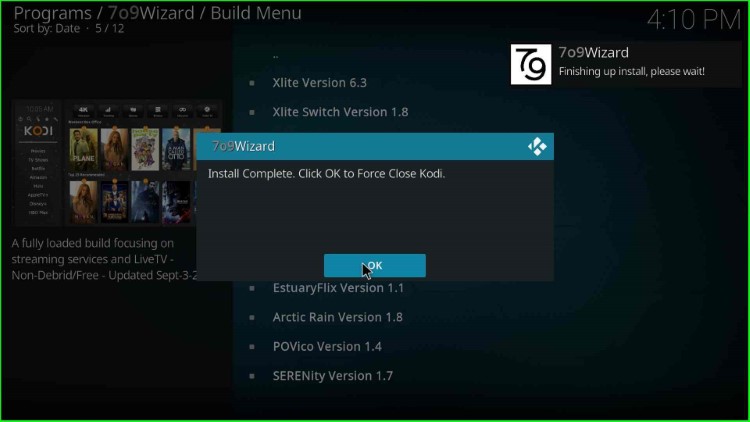
Wait until the Klix Free Kodi Build is installed successfully.

Wait for the downloading of Klix Free Build

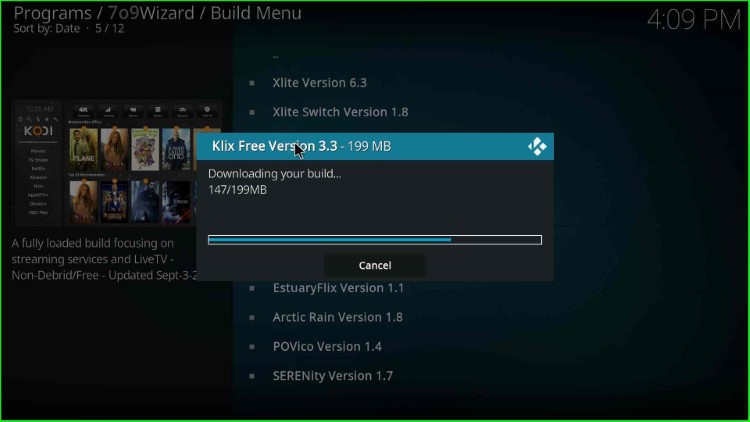
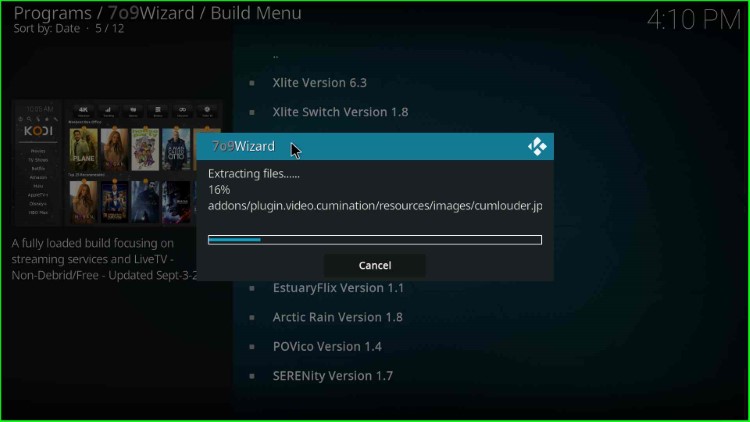
As the download completes, Klix Free Build extracts files; wait for the end.

Wait for the extracting files of Klix Free Build

Thereafter, tap OK to close Kodi.

Click OK to close Kodi

Start Kodi and Enjoy streaming.

Final Words

I have installed the Klix Free Kodi Build step by step. You may try installing the same and let us know if any error occurs.

Related Guides:

Before you start streaming on Firestick Apps/Websites, I would like to warn you once again that we do not know from where these Apps, Websites, Kodi Repositories, Wizards, Builds, and Addons fetch the streams.

The content you stream on Firestick Apps may be copyrighted and may land you in legal trouble even if you stream them unintentionally. Most of all, ISPs, Government, and authorized companies may monitor your online activities like streaming copyrighted movies, videos, TV shows, live shows, animes, etc.

To stay protected, and to get an exceptional streaming experience, I suggest you use IPVanish which is the fastest, most secure, and military-grade encryption VPN for Firestick. In addition, IPVanish hides your original IP address, encrypts your internet connection, and bypasses bandwidth throttling and geo-restrictions.

I have been personally using IPVanish for a couple of years and what I can say is that IPVanish is the best VPN for Firestick Apps in all aspects for all devices because the VPN unlocks geo-restricted streams and enhances my streaming experience.

Disclaimer: VPNHacks.com does not support or encourage piracy and copyright infringements in any form. You should abide by the rules and regulations in your country. We just want to protect you because sometimes you may end up streaming copyrighted content unintentionally.

Save 81%: Only $2.49/Month

Taking an IPVanish VPN Subscription is really simple.

1.       First, subscribe to IPVanish by clicking here.

Most of all, IPVanish comes with a 30-day money-back guarantee. You can get a full refund if you are unsatisfied (I do not think you will be) with IPVanish, and they do not ask for any reason.

2.       Once you subscribe to IPVanish, download the IPVanish app and open it. Enter your e-mail and password and click the “Log In” button.

Login to IPVanish App

3.       Once you are signed in, select the VPN Server location that you want to connect to and click on the connect option.

Choose the VPN Location

4.       After that, you will see that your IP address has been changed. This way, you can protect your privacy and have an exceptional streaming experience.

Connect the Server

Save 81%: Only $2.49/Month

James is the Co-founder of VPNHACKS.COM. He is a streaming geek and a privacy expert. James streams over different devices like Firestick, Kodi, Roku, Shield, Boxes, Google Chromecast, and Apple TV. IPVanish VPN is his favourite VPN for streaming. more...

Leave a Comment

IPVanish Black Friday Offer