This tutorial will teach us how to install Hardnox Ultra Kodi Build. This Hardnox Ultra build installation guide is useful if you use Kodi on a Fire TV Stick, Android Box, Raspberry Pi, Nvidia Shield, Windows, iPhone, iPad, or any other supported device.
Both HardNox Ultra and MisFit Mods Kodi builds belong to Misfit Mods Repository. Moreover, HardNox Ultra has super easy navigation, cool graphics, and a clean interface.
HardNox Kodi Build is the best for watching movies, TV Shows, Sports, Kids, and Gaming category videos.
Another important factor for Hardnox Ultra build being in the best Kodi builds list is its small size and well-arranged video streaming content. Even, you can easily integrate the Real-debrid with Hardnox Ultra Kodi build.
It is needless to mention that if you are 18+ age, you can watch adult on Kodi using Hardnox build. So let’s know how to install the Hardnox ultra Kodi build step by step.
Attention! Before You Move Ahead.
I strongly advise protecting your privacy while streaming free movies/TV shows, and sports on Firestick/Kodi using Apps/Builds/Addons. Using a VPN while streaming on Firestick/Kodi is a good practice.
Currently, your IP address 18.119.213.42 is visible to everyone.I have been using the most secured #1 ExpressVPN for years because it has military-grade encryption, enables buffering-free streaming, hides your IP address and location, and bypasses geo-restrictions and bandwidth throttling.
Click here to get 4 Months Free
Note:- Streaming copyrighted content without a license is illegal and may land you in legal trouble. VPNHacks.com does not encourage piracy in any way.
How to Install Hardnox Ultra Kodi Build
Before starting the Hardnox build installation, we need to enable the installation of addons from unknown sources.
1. To install the Hardnox Kodi build, open the Kodi and go to Settings.
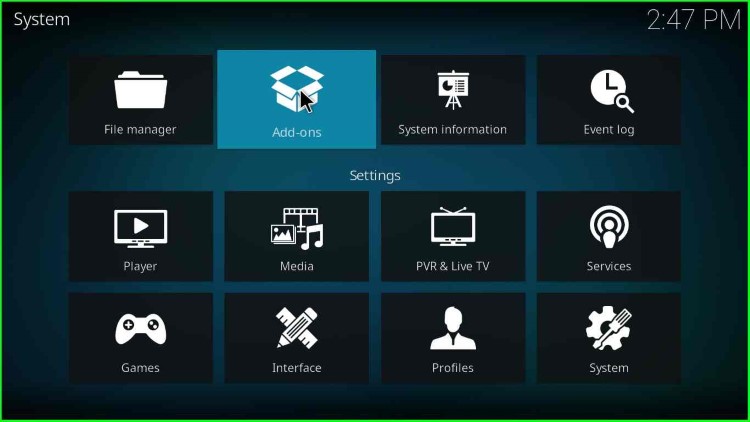
2. Thereafter, click System.
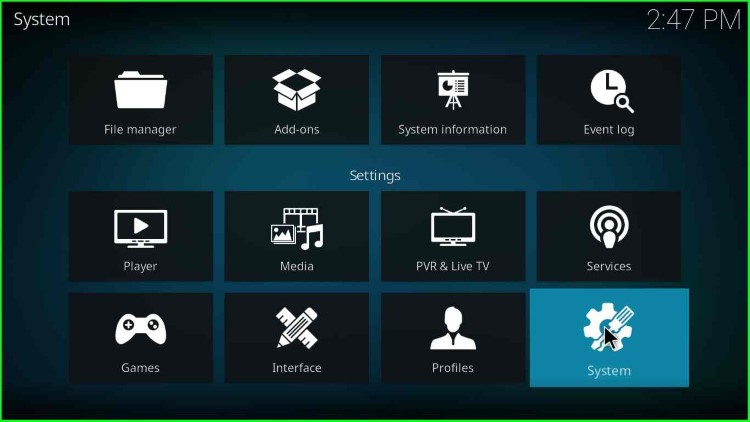
3. Go to the Add-ons.
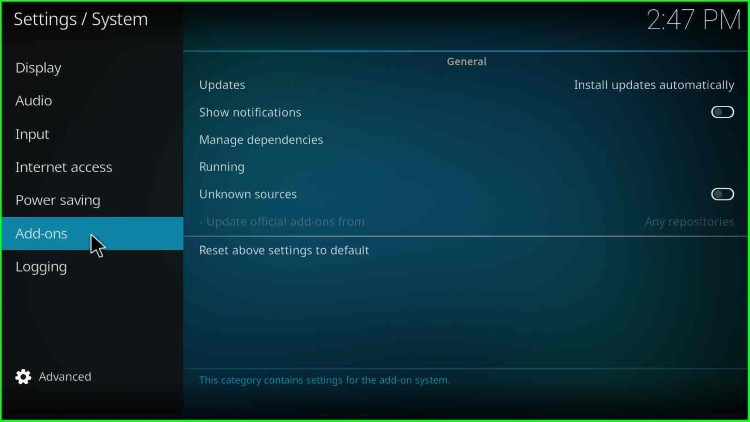
4. Click on the radio button to enable unknown sources.
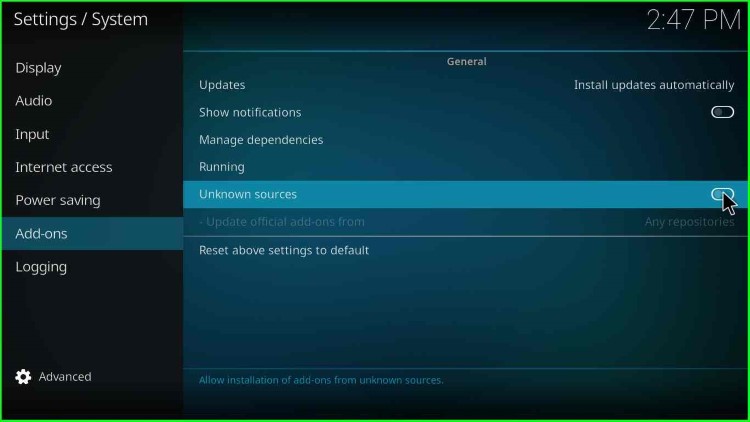
5. Click on the Yes button when a warning popup appears. Before installing any build or addon, ensure the addon repository is safe to use and does not perform any malicious activity.
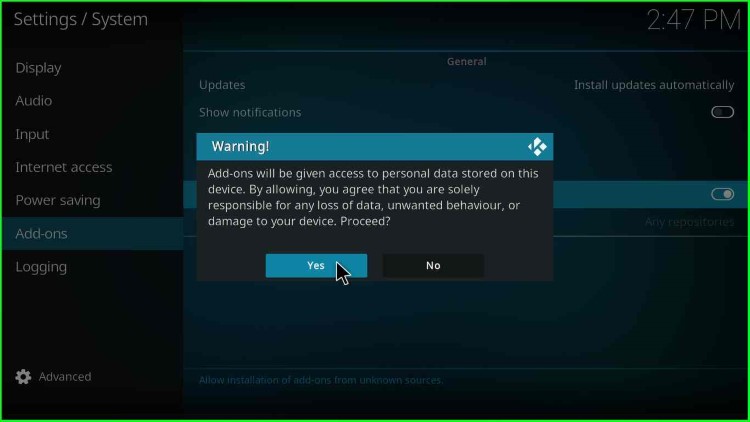
6. Once you click on the Yes option, the dialogue box will disappear.

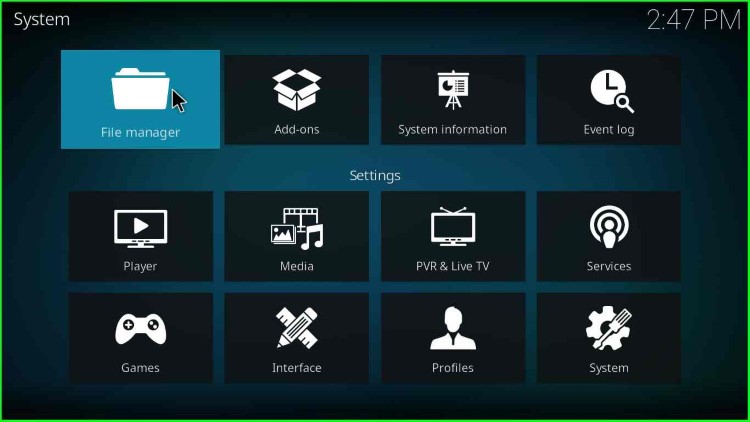
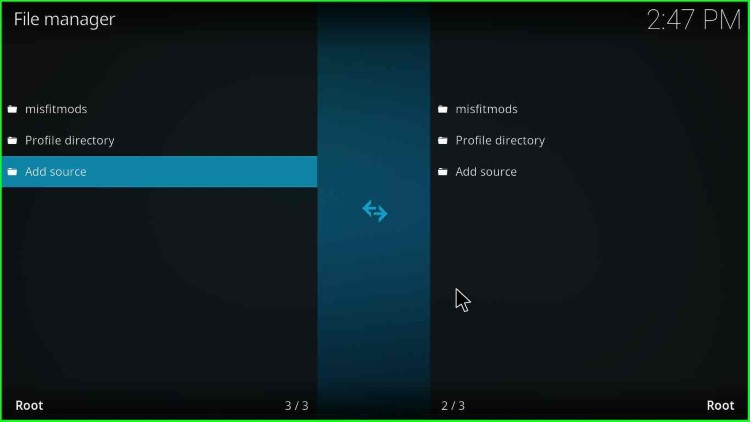
7. Then, go to the File manager.
HardNox Ultra Build Installation Source
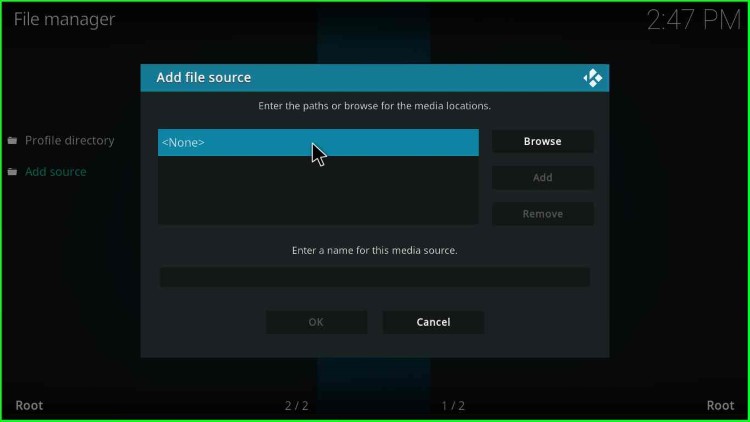
8. Click on Add source option to add the Hardnox build source.

9. Click on <None> option.
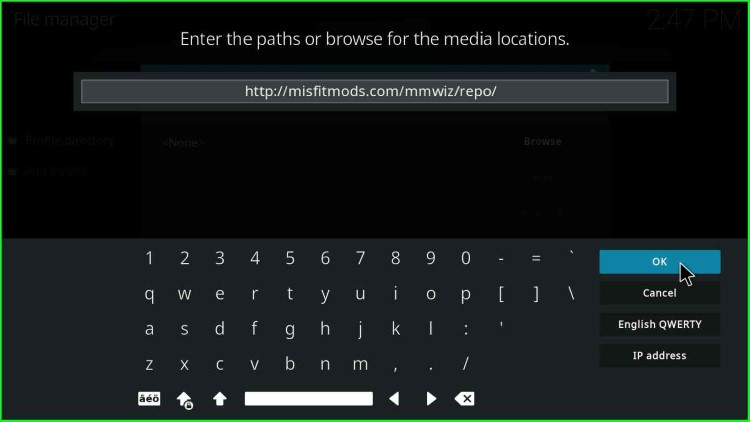
10. Enter the Hardnox media location in the text box.
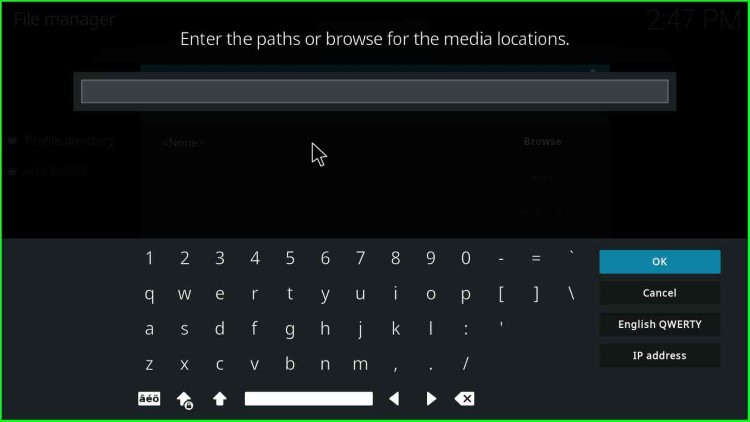
11. Hardnox Kodi Build media location path is http://misfitmods.com/mmwiz/repo, as Hardnox belongs to the misfit mods repository.
12. Now, enter the media source name for the Hardnox build. The text field will have repo as a default value.

13. Enter the media source as “misfitmods“.
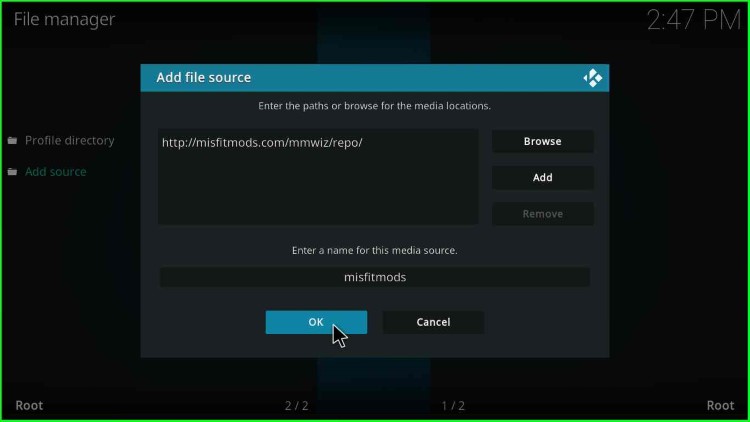
14. Click OK and go back.
15. Then click on the Add-ons option.
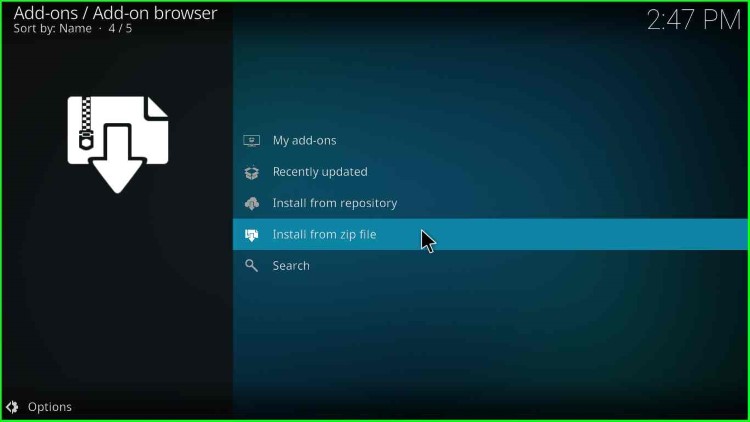
Install HardNox Ultra Build From Zip File
16. Next, click on “Install from zip file“.
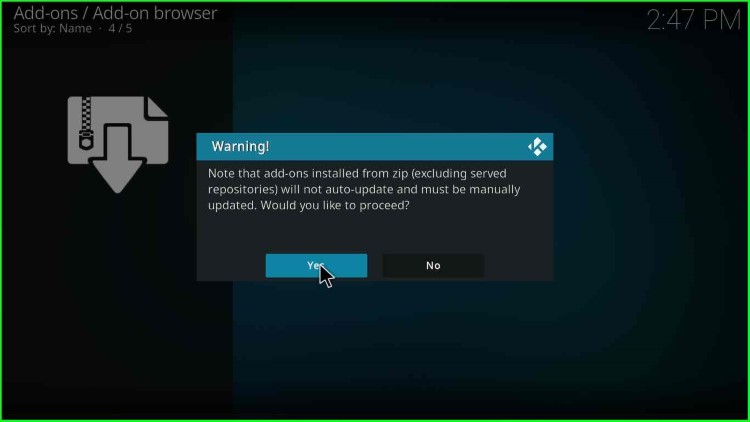
17. Click Yes when a warning popup appears. (Note:- You should manually update the build when any update is available.)
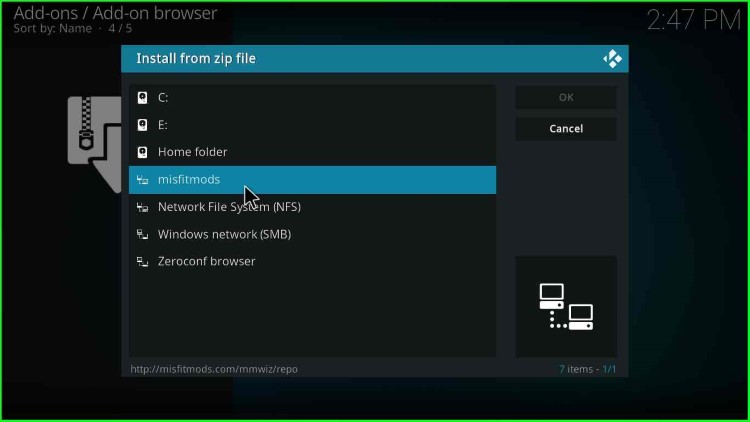
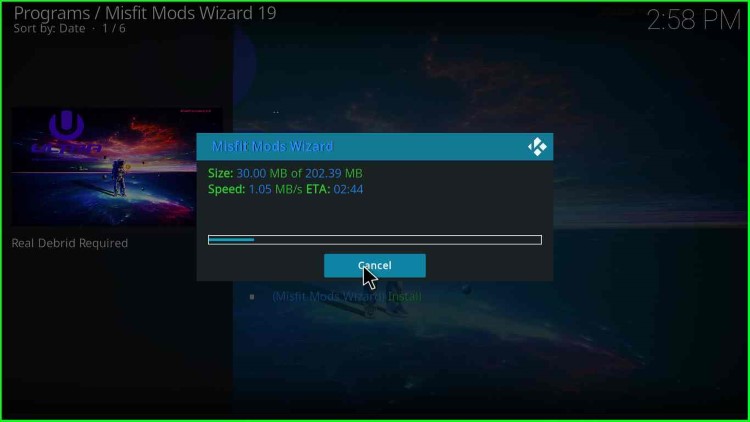
18. Click on the misfitmods option.
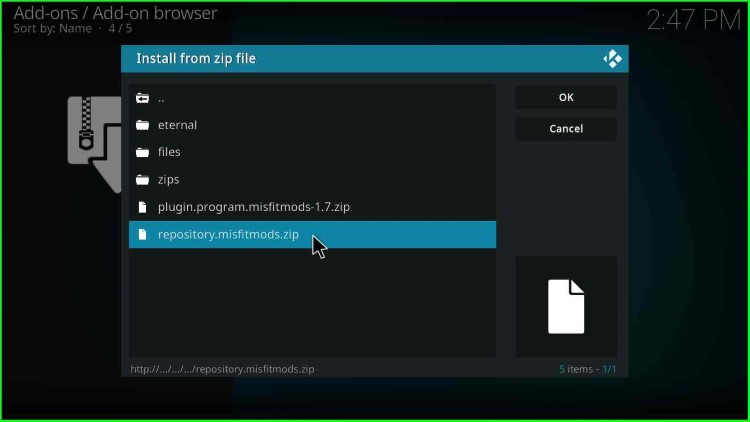
19. Many options appear named as eternal, files, zips, plugin.program.misfitmods-x.x.zip (Here, x is the version of the build/addon zip file).
HardNox Ultra Installation From Misfitmods Repository
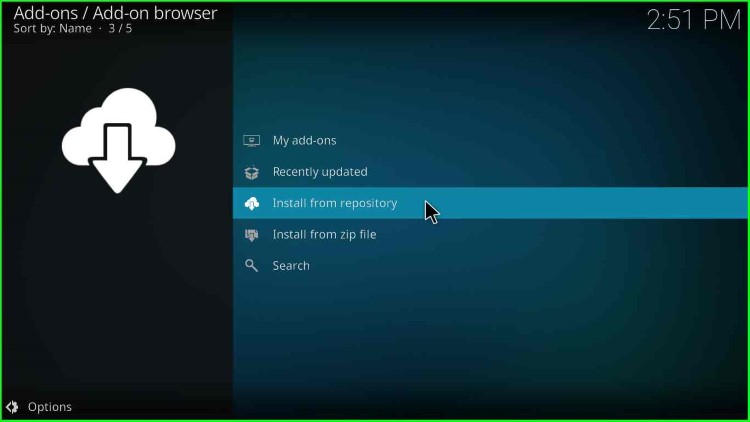
20. Thereafter, click on the Install from repository option.
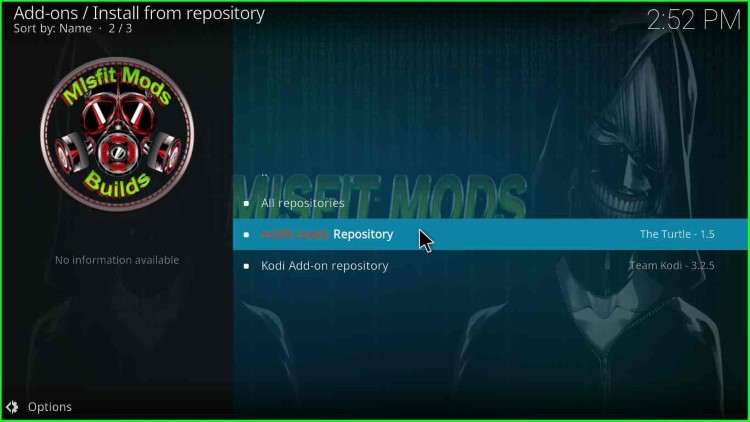
21. Then, click on misfit mods Repository.
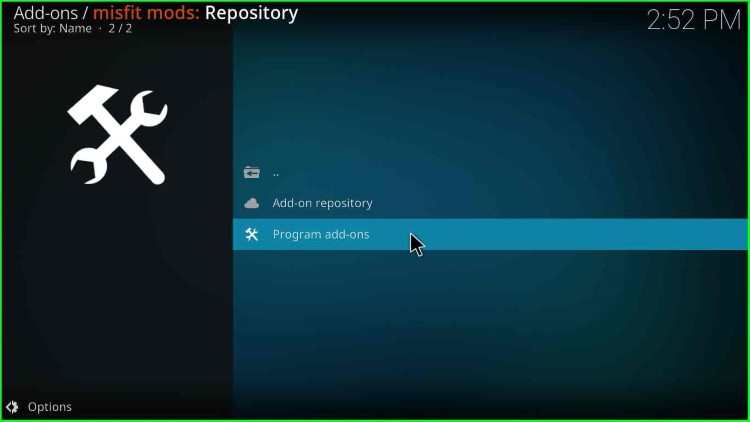
22. Next, click on Program add-ons.
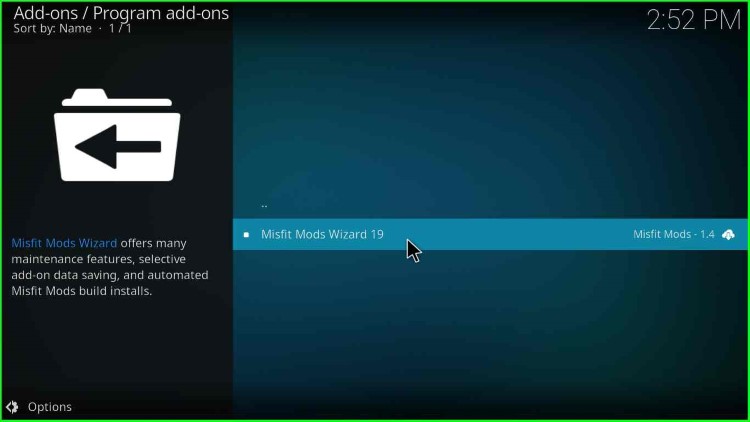
23. Finally, you will get the Misfit Mods Wizard 19 option.
24. On the bottom right, you have an ” Install ” button.
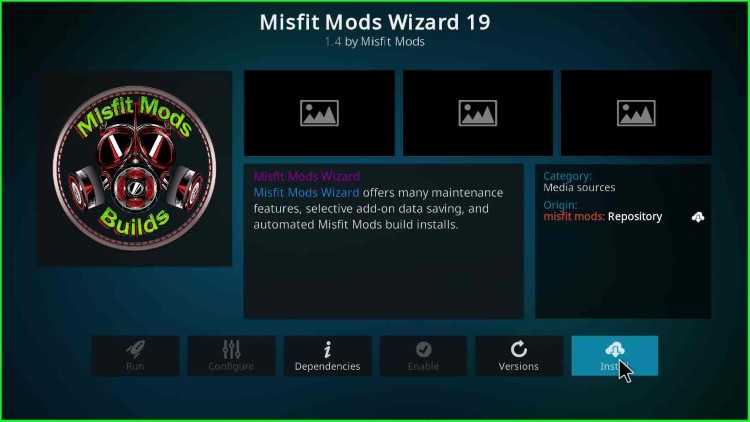
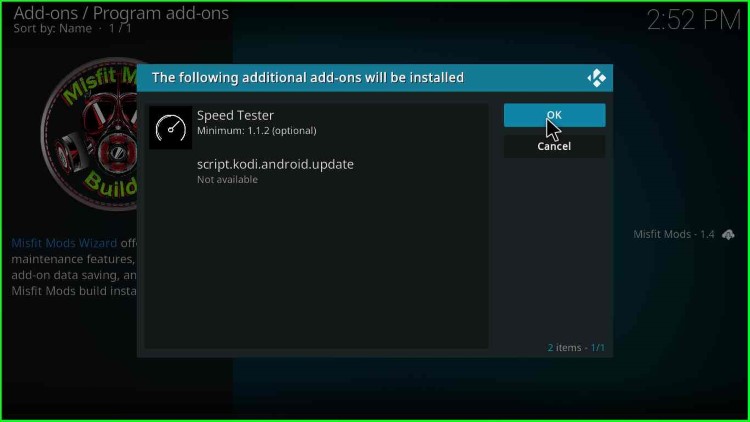
25. Click the OK button.
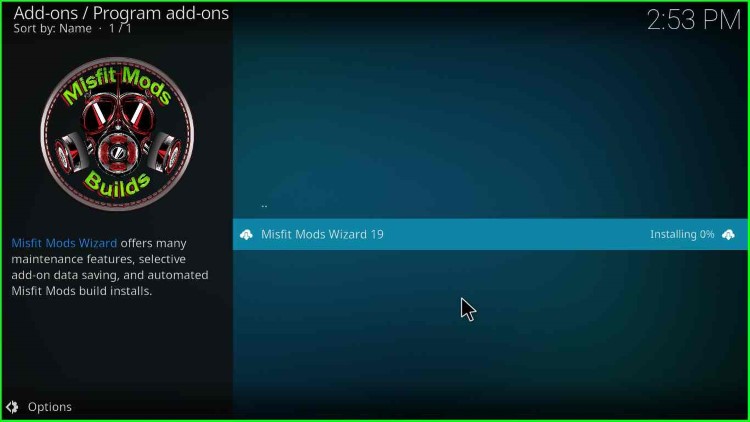
26. Installation of Misfit Mods Wizard 19 starts, and you can see the progress on the right side.
27. After some time, on top, a message appears as “Misfit Mods Wizard 19 Add-on installed“.
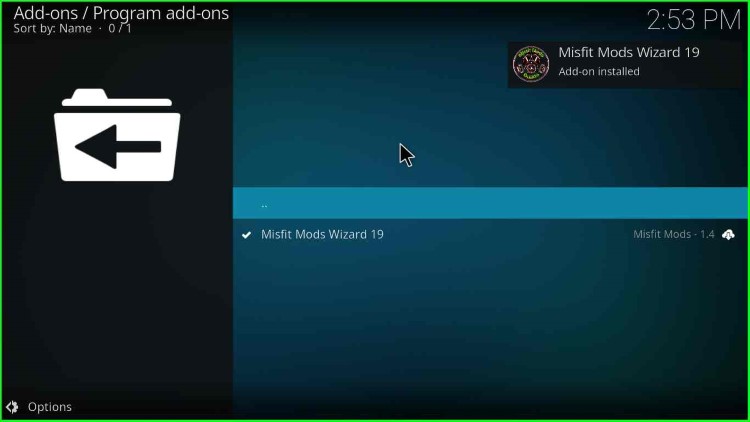
28. Click on Continue.
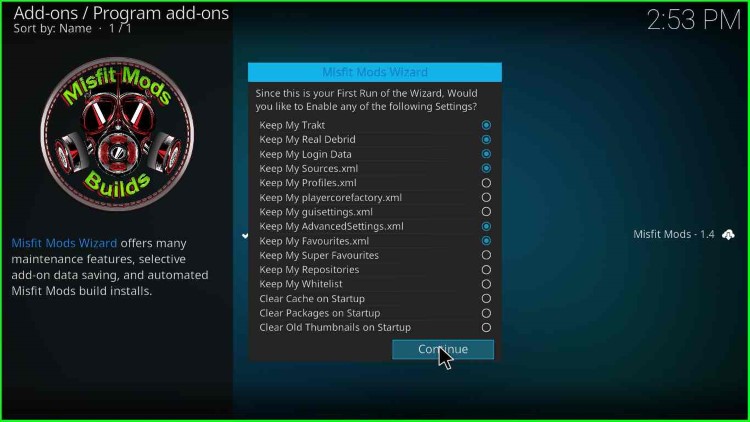
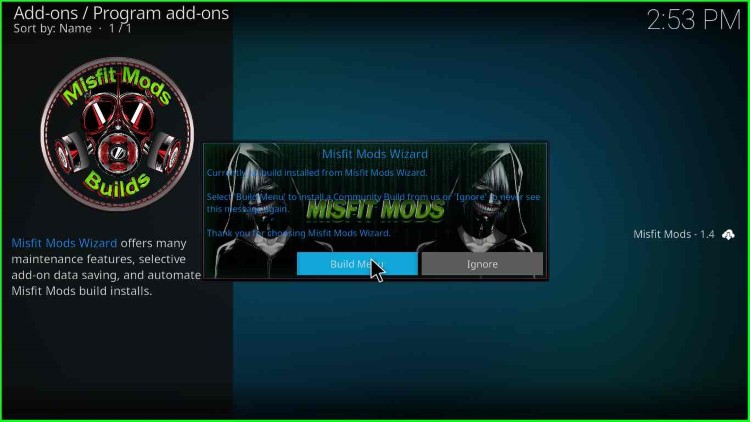
29. Then, you will have two options, “Build Menu” and Ignore. Click on Build Menu.
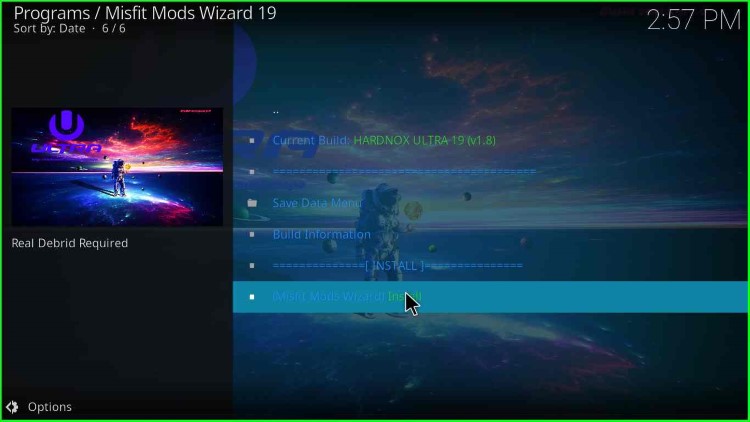
30. A list of Misfit Mods Builds appears where the version wise list is available. Now, under Matrix Builds option, select the Hardnox ultra build option.

31. Click on the “Misfit Mods Wizard Install” option.
32. Then, a message appears: “Would you like to Download and Install: HARDNOX ULTRA 19 v1.x“. So, click on “Yes, Install“.
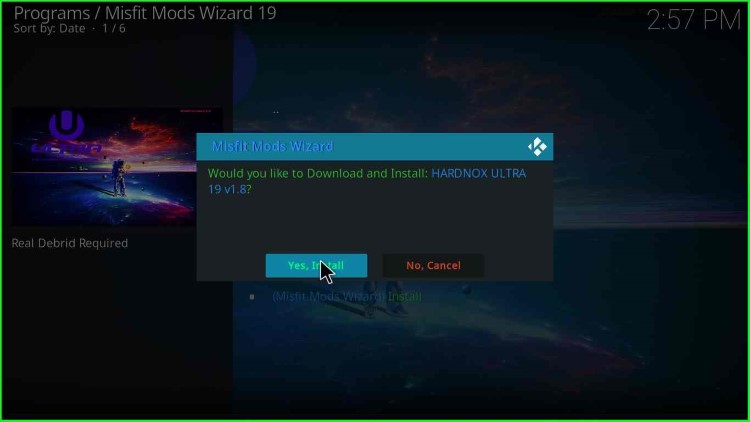
33. The installation will start soon after clicking on the Yes button.
34. Once the installation is complete, force close the Kodi and start.
Before you start streaming on Firestick Apps/Websites, I would like to warn you once again that we do not know from where these Apps, Websites, Kodi Repositories, Wizards, Builds, and Addons fetch the streams.
The content you stream on Firestick may be copyrighted and may land you in legal trouble even if you stream unintentionally. Most of all, ISPs, Government, and authorized companies may monitor your online activities like streaming copyrighted movies, videos, TV shows, live shows, animes, etc.
To stay protected, and to get an exceptional streaming experience, I suggest you use ExpressVPN which is the fastest, most secure, and military-grade encryption VPN for Firestick. In addition, ExpressVPN hides your original IP address, encrypts your internet connection, and bypasses bandwidth throttling and geo-restrictions.
I have been using ExpressVPN for a couple of years and I can say that ExpressVPN is the best VPN for Firestick Apps in all aspects for all devices because the VPN unlocks geo-restricted streams and enhances my streaming experience.
Disclaimer: VPNHacks.com does not support or encourage piracy and copyright infringements in any form. You should abide by the rules and regulations in your country. We just want to protect you because sometimes you may end up streaming copyrighted content unintentionally.
Limited Time Offer: Get 4 Months Free
Taking an ExpressVPN Subscription is simple.
- First, subscribe to ExpressVPN by clicking here.
ExpressVPN comes with a 30-day money-back guarantee. You can get a full refund if you are unsatisfied (I do not think you will be) with ExpressVPN, and they do not ask for any reason.
- Once you subscribe to ExpressVPN, download the ExpressVPN app and open it. Enter your e-mail and password and click the “Log In” button.
- Once you are signed in, select the VPN Server location that you want to connect to and click on the connect option.
- After that, you will see that your IP address has been changed. This way, you can protect your privacy and have an exceptional streaming experience.