This guide will teach us how to install the GAIA Kodi add-on. Like Magic Dragon, TheOath, and TheCrew Kodi add-ons, GAIA is also a popular Kodi add-on in 2024.
GAIA add-on is known for its premium look and user-friendly interface. Moreover, you must integrate Trakt or Real Debrid to work with GAIA Addon. When you integrate Real-Debrid with the GAIA add-on, you can stream HD videos on Kodi.
Once you install the GAIA Kodi add-on, you must install many added Kodi add-ons. The additional add-ons include Orion, URLResolver, Studio Icons, Addon Signals, Kodi Six, Youtube-dl control, Kodi65 Library, Plugin routing, ExtendInfo Script, etc.
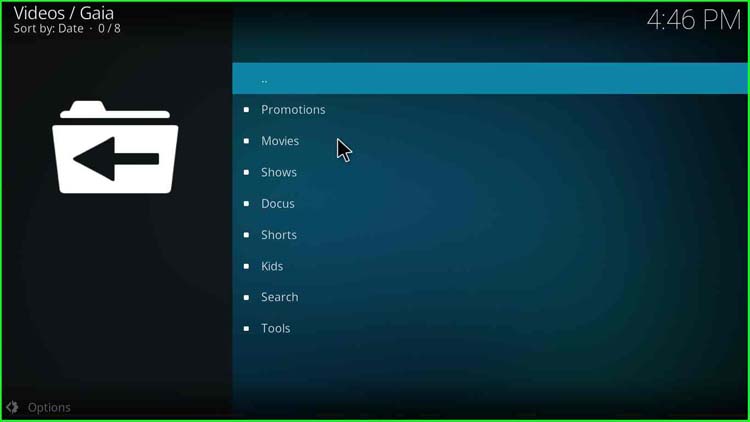
As said earlier, the GAIA Kodi add-on has a clean and easy-to-navigate user interface. In addition, GAIA Addons contain various options, viz. Promotion, Movies, Shows, Docus, Shorts, Kids, Search, Tools, etc.
GAIA is a fork of Bubbles add-on and offers unlimited streaming of Movies, Videos, TV Shows, etc. Let’s start with the GAIA Add-on Installation process.
How to Install GAIA Kodi Addon
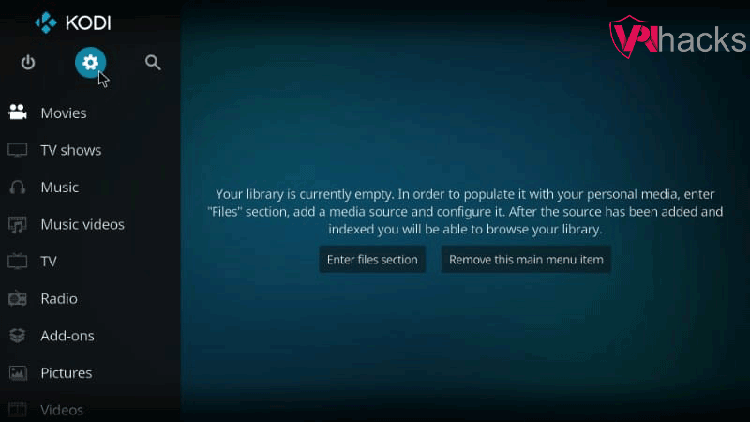
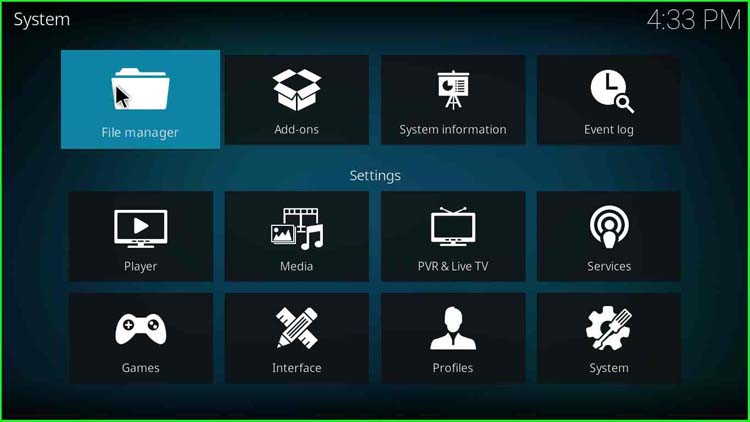
1. Go to Kodi’s home screen and then to the “Settings“.
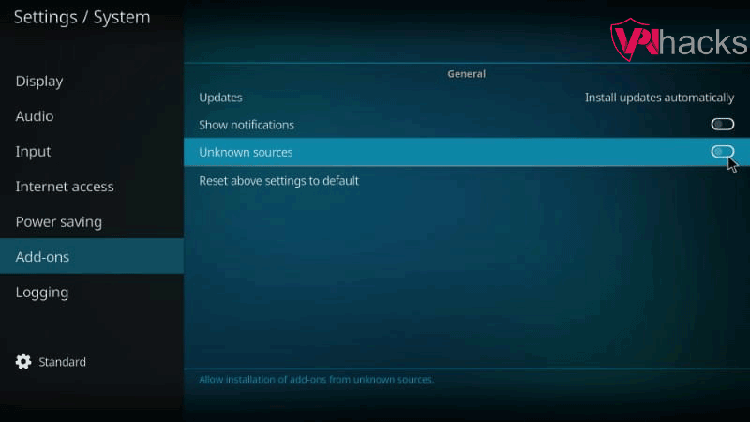
2. Enable Unknown sources.
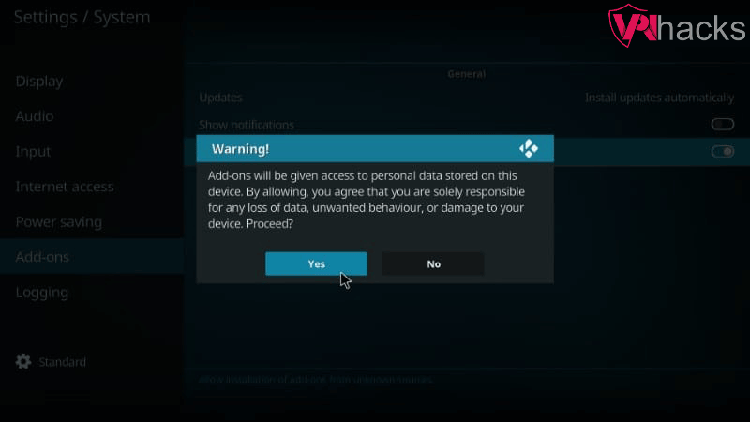
3. Click Yes when a warning popup appears.
4. Again, go to the settings.
5. Click on “File Manager“
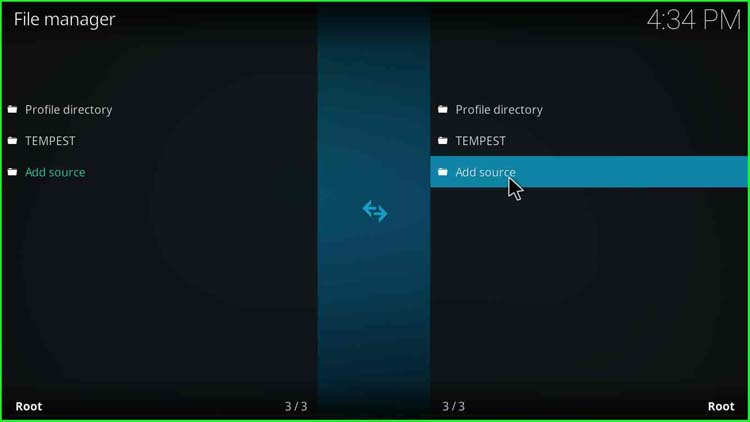
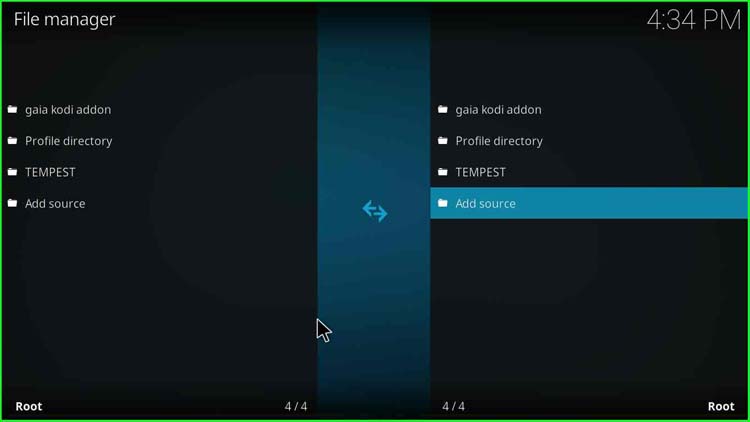
Add GAIA Add-on Source
6. Hover over to the “Add source” and click on it.
7. Double click on “<None>“
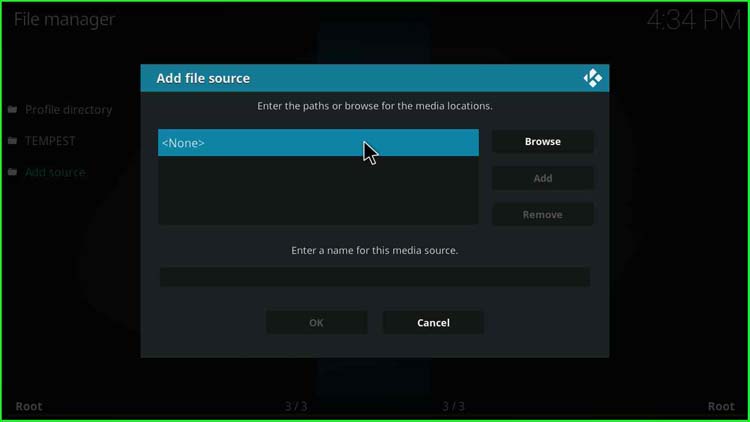
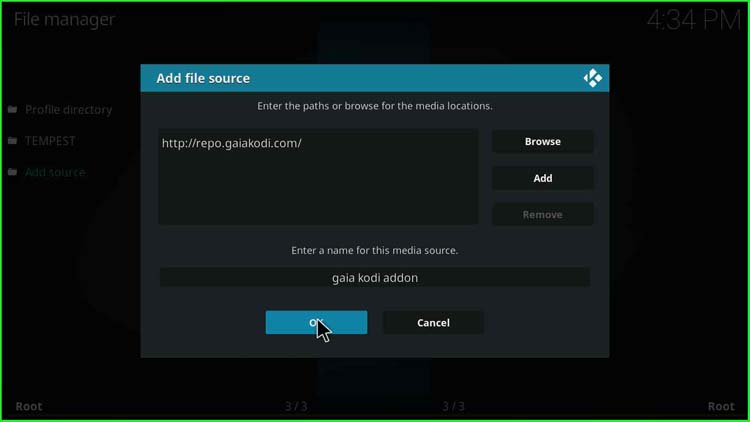
8. Enter the media location path as http://repo.gaiakodi.com.

9. Hover over to the media source name.
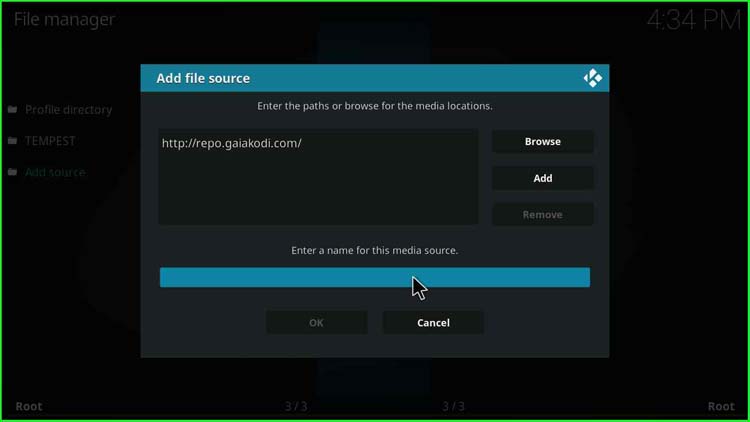
10. enter any name for the media source; I entered “gaia kodi add-on“.

11. Click “OK“
12. Go back to the previous menu.
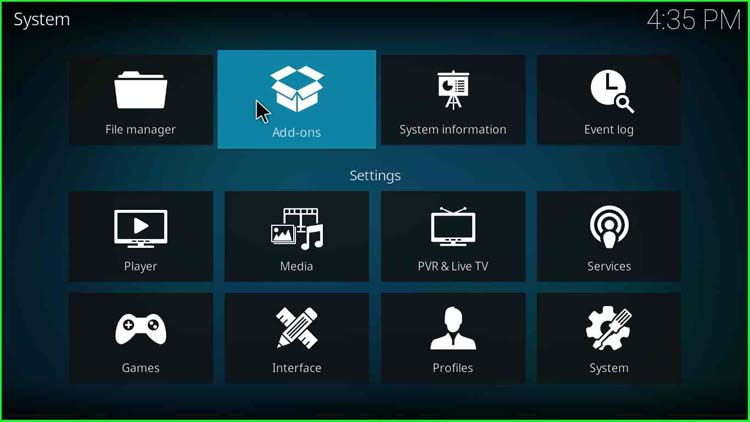
13. Again, visit Settings on the Kodi home screen.

14. Thereafter, click on “Add-ons“
Install GAIA From Zip File
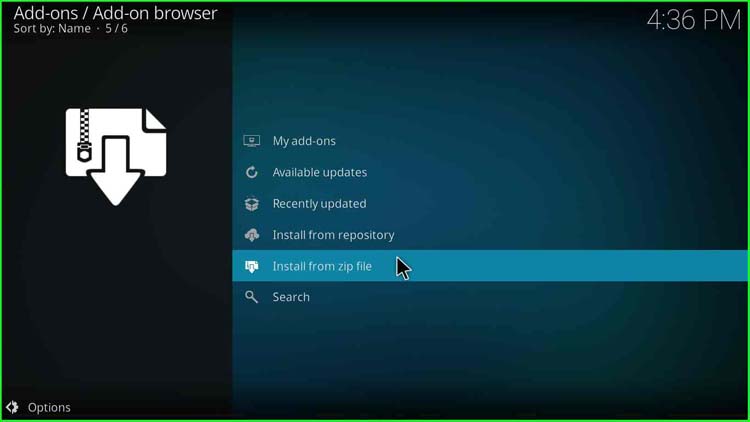
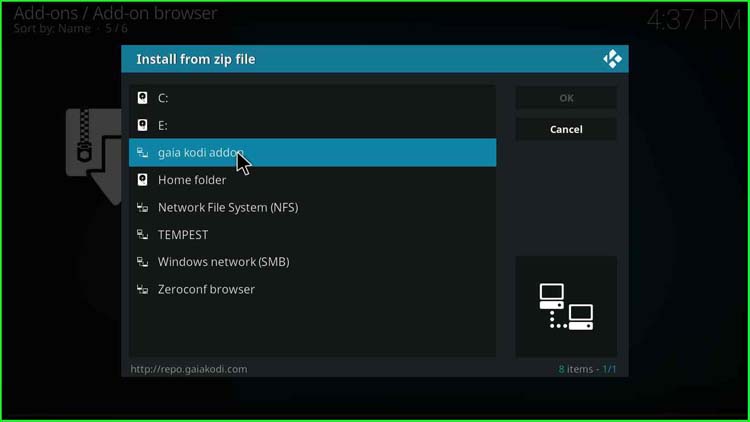
15. Click on “Install from zip file“.
16. Double click on “gaia kodi add-on“.
17. Click on “repository.gaia.zip“.
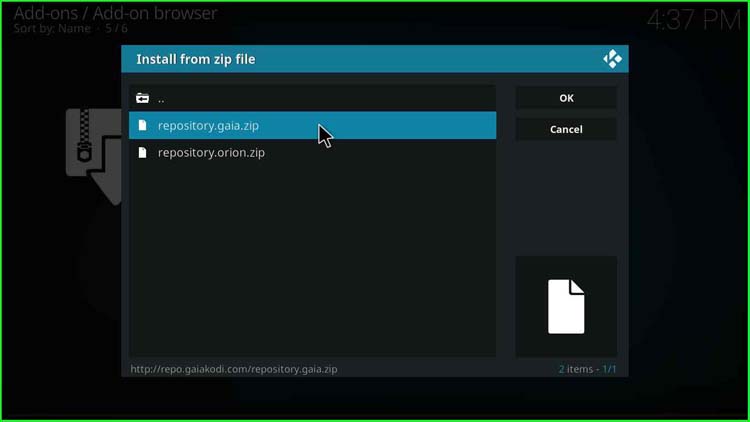
18. A message appears “Gaia Repository Add-on installed“.
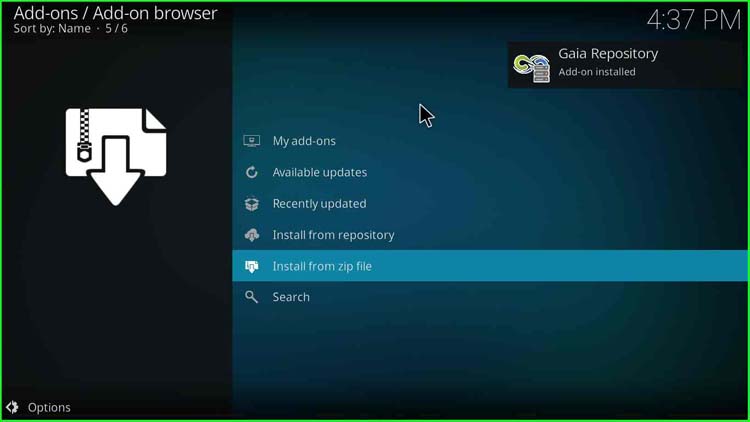
Install GAIA Add-on From Repository
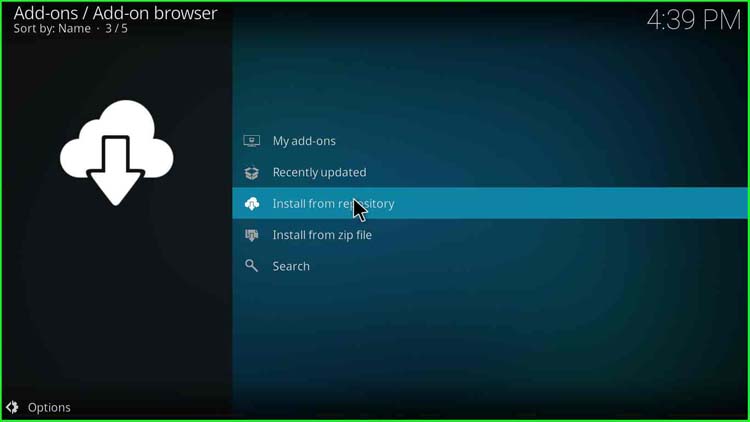
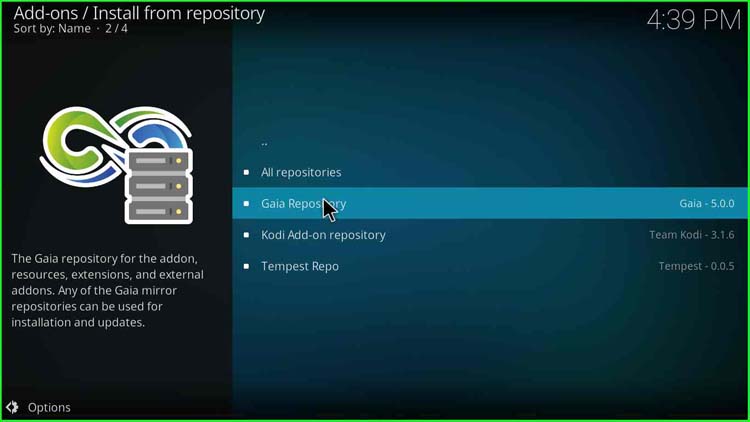
19. Click on “Install from repository“.
20. Double-click on “Gaia Repository“.
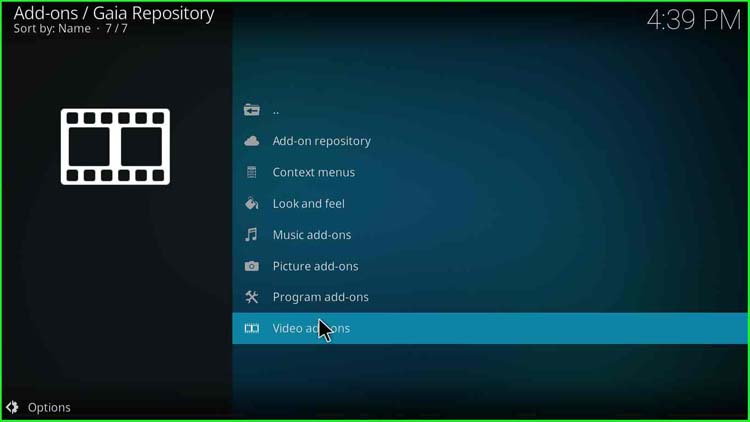
21. Click on “Video add-ons“.
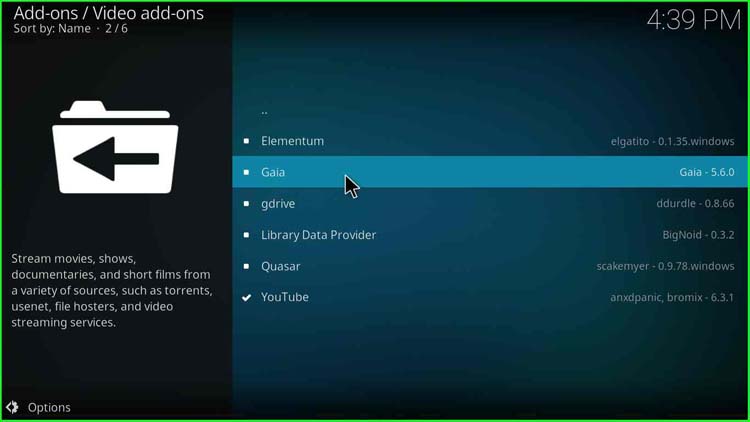
22. Thereafter, click on “Gaia“.
23. On the bottom right, click on “Install“.
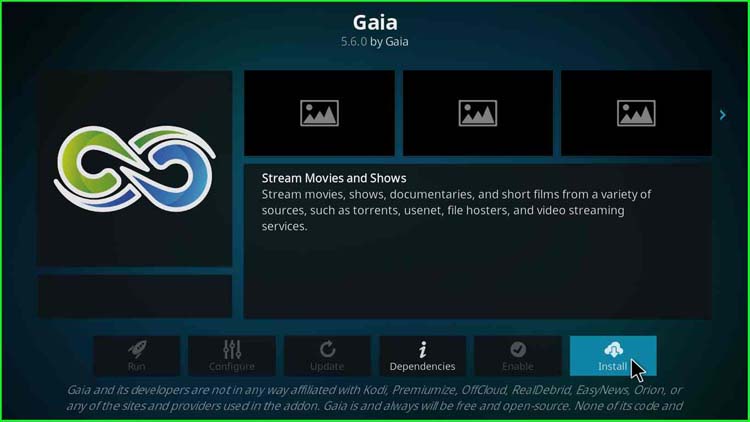
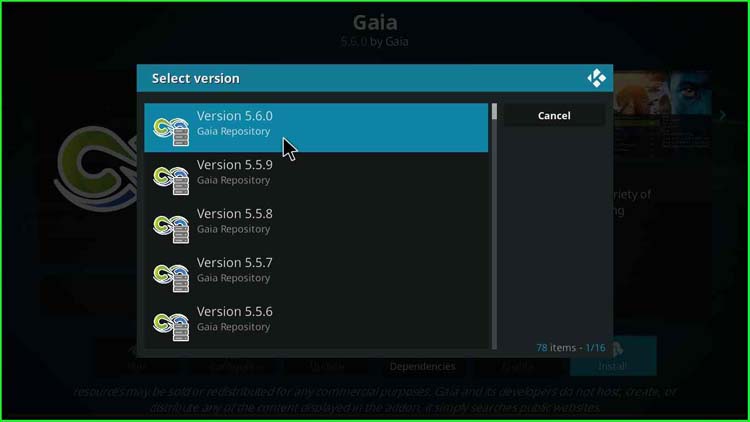
24. Select the version; my screen shows Version 5.6.0.
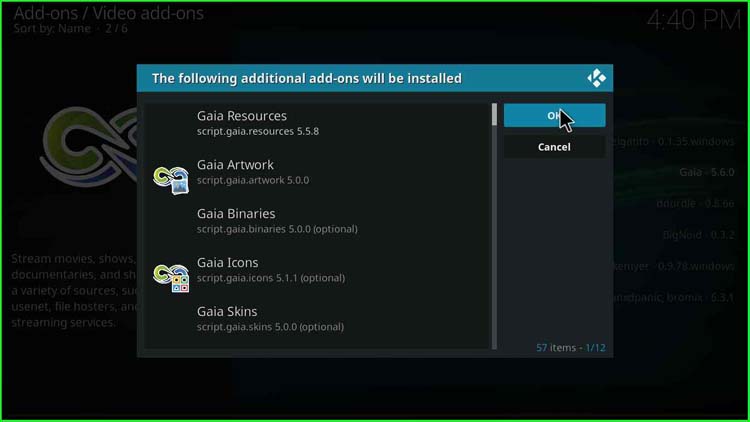
25. A message appears stating to install the additional add-ons viz. Gaia Resources, Artwork, Binaries, Icons, Skins, etc. Then click on “OK“.
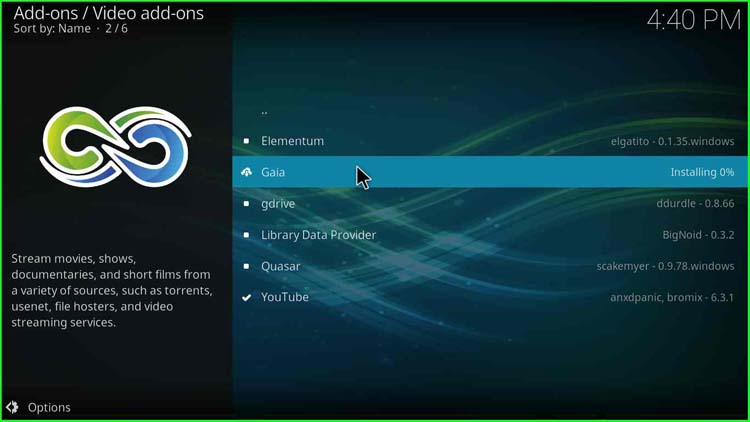
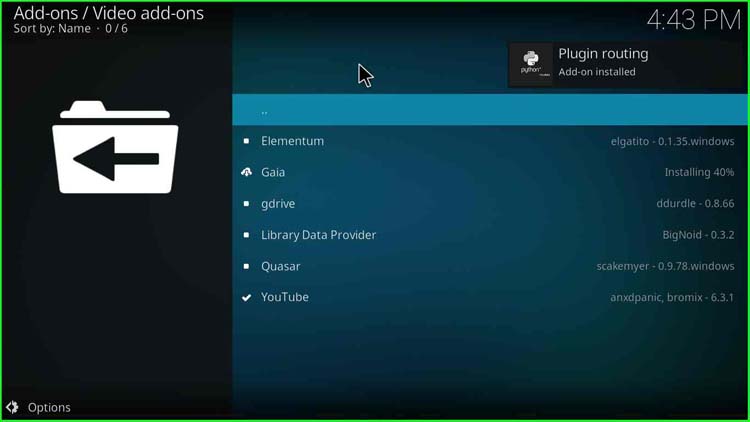
26. Once the installation of the GAIA Kodi add-on starts, you can see the progress on the right of the screen.
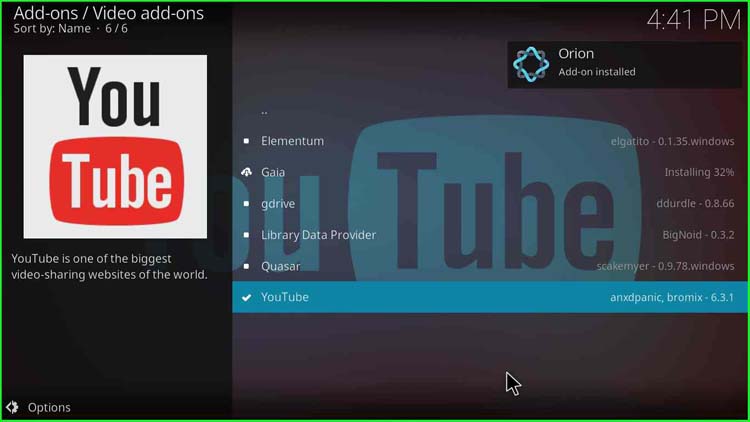
27. Now, several messages appear stating, “Orian Add-on installed“.
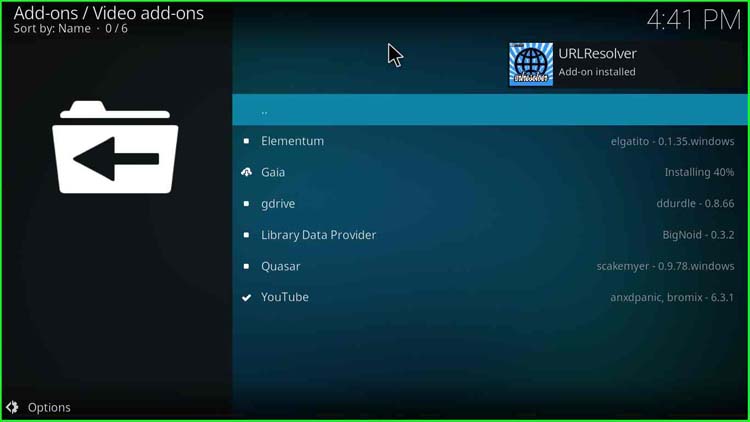
28. URLResolver Add-on installed.
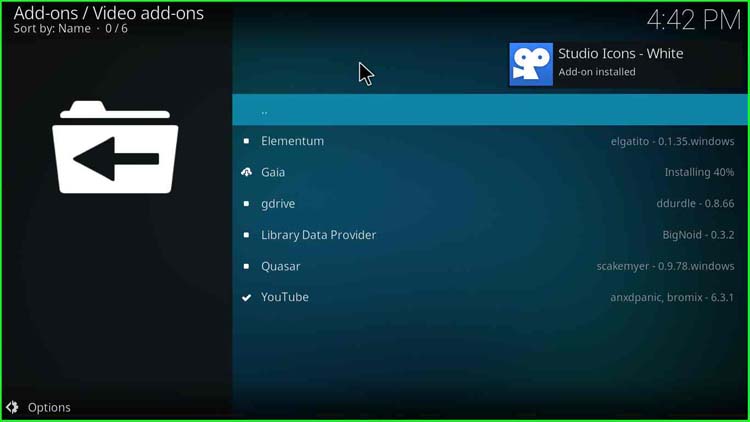
29. Studio Icons – White Add-on installed.
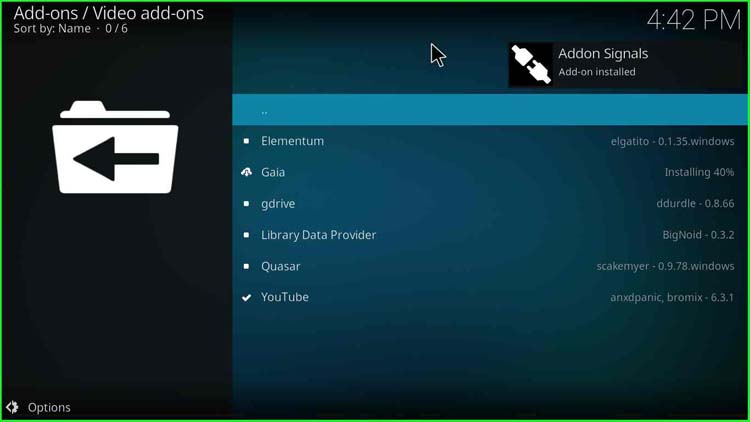
30. Addon Signals Add-on installed.
31. Kodi Six Add-on installed.

32. Youtube-dl Control Add-on installed.

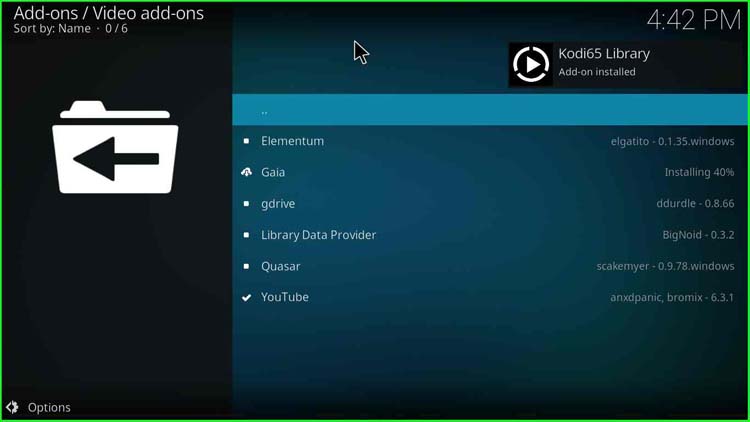
33. Kodi65 Library Add-on installed.
34. Plugin routing Addon-installed.
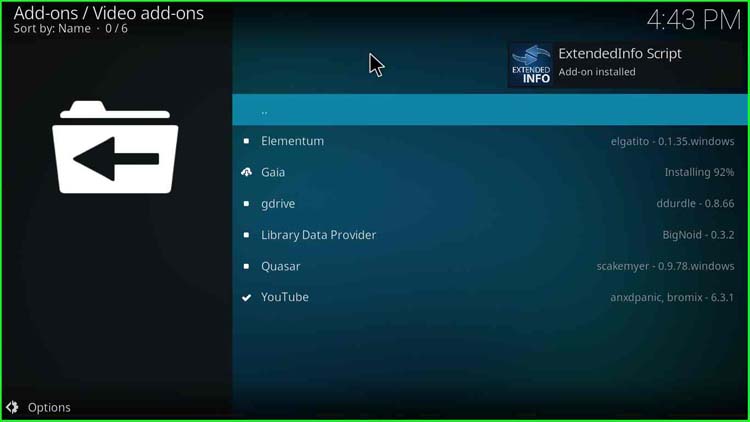
35. ExtendedInfo Script Add-on installed.
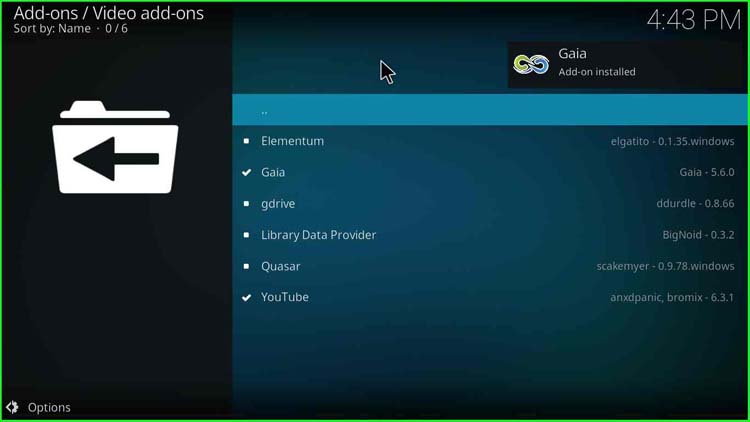
36. Finally, GAIA Add-on is installed.
37. Go to the Kodi Home screen and click “Add-ons“.
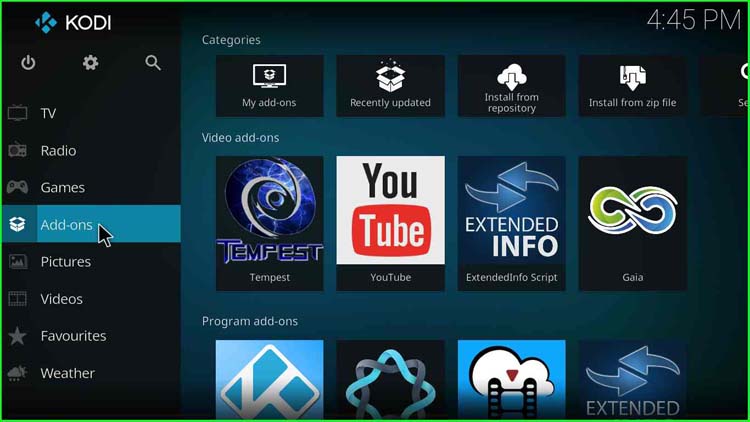
38. double click on “Gaia” on the right-side pane. It may take some time. Let it open.
39. A list of various options open, viz. Promotion, Movies, Shows, Docus, Shorts, Kids, Search, Tools, etc.
40. Double-click and choose the option of your choice.

Finally, we have installed the GAIA Kodi add-on.
Cheers! Enjoy the buffer-free streaming.
