This article will explain the Smokin Kodi Build installation process with useful links and screenshots. let’s go ahead and talk about it.
Smokin Kodi Build is one of the great Kodi Builds, which offers unlimited high-quality streams of different categories like Music, Movies, Sports, Live TV, and TV Shows. Smokin Build is easy to install from the Doomzday Wizard Repository.
Apart from Smokin Build, Doomzday Wizard contains several add-ons, including The Crew, TVTap, The Loop, Homelander, SportsHD, and Ghost.
Moreover, Smokin works well with Android TV Box, Firestick, Google Chromecast, Mac, iOS, Windows, and Nvidia Shield.
Let us install Smoking Kodi Build step by step.
Installation Steps
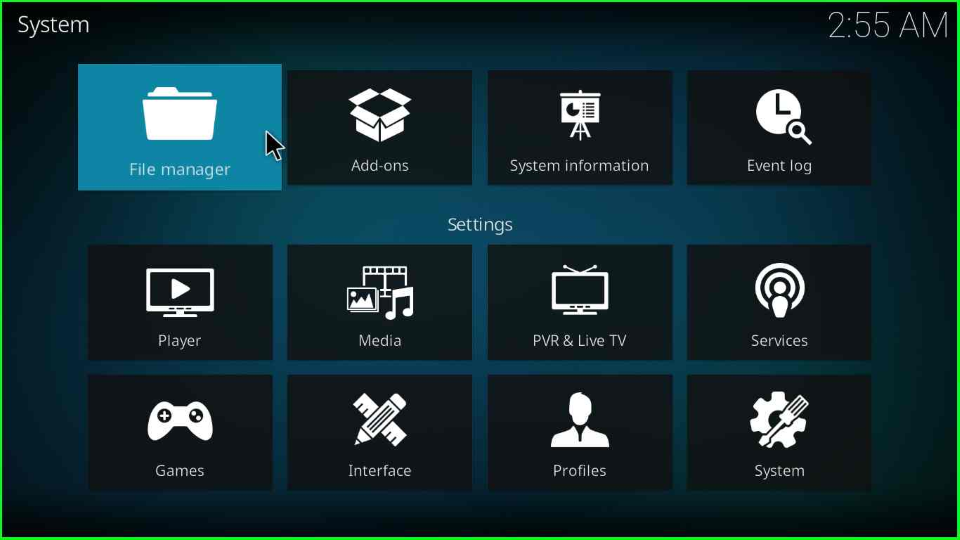
Launch the Kodi application and pick the Settings icon from the left corner.
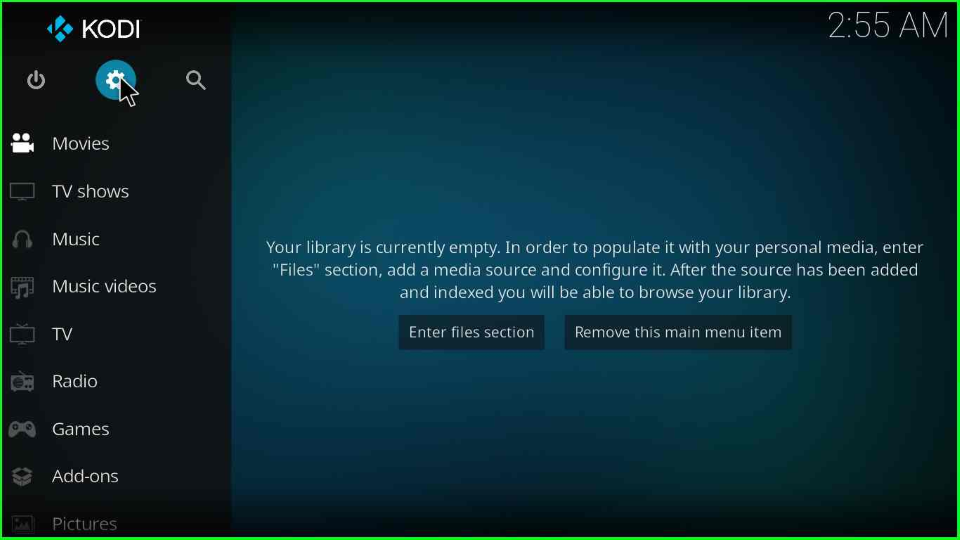
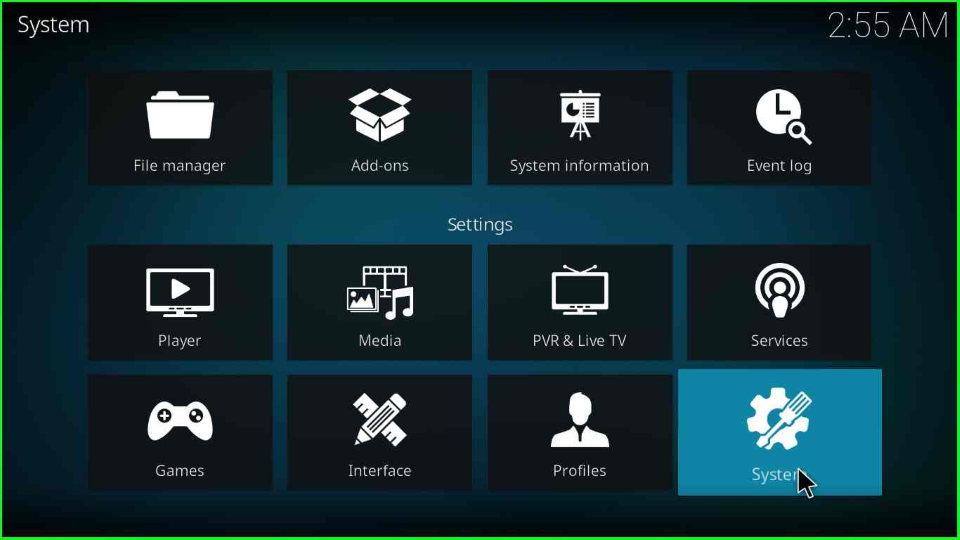
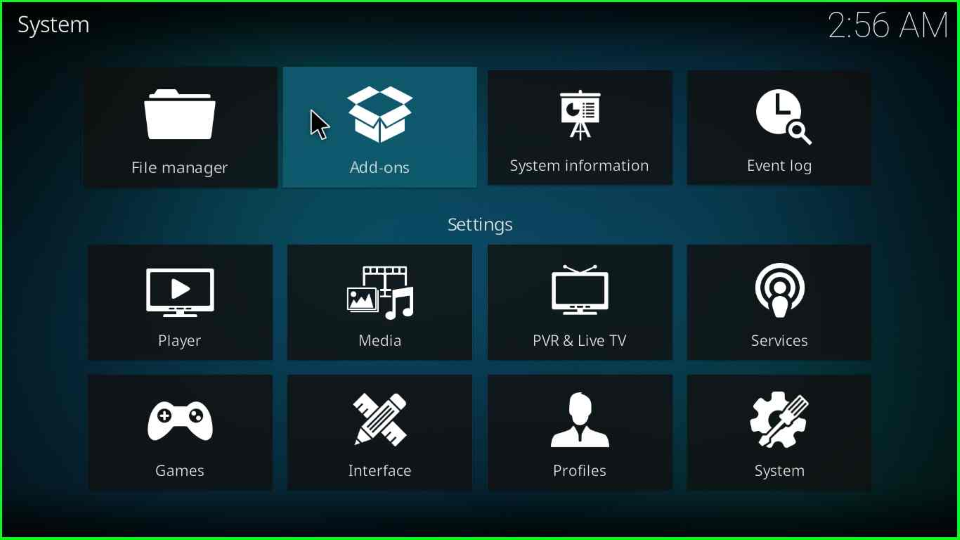
At the right corner of the screen, choose the bottom icon System.
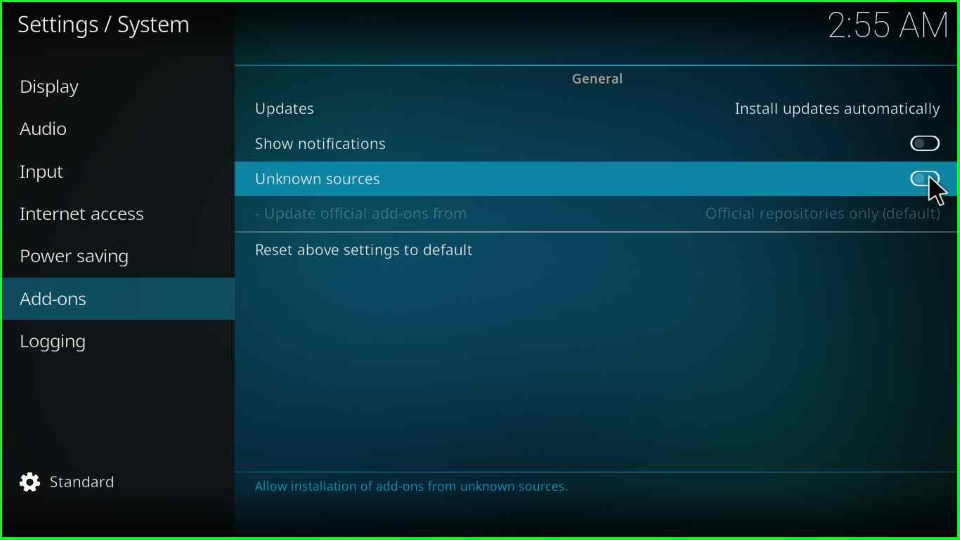
Take the cursor on the Add-ons tab and switch on the sliding button of the Unknown sources.
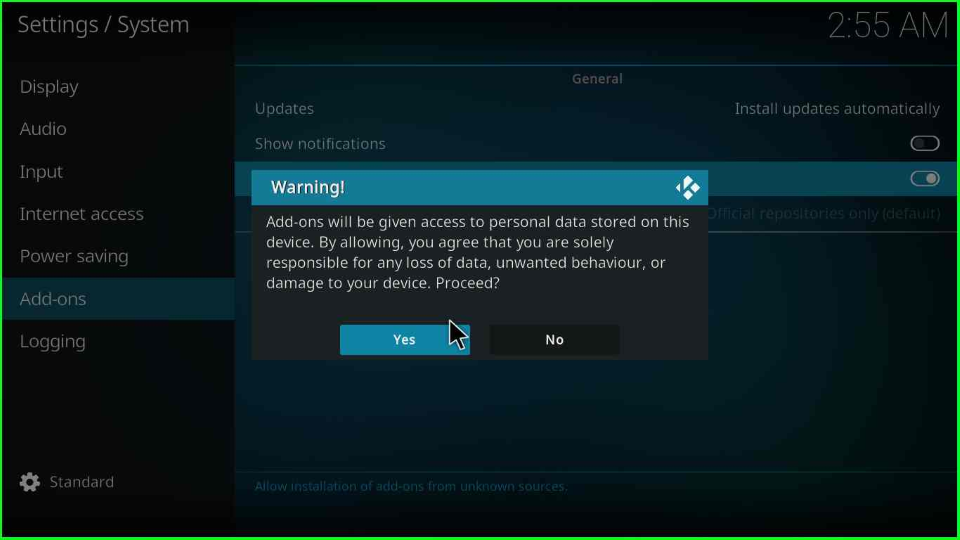
Hit the Yes button to close the warning box.
Add Media Source & Repository
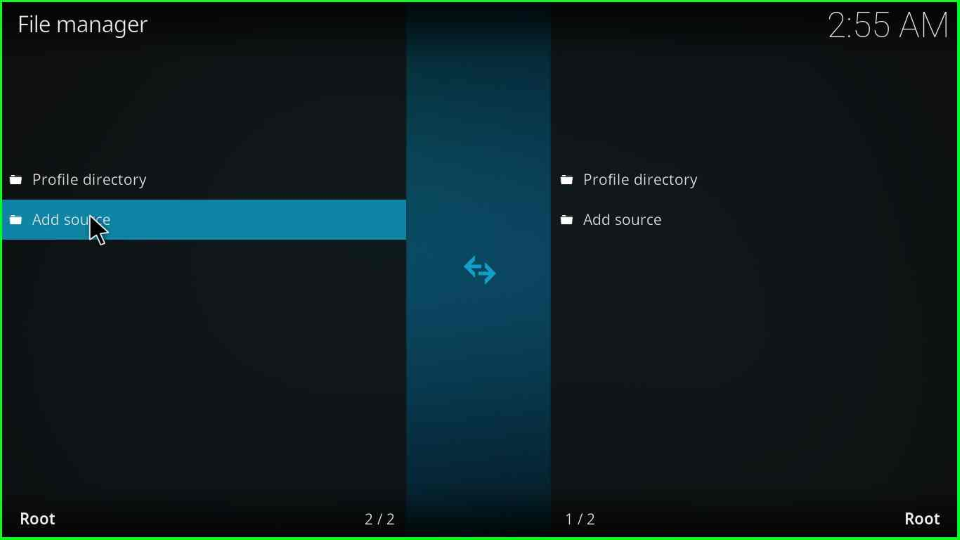
Go back and tap on the File manager.
The File Manager tab will open a new window, where you must select the Add source tab.
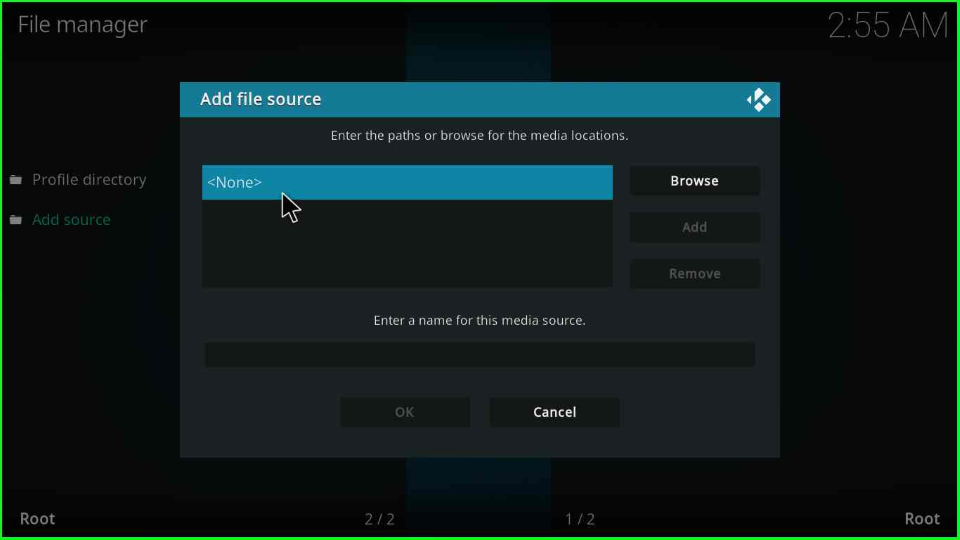
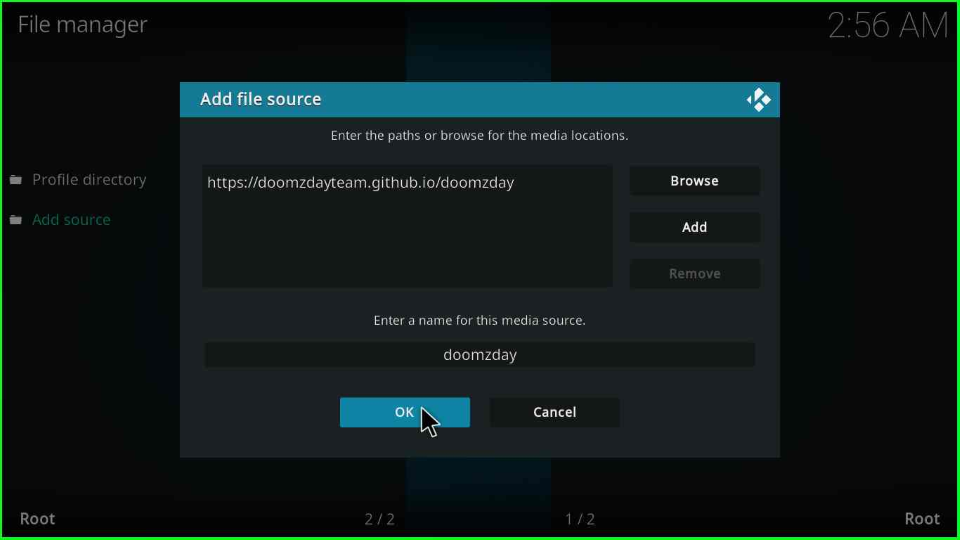
Select the blue highlighted label <None>.
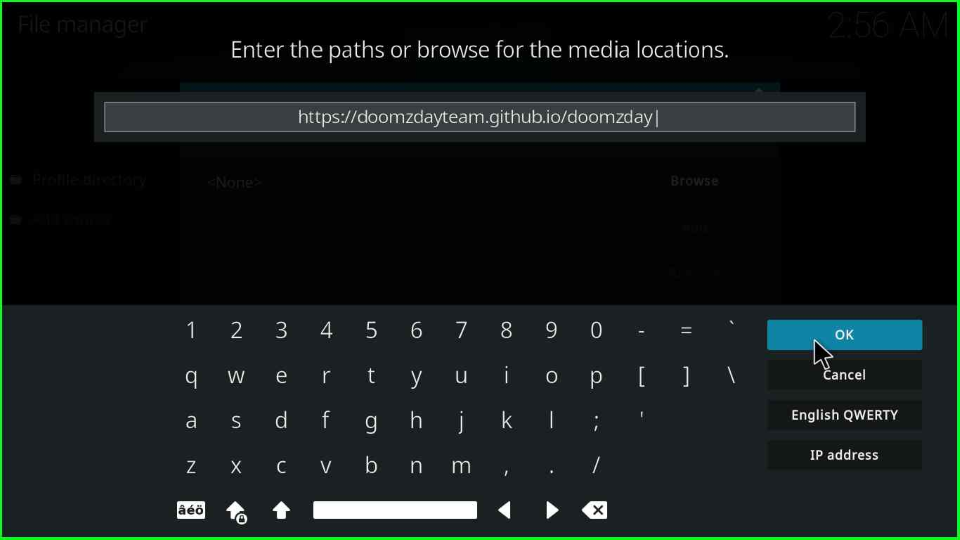
Enter the URL https://doomzdayteam.github.io/doomzday/ and press OK.
Write doomzday inside a “Enter a name for this media source” label and hit OK.

Double verify the URL and name and click the OK button.
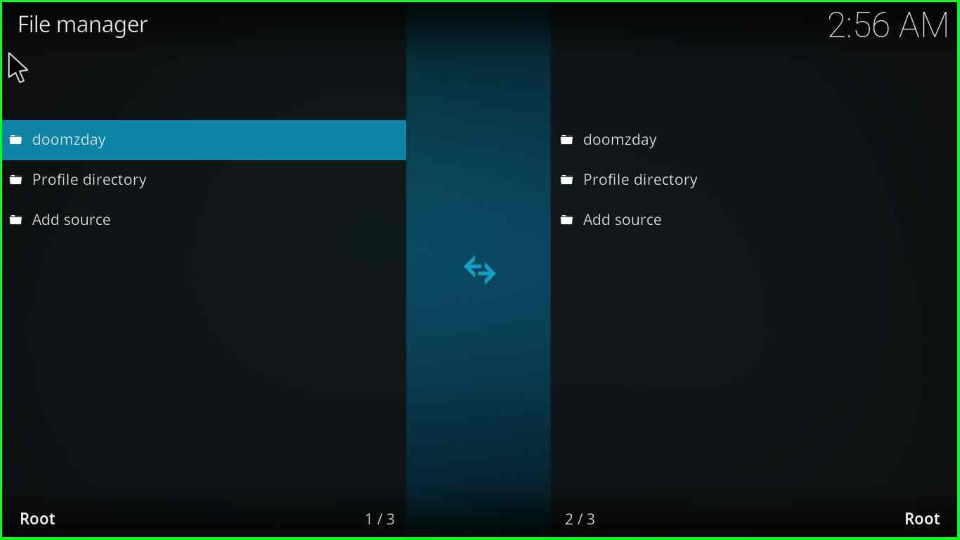
Turn back to the page; your doomzday folder is added to the File Manager page.
Install from Zip File
Again, go to the previous window and hover over the second icon, Add-ons.
Select the Install from zip file.
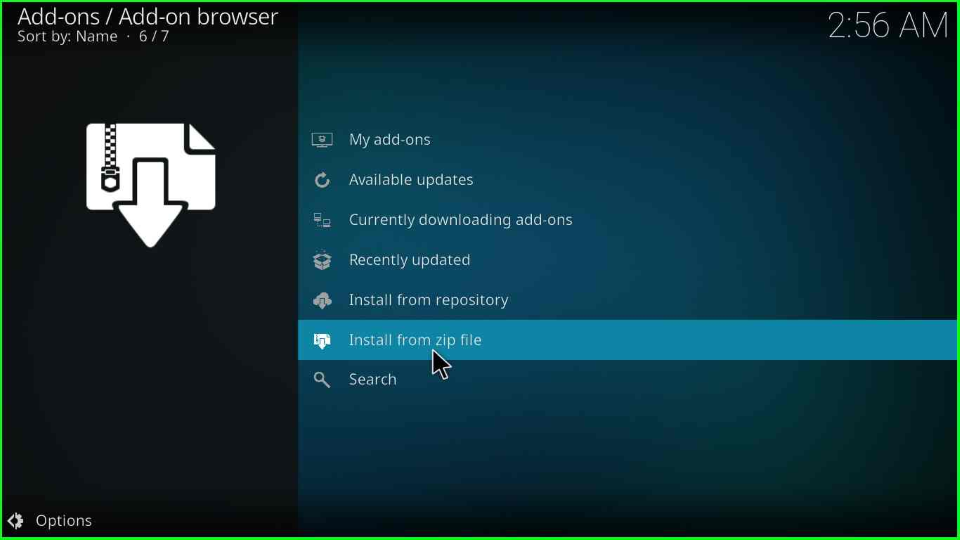
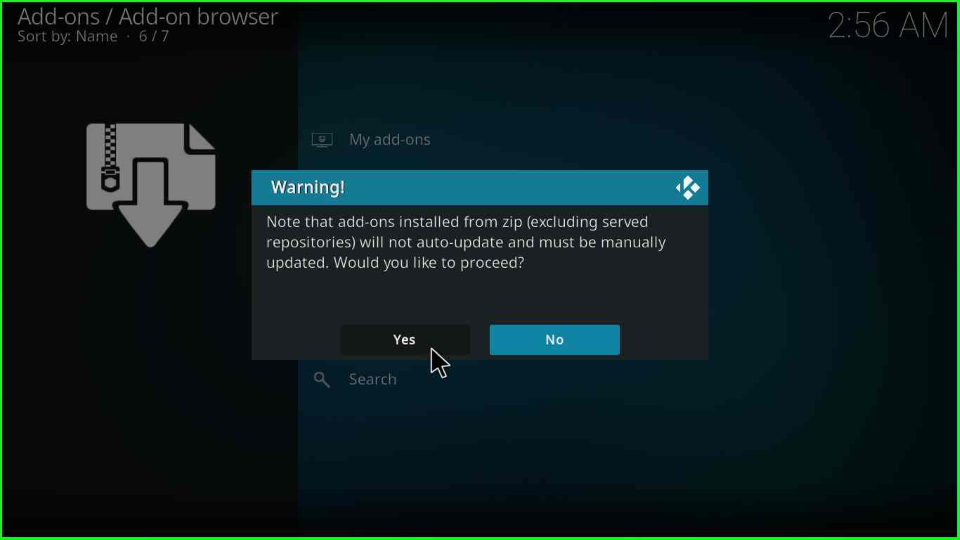
The page will display a warning box; click Yes to move ahead.
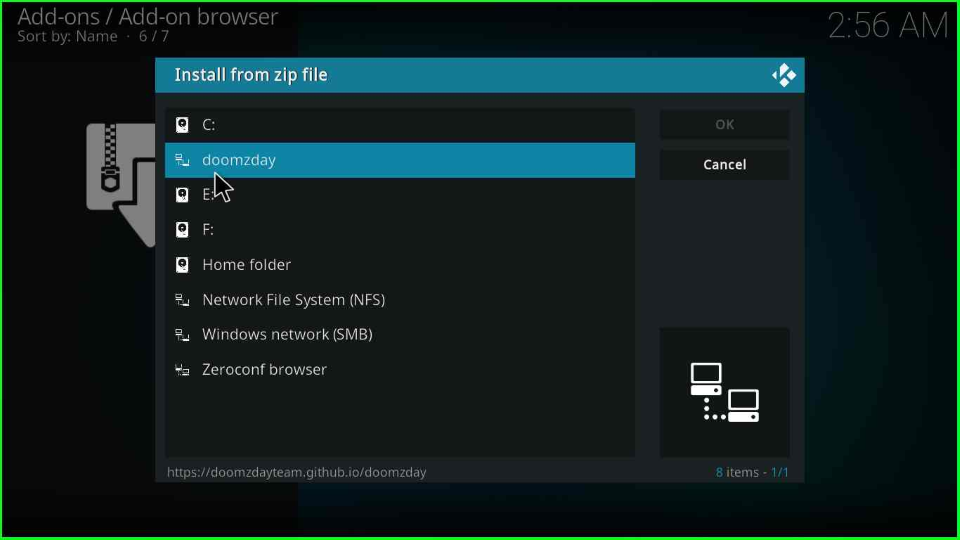
Choose the doomzday directory.
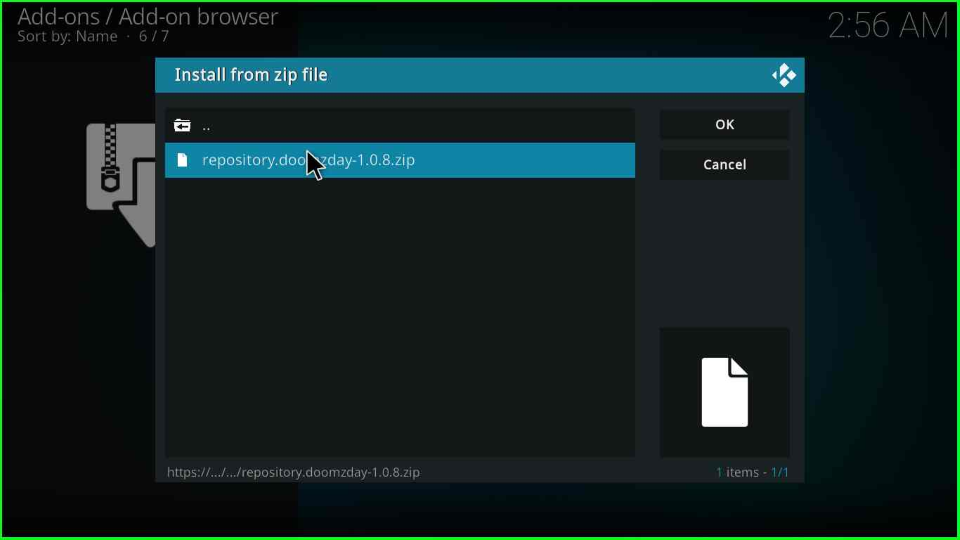
Select the repository.doomzday-x-x-x.zip. (Here, x denotes version).
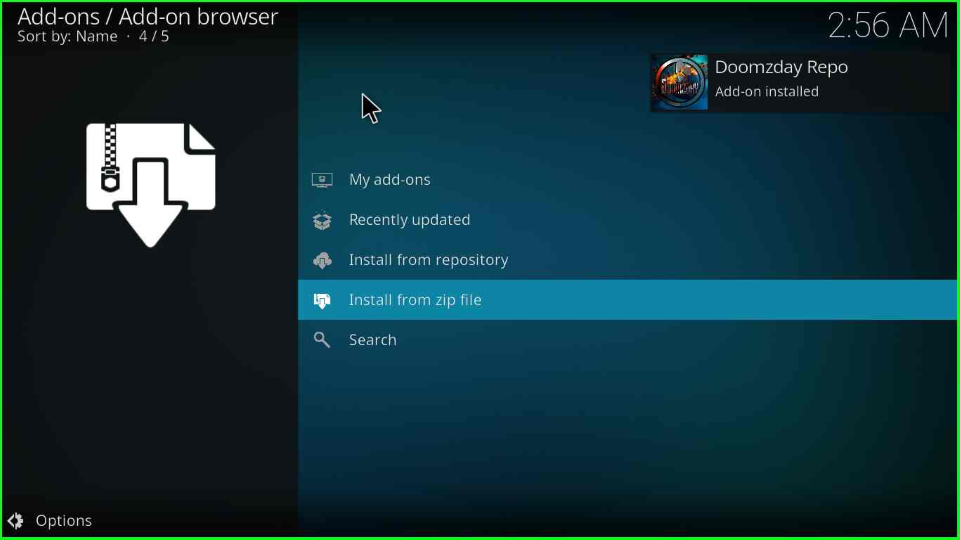
Wait for the Doomzday Repo installation message on the Add-on browser screen.
Install from Repository
Now, put your cursor on the Install from repository and click it.
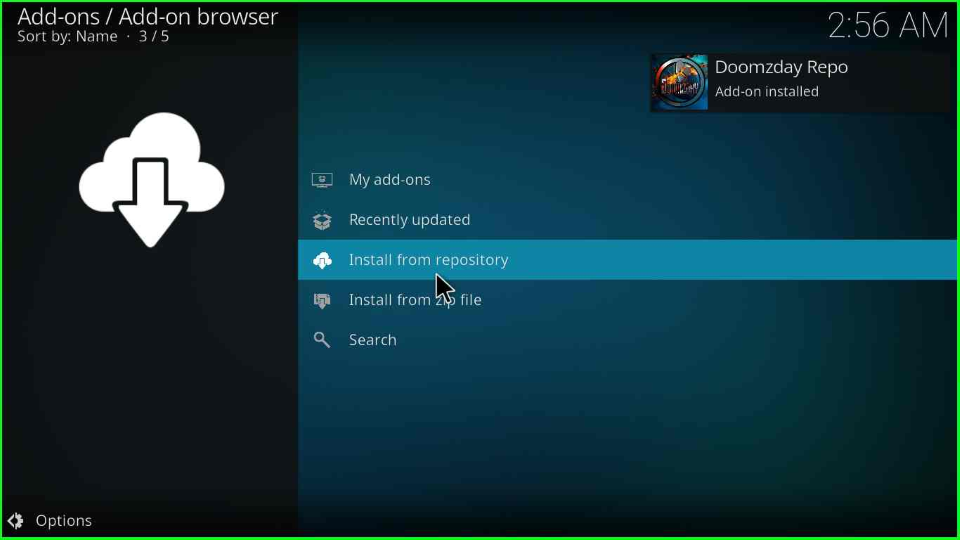
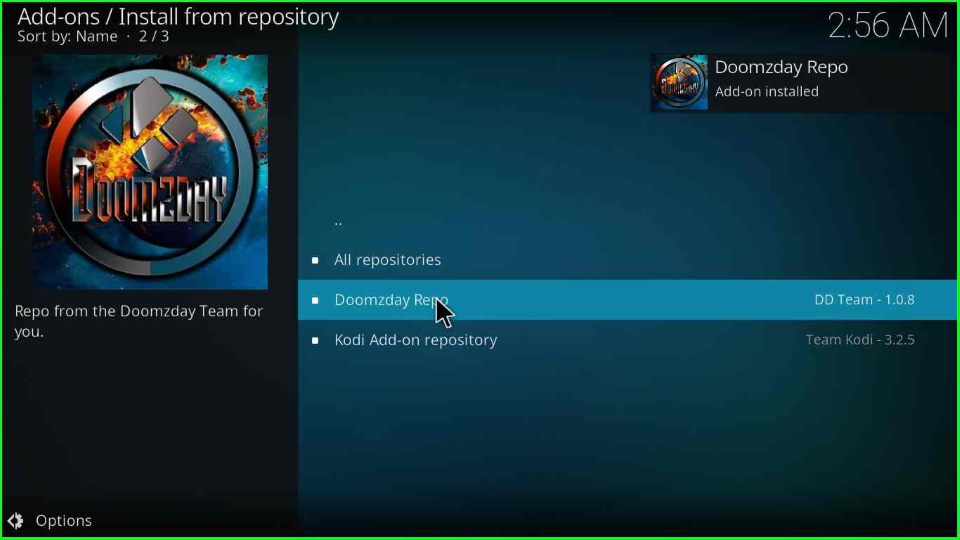
Click on the Doomzday Repo option available just after the All repositories.
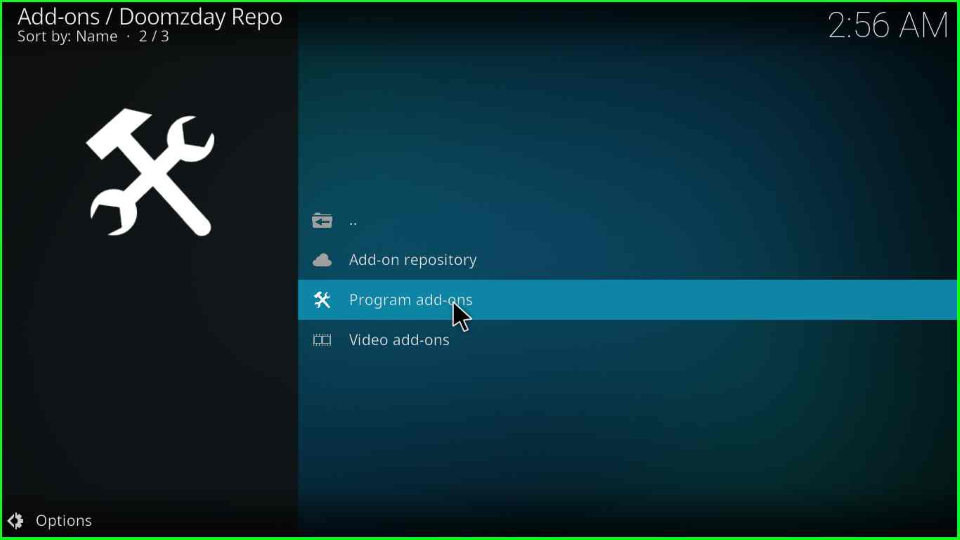
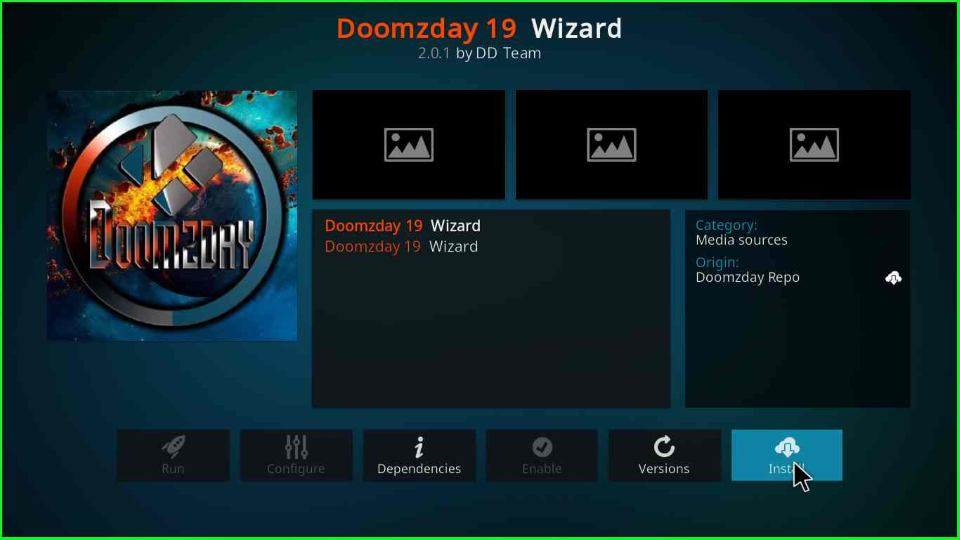
Install Doomzday 19 Wizard
Open the Program add-ons tab inside the Add-ons / Doomzday Repo screen
After that, select the Doomzday 19 Wizard.
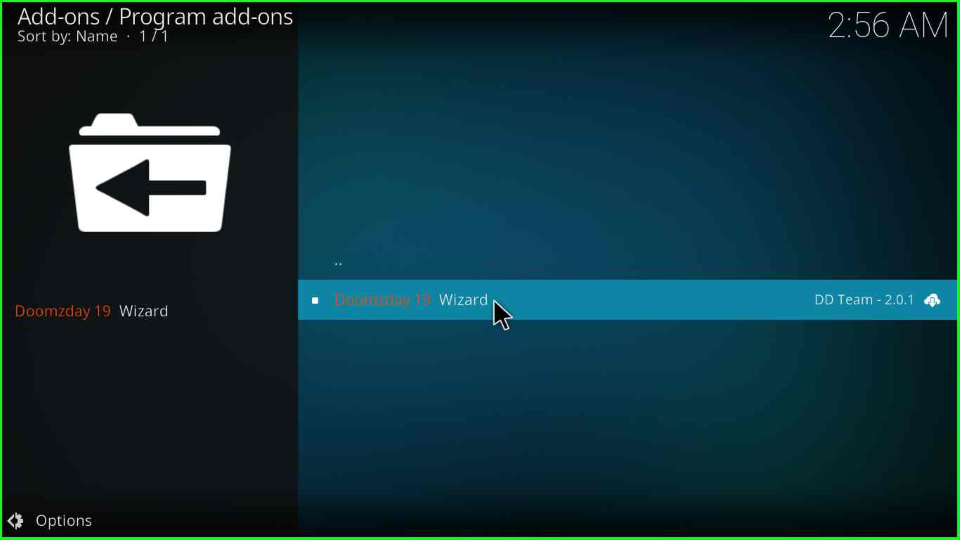
Hit the Install tab located at the right corner of the page.
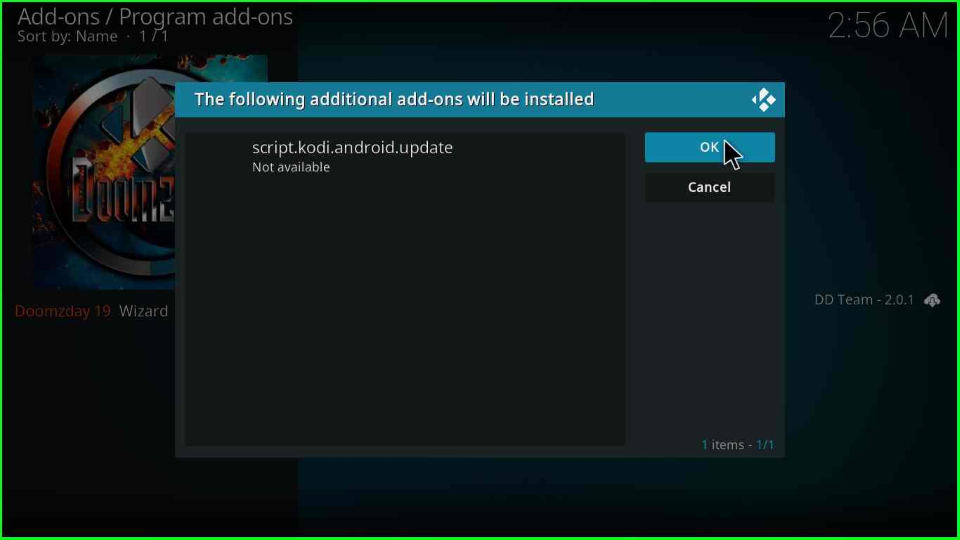
Select the blue button OK to install additional add-ons.
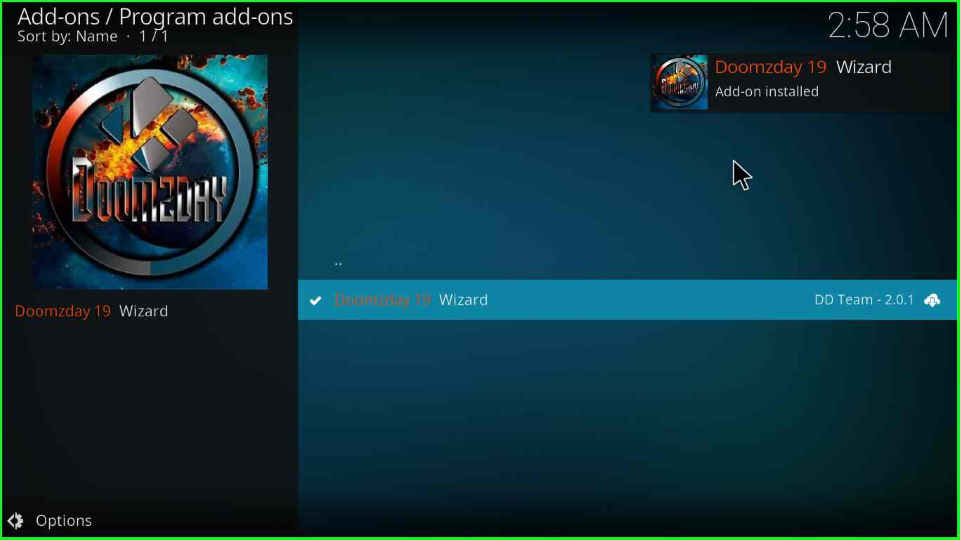
The Doomzday 19 Wizard starts installing. Wait for the notification popup in the top right section.
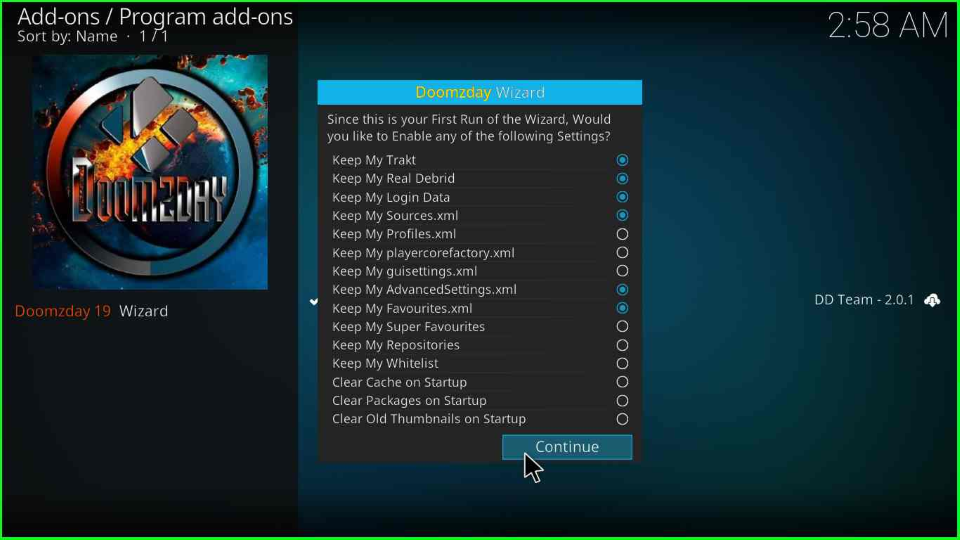
As it downloads completely, a small window will open; click on Continue.
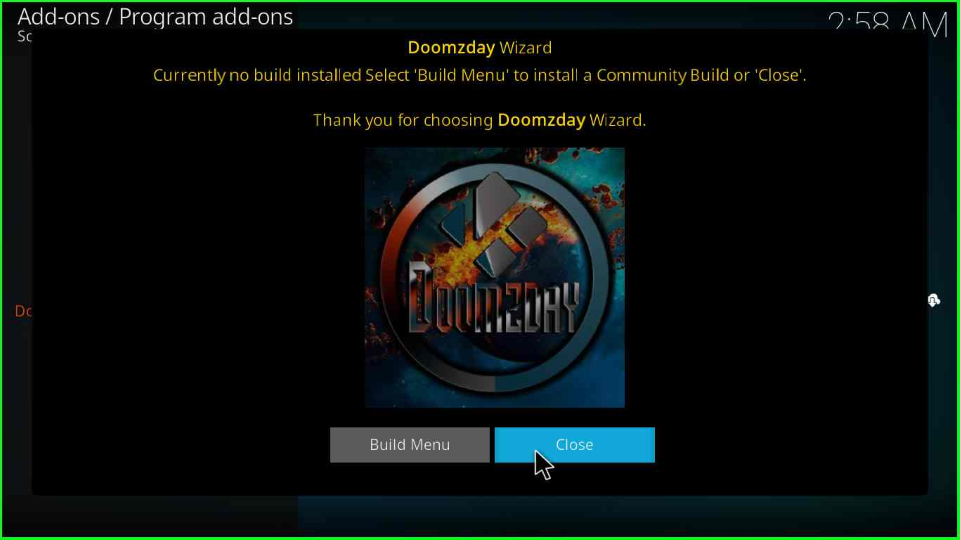
Again, a large Doomzday Wizard window appears that contains two buttons. One is Build Menu, and the other is Close. Here, I will choose Close.
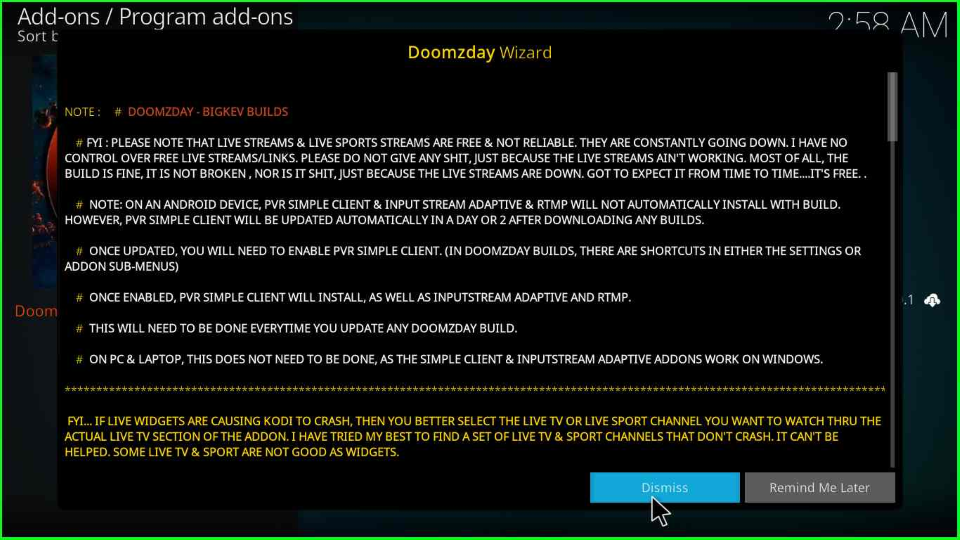
Next, tap on Dismiss, as shown on the popup page.
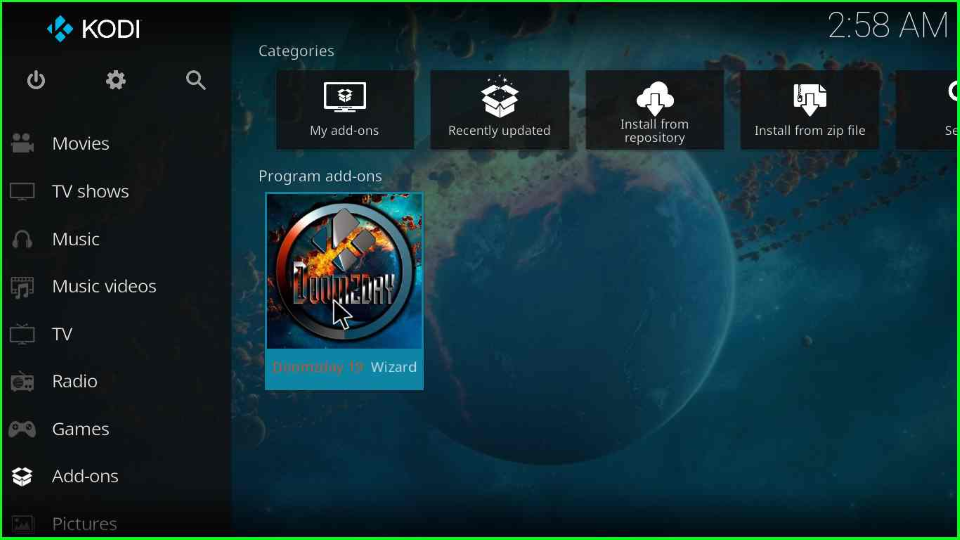
Go to the Kodi Home page and select the Add-ons option. Just inside the Program add-ons, you will see Doomzday 19 Wizard. Select it.
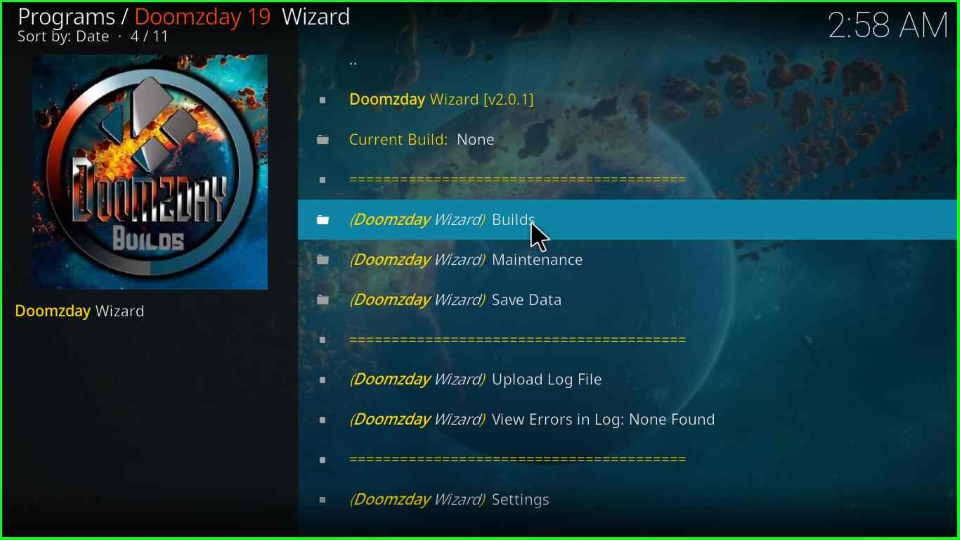
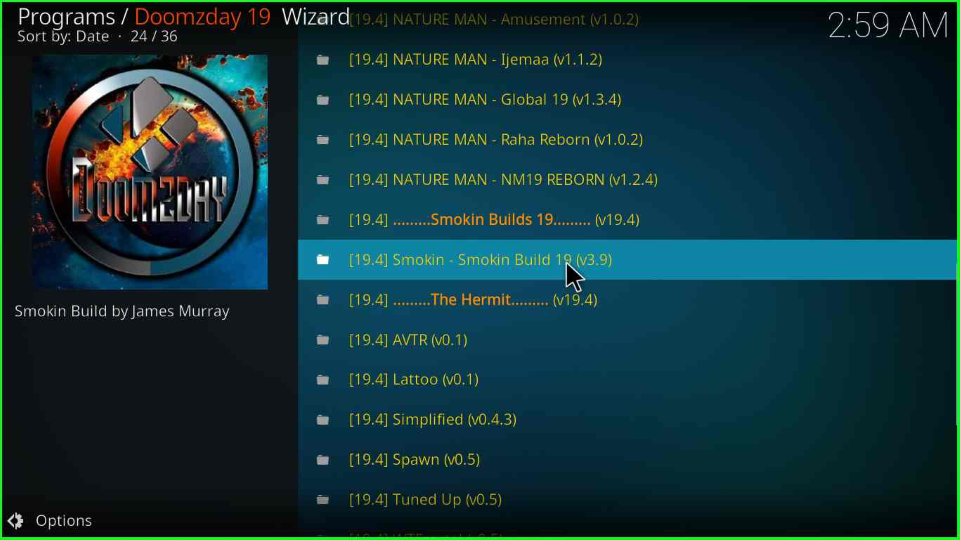
Open the (Doomzday Wizard) Builds folder.
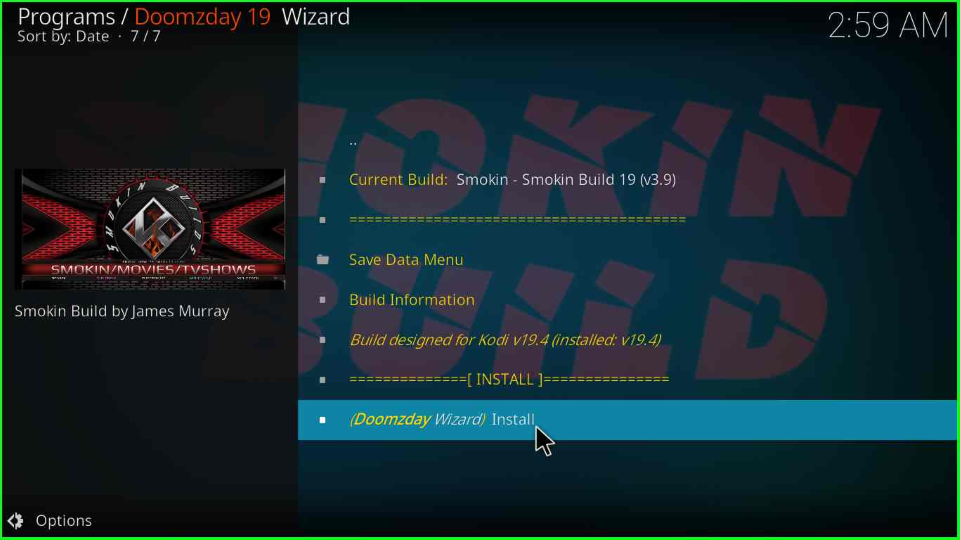
On this page, tap on the Smokin Build.
Choose the last option (Doomzday Wizard) Install.
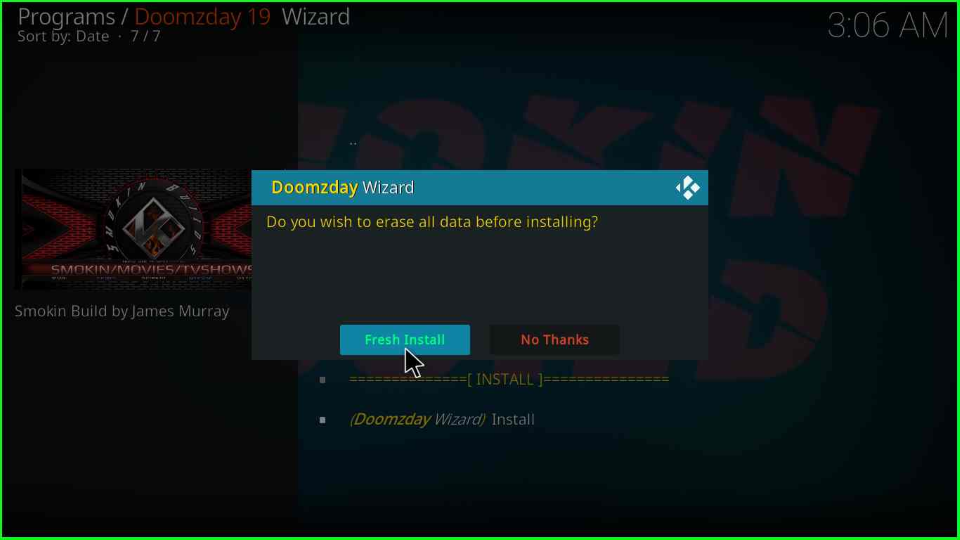
Choose the Yes, Install button, which appears on the popup box.

Hit the Blue button Fresh Install to fresh install it.
Wait for a Doomzday popup box to appear and start installing the Build.
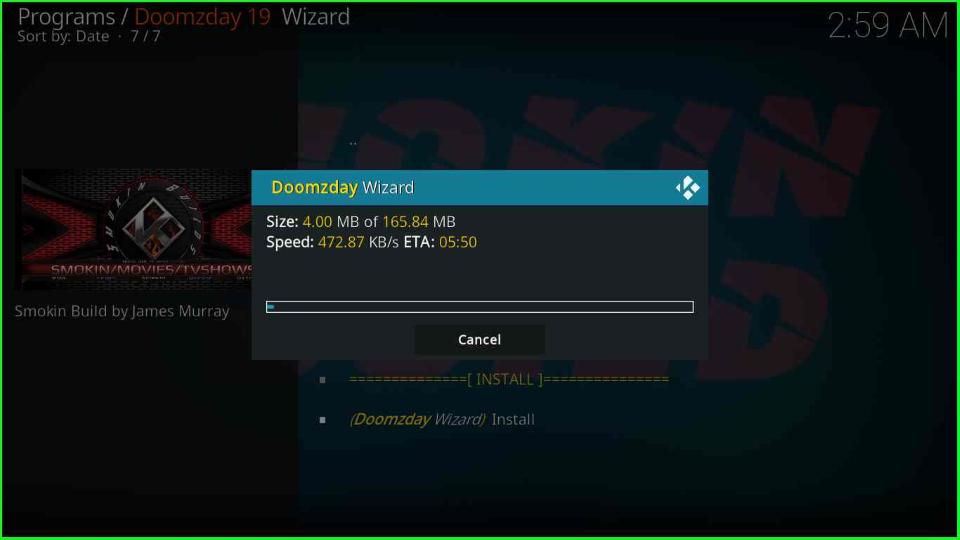
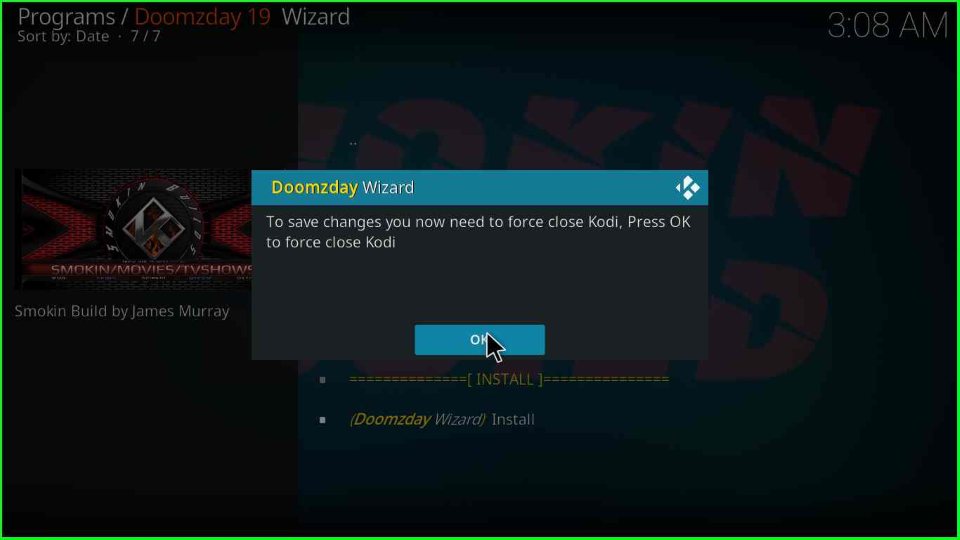
After the completion, your Smokin Build is successfully installed on your device. Click OK to save it.
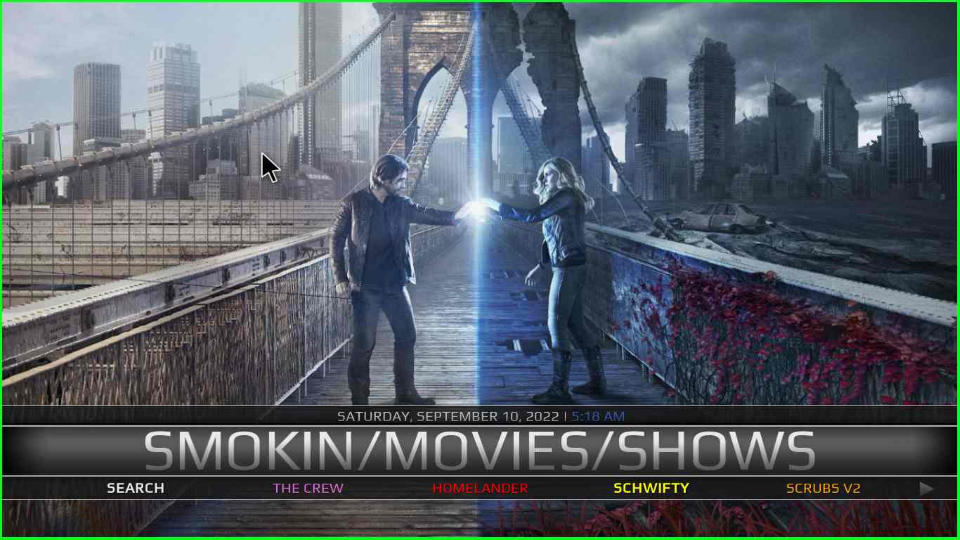
Open the Kodi again. Now, you will see the dashboard of the Smokin Kodi Build. Choose any of the streaming genres and enjoy.
Final Words
At last, Smokin is the best Kodi Build to watch high-quality shows and movies. You can easily install it by following the above steps. But keep in mind that there is a possibility that you might end up streaming illegal content unintentionally; hence, ensure you have a reliable VPN to access the content.
