In this post, we have listed the necessary steps to install the Otaku addon on Kodi. These steps work fine with Android, Firestick Lite, 4K, Fire TV Cube, Mac, iOS, Apple TV, Smart TV, etc.
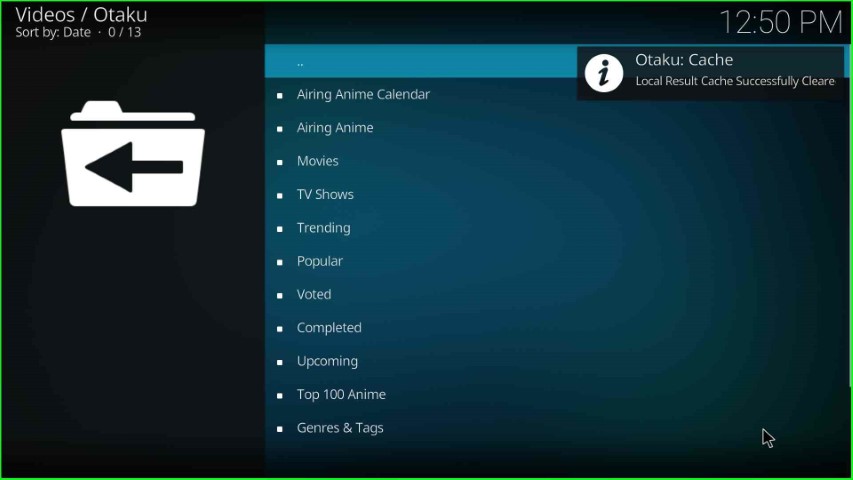
Otaku is one of the best anime add-ons that is available on Hooty’s repository. Here, you can look for different sections to navigate, including TV Shows, Upcoming, Popular, Voted, Airing Anime, Trending, Top 100 Anime, etc.
Although the addon works well with movies and TV shows, integrating with RealDebird and Premiumize provides better-quality videos.
Installation Steps
Enables Unknown Sources
Open the Kodi window and select the Settings tab.
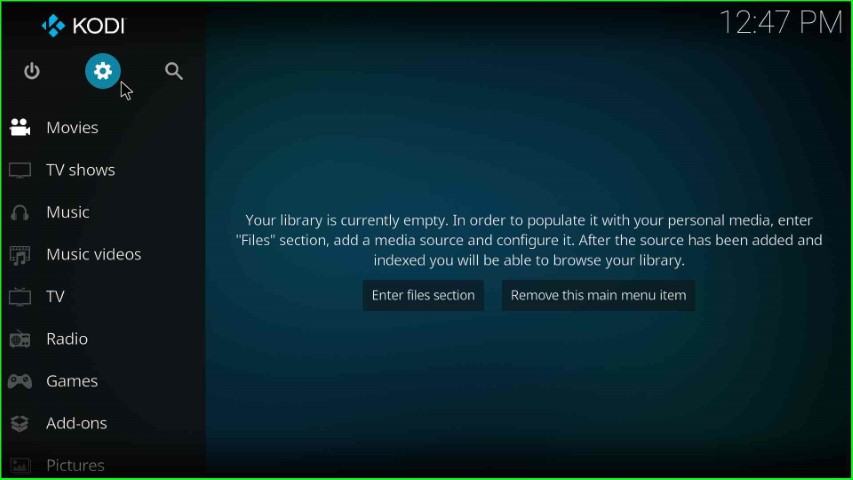
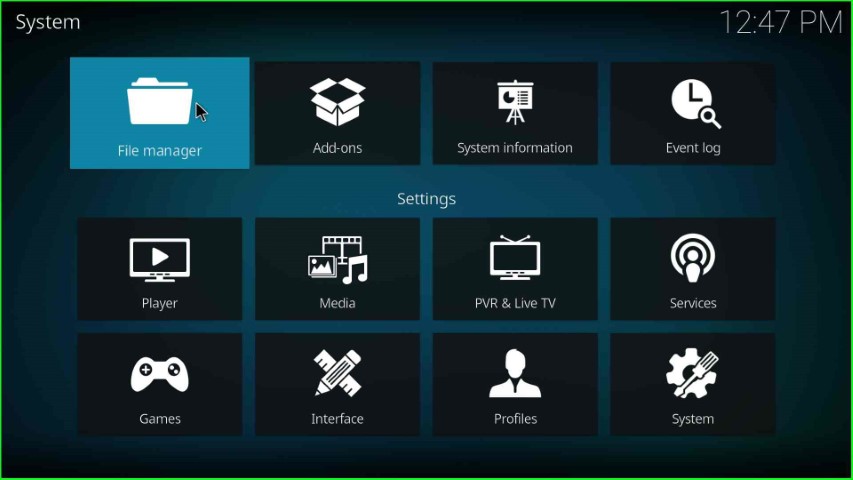
Choose the System icon from the list of options.
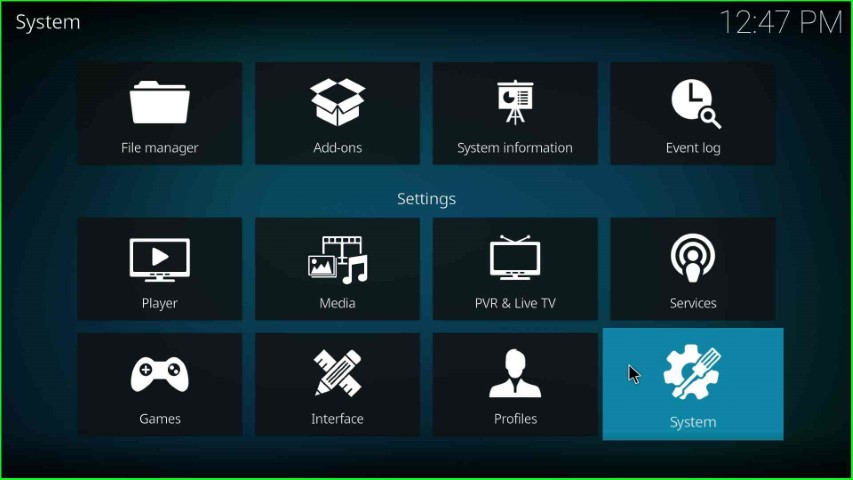
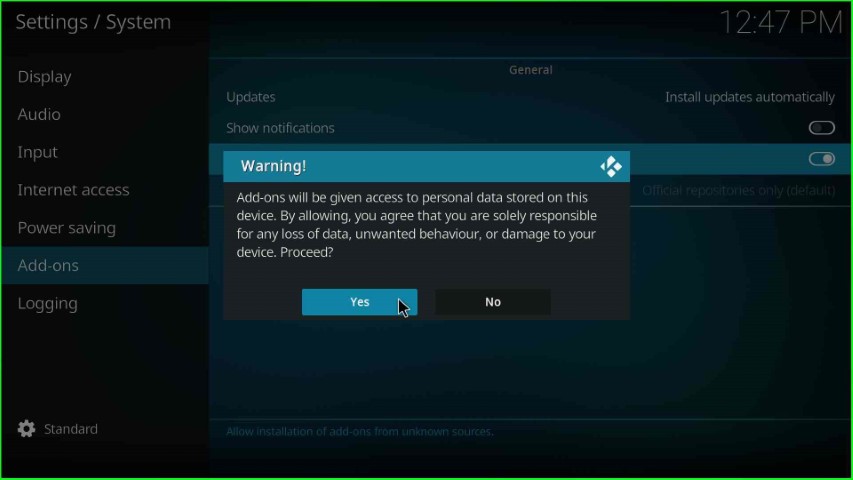
Put the cursor on the Addons icon and turn on the Unknown sources tab.
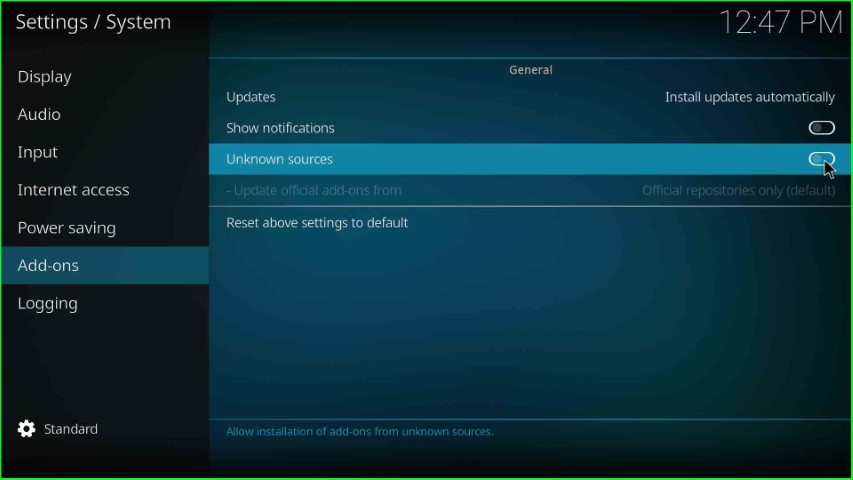
Click on the Yes tab, as shown in the warning sign.
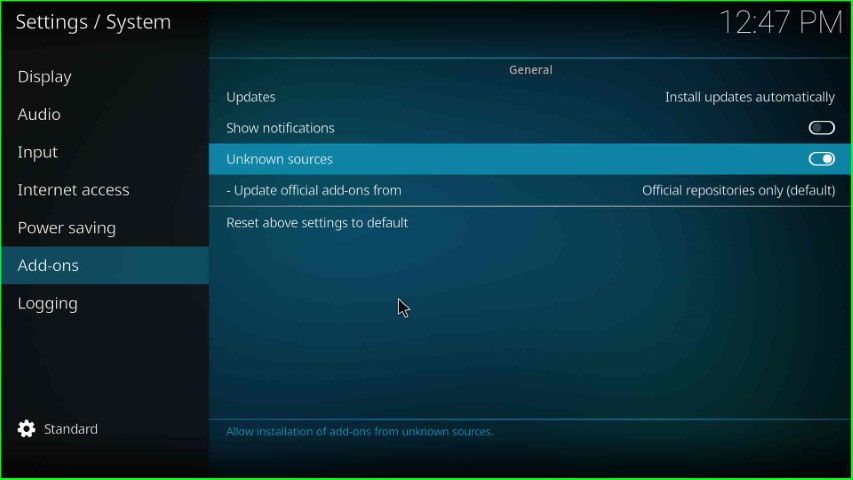
On this page, you can see the Unknown Sources button enabled successfully.
Add Media Source Repository and URL
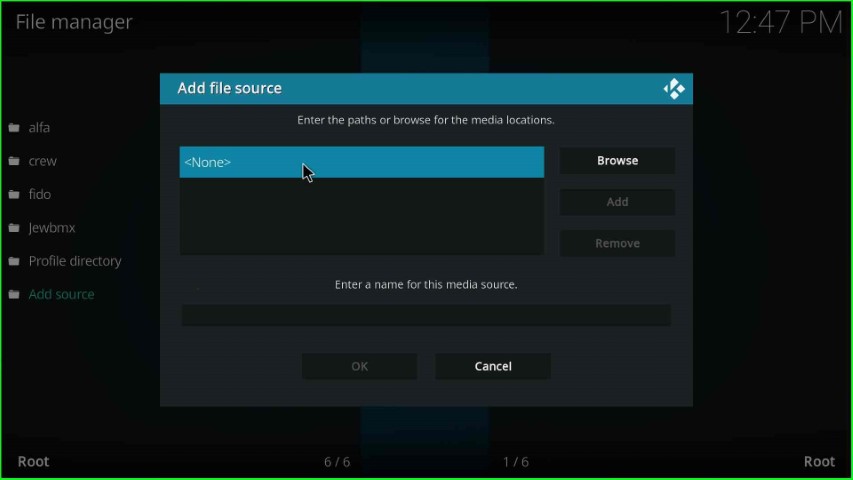
Select the first tab, File manager.
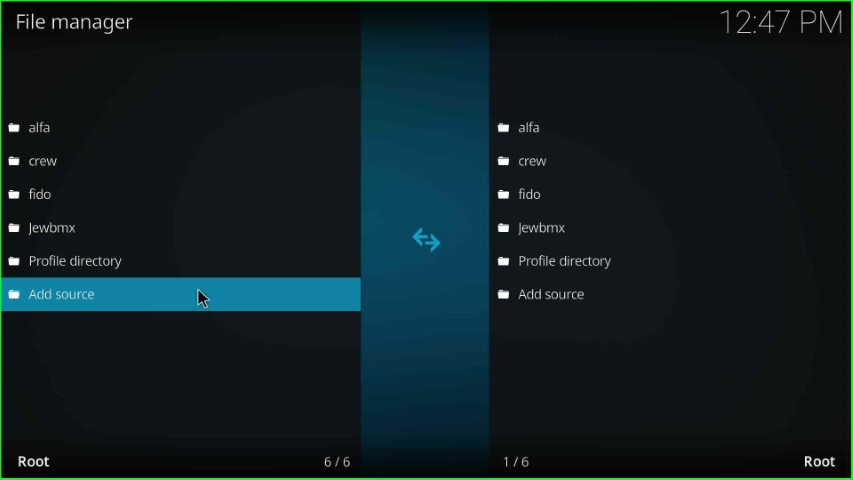
Here, tap on the Add source option.
Hit the <None> tab in the Add file source window.
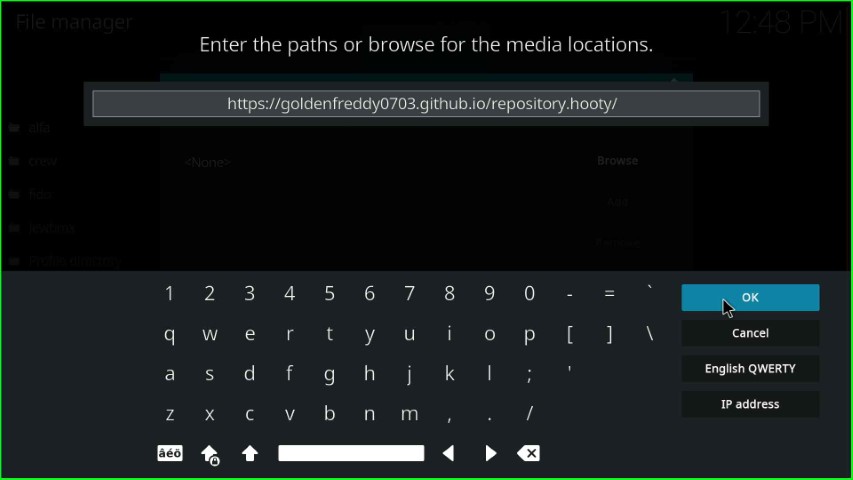
Here, write the path for the media location.

Enter the repository path as https://goldenfreddy703.github.io/repository.hooty/.
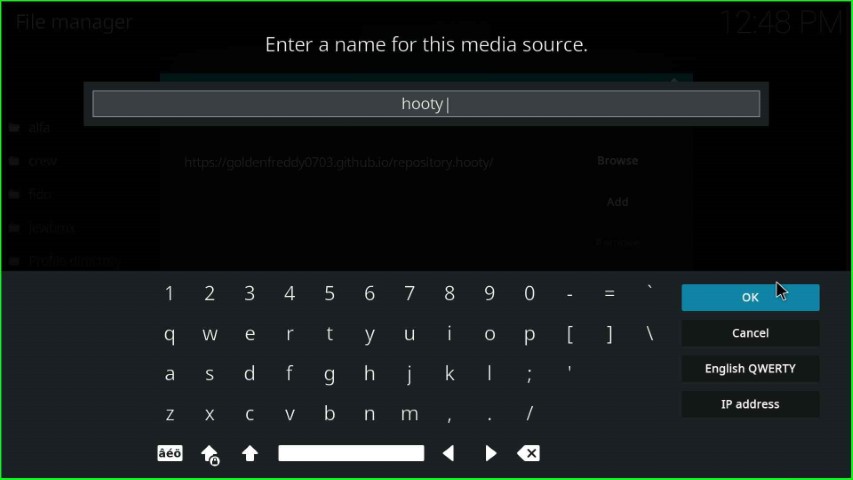
Click on enter a name for this media source label text to change the media source name.

In this step, enter a name for this media source as hooty and hit the OK key.
Check the media source URL and name you entered and press the OK button.
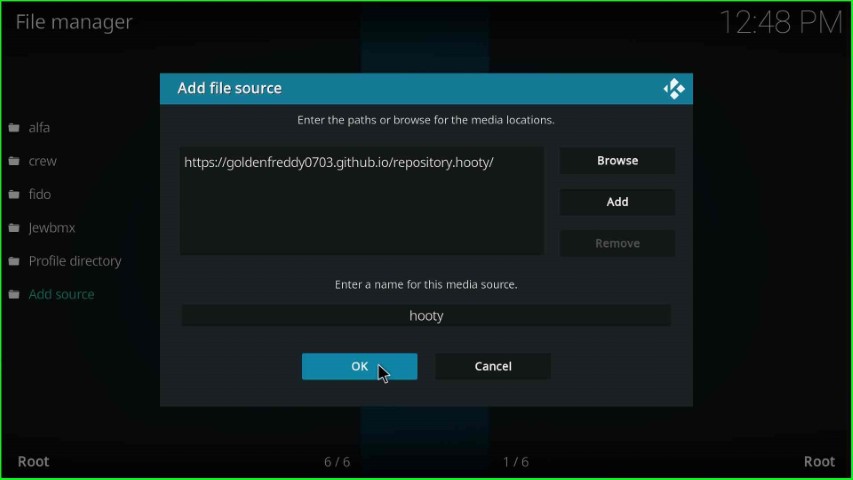
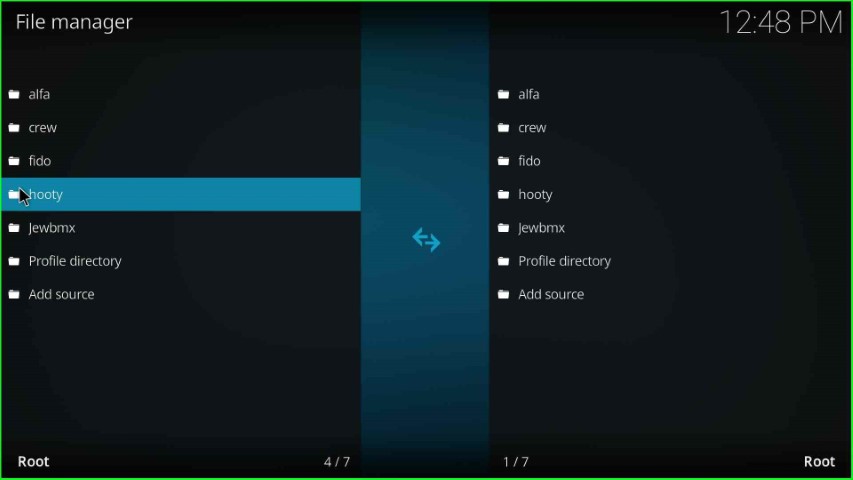
Here, you can see the recently added media source, hooty.
Install from Zip File
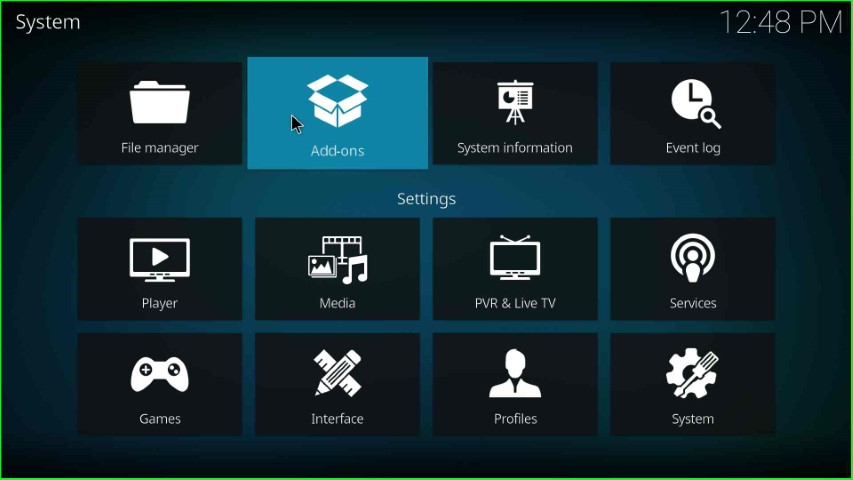
Return to the System Settings and click on the Addons key.
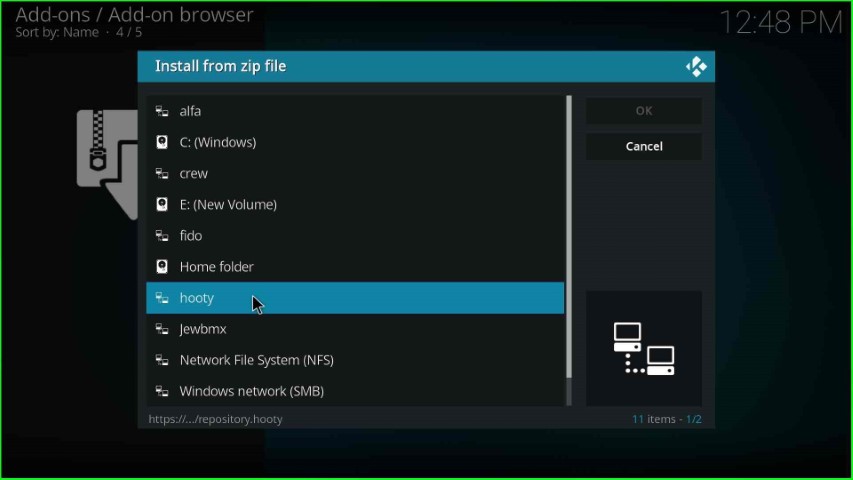
Tap on the Install from zip file option.

Choose the hooty source from the available options.
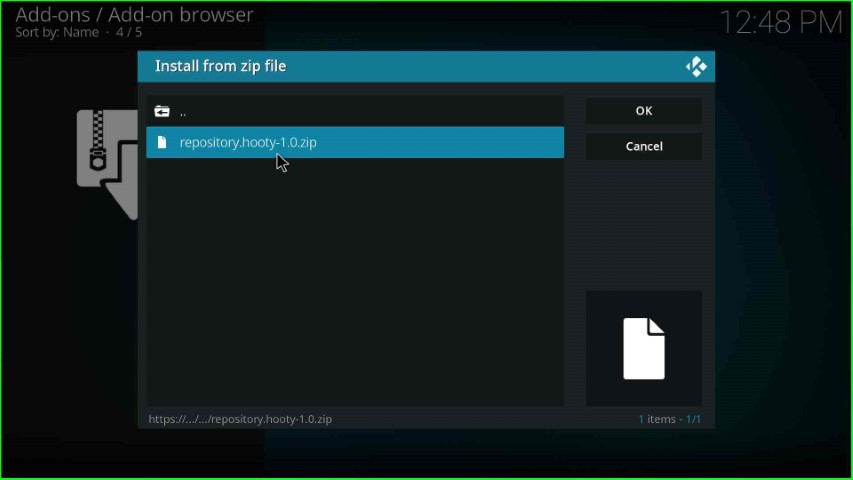
Tap on the repository.hooty-x.x.zip file.
Wait until you see the message Hooty’s Repository Add-on installed on the screen.
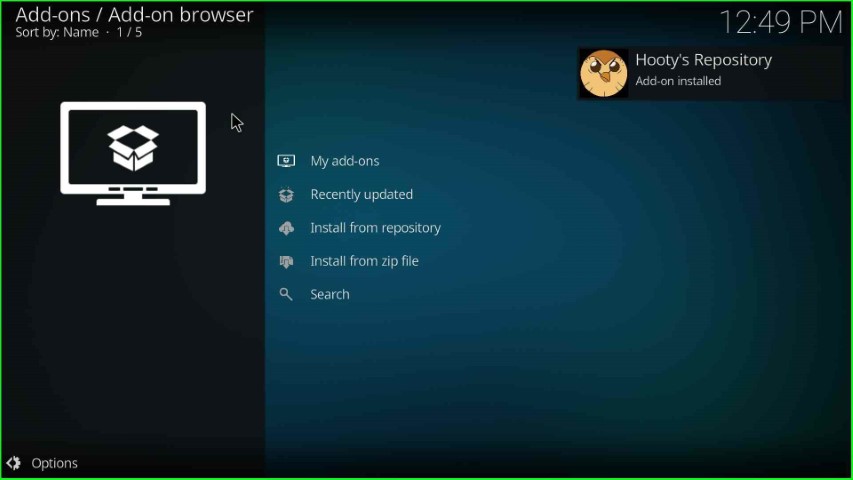
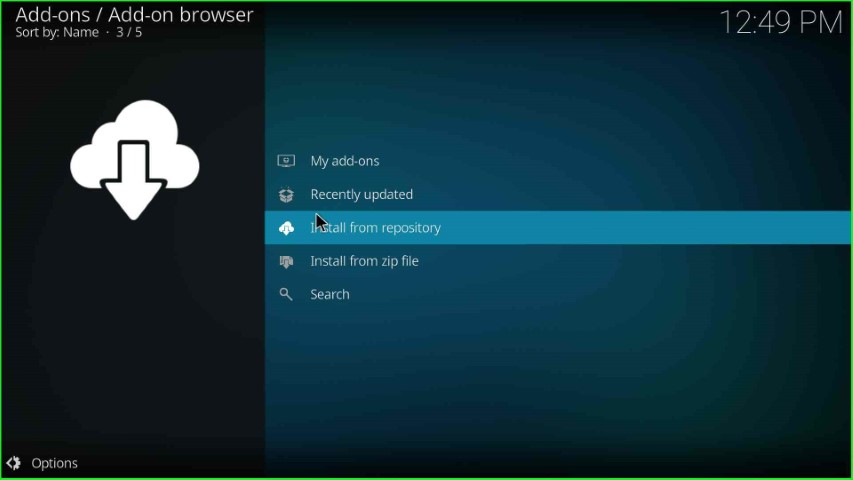
Install from Repository
Choose the next option, Install from repository.
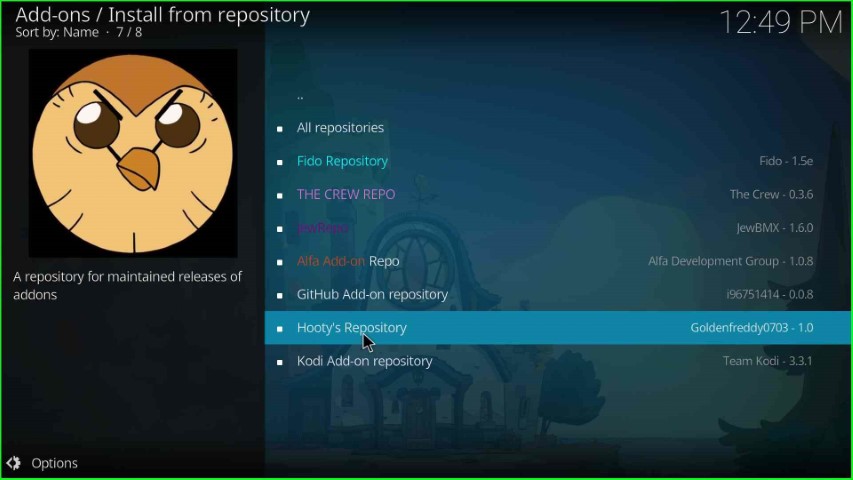
Click on Hooty’s Repository from here.
Install Otaku Addon
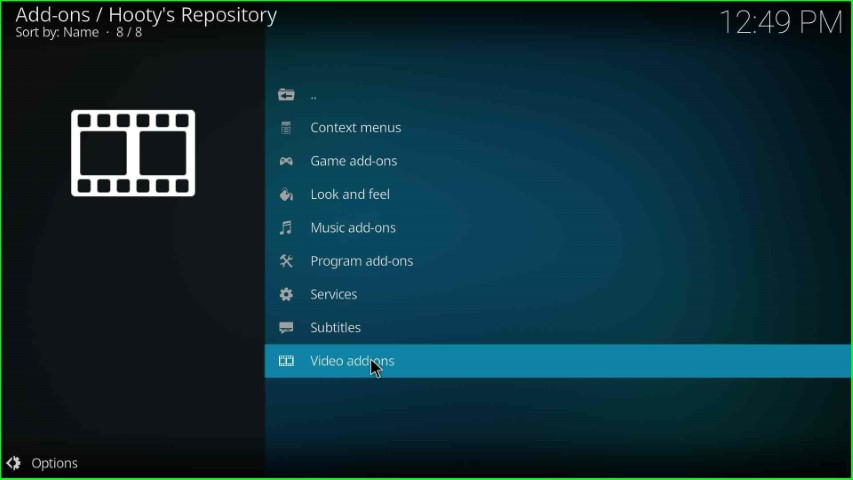
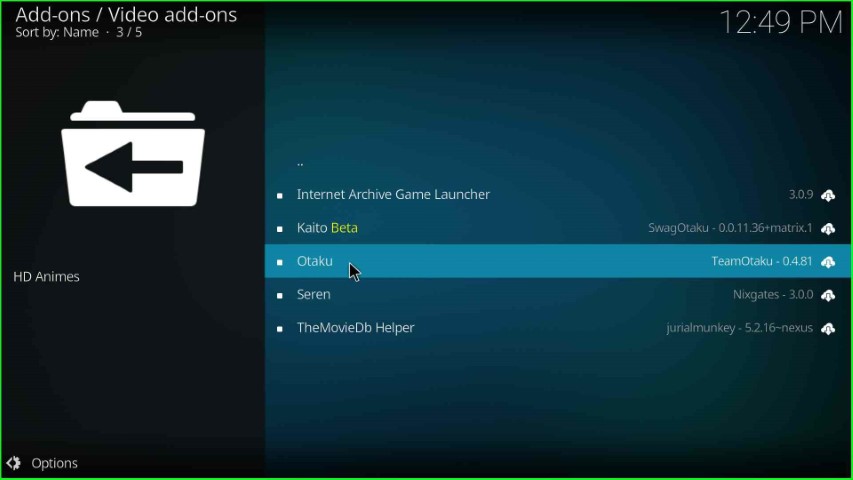
Select Video add-ons from the Add-ons page.
Tap on the Otaku addon from the list of addons.
Press the Install key from the bottom right corner of the screen.
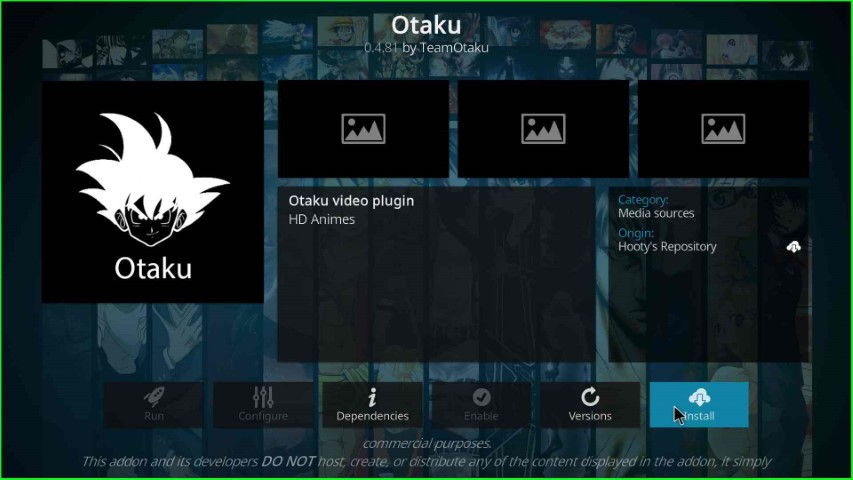
Click on the OK button displayed in the pop-up window.

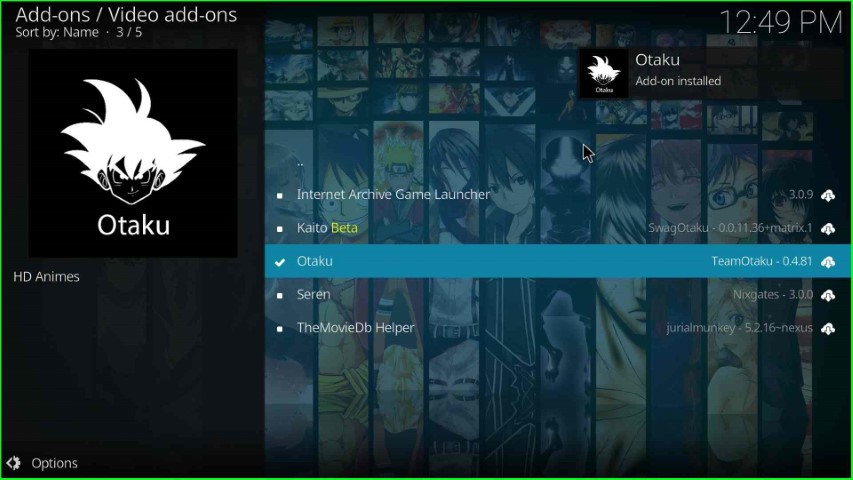
Wait for the installation message Otaku Add-on installed on the screen.
Launch Otaku Addon
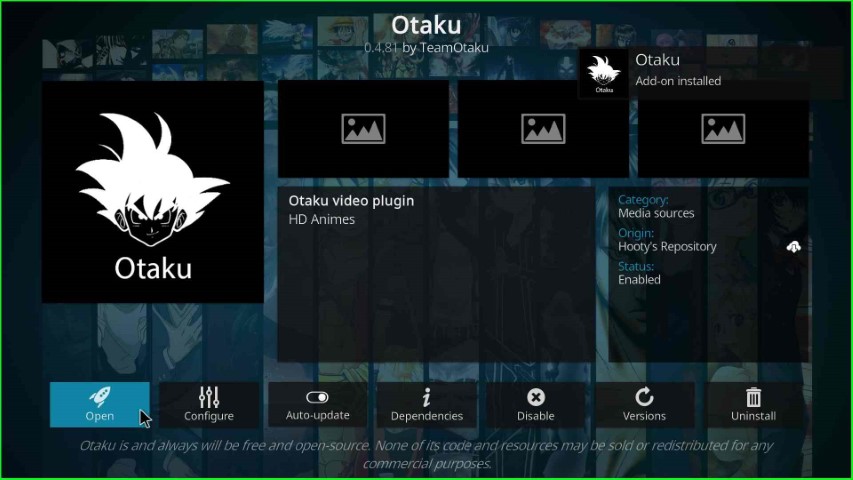
Now, select the Otaku addon.

Open the Otaku addon.
Wait for some time until the Otaku screen appears.

The Otaku screen appears with immense streaming options.