Within the post, we will let you know the easy steps to install the Fetch addon on Kodi. These steps are also applicable to use on other platforms like Firestick Lite, Apple TV, MacOS, Android TV Box, Fire TV Cube, Nvidia Shield, Linux, Samsung TV, Mecool Boxes, iOS, Raspberry Pi, Chromecast, etc.
Fetch is one of the best Kodi live TV add-ons that provides streaming channels for different countries, like the US, UK, and Canada, across the globe. Here, you can find streaming content in various categories, including comedy, music, entertainment, animation, sports, classics, travel, news, lifestyle, etc.
Also, the add-on content is well arranged, with separate sections for English and international channels, which makes searching easy. Some of the available channels for the Fetch addon are PBS, Samsung TV Plus, Xiaomi, TCL, Vizio, and Red Box.
Installation Steps
Let’s go ahead with the steps to install the Fetch addon on Kodi.
Enable Unknown Sources
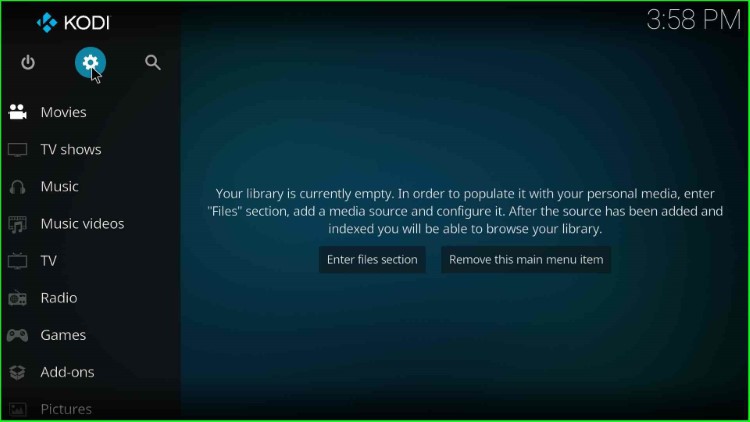
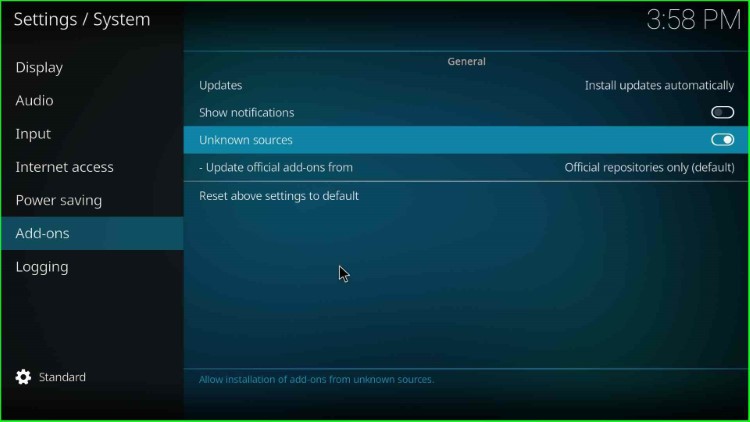
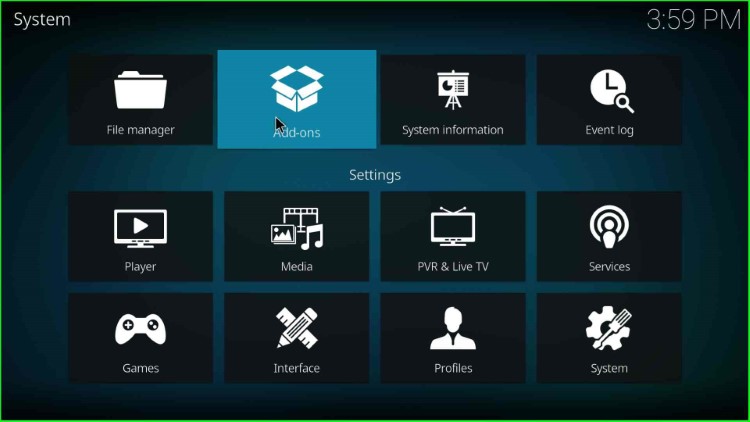
Open the Kodi Home screen and click on the left side gear icon, Settings.
Select the System sign available at the bottom of the screen.
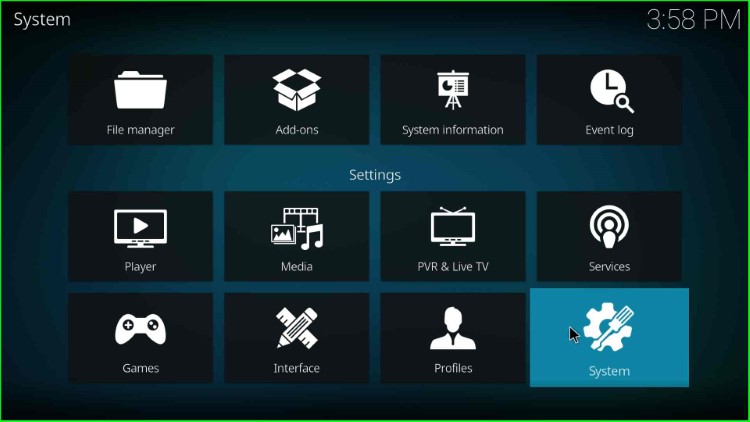
Now, hit the Add-ons tab listed just after the Power saving option.
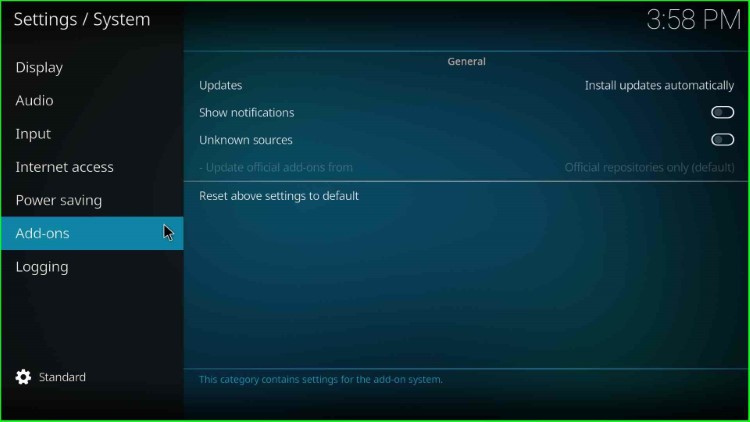
Thereafter, turn on the Unknown source key using the slider button.
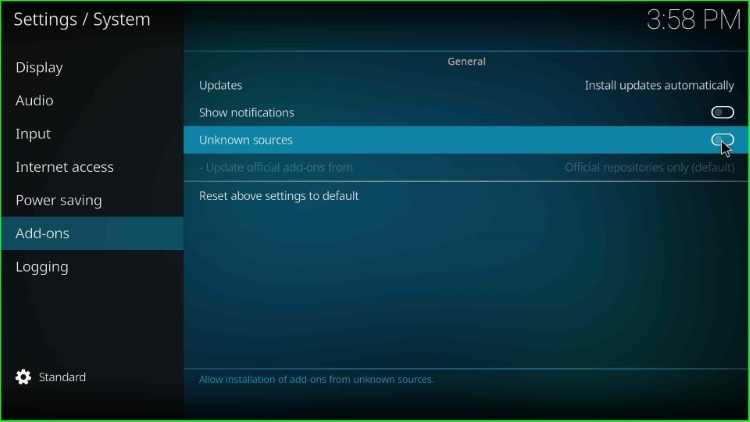
As you enable the slider button, it pops up a warning message when you tap Yes.
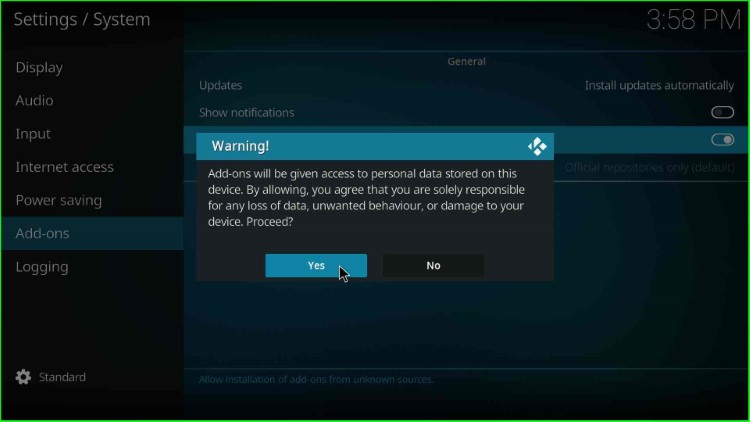
After clicking Yes, you have allowed the installation of unknown sources on your device.
Add Media Source and Repository URL
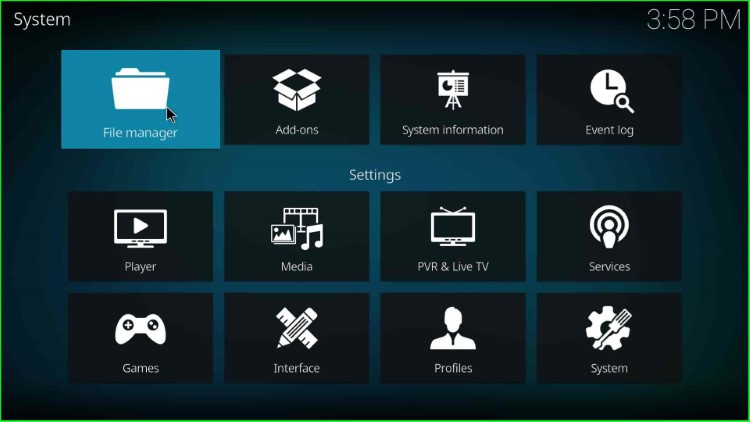
Go back to the System Settings page and choose the File manager key.
Inside it, select the left-side option, Add source.

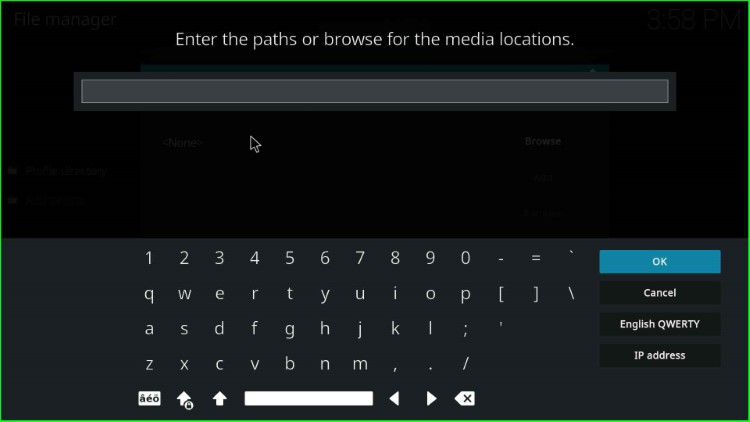
Now, hit the <None> option as listed in the Add file source window and go ahead.
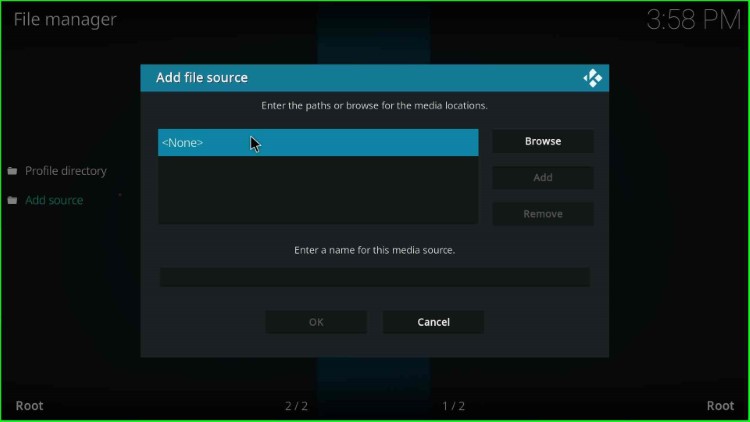
It shows an Enter the paths or browse for the media location page.
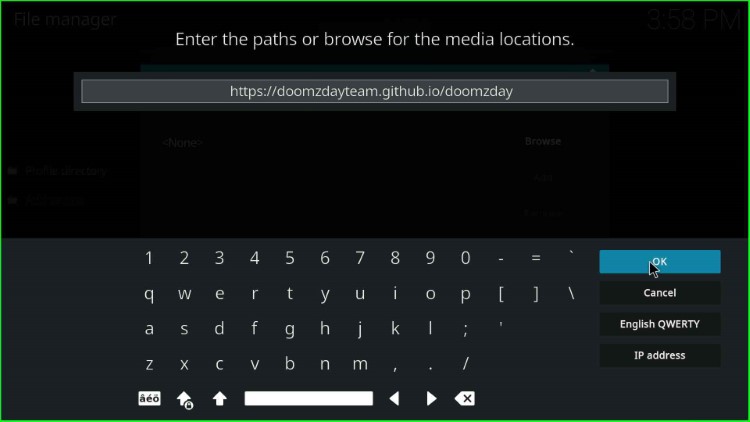
Enter here the path for the doomzday repository as https://doomzdayteam.github.io/doomzday and hit the OK sign.
After adding the repository path, move further with the media source name text box.
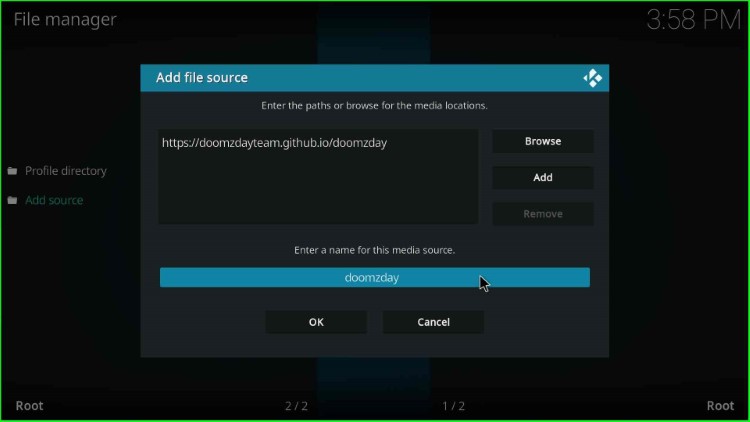
Add the media source name as doomzday and press the OK sign.

Recheck the details you entered and hit the OK toggle to save them.

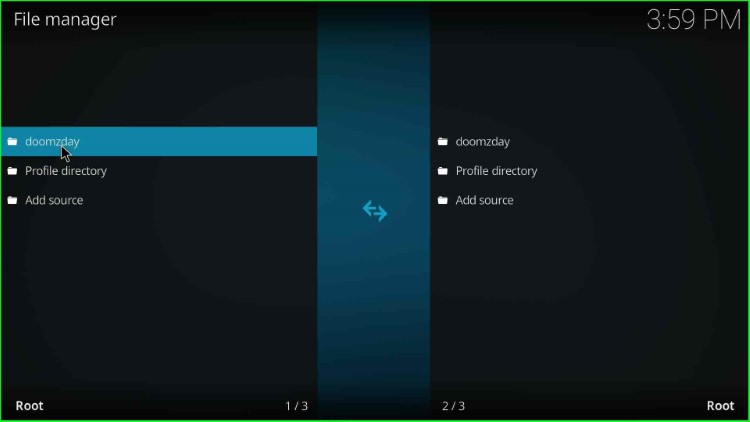
The media source was saved on the top of the File manager page.
Install from Zip File
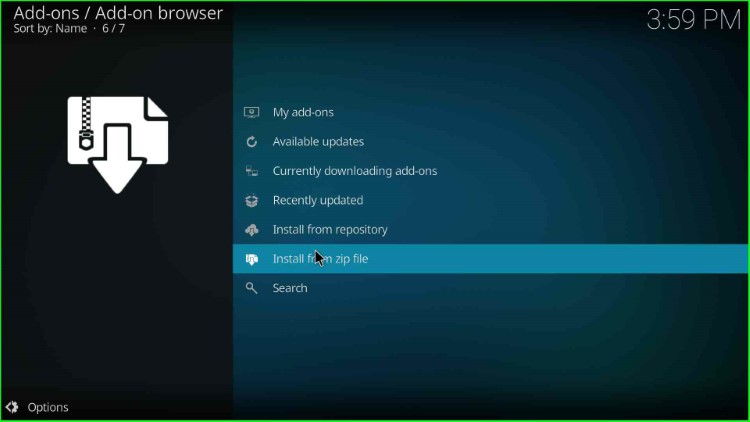
Go back to the System page again and choose the next tab, Add-ons.
Next, click on the Install from zip file option.
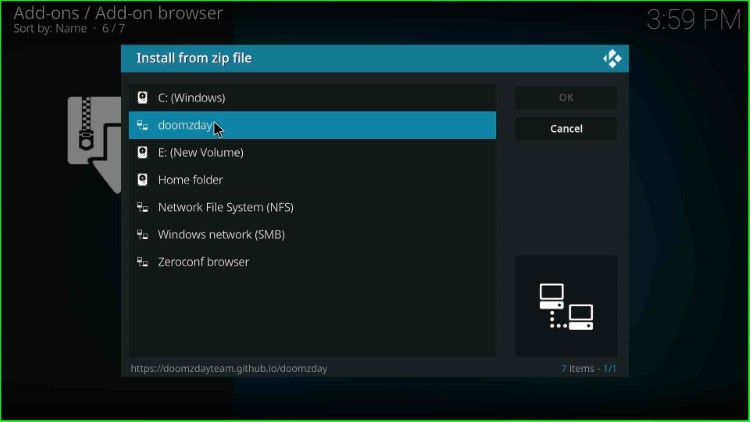
Now, hit the doomzday media source.
Select the repository.doomzday-x.x.x.zip file and hit the OK button.
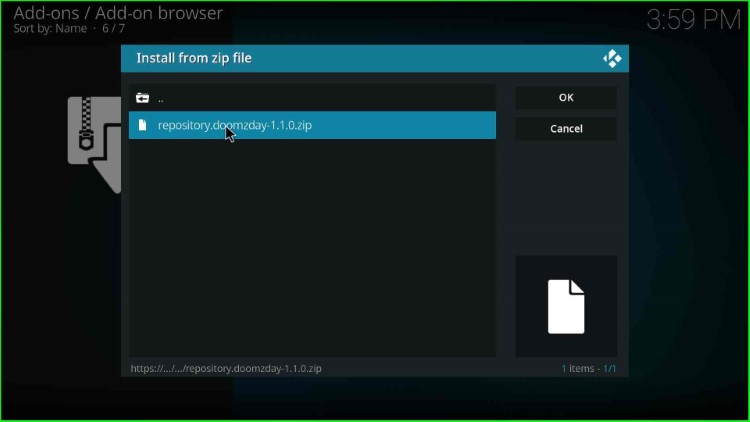
Wait for the installation notification, i.e., the Doomzday Repo Add-on installed on the right side of the screen.
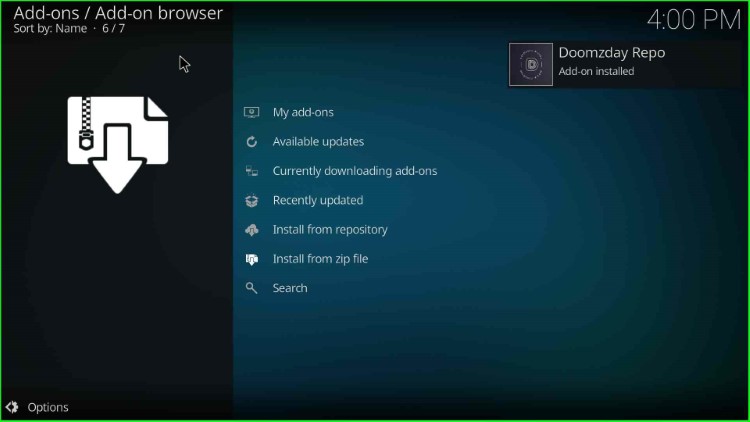
Install from Repository
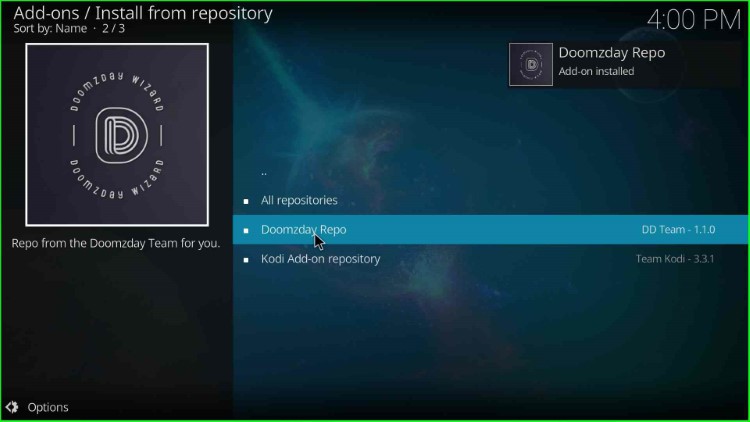
After installing the repository addon, click on the Install from repository tab.
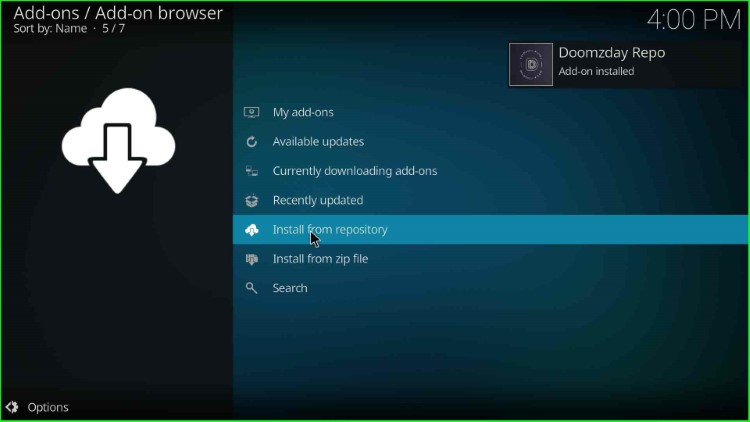
Choose the second option Doomzday Repo just after the All repositories.
Install Fetch Addon
Tap on the Video add-ons option.
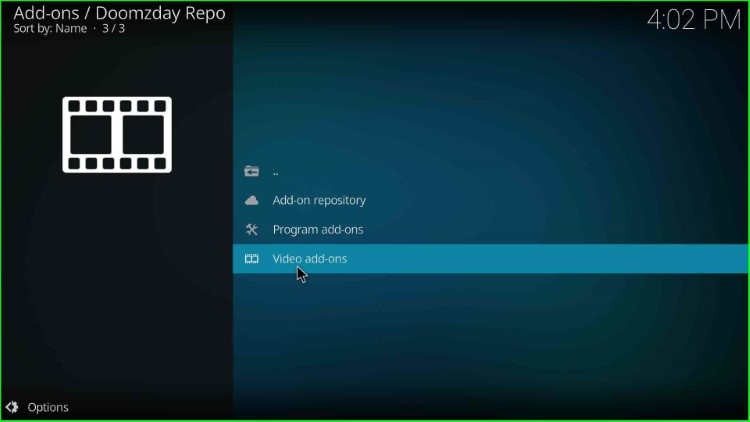
Choose the Fetch addon.

In the next step, hit the Install button.
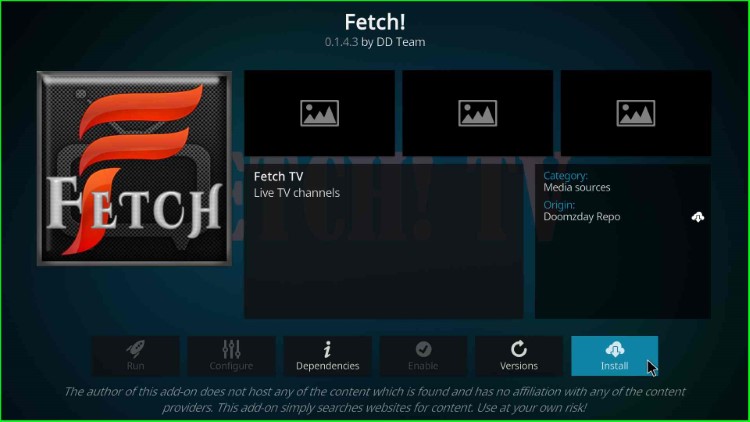
The Fetch addon starts installing; wait for its completion.
How to Use the Fetch Addon
Let us know the process for using the Fetch Addon on Kodi.
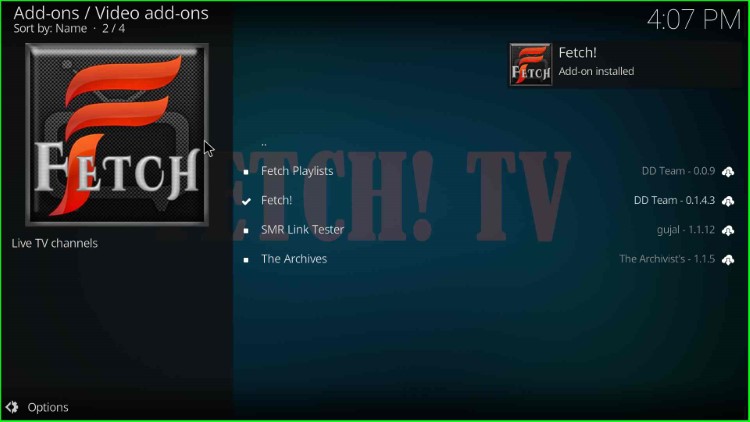
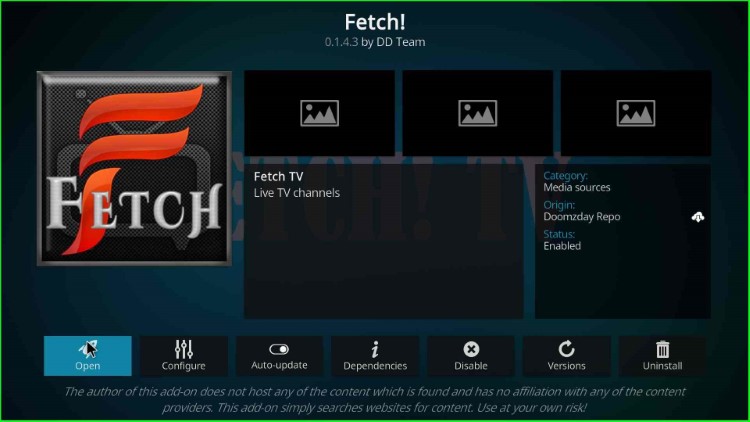
After installing successfully, single-click on the Fetch addon. Here, you can also find other add-ons like The Archives and Fetch Playlists for streaming content.
Tap on the Open key.
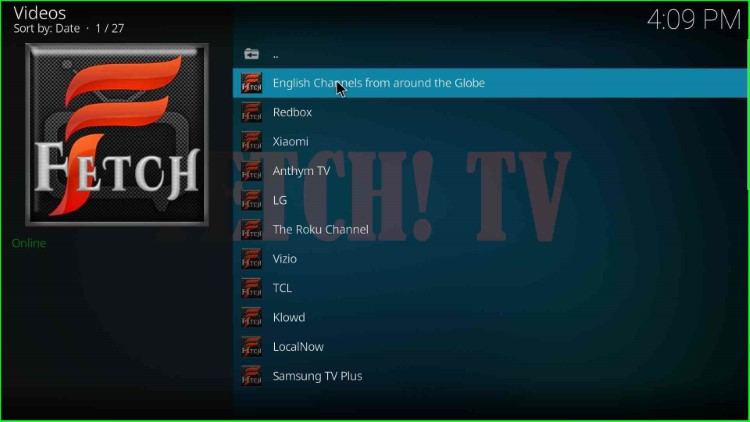
The Fetch addon home screen appears, containing many channels like Redbox, Xiaomi, Anthym TV, LG, TCL, Klowd, LocalNow, Vizio, Samsung TV Plus, etc. select English channels from here.
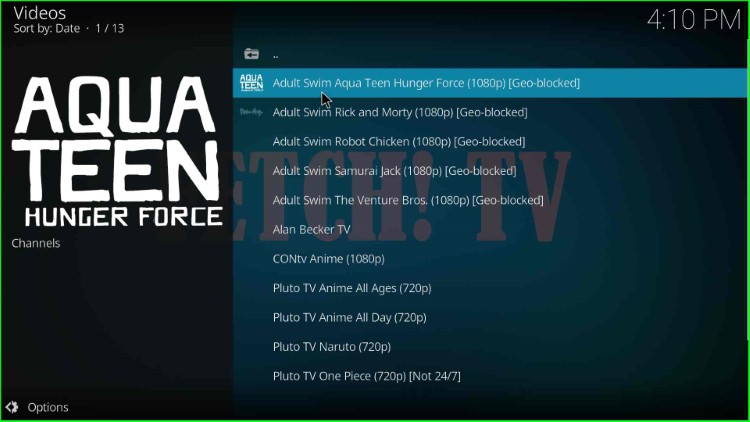
Choose the Animation category from the list of categories, i.e., Business, Auto, Classic, Comedy, AutoEntertainment, AnimationKoids, AnimationClassic, ClassicMovies, etc.

It provides all animated content. Here, I choose Adult Swim Aqua Teen Hunger Force (1080p). Now, click on it and start streaming.
Final Words
Overall, we have included all the necessary steps to install the Fetch addon on Kodi with a description. So, just go ahead with the installation steps one by one using the listed screenshots. Also, freely ask queries related to it in the comment section.