Within the post, you will learn how to install DaButcher Wizard on Kodi Windows. These steps work well with Android, Firestick, Roku, Linux, Chromecast, Raspberry Pi, Apple TV, PC, Smart Phones, iOS, Nvidia Shield, Samsung TV, etc.
DaButcher Wizard is the well-known Kodi Wizard that can be installed using the DaButcher repository. It has an easy-to-use interface where all sections are arranged properly. These sections are Build Menu, Authorize Debrid and Trakt, Notification, Settings, and Maintenance.
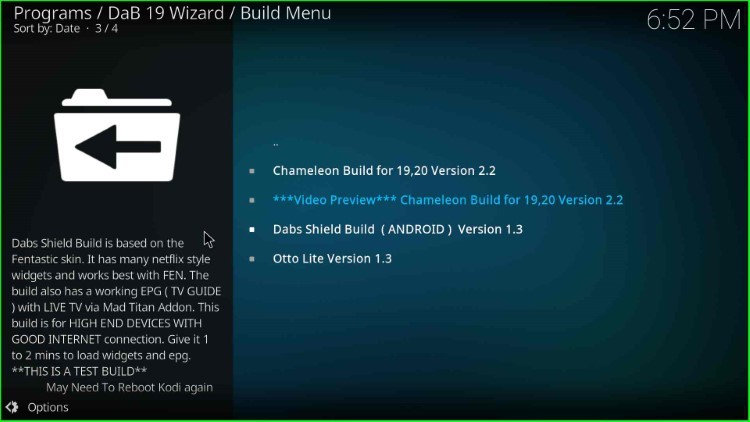
In addition, you can integrate Real Debrid for a high-quality streaming experience. Also, it contains various popular builds for streaming movies and TV shows, including Chameleon, Otto Lite, and Dabs Shield.
Installation Steps
Following are the best steps to install Dabutcher Wizard on Kodi.
Enable Unknown Sources
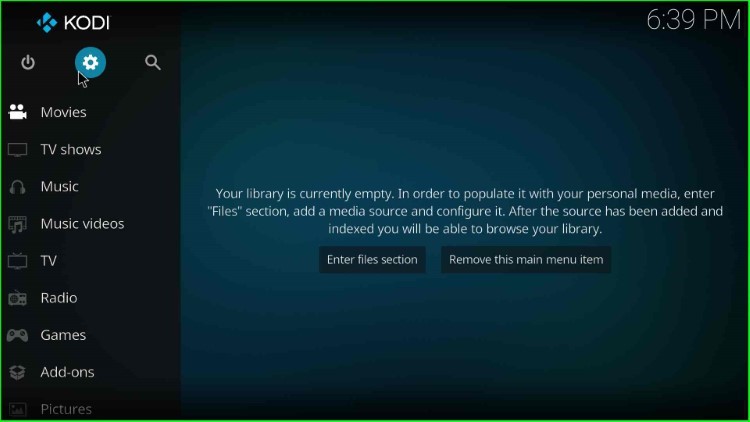
Open the Kodi app and select the right-side icon, Settings.
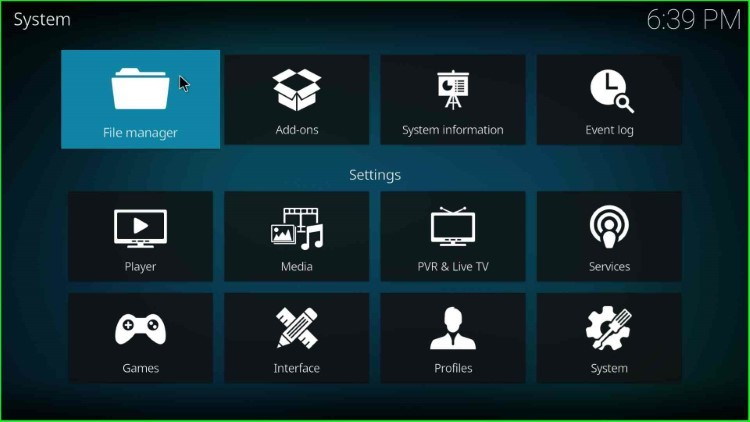
Now, you are on the Settings page, which lists lots of icons to choose from, i.e., Player, Media, File Manager, etc. Here, just click on the System tab and go ahead.
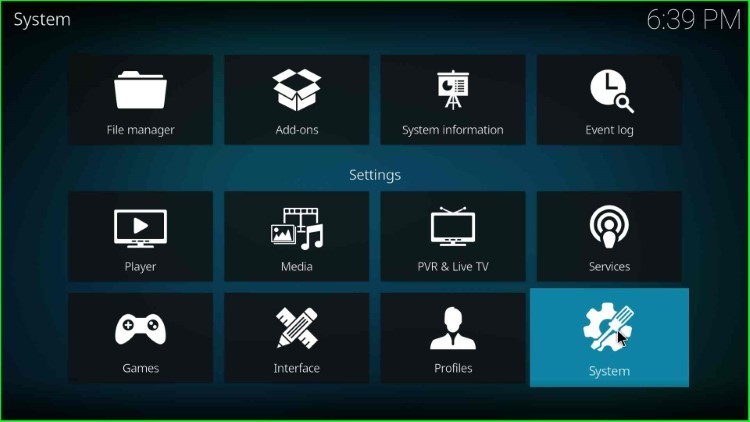
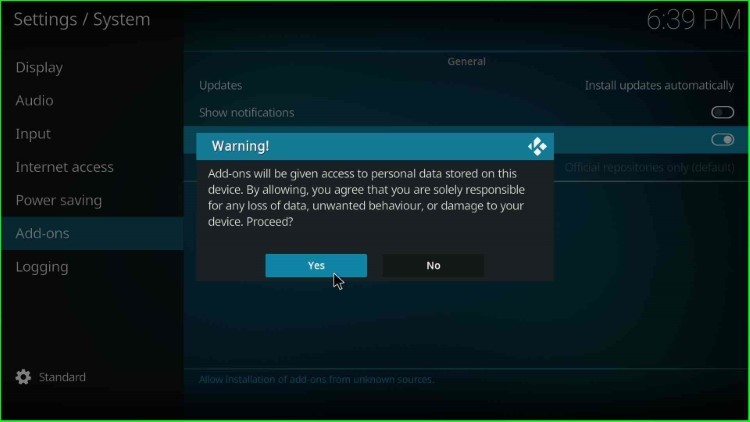
After that, choose the Add-ons option from the list of available options like Display, Audio, Input, Internet access, and Logging.
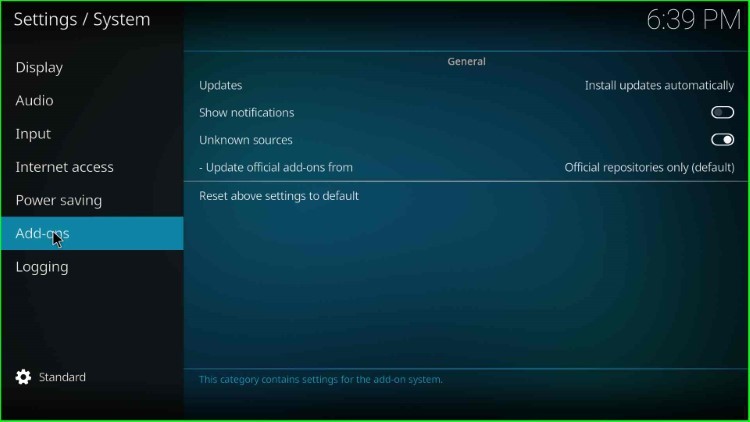
In this step, just turn on the blue-highlighted Unknown Sources button.
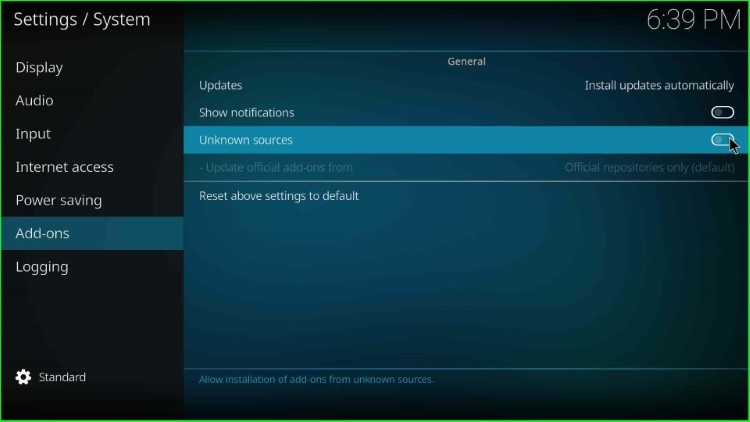
Hit the Yes button to permit an unknown source installation.
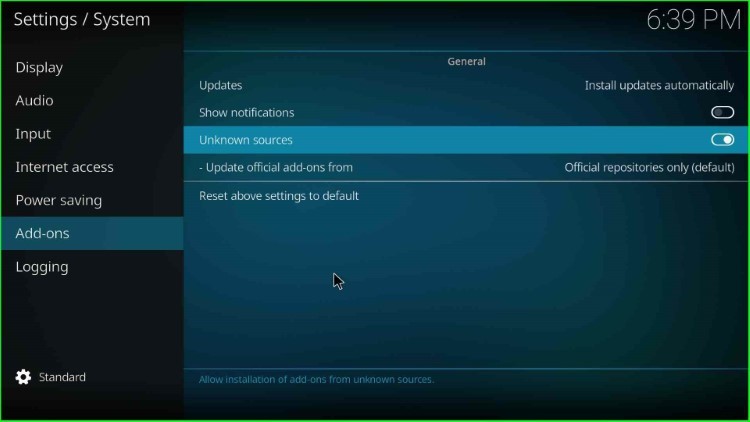
After submitting yes, you can see Unknown source automatically enabled on your device.
Add Media Source and Repository URL
Go back to the Settings window and select the top-right sign, File Manager.
Inside it, double tap on the right-side Add source option.
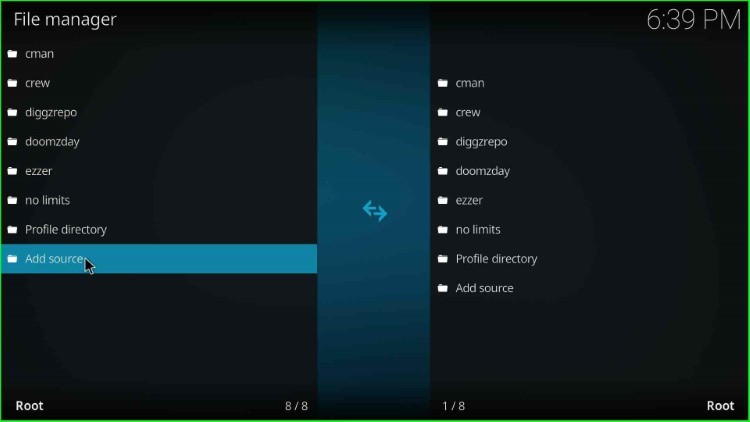
The Add file source window appears, which shows a <None> option. Click on it.
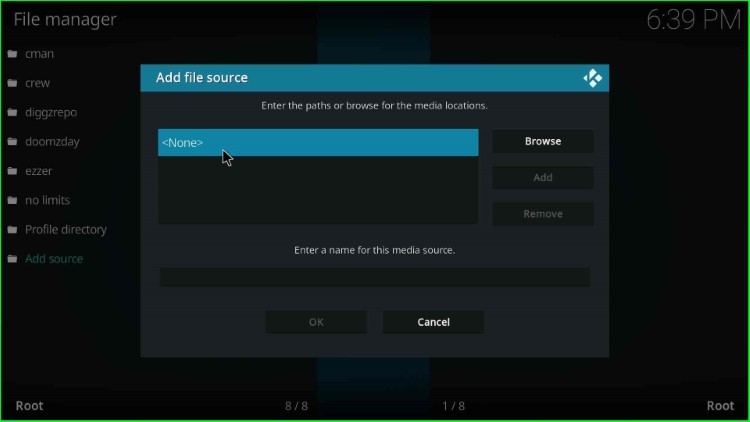
This page asks you to enter the path for the media location.

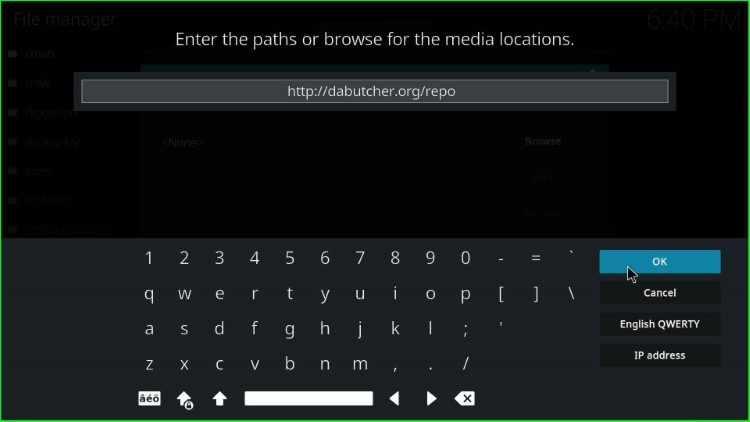
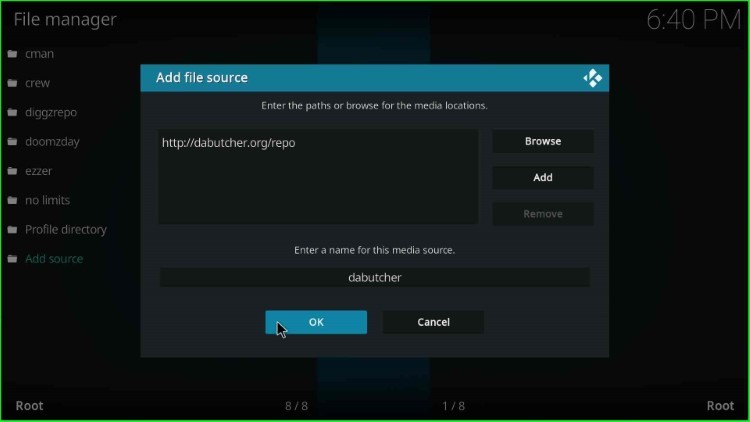
Enter the media path here as http://dabutcher.org/repo and tap the OK sign.
Now, go to the below label text and tap on the source name text box.
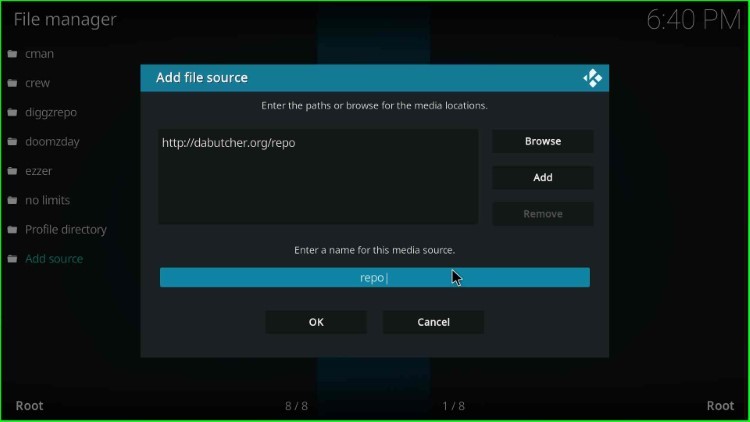
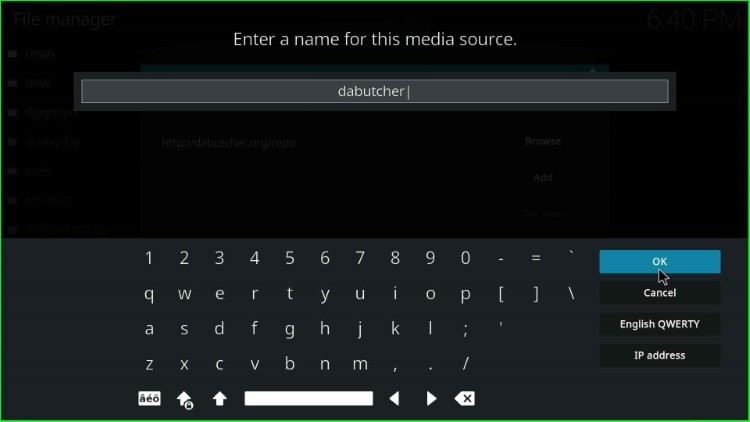
Here, change the source name from repo to dabutcher and hit the OK key.
Finally, check all the entries carefully, like the dabutcher URL and name, and press the OK button.
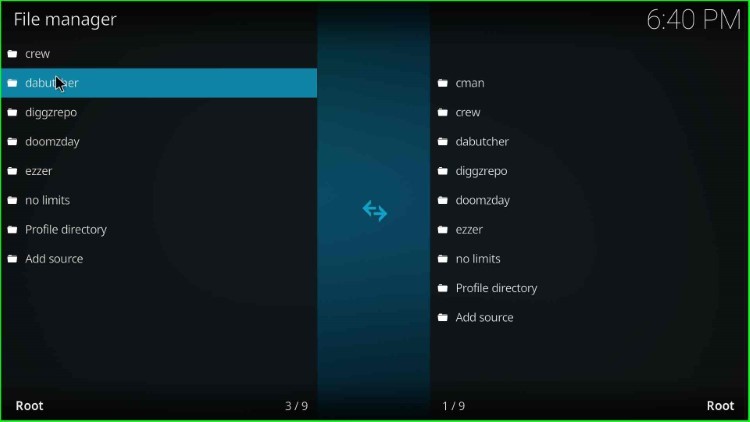
dabutcher source was successfully added to the File manager window.
Install from Zip File
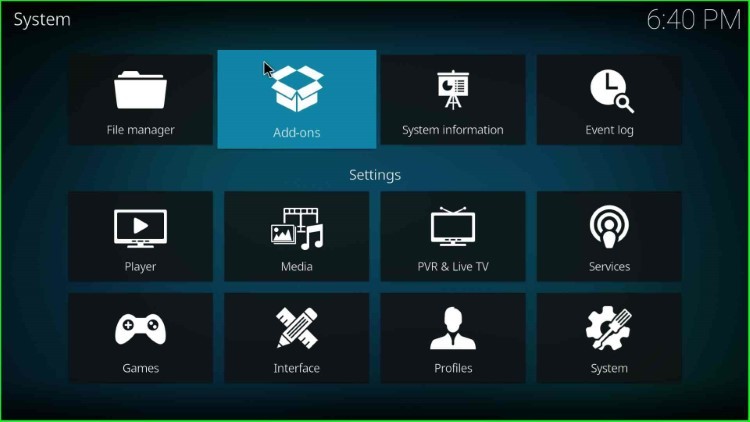
Press the ESC key to return to the System Settings, and here you can see the Add-ons icon just before the System Information; click on it.
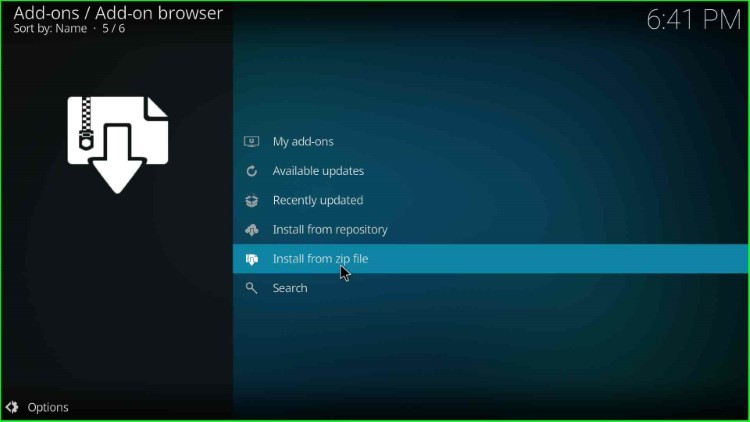
The Add-on browser screen appears and contains various navigating tabs like My add-ons, Available updates, Recently updated, Install from repository, Install from zip file, etc. Choose Install from zip file tab here.
Tap on the recently saved dabutcher source and hit enter.
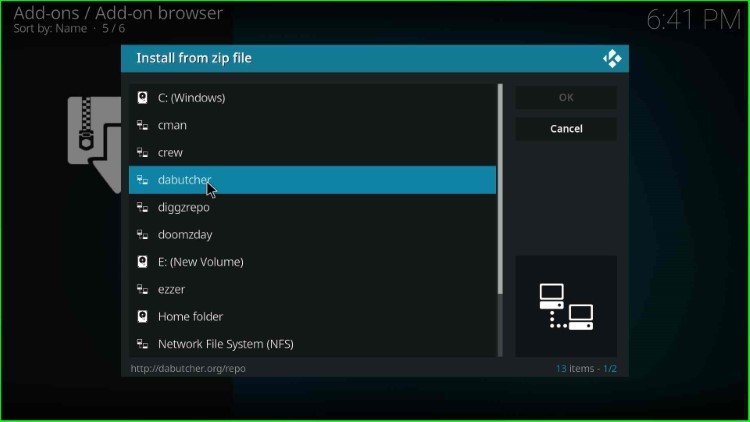
Here, click on the first repository.dab-x.x.zip file.
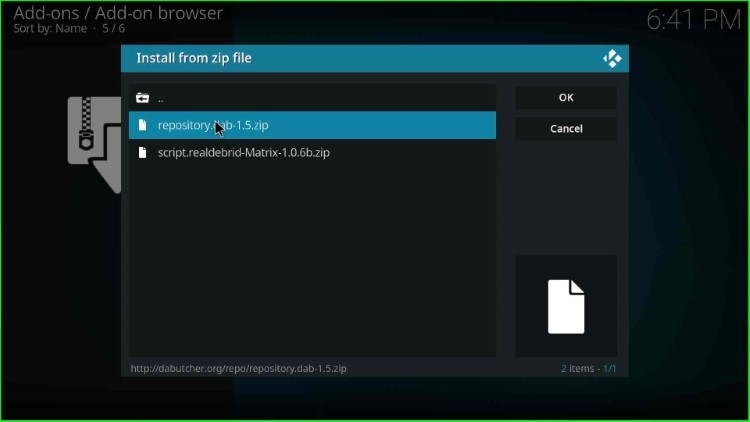
DaButcher Repository Add-on was installed successfully, and wait for it to complete.
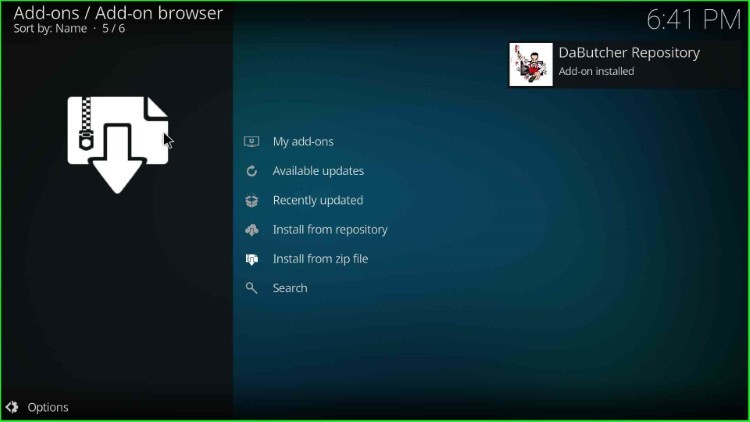
Install from Repository
Now, choose the Install from repository option just before the Install from zip file option.
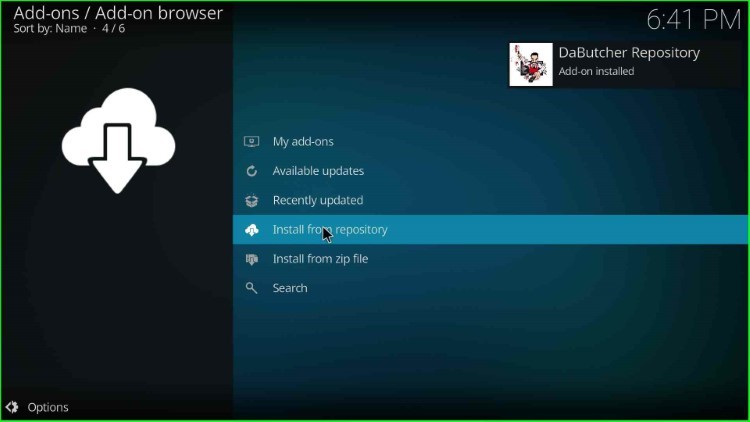
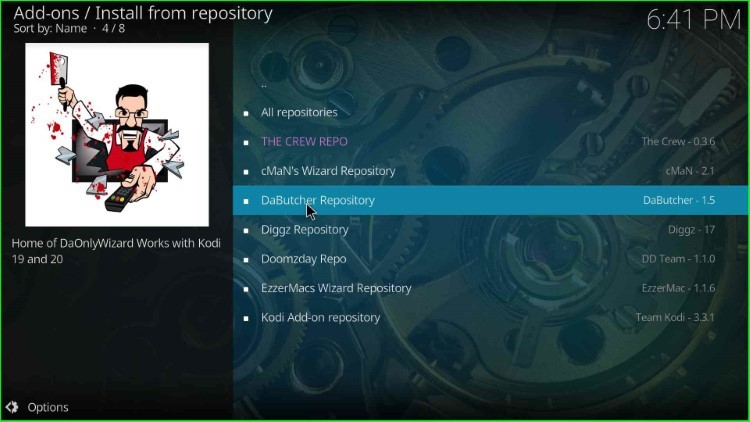
Next, select the Dabutcher Repository.
Install DaButcher Wizard
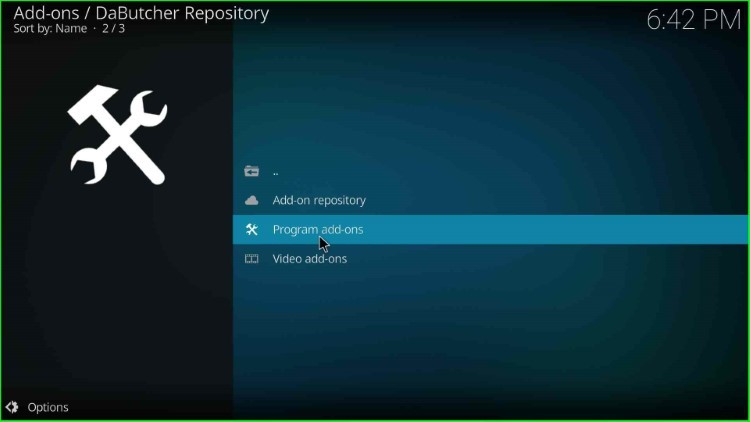
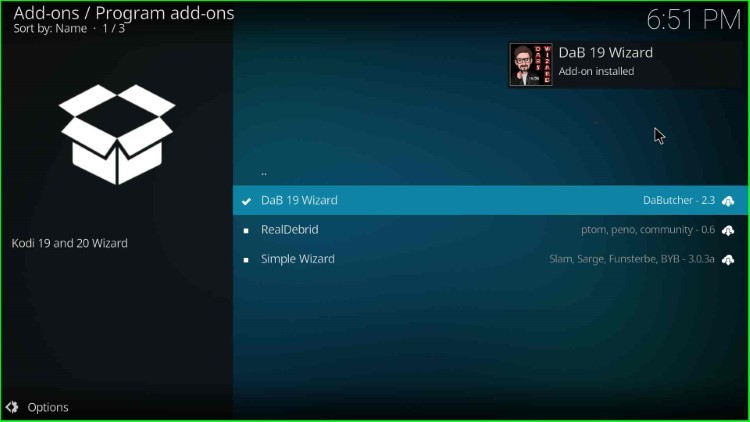
Tap on the second option Program add-ons available just after the Add-on repository.
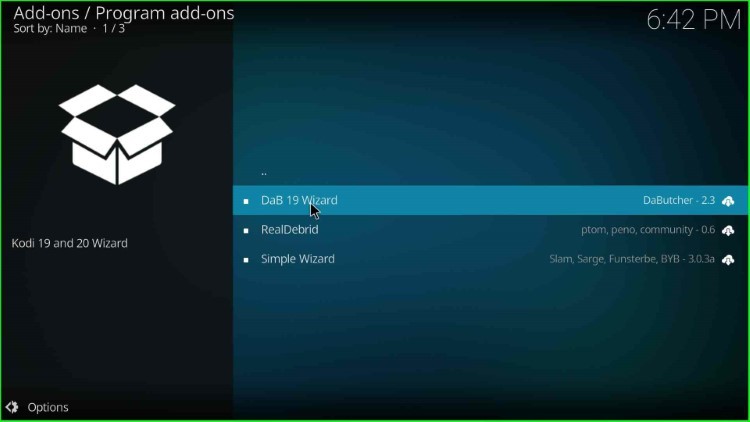
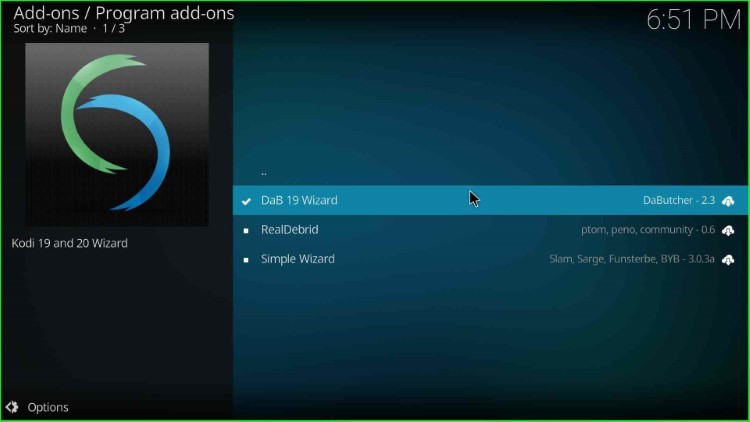
Here, you can see three options DaB 19 Wizard, RealDebrid, Simple Wizard, etc. Click on the DaB 19 Wizard from here.
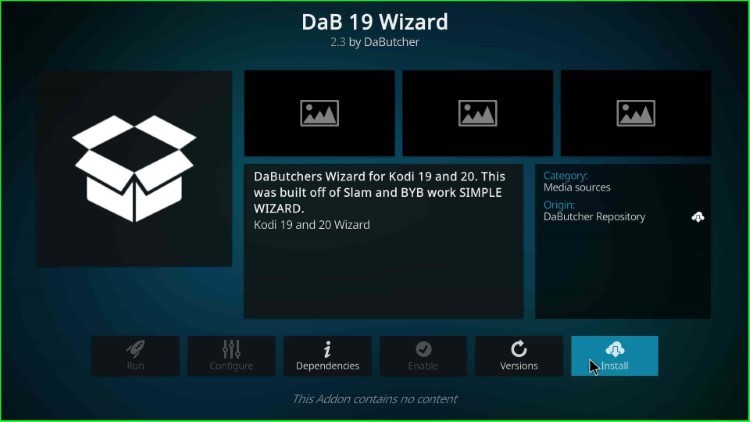
Thereafter, press the Install button.
Wait for the notification that the DaB 19 Wizard Add-on installed on the screen.
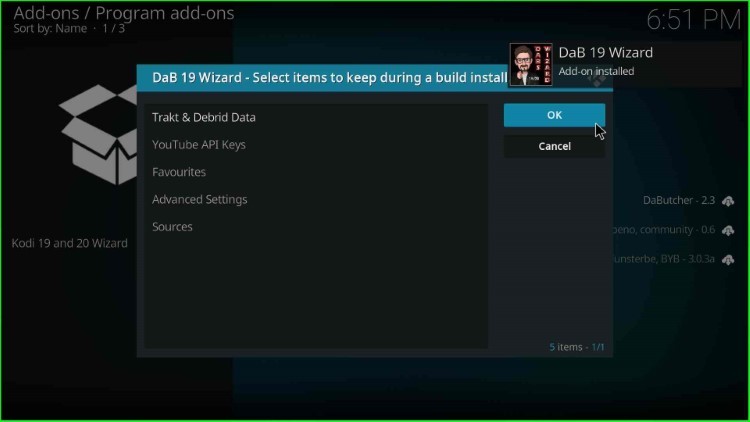
After installing, select the DaB 19 Wizard.
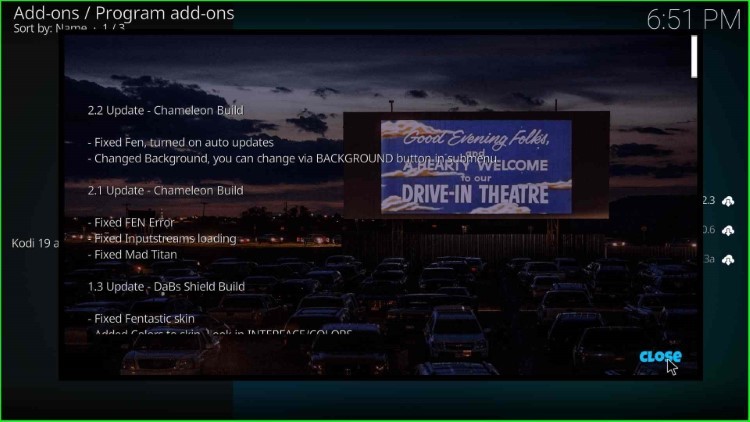
Tap on Close to close the unnecessary window that appears on the screen.
Launch DaButcher Wizard
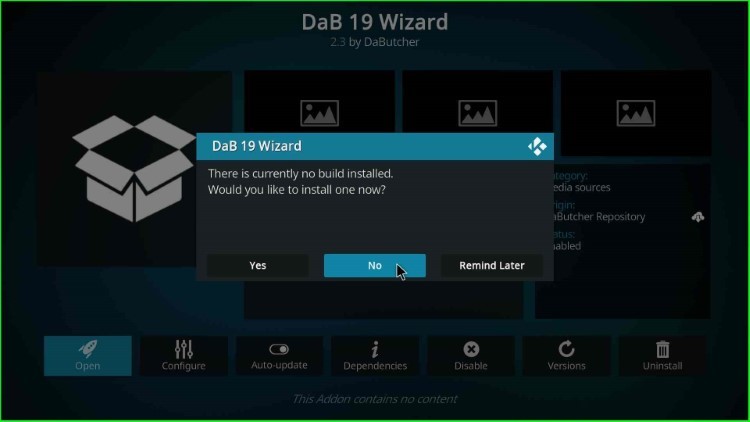
Again, click on the DaB 19 Wizard.
Now, hit the No button if you don’t want to install the build.
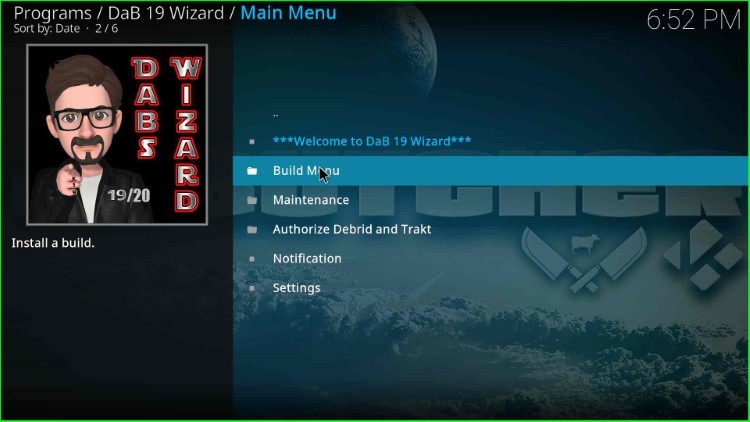
The Dab 19 Wizard main menu appears with options like Build Menu, Maintenance, Notification, Authorize Debrid, and Trakt. Select the Build Menu from here.
Here, it shows builds like Chameleon, Dabs Shield, Otto Shield, etc. for installation.
Final Words
Overall, the guide provided all the basic steps to install DaButcher Wizard on Kodi, it supports devices like Android, iOS, and Firestick. In addition, the wizard contains many popular builds for streaming that give a seamless user experience. So, install the Wizard on your device and share your reviews in the comment section.
