This tutorial will teach us how to install the Chameleon Dabutcher Kodi build in minutes. This tutorial will be useful for installing the Dabutcher Kodi build on any Kodi-supported platform, viz. Amazon Firestick, Android Box, Nvidia Shield Pro, Raspberry Pi, etc.
Dabutcher build Chameleon has many categories, and streaming options leading to the best Kodi builds. Moreover, the Dabutcher Kodi build has an attractive layout and user-friendly options. Further, we will install the Chameleon Kodi build in the next steps.
Install Dabutcher (Chameleon) Kodi Build
The installation process is quite easy; let’s start.
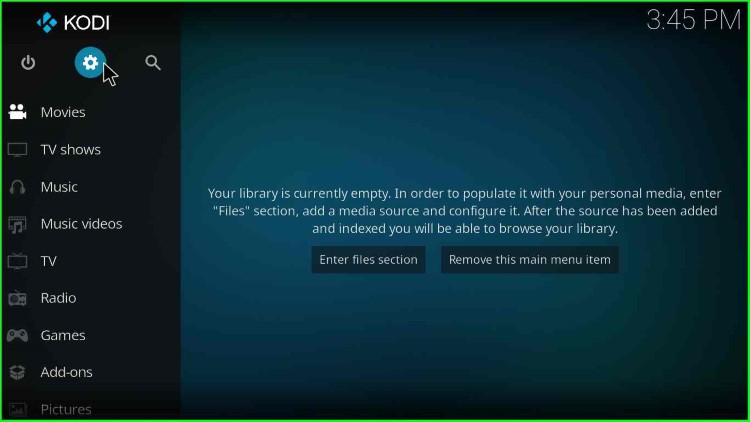
1. Open the Kodi settings.
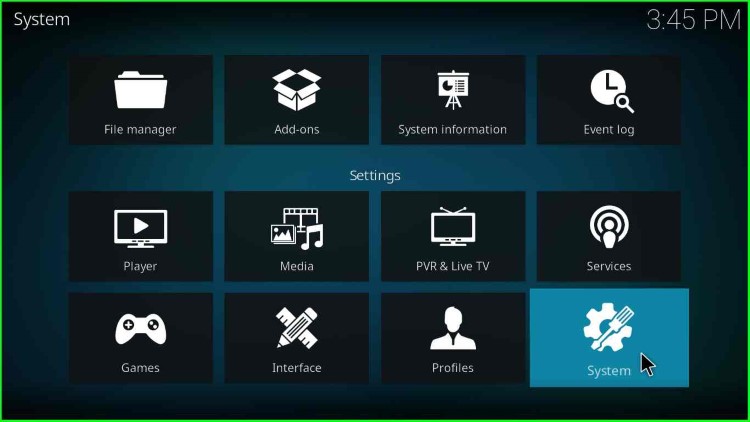
2. after that, click System.
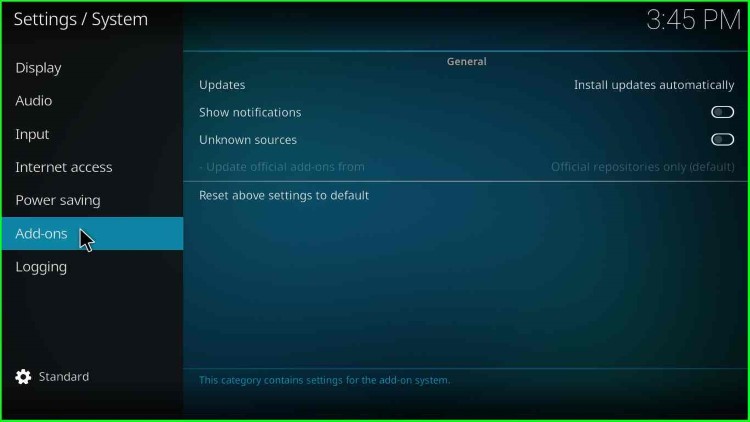
3. In this step, we will enable the installation of unknown sources. So, go to the Add-ons button and click on it.
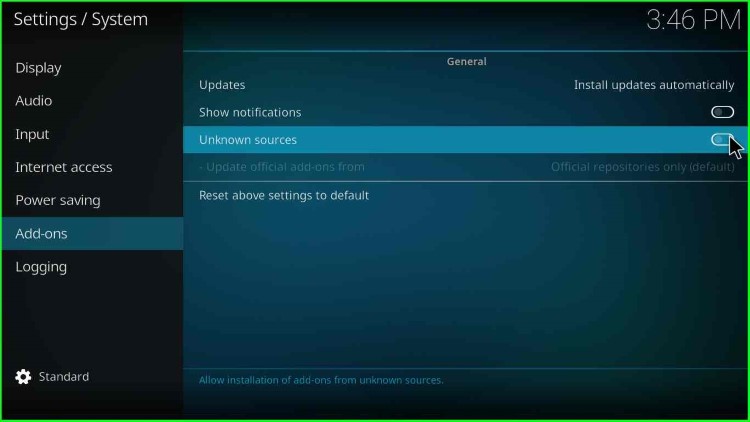
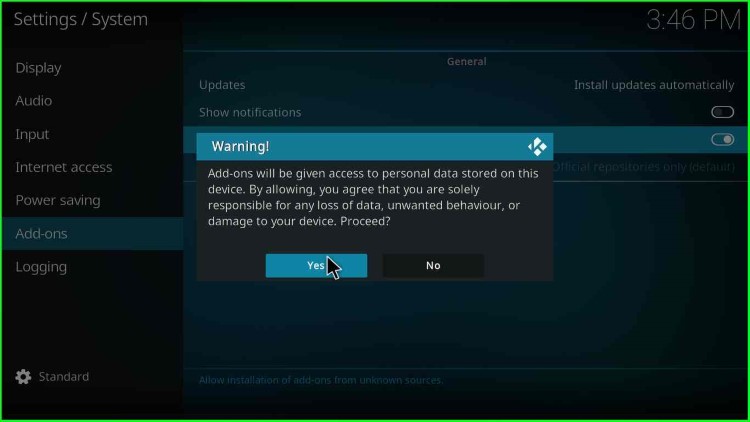
4. By default, the unknown sources option is disabled, so click on the radio button, as mentioned in the screenshot below.
5. When you click the radio button, a warning popup appears; click on the Yes button, as Dabutcher Kodi builds are reportedly safe to use.
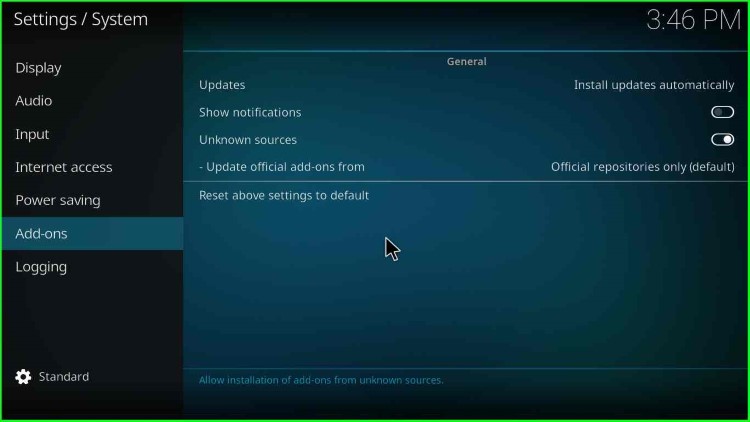
6. This dialogue box will close.
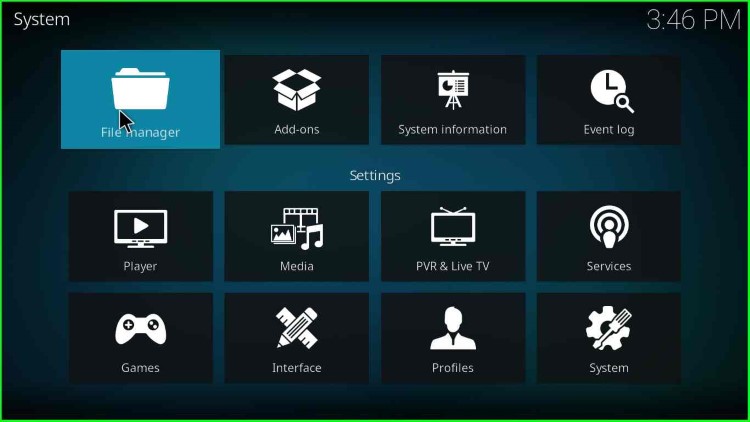
7. after that, click on File manager.
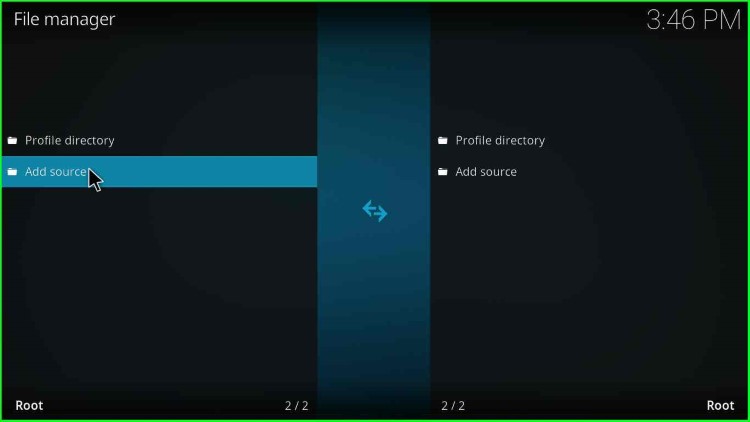
Dabutcher Installation Source
8. Once you click on the File manager option, you will find the following options, then click on Add source.
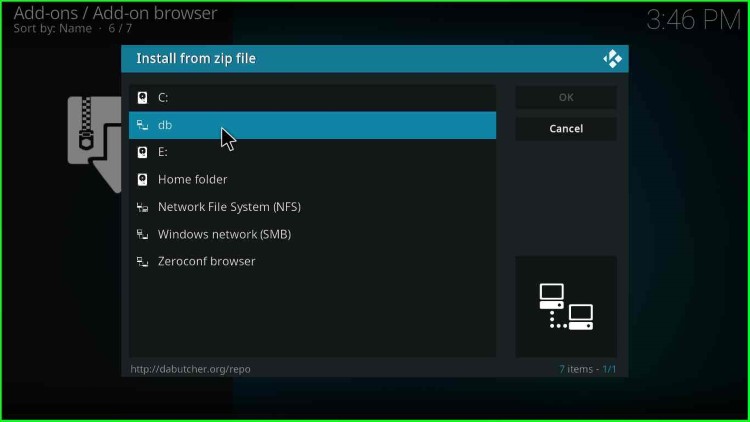
9. Then, click on <None>.
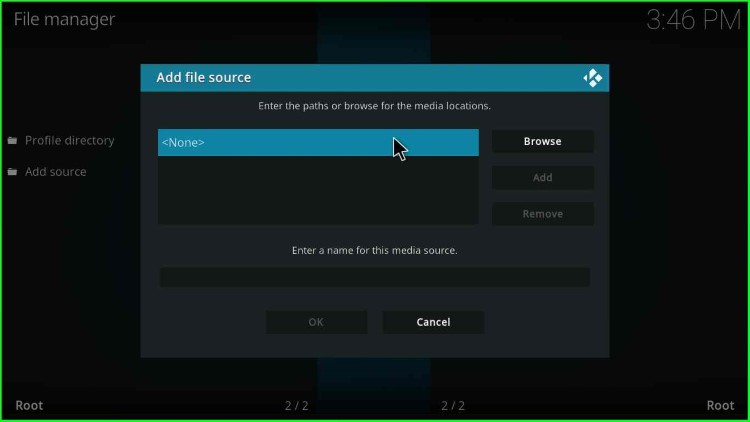
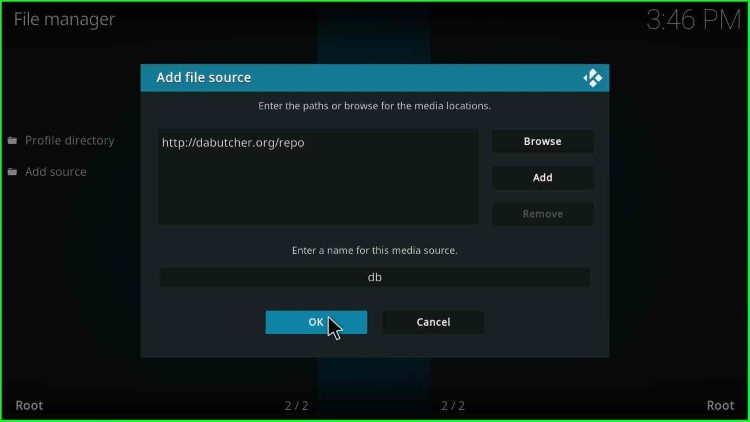
10. A text box asks to enter the paths or browse for the Dabutcher media locations.
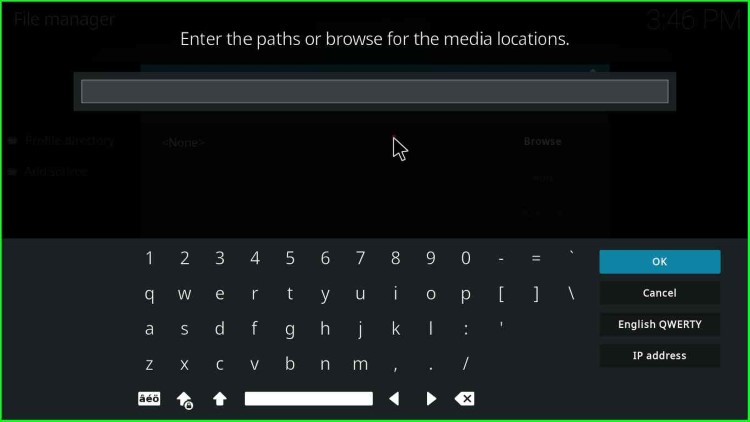
11. Enter the media source location as http://dabutcher.org/repo
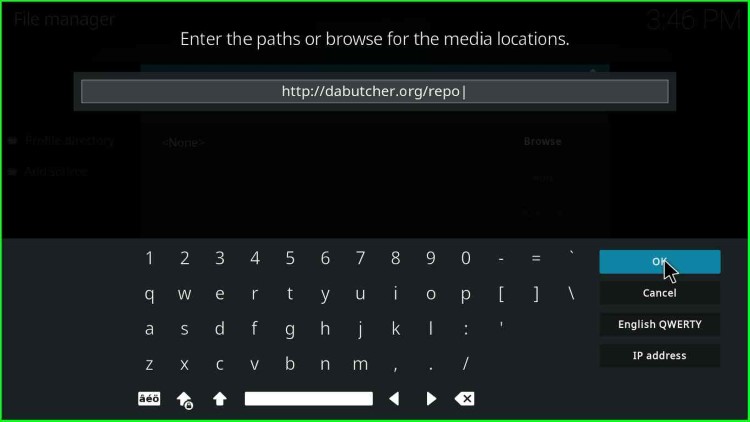
12. Now, slide down, put the cursor in the media source field, and delete the repo.
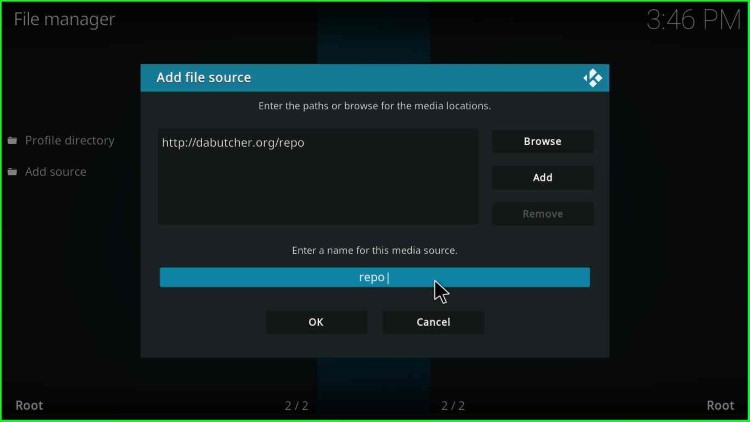
13. Enter the media source name as db to easily remember this. Then click OK.
14. Now, come back and look for option Add-ons.
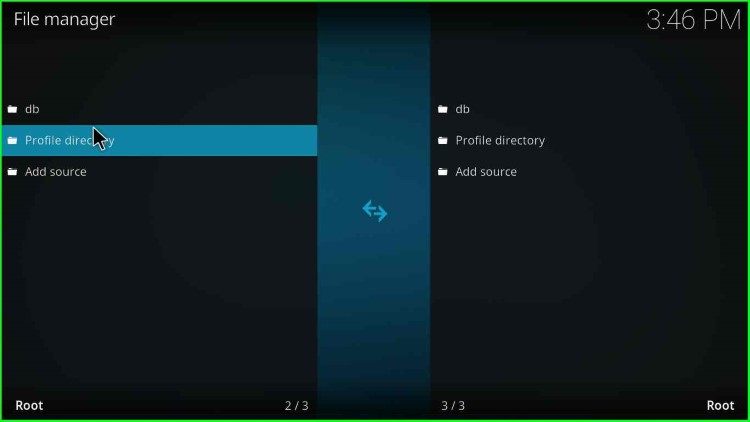
15. Click on Add-ons.

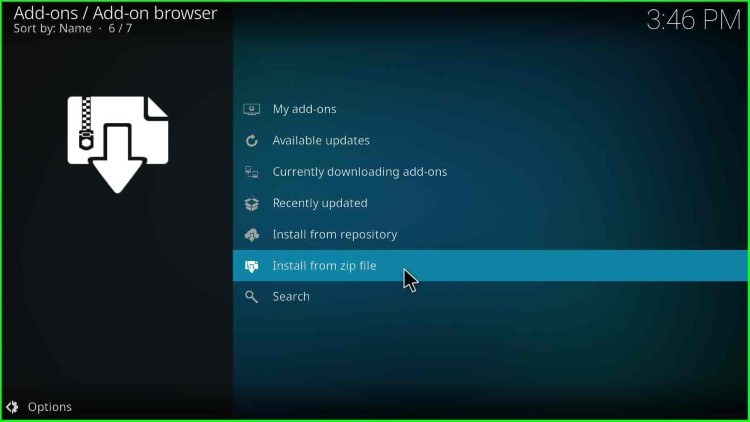
Install Dabutcher From Zip File
16. Thereafter, click on Install from zip file.
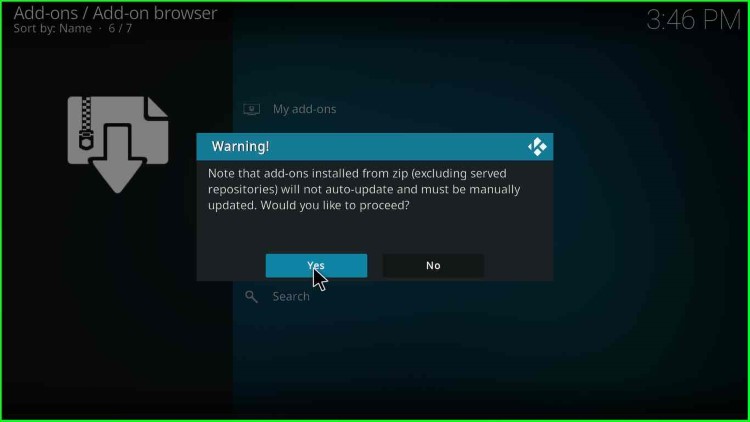
17. A popup warns for a manual update of the Dabutcher add-ons. Click the Yes option.
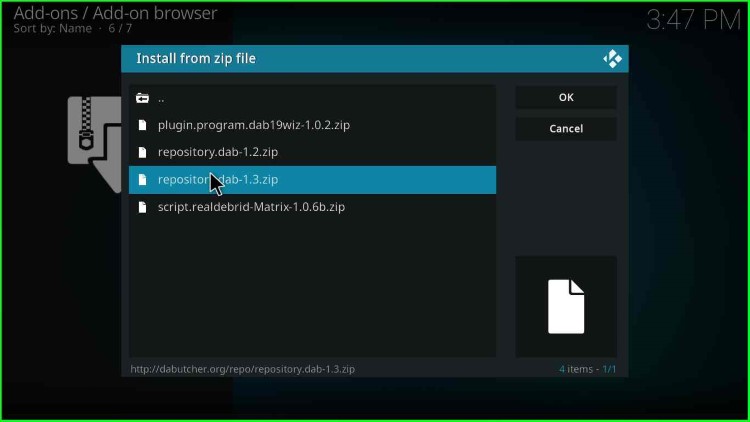
18. Now, you will be able to see the media source name that you defined earlier. So, double-click on db.
19. Then click on the repository.dab-1.3.zip file.
20. Soon, you will see a message on the top-right corner stating, “DaButhcer Repository Add-on installed“. Remember, you might have to wait for some time till the installation message appears.
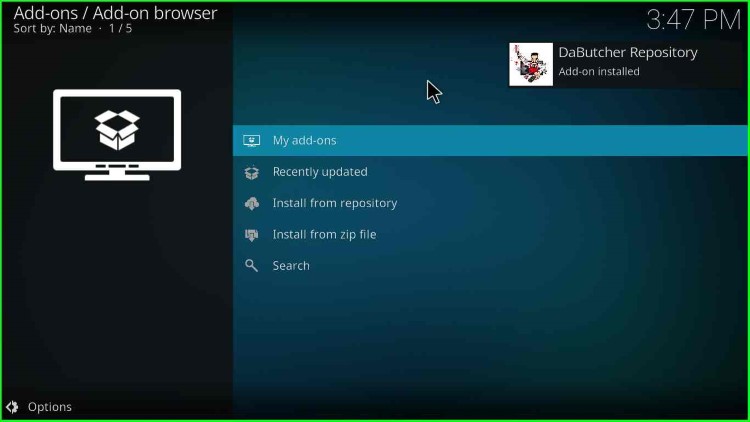
Dabutcher Install From Repository (Chameleon)
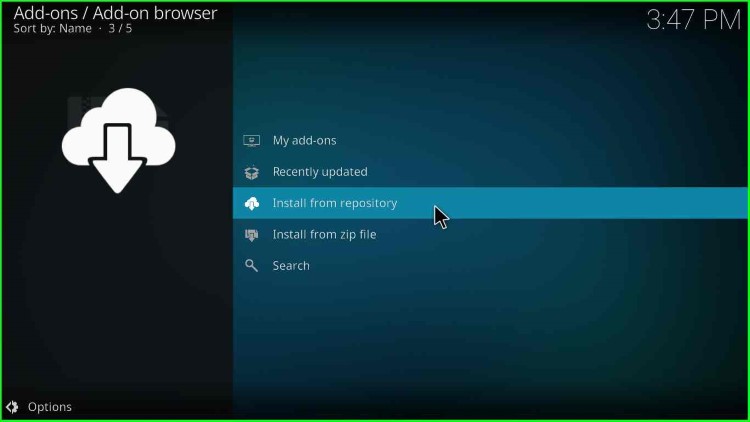
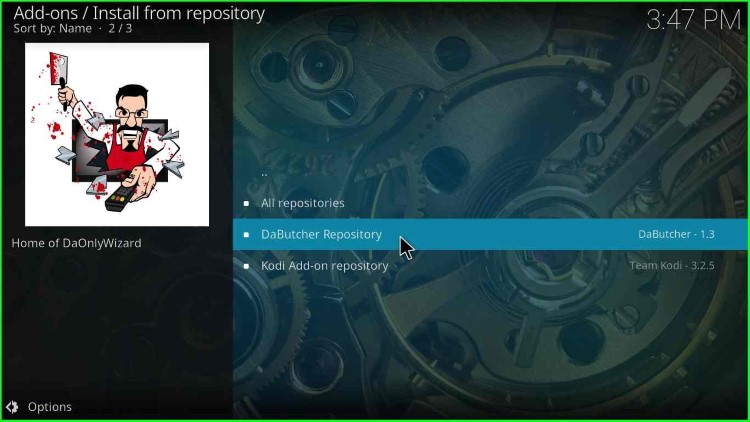
21. Thereafter, click on Install from repository.
22. Click on the second option DaButcher Repository.
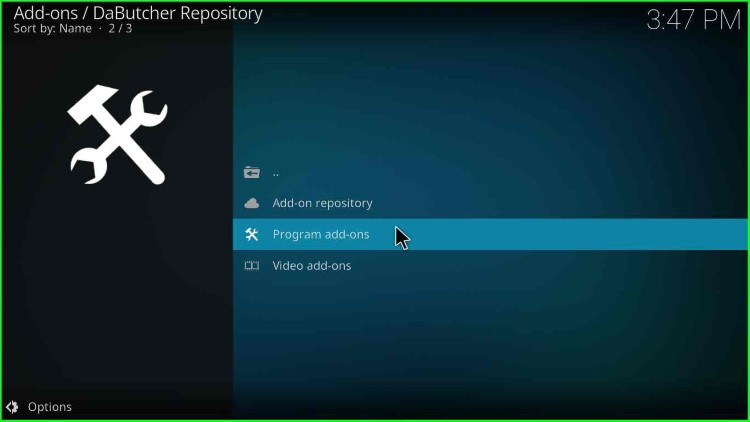
23. Then click on Program add-ons.
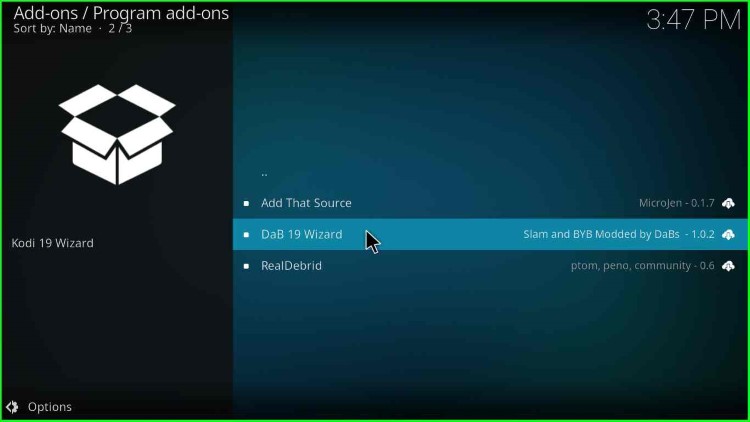
24. Moving ahead, click on DaB 19 Wizard option.
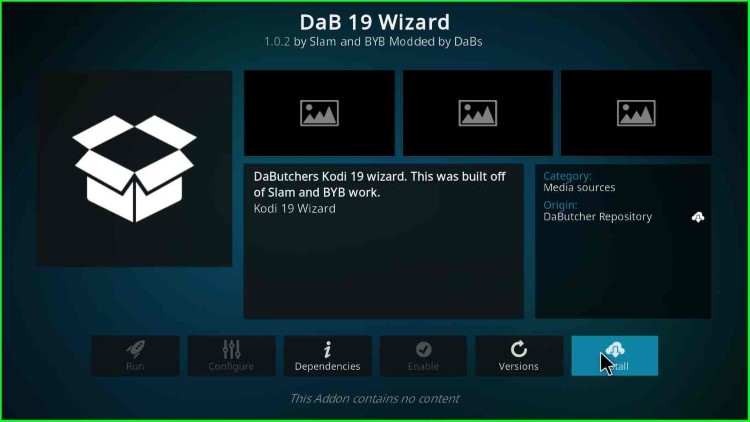
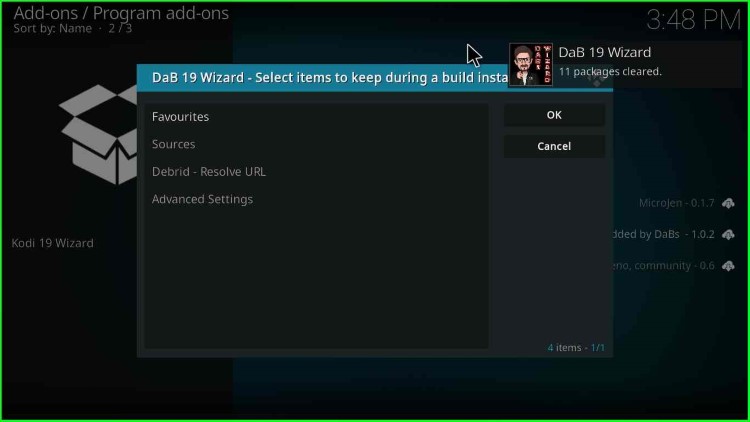
25. Now, you will find many options in the next window, as mentioned below in the screenshot. Have a glance at the bottom-right corner and click on the Install button.
26. Now, wait for some time till you get another message stating, “DaB 19 Wizard 11 packages cleared.” and click the OK button.
27. Move the mouse toward the left side of the screen and click on the CLOSE button.
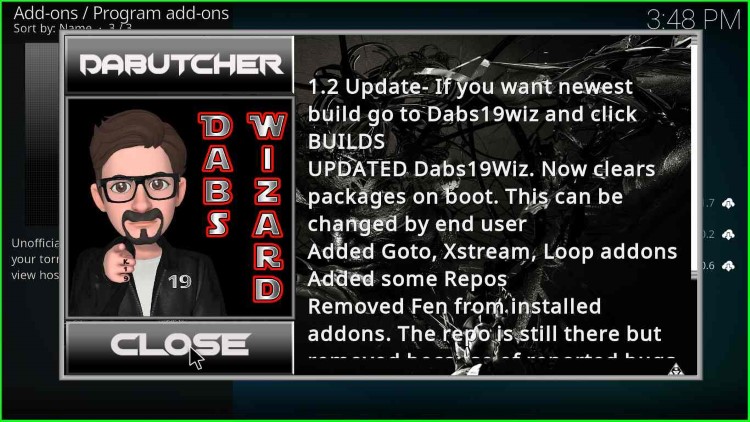
28. The following screen will appear as soon as you click the close button.

29. Go to the Kodi home screen and click the Add-ons option.
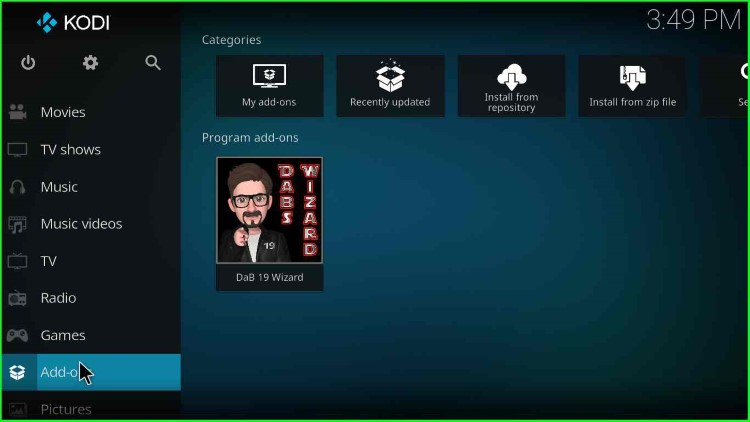
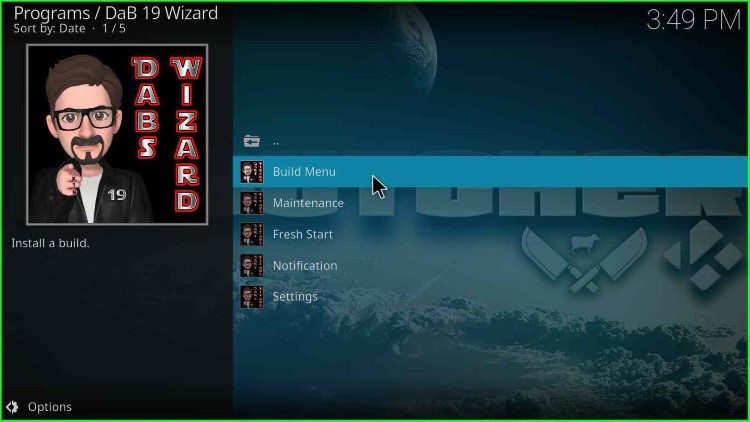
30. Click on Program add-ons; on the right side, you will find the Dab 19 Wizard icon; select the option.
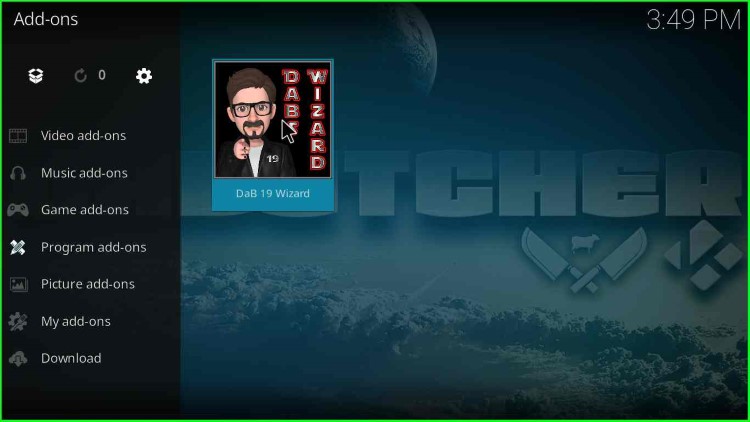
31. There are many options like Build Menu, Maintenance, Fresh Start, Notification, Settings, etc. Click on Build Menu.
Chameleon Build Installation
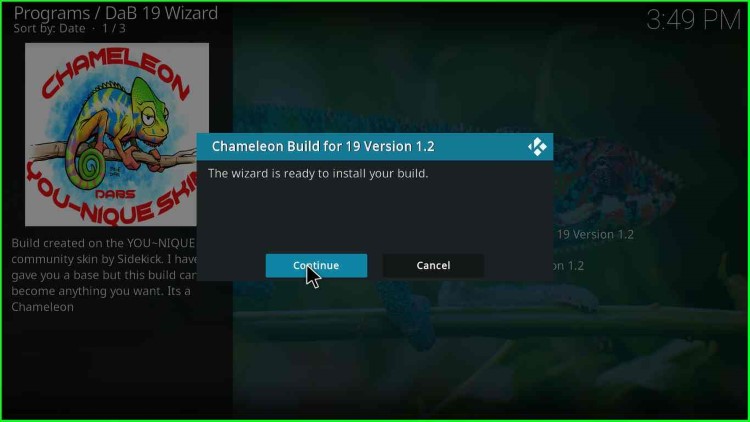
32. Click on the very first menu, i.e., Chameleon Build for 19 Version 1.2; your version might be different.

33. Then, another popup titled “Chameleon Build for 19 Version 1.2” gives the message “The wizard is ready to install your build“. Finally, you click on the Continue button.
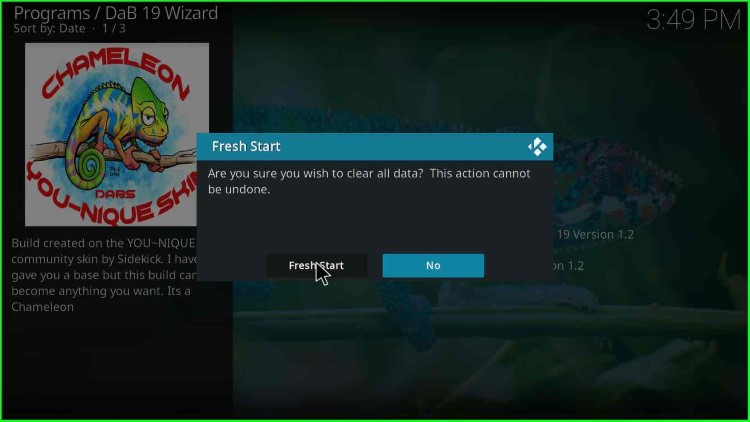
34. Another message pops up “Do you wish to clear all data before installing“, click on the Fresh Start button.

35. Again, a message appears stating, “Are you sure you wish to clear all data? This action cannot be undone.” click on FreshStart.
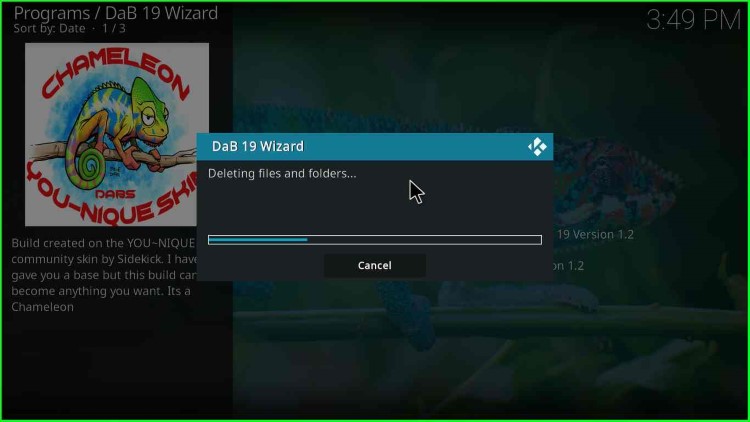
36. wait for some time till the files and folders get deleted.
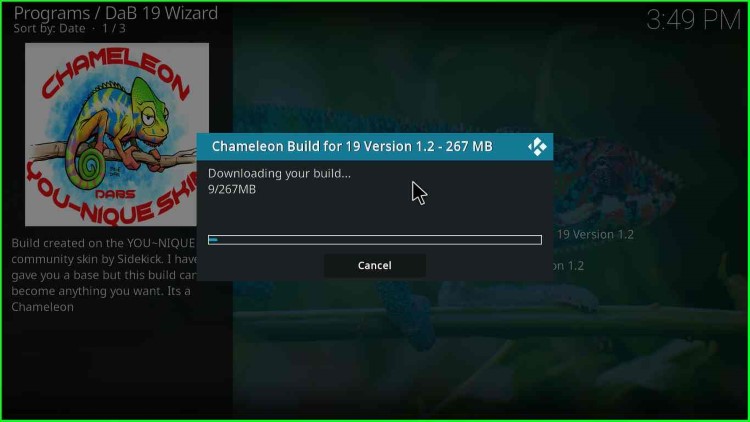
37. Now, Chameleon Build will start downloading the build.
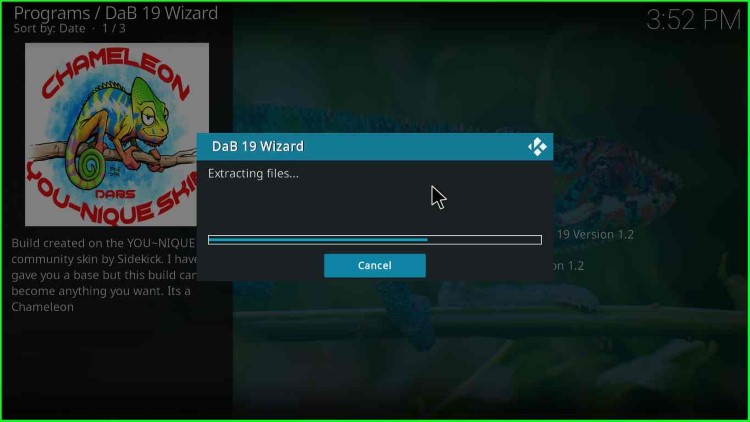
38. A message appears as “Extracting files“.
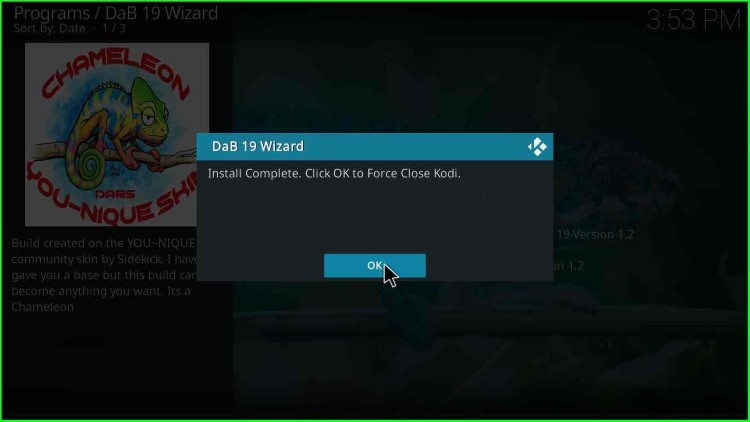
39. A message appears as “Install Complete. Click OK to Force Close Kodi“. Click OK; as soon as you click on OK, Kodi will close.
40. That’s all; the installation is complete.
Finally, you have successfully installed the Dabutcher and Chameleon build.
