Home » Kodi » How to install Slamious Kodi Build on Firestick in 2023

How to install Slamious Kodi Build on Firestick in 2023

In this tutorial, we will learn how to install Slamious Kodi Build. These installation steps are the same for Windows, Mac, Linux, Android, iOS, and Raspberry Pi devices.

The Slamious is part of the Slamious Wizard catalog. Slamious build is known to be the most popular Kodi build among them.

For your streaming needs, this is the top build that you need because it has the best Kodi addons wrapped into it.

Most of all, the UI is much much convenient to use. Also, navigating through this build is easy and natural.

Attention, Cord-cutters!

I want to warn you that whatever you stream online is visible to the Government, ISPs, and Third Parties. Following are some of your details:-

IP Address: 35.172.111.47
Location: Virginia US
ISP: AS14618 Amazon.com, Inc.

You must be aware that streaming copyrighted content without a license is illegal and may land you in legal trouble.

I urge you to comply with the rules and regulations in your country, but what if you land up streaming illegal content unintentionally?

Hence, I suggest using the most secure VPN, i.e., IPVanish which has military-grade encryption. In addition, IPVanish enables buffering-free streaming, hides your IP address, Location, and bypasses the geo-restrictions and bandwidth throttling.

Special Deal: Only $3.33/Month

How to Install Slamious Kodi Build

The Slamious is among one of the best Kodi builds in January 2023. Following are the steps to install Slamious Kodi Build.

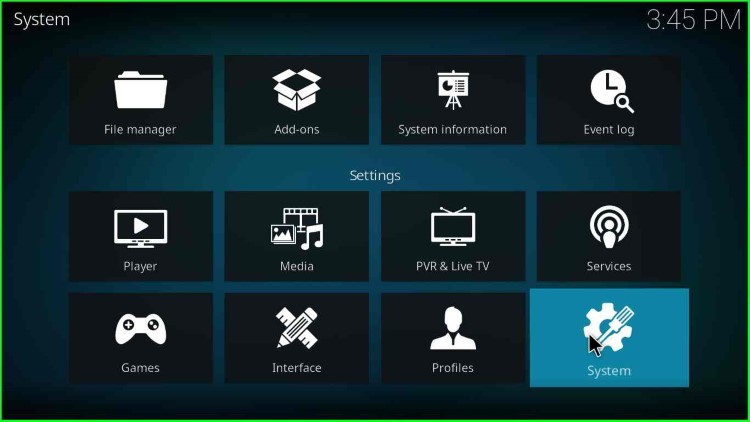
1.            First of all, open the Kodi and go to the Home Screen

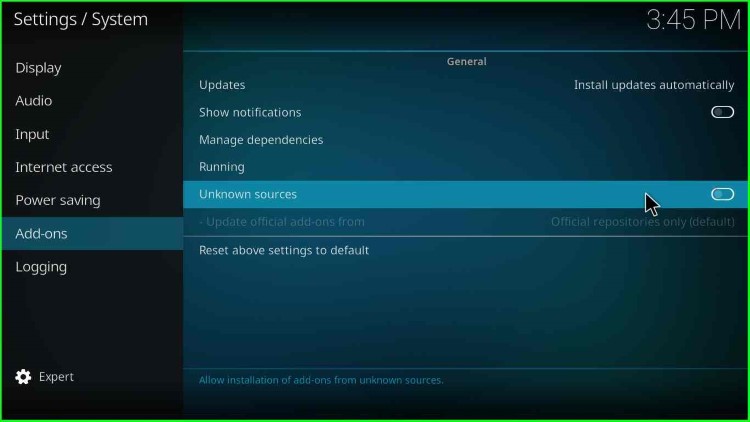
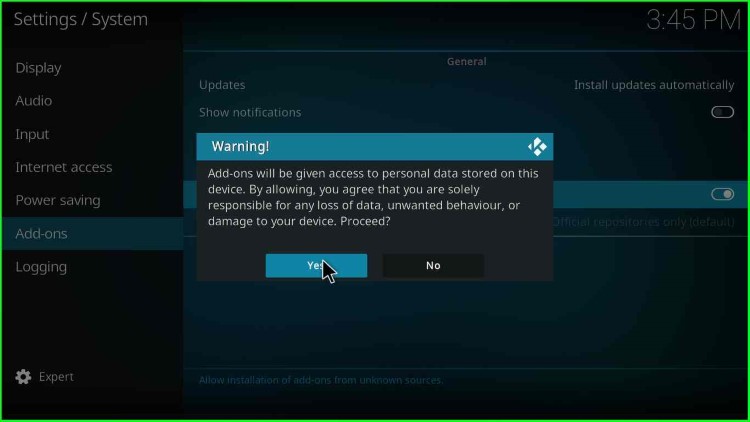
2. After that, follow this path

Add-ons –> Settings –> Enable Unknown Sources

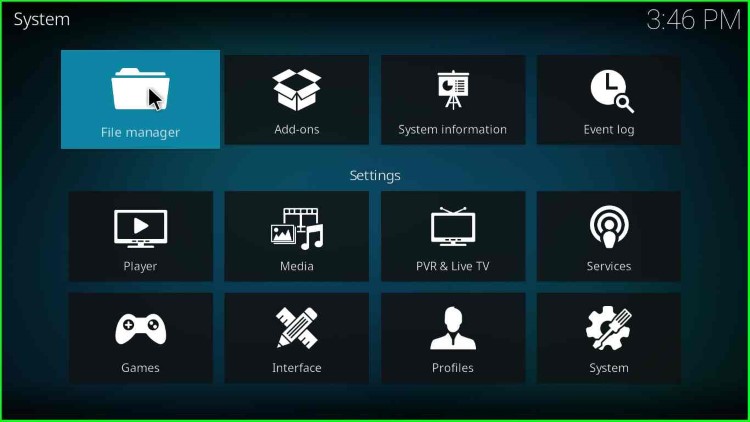
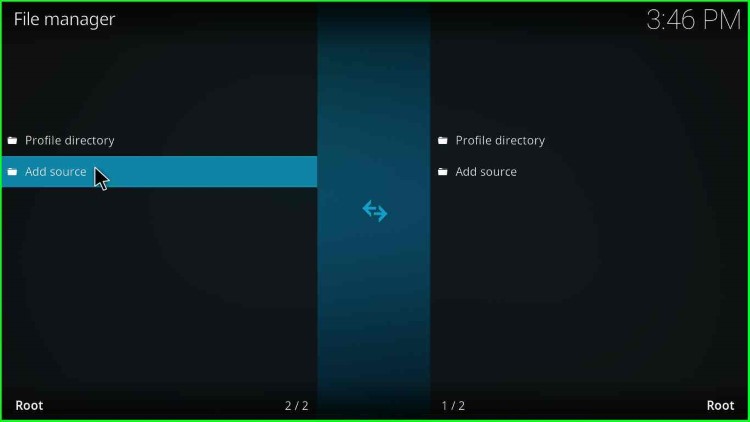
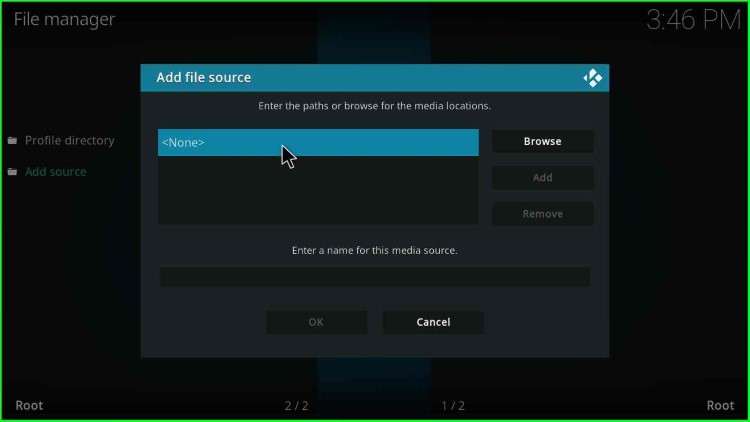
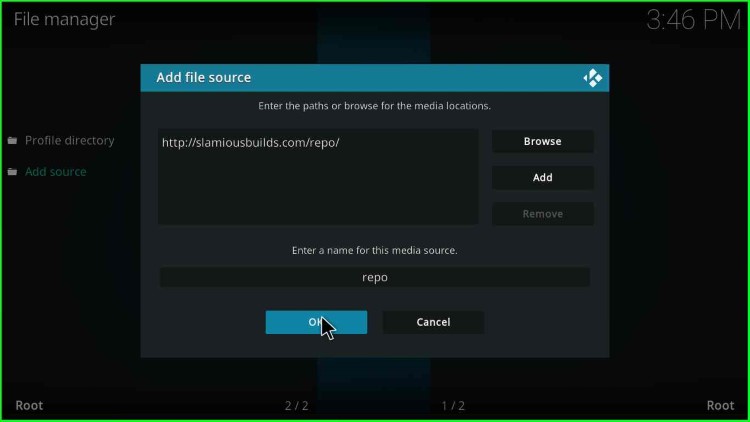
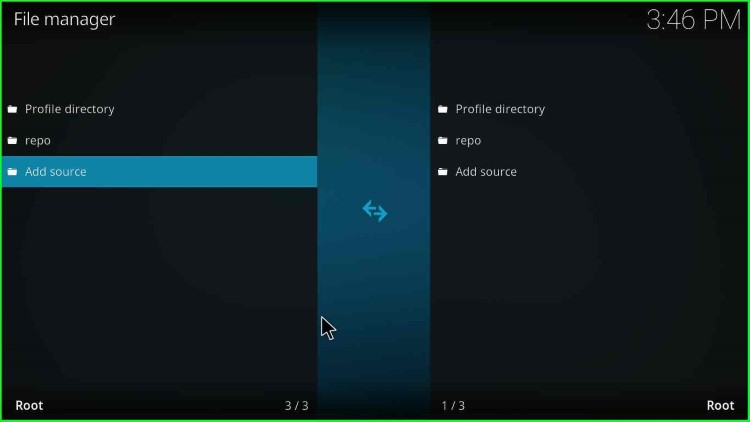
3.            Go to the “File Manager” from the “Settings” menu and click on “Add Source

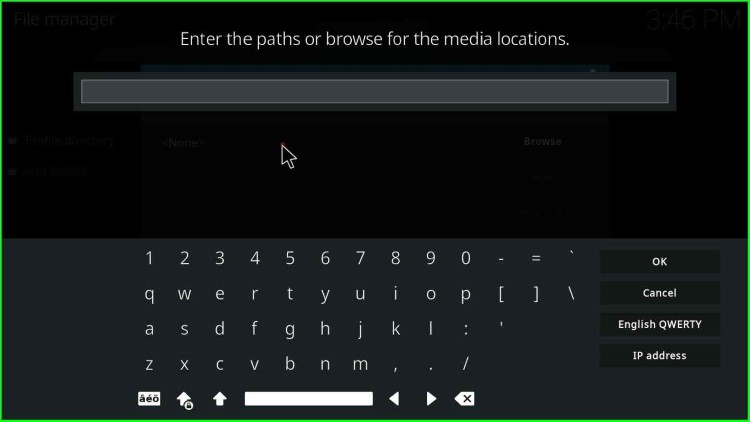
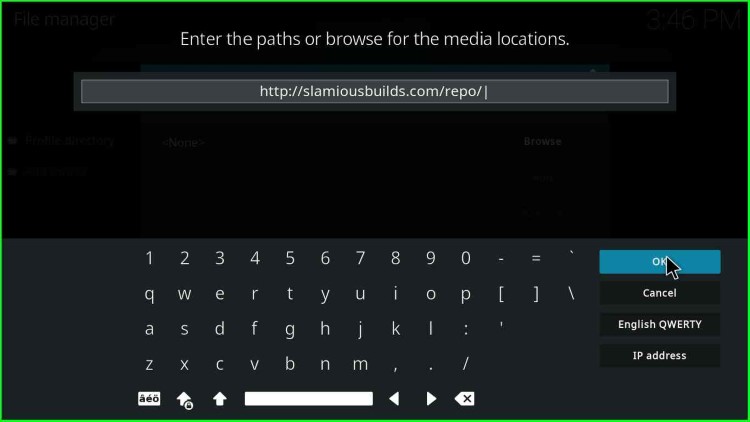
4.            Enter the URL “http://slamiousbuilds.com/repo” (Currently, Slamious build is not working, we will update when it is up)

5.            Enter any name you want; I entered “Slamious“. After that, click “OK

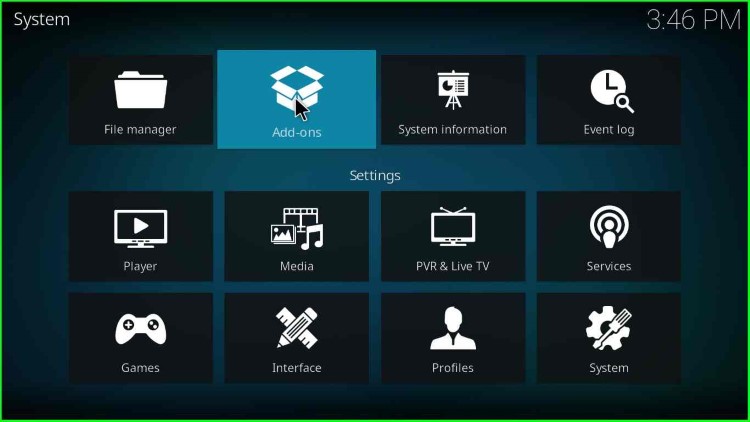
6.            Then choose the option “Add-on Browser” from the “Add-Ons” menu

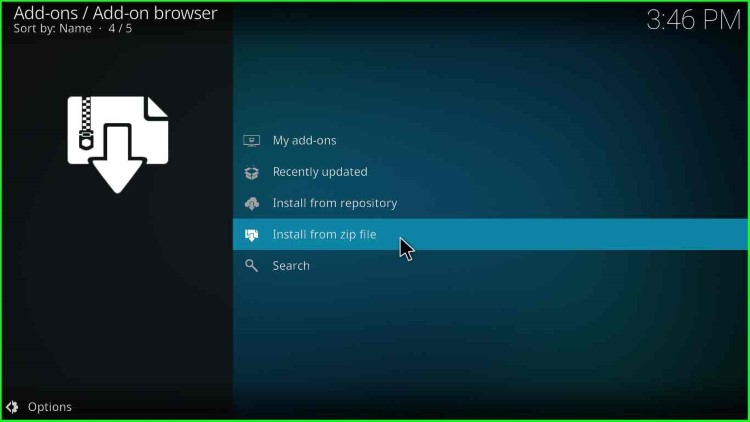
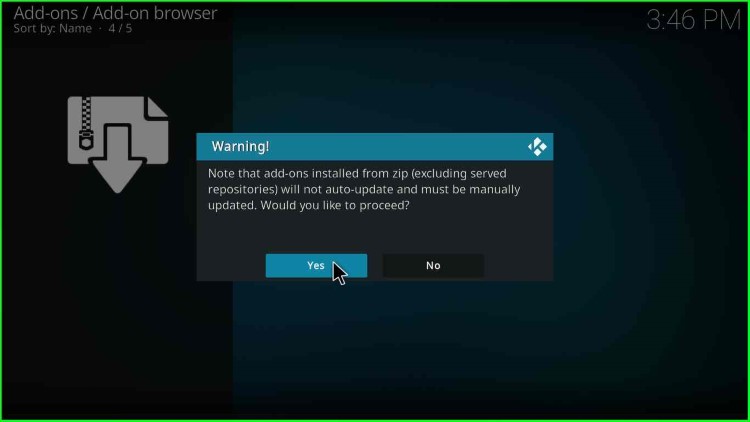
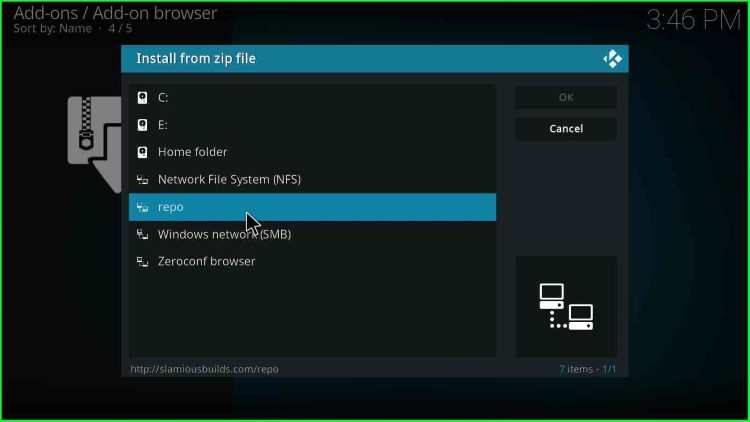
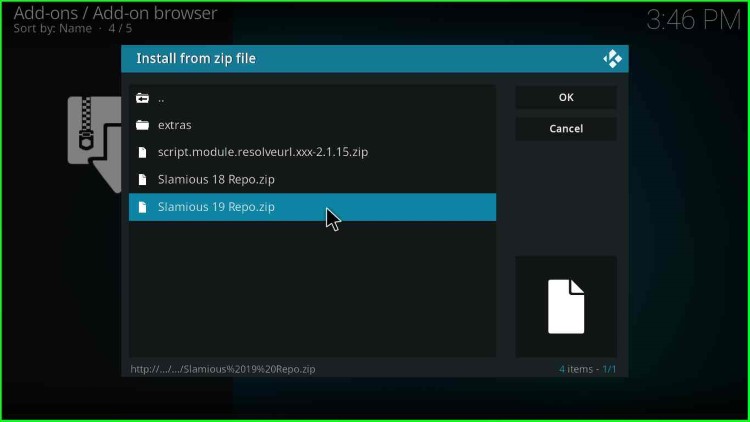
7.            Click on “Install from zip file“, and you will find an option with the name that you entered earlier as “Slamious“, click on that and choose “Slamious Repo.zip” 

8.            After some time “Add-on enabled” notification appears

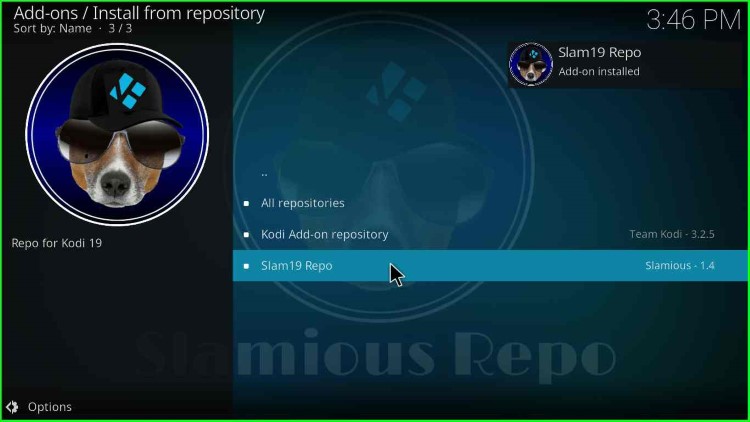
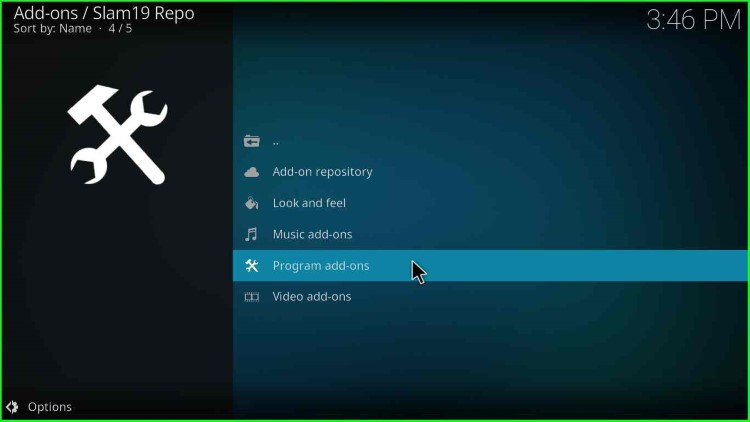
9.            Click on “Install from repository” and choose “Slamious Repo

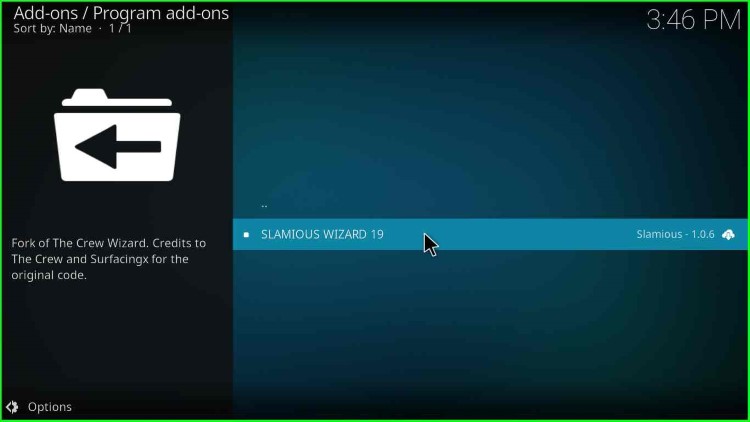
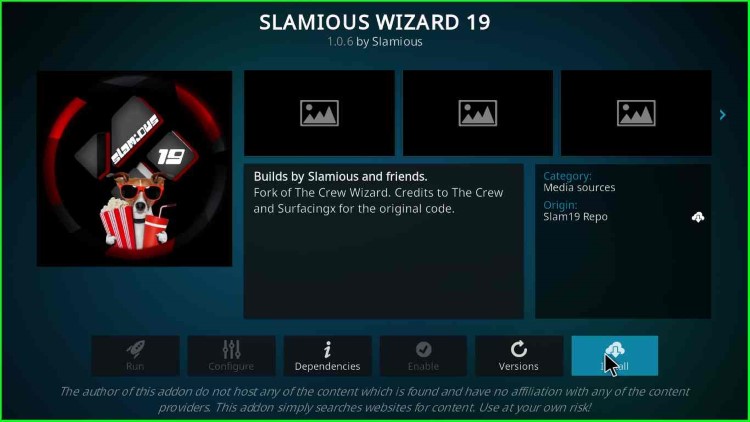
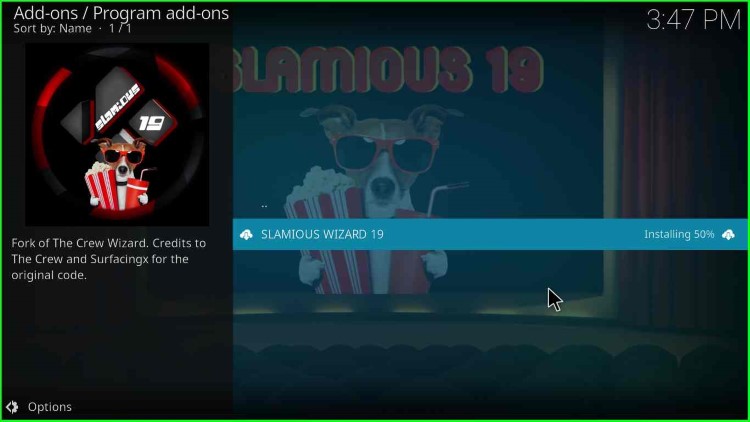
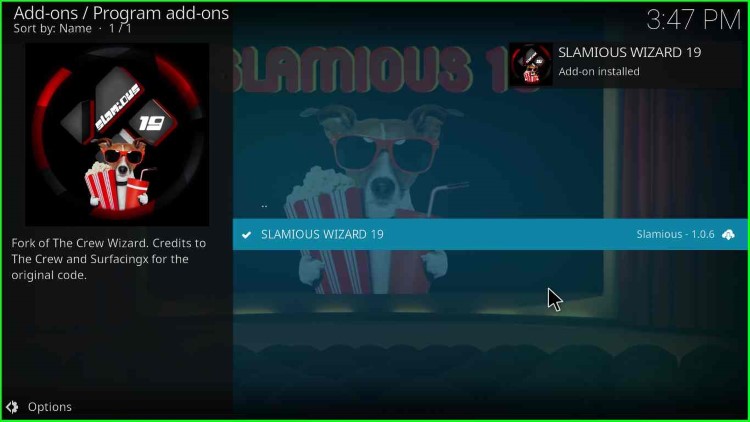
10.          Thereafter click Program add-ons –> Slamious Wizard –> Install

11.          Wait for some time, and a notification stating Add-on enabled appears

12.          Go to the Home of the Kodi and click on Add-ons –> Program Add-ons –> Slamious  Wizard

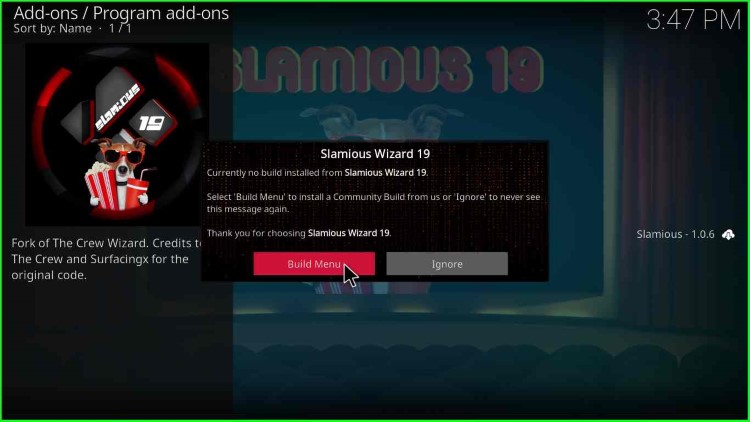
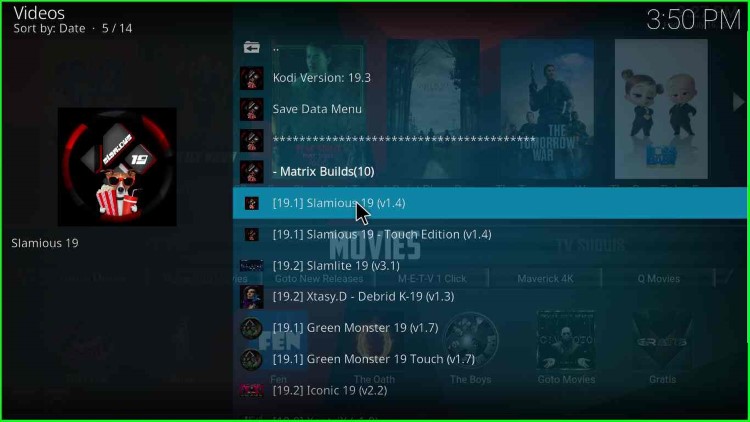
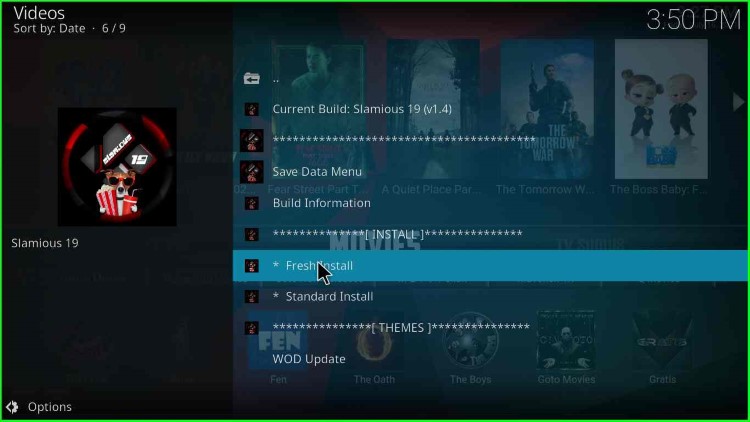
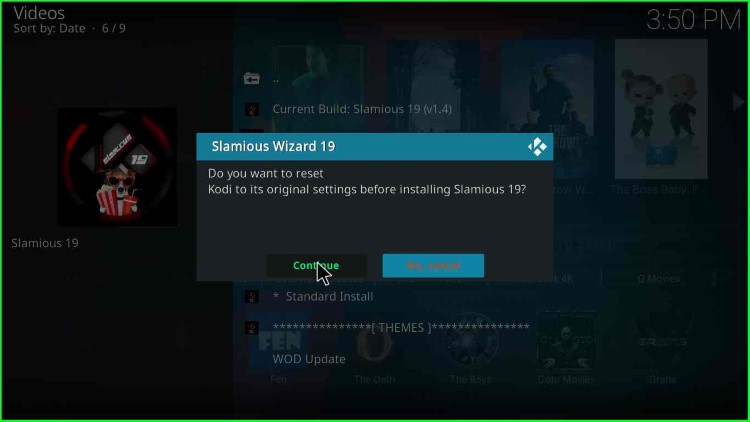
13.          Thereafter, choose your build and click on “Fresh Install”

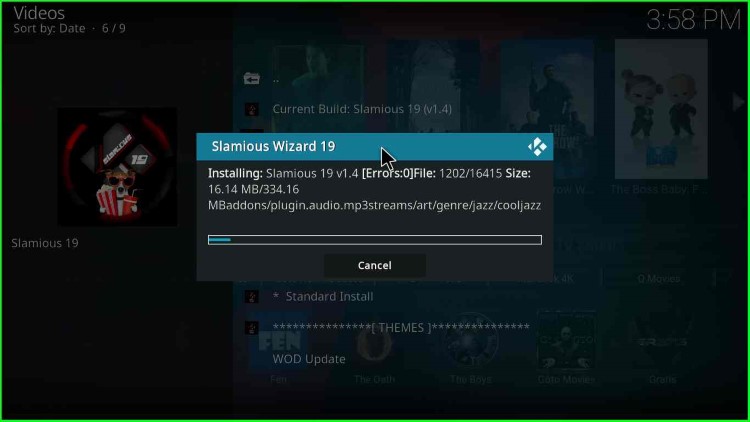
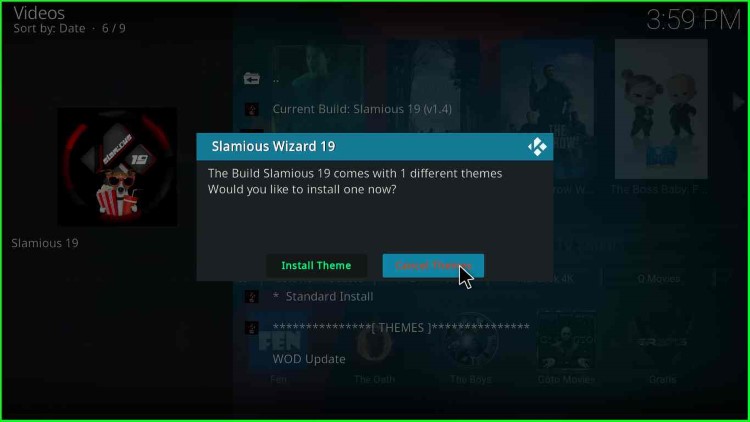
14.          Wait for some time while the Slamious build gets downloaded and installed

15.          Restart the Kodi

16.          Your Slamious Build is ready to use

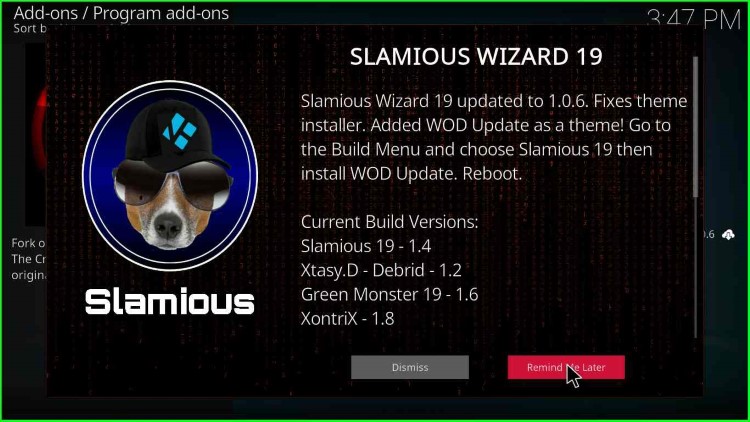
NOTE: It may take some time to fully update and load the Kodi build.

If you have problems installing the Slamious build, follow the screenshots mentioned.

Slamious Build Installation Screenshots

You can follow these screenshots to install Slamious build in place of the above-mentioned installation steps.

Slamious Settings
System
Unknown Slamious Sources
Warning Message
Addons
File Manager Kodi
Add Source for Slamious
None Slamious
Media Location for Slamious
Slamious Repository Path
Slamious Media Source
Slamious File Manager
Addons Slamious
Install Slamious from Zip File
Installation Warning
Install slamious from zip
Slamious 19 Repo.zip
Slam 19 Repo Add-on installed
Slam 19 Repo
Slamious Program add-ons
Slamious Wizard 19
Install
Wizard
Wizard Addon Installed
Remind me Later Message
Slamious Continue
Slamious Build Menu
Slamious 19
Fresh Install, Standard Install
Slamious Wizard 19 Continue
Installation Progress Slamious
Install Slamious Theme

Final Words

Before you start streaming on Kodi, I would like to warn you once again that we do not know the source of Kodi Repositories, Wizards, Builds, and Addons and from where they fetch the streams.

The content you stream on Kodi may be copyrighted and may land you in legal trouble because ISPs, Government, and authorized companies may monitor your online activities like streaming copyrighted movies, videos, TV shows, live shows, animes, etc.

To stay protected, and to get an exceptional streaming experience, I suggest you use IPVanish which is the fastest, most secure, and military-grade encryption VPN on the planet. In addition, IPVanish hides your original IP address, and encrypts your internet connection, bypasses bandwidth throttling and geo-restrictions.

I have been personally using IPVanish for a couple of years and what I can say is IPVanish is the best VPN in all aspects for all devices. I did not face any problems with any app or device.

Note: VPNHacks.com does not support or encourage piracy and copyright infringements in any form. You should abide by the rules and regulations in your country. We just want to protect you because sometimes you may land up streaming copyrighted content unintentionally.

IPVanish Hot Deal: Subscribe for as low as $3.33/Month

Taking an IPVanish VPN Subscription is really simple.

1.       First, subscribe to IPVanish by clicking here.

Most of all IPVanish comes with a 30-day money-back guarantee. You can get a full refund if you are not satisfied (I do not think you will be) with IPVanish and they do not ask for any reason.

2.       Once you subscribe IPVanish, download the IPVanish app and open it. Enter your e-mail and password and click on the “Log In” button.

3.       Once you are signed in, select the VPN Server location that you want to connect to and click on the connect option.

4.       After that, you will see that your IP address has been changed. That’s all. Have a safe streaming. 

Related Guides:

James is the Co-founder of VPNHACKS.COM. He is a Network security expert with hands-on experience on Server Administration, UTM Management, Datacentre Consolidation, Migration, etc. Also, He has Configured Proxy Servers and Implemented VPN tunnels. more...

Leave a Comment

IPVanish VPN